The world of PC gaming offers a virtually endless landscape of experiences, from sprawling open worlds to intricate strategy simulations. However, for many seasoned players, the true magic lies not just in the base game, but in the vibrant and creative community that builds upon it through mods. Mods, short for modifications, can introduce new content, tweak gameplay mechanics, improve graphics, or even fundamentally alter the way a game is played. For games like Minecraft, which boasts one of the most active modding communities, a tool called Forge is indispensable for unlocking this potential.
This guide will walk you through the process of using Forge to install mods, transforming your favorite games into entirely new adventures. We’ll cover everything from understanding what Forge is and why it’s essential, to the step-by-step installation process, and finally, how to manage and troubleshoot your modded game. While this guide focuses primarily on Minecraft, the fundamental principles of using a mod loader like Forge are applicable to other games and modding ecosystems.
Understanding Forge: The Gateway to Modded Gaming
Before we dive into the installation process, it’s crucial to understand what Forge is and why it’s the de facto standard for modding many popular games, particularly Minecraft.
What is Forge?
Forge is a free and open-source modding API (Application Programming Interface) and mod loader. In simpler terms, it’s a piece of software that creates a framework, or a set of rules and tools, that allows mod developers to create mods that are compatible with a specific version of a game. Without Forge, mods would have to be individually patched into the game’s files, a process that is cumbersome, error-prone, and makes updating the game or your mods incredibly difficult.
Forge acts as an intermediary. When you install Forge for a specific game version, it modifies the game’s core files in a way that allows it to recognize and load mods. Then, when you place compatible mods into a designated folder, Forge loads them automatically when you launch the game, integrating their features seamlessly.
Why Use Forge?
The benefits of using Forge for modding are numerous:
- Compatibility: Forge ensures that mods designed for a specific version of the game and Forge itself will work together without conflicts. This is a huge time-saver and prevents the frustration of incompatibilities.
- Ease of Installation: Forge streamlines the installation process for both players and mod developers. For players, it means simply dropping mod files into a folder. For developers, it provides a robust API to build upon.
- Mod Management: Forge allows you to easily enable or disable mods, helping you manage your mod list and troubleshoot any issues that arise.
- Community Support: Forge has a massive and active community, meaning you can find plenty of tutorials, forums, and support if you encounter problems.
- Performance and Stability: Forge is generally well-optimized, contributing to a stable and playable modded experience.
It’s important to note that Forge is specific to game versions. A Forge installation for Minecraft 1.12.2 will not work with mods designed for 1.16.5, and vice versa. This is because the underlying game code changes with each update, requiring a corresponding update to Forge and the mods that depend on it.
Installing Forge: A Step-by-Step Guide
The process of installing Forge is straightforward, but it requires attention to detail. We’ll break it down into clear, manageable steps.
Downloading the Correct Forge Version
The first and most critical step is to download the correct version of Forge for the game you intend to mod and the specific game version you are playing.
- Identify Your Game Version: Determine which version of the game you are using. For Minecraft, this might be 1.19.2, 1.18.1, or an older version.
- Visit the Official Forge Website: Navigate to the official Minecraft Forge website (files.minecraftforge.net). Be wary of unofficial download sites, as they may host malware or outdated versions.
- Select the Game Version: On the Forge website, you’ll typically see a list of supported game versions. Click on the version that matches your game installation.
- Choose Between “Recommended” and “Latest”: Forge releases usually come in two flavors: “Recommended” and “Latest.”
- Recommended: This is the most stable and thoroughly tested version. It’s generally the best choice for most users, especially if you’re new to modding.
- Latest: This version includes the newest features and bug fixes, but it might be less stable as it hasn’t undergone as much testing. If you want the absolute newest mods or features, you might opt for “Latest,” but be prepared for potential minor issues.
- Download the Installer: Click the “Installer” button for your chosen release. You will usually be presented with an advertisement page. Wait for the “Skip” button to appear in the top-right corner and click it. This will download the Forge installer file (usually a
.jarfile).
Installing Forge on Your System
Once you have downloaded the Forge installer, it’s time to run it.
- Locate the Downloaded Installer: Find the
.jarfile you just downloaded. It will likely be in your Downloads folder. - Ensure Java is Installed: Forge installers are Java applications. You need to have Java installed on your computer for the installer to run. If you don’t have Java, you can download it for free from the official Oracle Java website. Make sure you download a Java Development Kit (JDK) or Java Runtime Environment (JRE) that is compatible with your operating system.
- Run the Installer:
- Windows: Right-click on the Forge installer
.jarfile and select “Open With…” then choose “Java(TM) Platform SE binary” or a similar Java executable. Alternatively, you can open a Command Prompt or PowerShell window in the directory where you downloaded the file and typejava -jar forge-installer-file-name.jar(replacingforge-installer-file-name.jarwith the actual name of your downloaded file). - macOS/Linux: Open a Terminal window, navigate to the directory where you downloaded the file using the
cdcommand, and then typejava -jar forge-installer-file-name.jar.
- Windows: Right-click on the Forge installer
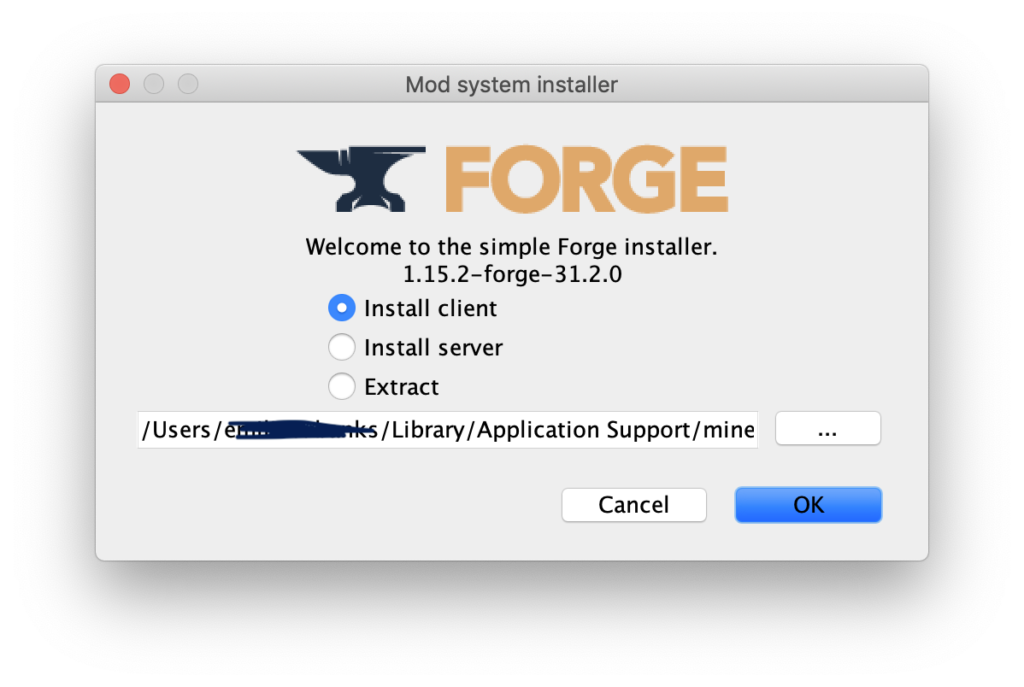
- Forge Installer Window: A Forge installer window will appear. Ensure that “Install client” is selected (this is the default and usually what you want). The “Game Directory” should automatically point to your game’s installation folder. If it doesn’t, you’ll need to manually browse to it.
- Click “OK” or “Install”: Click the “OK” or “Install” button to begin the installation. Forge will download any necessary files and modify your game installation. This process may take a few minutes.
- Confirmation: Once the installation is complete, you will see a confirmation message. Click “OK.”
Launching the Game with Forge

Now that Forge is installed, you need to launch your game through the Forge profile to ensure it loads correctly.
- Open Your Game Launcher: Launch the official game launcher (e.g., the Minecraft Launcher).
- Select the Forge Profile: Look for a dropdown menu, usually near the “Play” button, that allows you to select different game versions or profiles. You should see a new profile listed, typically named something like “forge-[version]-[forge_version]” (e.g., “forge-1.19.2-43.2.0”). Select this profile.
- Launch the Game: Click the “Play” button. Your game should now launch with Forge enabled. You might notice a slightly different loading screen, indicating that Forge is active.
If you see a confirmation that Forge has loaded successfully, congratulations! You’re now ready to install mods.
Installing Mods with Forge
With Forge installed and running, adding mods to your game is a simple matter of placing the correct files into the designated mod folder.
Finding and Downloading Mods
The first step is to find mods that are compatible with your installed Forge version and the game version it’s designed for.
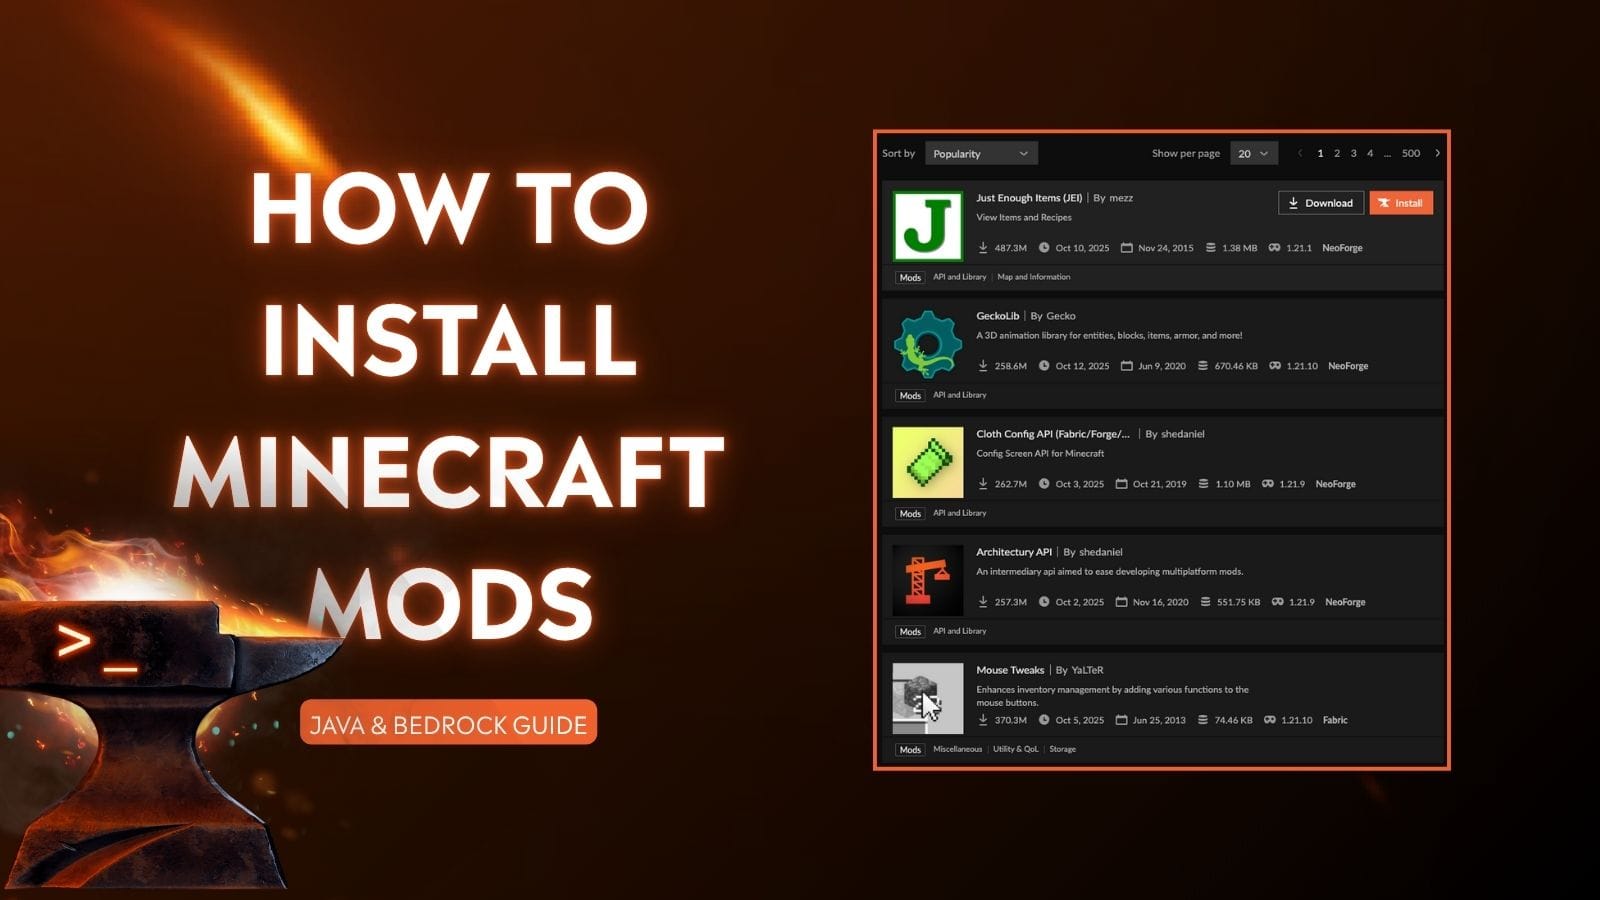
- Reputable Modding Websites: The best place to find mods is on well-known and trusted modding websites. For Minecraft, popular sites include:
- CurseForge (www.curseforge.com)
- Modrinth (modrinth.com)
- (For older games, specific community forums or dedicated modding sites might exist.)
- Check Compatibility: Crucially, always check the mod’s description page. It will explicitly state which game version and which mod loader (e.g., Forge, Fabric) it is compatible with. Downloading a mod for the wrong version will likely result in the mod not working or causing crashes.
- Download Mod Files: Mods usually come as
.jarfiles. Download these files to a convenient location on your computer.
Placing Mods in the Mods Folder
Once you have downloaded your desired mods, you need to place them in the correct folder.
- Locate Your Game’s Mods Folder:
- Minecraft:
- Windows: Press
Windows Key + R, type%appdata%.minecraft, and press Enter. Inside the.minecraftfolder, you should find a folder namedmods. If it doesn’t exist, create it. - macOS: Open Finder, click “Go” in the menu bar, and select “Go to Folder…”. Type
~/Library/Application Support/minecraftand press Enter. Look for themodsfolder, or create it if it’s not there. - Linux: Navigate to
~/.minecraftin your home directory. Look for themodsfolder, or create it.
- Windows: Press
- Other Games: The location of the
modsfolder will vary depending on the game. Often, it’s within the game’s installation directory or in a user data folder similar to Minecraft’s. Check the specific game’s modding documentation or community forums.
- Minecraft:
- Copy Mod Files: Drag and drop the
.jarfiles of the mods you downloaded into themodsfolder. - Launch the Game: Launch your game using the Forge profile you created earlier. Your newly added mods should now be active.
Managing and Troubleshooting Mods
Even with Forge, managing a large number of mods and dealing with potential issues is part of the modding experience.
Mod Conflicts and Crashes
- Read Mod Descriptions: Some mods are known to conflict with others. Check mod descriptions for known incompatibilities.
- Install Mods Incrementally: If you’re adding many mods at once, install them in small batches. If the game crashes after adding a few, you can more easily identify the problematic mod.
- Check the Crash Log: When the game crashes, it usually generates a crash log. For Minecraft, these are typically found in the
crash-reportsfolder within the.minecraftdirectory. Reading these logs can provide clues about which mod is causing the issue. - Remove Suspect Mods: If you suspect a particular mod is causing problems, try removing it from the
modsfolder. If the game launches correctly, you’ve found your culprit. - Update Mods and Forge: Ensure your Forge installation and your mods are updated to the latest compatible versions for your game.
Using a Mod Manager (Optional but Recommended)
For more complex modding setups, using a dedicated mod manager can greatly simplify the process of installing, updating, and organizing your mods. While Forge itself manages the loading, a mod manager can provide a more user-friendly interface for handling the mod files. Popular mod managers for Minecraft include:
- CurseForge App: This official app allows you to download and manage mods directly from CurseForge, create modpacks, and easily install Forge profiles.
- MultiMC/Prism Launcher: These are excellent third-party launchers that allow you to create separate instances of your game with different mod configurations, making it easy to switch between modded and vanilla experiences or test different modpacks.
These launchers often integrate with Forge installation and mod management, providing a more streamlined experience.
Conclusion: Unleash Your Game’s Potential
Forge is an essential tool for anyone looking to delve into the expansive and creative world of modding. By providing a stable platform and a streamlined installation process, it empowers players to customize their gaming experiences beyond what the developers originally intended. Whether you’re aiming to enhance visuals, add new gameplay mechanics, or entirely reinvent a beloved game, understanding and utilizing Forge is your first step.
Remember to always download mods from reputable sources, carefully check for version compatibility, and approach modding with a bit of patience. With Forge as your gateway, the possibilities for your favorite games are truly limitless, offering endless hours of new adventures and discoveries. Happy modding!
aViewFromTheCave is a participant in the Amazon Services LLC Associates Program, an affiliate advertising program designed to provide a means for sites to earn advertising fees by advertising and linking to Amazon.com. Amazon, the Amazon logo, AmazonSupply, and the AmazonSupply logo are trademarks of Amazon.com, Inc. or its affiliates. As an Amazon Associate we earn affiliate commissions from qualifying purchases.