In the rapidly evolving landscape of digital security, having the right tools and knowledge is paramount. For those venturing into penetration testing, ethical hacking, and digital forensics, Kali Linux stands as an undisputed champion. This powerful, Debian-derived Linux distribution comes pre-loaded with hundreds of sophisticated tools designed for a wide array of cybersecurity tasks. Whether you’re a seasoned security professional looking to optimize your workflow or an aspiring white-hat hacker taking your first steps, mastering Kali Linux installation is a fundamental skill.
This guide will walk you through the essential steps, considerations, and best practices for installing Kali Linux, ensuring you can set up your ultimate cybersecurity toolkit with confidence. We’ll explore various installation methods, prepare your system, and guide you through the process, equipping you with the knowledge to establish a robust and effective hacking environment.
Understanding Kali Linux: Why It’s Indispensable
Before diving into the technicalities of installation, it’s crucial to grasp what Kali Linux is and why it has earned its reputation as the go-to operating system for cybersecurity experts worldwide. Understanding its purpose and capabilities will underscore the value of this installation journey.
What is Kali Linux?
Kali Linux is a free, open-source, Debian-based Linux distribution specifically tailored for digital forensics and penetration testing. Developed and maintained by Offensive Security, it is essentially a highly specialized operating system pre-configured with a vast collection of security tools. Unlike general-purpose operating systems, Kali Linux is built with a singular focus: to provide a robust platform for testing and evaluating the security of networks, systems, and applications. Its roots trace back to BackTrack Linux, a previous iteration that also focused on penetration testing, which Kali superseded in 2013, bringing significant improvements in tool organization, stability, and overall user experience.
The Powerhouse for Penetration Testers and Ethical Hackers
The true power of Kali Linux lies in its expansive arsenal of tools. These tools are categorized for different phases of penetration testing, making it an all-in-one solution for ethical hacking. Some of the key categories and examples include:
- Information Gathering: Tools like Nmap for network scanning, Maltego for open-source intelligence, and Shodan for device discovery help gather crucial data about targets.
- Vulnerability Analysis: Nessus and OpenVAS identify weaknesses in systems and applications.
- Web Application Analysis: Burp Suite and OWASP ZAP are invaluable for testing web applications for vulnerabilities like SQL injection and XSS.
- Password Attacks: John the Ripper and Aircrack-ng are used for cracking passwords and wireless network keys.
- Wireless Attacks: Tools like Wireshark for network protocol analysis and Reaver for WPS attacks are essential for wireless security assessments.
- Exploitation Tools: Metasploit Framework stands out as a powerful platform for developing, testing, and executing exploits.
- Forensics Tools: The Sleuth Kit and Autopsy aid in digital investigations and data recovery.
This comprehensive suite of tools, combined with the flexibility and power of the Linux kernel, makes Kali Linux an indispensable resource for anyone involved in identifying and mitigating cybersecurity threats.
Why Choose Kali Linux?
Beyond its impressive toolset, several factors contribute to Kali Linux’s popularity and utility:
- Vast Toolset & Regular Updates: With hundreds of tools and constant updates from the Offensive Security team, Kali ensures you always have access to the latest security technologies.
- Open-Source and Free: Being open-source means it’s transparent, community-driven, and completely free to download and use, making it accessible to everyone from students to professionals.
- Strong Community Support: A large and active community means ample resources, forums, and documentation are available for troubleshooting and learning.
- Flexibility and Customization: As a Linux distribution, Kali is highly customizable. Users can tailor their environment, add new tools, and configure settings to suit their specific needs.
- Live Boot Capability: Kali Linux can be run directly from a USB drive or DVD without installing it to a hard drive, offering a portable and non-invasive way to perform security assessments.
- Designed for Purpose: Unlike trying to replicate its environment on another OS, Kali is purpose-built, meaning tools are integrated and dependencies are often pre-configured, reducing setup headaches.
For these reasons, Kali Linux isn’t just an operating system; it’s a strategic asset for anyone serious about digital security.
Preparing for Your Kali Linux Installation Journey
Installing an operating system, especially one as specialized as Kali Linux, requires careful preparation. This section will guide you through understanding system requirements, choosing the right installation method for your needs, and gathering all necessary components.
System Requirements: Ensuring a Smooth Experience
While Kali Linux can run on relatively modest hardware, the performance of your cybersecurity tasks will heavily depend on your system’s capabilities. Here are the minimum and recommended specifications:
- Minimum Requirements (for basic CLI tasks):
- RAM: 512 MB (for XFCE desktop environment)
- Disk Space: 20 GB
- CPU: Single-core 1 GHz processor
- Recommended Requirements (for most tasks, GUI, and multiple tools):
- RAM: 2 GB or more
- Disk Space: 40 GB or more
- CPU: Dual-core 2 GHz processor or better
- Virtual Machine (VM) Specifics: If installing in a VM, allocate at least 2 GB RAM and 20-30 GB disk space. More is always better, especially for memory-intensive operations.
- Graphics: A modern graphics card can be beneficial for certain GPU-accelerated cracking tools, though not strictly required for the OS itself.
Ensure your system meets at least the recommended specifications for a comfortable and efficient experience.
Choosing Your Installation Method
Kali Linux offers several installation methods, each with its own advantages and disadvantages. Your choice will depend on your specific needs, comfort level, and the hardware you have available.
-
Virtual Machine (VM):
- Pros: Safest for beginners, allows running Kali alongside your primary OS (Windows/macOS) without partitioning, easy to snapshot/revert, ideal for testing without affecting host system.
- Cons: Performance overhead, resource-intensive for the host machine.
- Ideal for: Beginners, those who need to switch between OSes frequently, and anyone not wanting to commit dedicated hardware. Popular VM software includes VirtualBox and VMware Workstation Player (free).
-
Dual Boot:
- Pros: Full access to hardware, better performance than a VM, ideal for dedicated security work while retaining your primary OS.
- Cons: Requires partitioning your hard drive, more complex installation, potential risk of data loss if not done carefully.
- Ideal for: Users who want near bare-metal performance but still need access to another OS.
-
Bare Metal (Direct Install):
- Pros: Maximum performance, full control over hardware, dedicated environment.
- Cons: Replaces your existing operating system, requires a dedicated machine.
- Ideal for: Dedicated security workstations or laptops.
-
Live USB/DVD:
- Pros: Portable, runs Kali without installation (non-persistent or persistent options), great for quick audits or emergencies.
- Cons: Can be slow depending on USB speed, non-persistent mode loses all changes on reboot, persistent mode can be slower than a full install.
- Ideal for: On-the-go security tasks, forensic analysis without altering the suspect system.
-
Windows Subsystem for Linux (WSL):
- Pros: Integrates Kali Linux command-line tools directly into Windows, very lightweight, no dual-booting or VM required.
- Cons: Only command-line interface (CLI) for official WSL, no full graphical desktop environment, limited hardware interaction (e.g., Wi-Fi adapter drivers).
- Ideal for: Developers or users who primarily need Kali’s command-line tools without the full OS experience.
For the purpose of this comprehensive guide, we will primarily focus on the Virtual Machine and Direct/Dual Boot approaches, as they represent the most common and robust installation methods for a fully functional Kali Linux environment.
Essential Prerequisites and Downloads
Regardless of your chosen method, there are some universal steps to prepare:
-
Download Kali Linux ISO Image:
- Visit the official Kali Linux download page:
kali.org/get-kali/ - Choose the appropriate architecture (64-bit or 32-bit) and the preferred desktop environment (XFCE is default and lightweight, but GNOME, KDE, MATE, LXDE, LXQt are also available). The “Installer” image is recommended for most installations.
- Important: Only download from the official site to avoid tampered images.
- Visit the official Kali Linux download page:
-
Verify ISO Integrity (Crucial!):
- After downloading, compare the SHA256 checksum of your downloaded ISO with the one provided on the official Kali Linux download page. This ensures the file hasn’t been corrupted during download or tampered with.
- On Windows, open PowerShell and use
Get-FileHash -Algorithm SHA256 "pathtokali.iso". - On Linux/macOS, open a terminal and use
sha256sum "path/to/kali.iso".
-
Create a Bootable USB Drive (for Bare Metal/Dual Boot/Live USB):
- You’ll need a USB drive (at least 8 GB, preferably 16 GB for persistent live USB).
- Download a reliable utility:
- Rufus (Windows): Excellent for creating bootable USB drives.
- Etcher (Windows, macOS, Linux): Simple, cross-platform, and highly recommended for its user-friendliness.
- Follow the utility’s instructions to “burn” the Kali Linux ISO onto your USB drive. This process will format the USB drive, so back up any important data on it first.
-
Backup Important Data (for Dual Boot/Bare Metal):
- If you plan to install Kali Linux alongside or instead of your current operating system, BACK UP ALL YOUR IMPORTANT DATA. Disk partitioning carries a risk of data loss if not performed correctly.
-
Disable Secure Boot (if necessary):
- Some modern UEFI systems with Secure Boot enabled might prevent booting from the Kali Linux USB drive. You may need to enter your system’s BIOS/UEFI settings (usually by pressing F2, F10, F12, or Del during boot) and disable Secure Boot. Remember to re-enable it after installation if you wish.
-
Set Up Your Virtual Machine (if using VM):
- Install VirtualBox or VMware Workstation Player on your host system.
- Create a new virtual machine, selecting “Linux” and “Debian (64-bit)” as the OS type/version.
- Allocate at least 2 GB RAM and 20-30 GB virtual hard disk space (dynamically allocated is fine).
- Mount the Kali Linux ISO as the virtual CD/DVD drive for the VM.
With these preparations complete, you are now ready to embark on the installation process itself.
Step-by-Step Installation: Bringing Kali Linux to Life
This section provides a detailed walkthrough of the installation process. We’ll cover the general steps applicable to both virtual machine and bare metal installations, highlighting key decisions you’ll need to make along the way.
Initial Boot and First-Time Configuration
Whether you’re booting from a USB drive or launching a virtual machine, the initial steps are similar.
- Boot from the Installer:
- For USB/Bare Metal: Insert your bootable Kali Linux USB drive, restart your computer, and press the appropriate key (often F2, F10, F12, or Del) to enter the boot menu or BIOS/UEFI settings. Select your USB drive as the boot device.
- For Virtual Machine: Start your VM. It should automatically boot from the Kali Linux ISO mounted as the virtual CD/DVD.
-
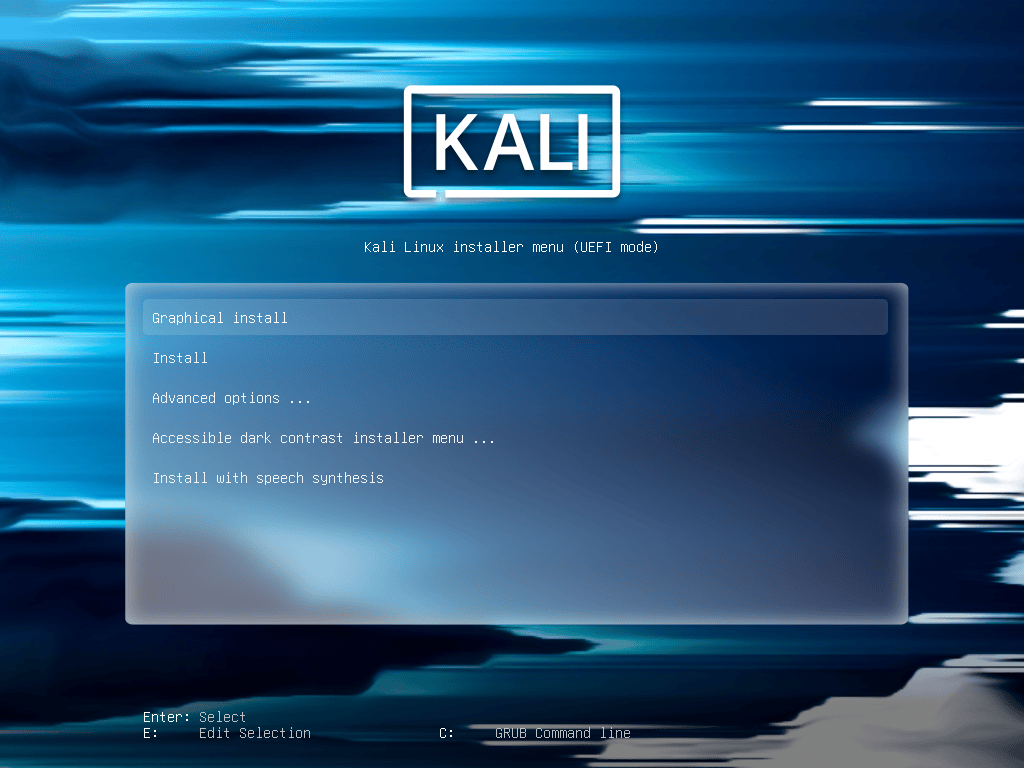
Kali Linux Boot Menu:
- You’ll be presented with the Kali Linux boot menu.
- Choose “Graphical install” for an easier, wizard-driven installation process. “Install” offers a text-based alternative, while “Live” options let you run Kali from RAM without installation.
-
Language and Location:
- Select your preferred language for the installer and the installed system.
- Choose your location (country) to set the system’s timezone and locale.
-
Keyboard Layout:
- Select your keyboard layout. Take care here, as an incorrect layout can make typing passwords difficult later.
-
Network Configuration:
- The installer will attempt to detect and configure your network. If you have an Ethernet connection, it might configure automatically via DHCP.
- If you’re using Wi-Fi, you might be prompted to select your network and enter the password. If network configuration fails or you prefer to do it later, you can skip this step.
- Hostname: Enter a hostname for your system (e.g.,
kali-box). - Domain Name: You can leave this blank if you’re not part of a specific domain.
-
User and Password Setup:
- Full Name for the New User: Enter your full name.
- Username for your account: This will be your login name (e.g.,
kaliuser). Avoid using ‘root’ directly as your primary user. - Password for the new user: Choose a strong, memorable password. Re-enter it to confirm.
- Important: Unlike older versions, Kali Linux now encourages using a standard user account by default for better security. You can gain root privileges using
sudo.
Disk Partitioning: Where Kali Linux Will Reside
This is one of the most critical steps, especially for dual-boot or bare-metal installations. Carefully consider your options.
-
Partitioning Method:
- “Guided – Use entire disk”: This is the easiest option and recommended for virtual machines or if you’re dedicating an entire hard drive to Kali Linux (bare metal). It will erase everything on the selected disk.
- “Guided – Use entire disk and set up encrypted LVM”: For enhanced security, encrypts your entire disk. More complex and can impact performance.
- “Guided – Use entire disk and set up LVM”: Uses Logical Volume Management, offering flexibility for resizing partitions later.
- “Manual”: For advanced users or dual-boot setups. This allows you to create, resize, and assign partitions yourself.
- For Dual Boot: You would typically select an existing free space partition or shrink an existing OS partition (using a tool like GParted before starting the Kali installer) and then create new partitions for Kali Linux (e.g., a root partition
/and a swap partition).
- For Dual Boot: You would typically select an existing free space partition or shrink an existing OS partition (using a tool like GParted before starting the Kali installer) and then create new partitions for Kali Linux (e.g., a root partition
-
Select Disk to Partition: Choose the target disk for installation. BE ABSOLUTELY SURE YOU ARE SELECTING THE CORRECT DISK, especially if you have multiple drives or are dual-booting. Selecting the wrong disk will lead to data loss.
-
Partitioning Scheme:
- If using “Guided – Use entire disk,” the installer will suggest a scheme. Often, it’s “All files in one partition” (for simplicity) or “Separate /home partition” (good for separating user data from system files).
- For manual partitioning, at a minimum, you’ll need:
- A root partition (
/): This is where the core OS files reside. Recommend at least 20-30 GB. - A swap partition: Acts as virtual RAM. General rule of thumb is 1-1.5x your RAM if you have less than 4GB, or a fixed size (e.g., 4GB) if you have ample RAM.
- A root partition (
-
Finish Partitioning and Write Changes to Disk: Review the proposed partition layout. If everything looks correct, select “Finish partitioning and write changes to disk” and confirm your decision. This action is irreversible.
Installing the Base System and Software
-
Install the Base System: The installer will now copy the base Kali Linux files to your hard drive. This process can take some time.
-
Configure the Package Manager:
- The installer may ask if you want to use a network mirror. It’s generally a good idea to select “Yes” as it ensures you get the latest packages and security updates.
- If you’re using a proxy, you can configure it here.
-
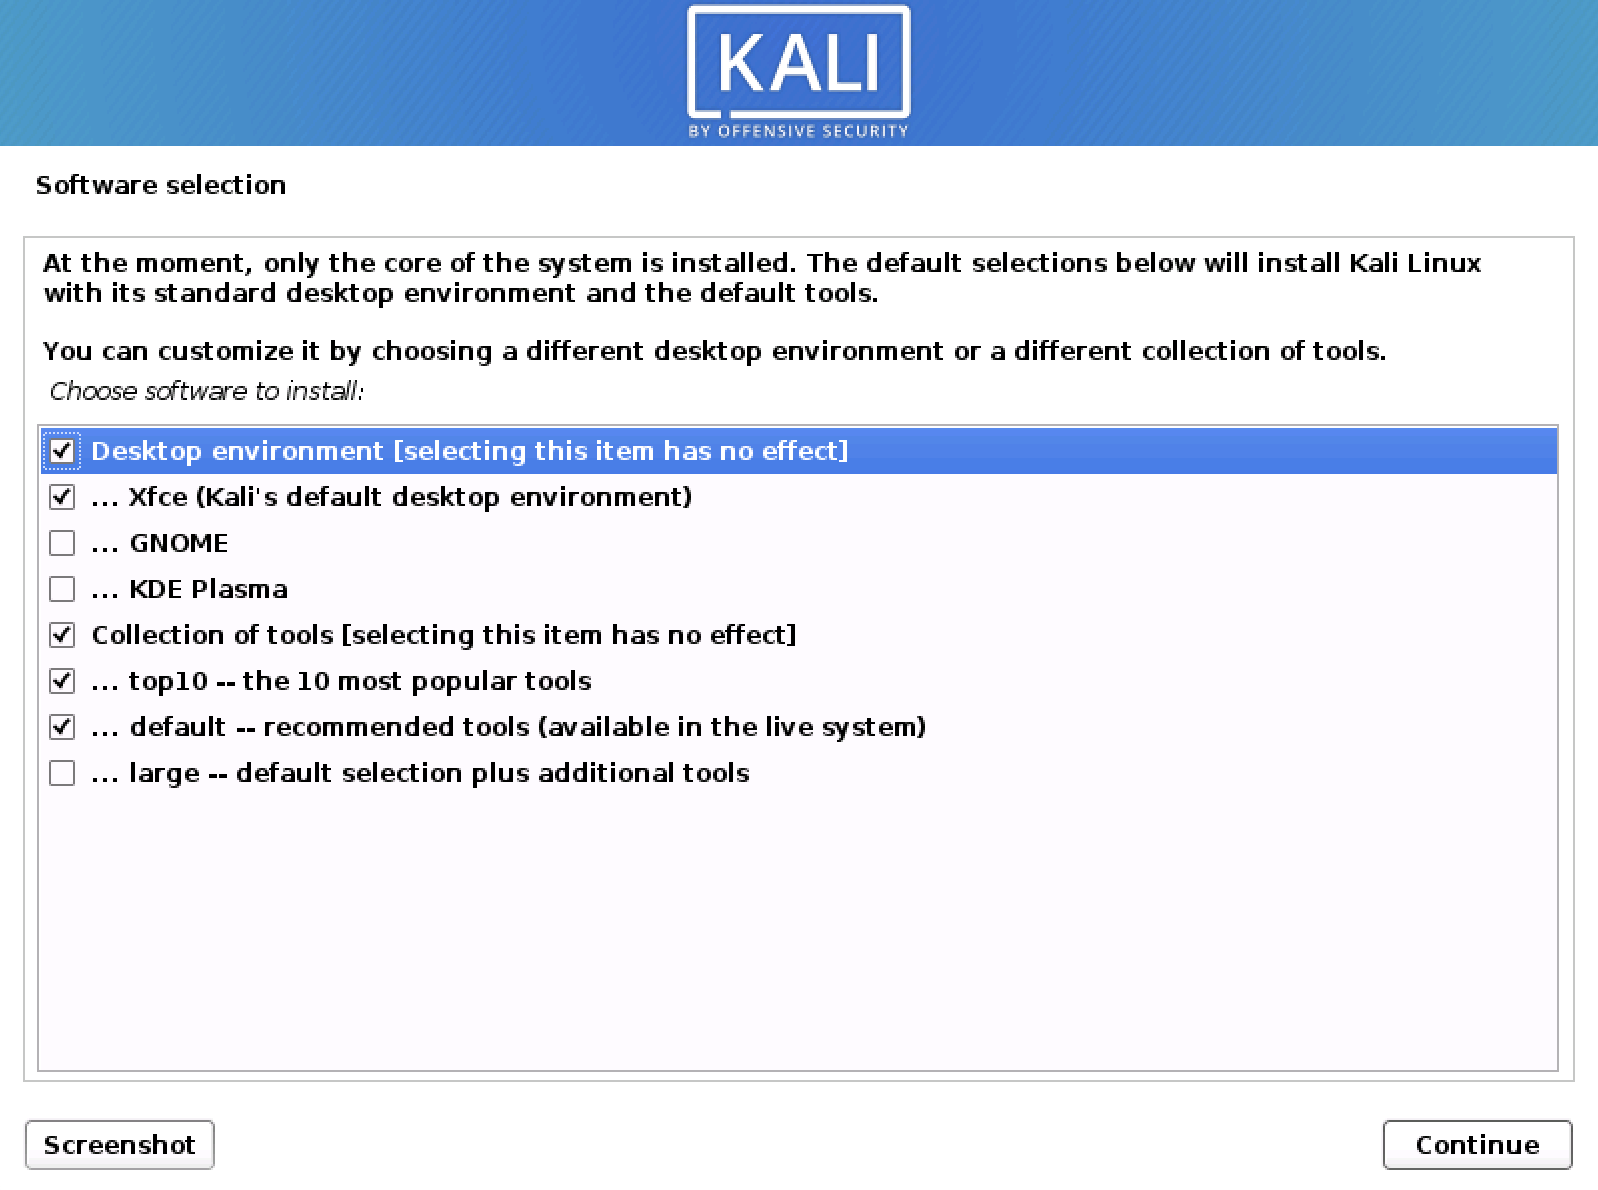
Select Software to Install:
- This screen allows you to choose which Kali Linux tools and desktop environment you want to install.
- Default: The standard Kali Linux desktop (XFCE) and the default collection of tools are selected. This is usually sufficient for most users.
- You can choose other desktop environments (GNOME, KDE Plasma, etc.) or specific tool categories if you wish, but for a first-time install, the defaults are a good starting point. You can always add more later.
-
Install GRUB Boot Loader:
- This is crucial for booting into Kali Linux. The installer will ask if you want to install the GRUB boot loader to the master boot record (MBR) or primary drive.
- “Yes” is almost always the correct answer.
- Select the correct drive to install GRUB to (usually
/dev/sdaor/dev/vdafor virtual machines). For dual-booting, ensure you install GRUB to the same drive as your existing OS’s bootloader so GRUB can detect and offer both operating systems at boot.
-
Finish Installation:
- Once GRUB is installed, the installation process is complete.
- Click “Continue” to reboot your system.
-
Reboot and Log In:
- Remove the USB drive/unmount the ISO from the VM before the system reboots to prevent it from booting back into the installer.
- Your system should now boot into Kali Linux. You’ll be presented with a login screen.
- Enter the username and password you created earlier.
Congratulations! You have successfully installed Kali Linux.
Post-Installation Essentials: Optimizing Your Kali Linux Environment
Installing Kali Linux is just the beginning. To ensure your system is secure, up-to-date, and fully functional, there are several crucial post-installation steps you should take.
Updating and Upgrading Your System
This is arguably the most important step after installation. Kali Linux is a continuously evolving distribution, and keeping your packages updated is vital for security and access to the latest tools.
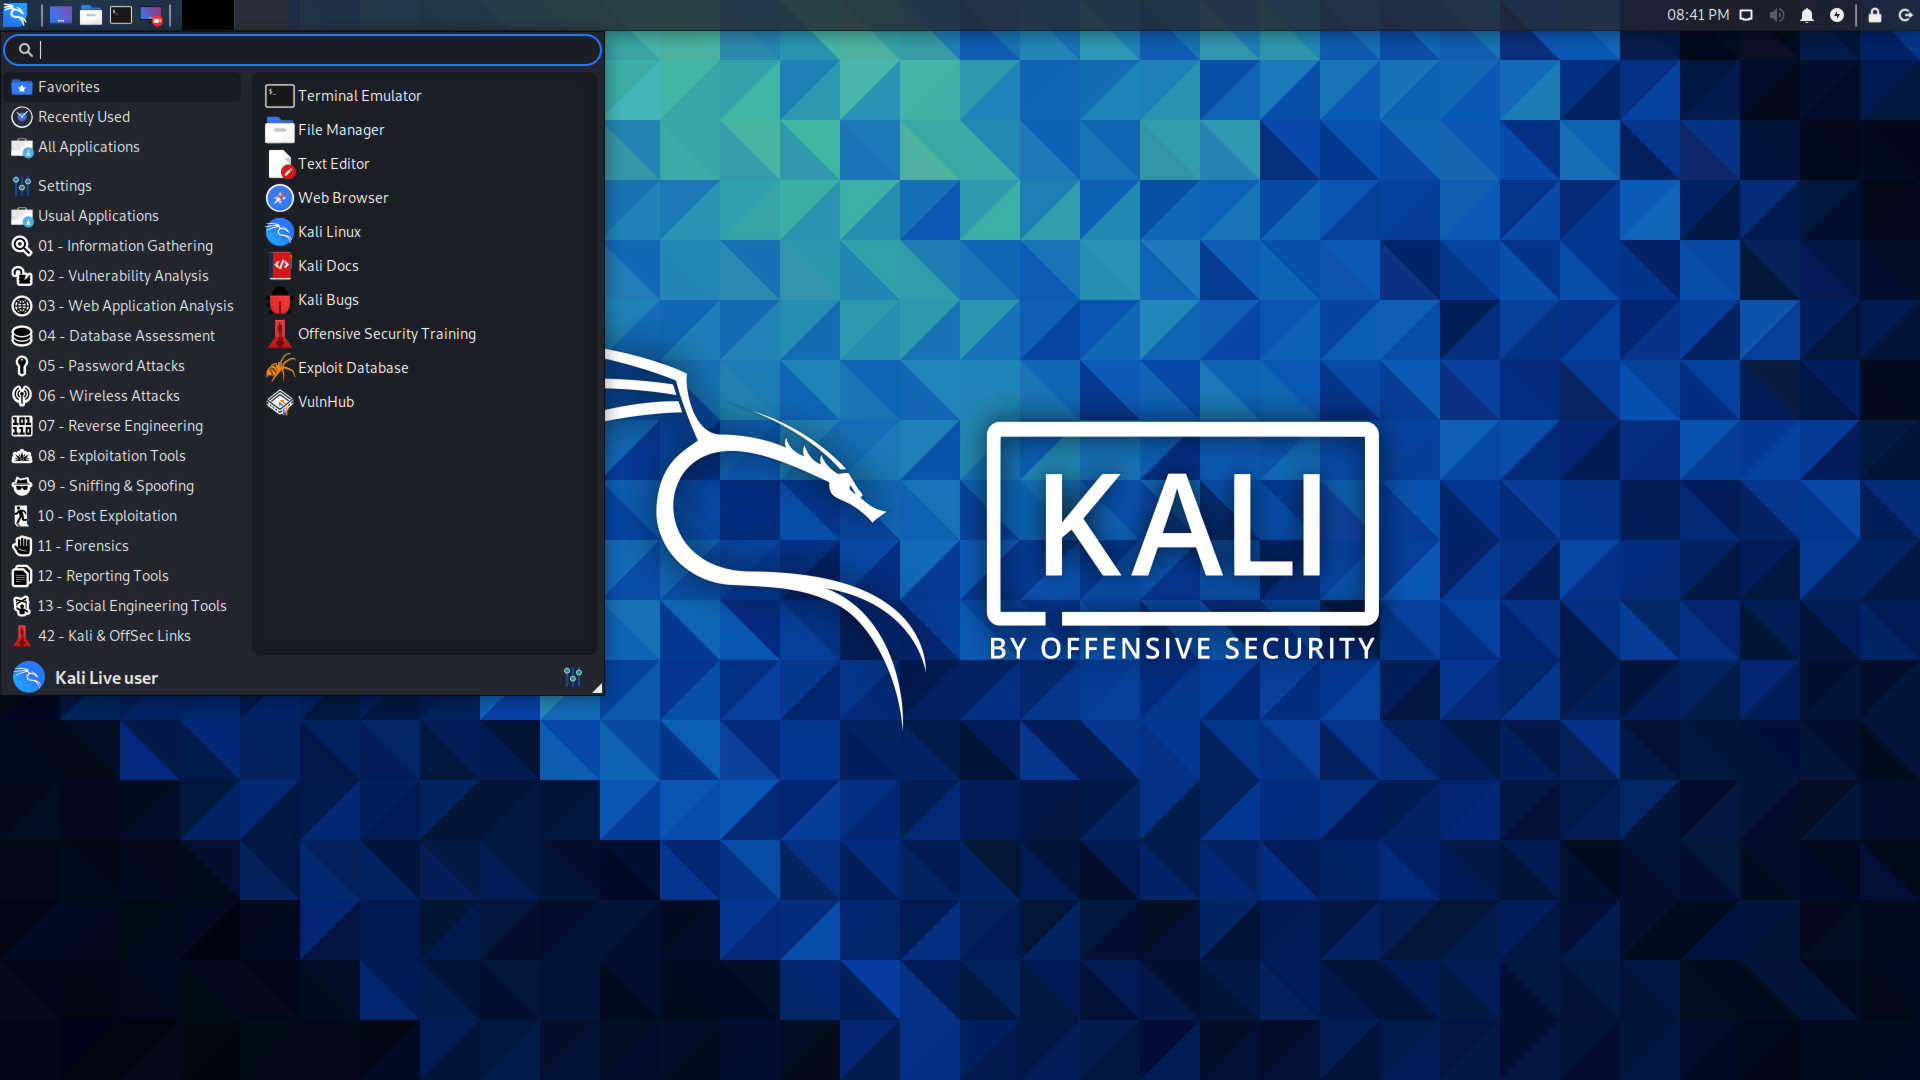
- Open a Terminal: Once logged in, open a terminal window (usually an icon on the desktop or in the applications menu).
- Update Package Lists:
bash

sudo apt update
This command downloads the latest package information from the repositories. - Upgrade Installed Packages:
bash

sudo apt upgrade
This command upgrades all installed packages to their latest versions. - Perform a Distribution Upgrade (Optional, but recommended for major updates):
bash

sudo apt dist-upgrade
This command performs a “smart” upgrade, handling dependency changes with new versions of packages. It might install new packages or remove old, conflicting ones. - Clean Up (Optional):
bash

sudo apt autoremove

sudo apt clean
autoremoveremoves packages that were automatically installed to satisfy dependencies for other packages and are no longer needed.cleanclears the local repository of retrieved package files.
Run these commands regularly (e.g., weekly) to keep your Kali Linux installation fresh and secure.
Enhancing Virtual Machine Performance
If you installed Kali Linux in a virtual machine, installing “Guest Additions” (VirtualBox) or “VMware Tools” (VMware) is essential for optimal performance and integration with your host system. These packages provide features like:
- Improved Display Performance: Better screen resolution, full-screen mode, and graphical acceleration.
- Seamless Mouse Integration: No need to capture/release the mouse pointer.
- Shared Clipboard: Copy and paste between host and guest.
- Shared Folders: Easily transfer files between host and guest.
- Drag-and-Drop functionality.
For VirtualBox Guest Additions:
- From the VirtualBox menu, go to
Devices -> Insert Guest Additions CD image.... - Open a terminal in Kali Linux and navigate to the mounted CD-ROM drive (it usually mounts automatically in
/media/cdrom0or similar). - Install necessary dependencies:
bash

sudo apt update

sudo apt install -y build-essential dkms linux-headers-$(uname -r)
- Run the installer script:
bash

cd /media/cdrom0

sudo ./VBoxLinuxAdditions.run
- Reboot the VM:
sudo reboot
For VMware Tools:
- From the VMware menu, go to
VM -> Install VMware Tools. - Follow similar steps as VirtualBox: mount the virtual CD, install build essentials (
sudo apt install -y open-vm-tools-desktop), and then run the installer script (sudo ./vmware-install.plif using the tarball, or preferably just installopen-vm-tools-desktopviaapt). - Reboot the VM.
Customizing and Securing Your Kali Setup
Beyond basic updates, a few steps can further tailor and secure your Kali environment:
- Install Additional Tools: While Kali comes packed with tools, you might need others not included in the default selection. Use
sudo apt install <tool-name>to add them. You can browse Kali’s tool categories on the Offensive Security website to discover more. - Configure Network and VPN: Set up your network interfaces, configure static IPs if needed, or install and configure a VPN client for anonymous browsing and secure connections during your security assessments.
- Harden Your SSH Configuration: If you plan to access Kali remotely via SSH, ensure your
sshd_configfile (/etc/ssh/sshd_config) is properly secured (e.g., disable root login, use strong authentication, change default port). - Firewall Configuration: While Kali often runs without a strict firewall for flexibility, consider enabling and configuring
ufw(Uncomplicated Firewall) oriptablesif you need to restrict incoming/outgoing connections, especially for a production or sensitive environment. - Disable Unnecessary Services: Review running services (
systemctl list-units --type=service) and disable any you don’t need to reduce the attack surface. - Regular Backups: Implement a backup strategy, especially for your critical findings, custom scripts, and important configurations.
Troubleshooting Common Issues and Next Steps
Even with careful preparation, installations can sometimes encounter hiccups. Knowing how to address common issues can save you a lot of frustration.
Addressing Installation Glitches
- Boot Failures: If your system doesn’t boot into Kali Linux after installation, check your BIOS/UEFI settings to ensure the correct boot device is prioritized (e.g., the hard drive where Kali is installed). Revisit the GRUB installation step if dual-booting.
- GRUB Issues (Dual Boot): If Kali doesn’t appear in the boot menu alongside Windows, you might need to run a boot repair utility from a live USB (e.g., Boot-Repair for Ubuntu-based systems, which can also help with Debian-based Kali) or manually reconfigure GRUB.
- Network Connectivity Problems: If you have no internet after installation, check your network manager settings, ensure your network adapter is enabled, and verify that the correct drivers are installed (especially for wireless adapters). In VMs, ensure the network adapter is set to “NAT” or “Bridged Adapter” mode.
- Display/Resolution Issues: If the graphical environment looks wrong or has a low resolution, ensure your VM’s Guest Additions/VMware Tools are correctly installed, or that your graphics drivers are up to date on bare metal.
- “No root password set” / Sudo problems: Remember that modern Kali installs create a standard user. If you try
suorsudoand have issues, ensure your user is in thesudogroup (sudo adduser yourusername sudo).
When troubleshooting, consult the official Kali Linux documentation, the Offensive Security forums, or broader Linux communities (like Stack Exchange) for solutions. Provide detailed error messages and steps you’ve already taken.
Beyond Installation: Embracing the Kali Ecosystem
Installing Kali Linux is merely the gateway to a vast world of cybersecurity exploration. Here are some thoughts on your journey forward:
- Continuous Learning: The cybersecurity landscape is constantly changing. Dedicate time to learning about new vulnerabilities, tools, and attack vectors. The official Kali Linux documentation and Offensive Security courses (like PWK/OSCP) are excellent resources.
- Ethical Considerations: Always remember that with great power comes great responsibility. Use Kali Linux only for ethical purposes, with explicit permission, and within legal boundaries. Respect privacy and always strive to improve security, not exploit it maliciously.
- Practice, Practice, Practice: The best way to learn is by doing. Set up your own virtual labs (using tools like Metasploitable2, DVWA, or VulnHub VMs) to practice your skills in a safe and controlled environment.
- Community Engagement: Engage with the Kali Linux community. Share your knowledge, ask questions, and learn from others. This collective wisdom is invaluable.
By following this comprehensive guide, you’ve not only set up a powerful tool but also embarked on an exciting path in the world of cybersecurity. Embrace the challenge, keep learning, and use your new capabilities responsibly to make the digital world a safer place.
aViewFromTheCave is a participant in the Amazon Services LLC Associates Program, an affiliate advertising program designed to provide a means for sites to earn advertising fees by advertising and linking to Amazon.com. Amazon, the Amazon logo, AmazonSupply, and the AmazonSupply logo are trademarks of Amazon.com, Inc. or its affiliates. As an Amazon Associate we earn affiliate commissions from qualifying purchases.