In the digital age, speed is paramount. From booting up your computer to launching demanding applications, every second counts. For years, the traditional Hard Disk Drive (HDD) was the workhorse of personal computing, but a technological revolution has reshaped our expectations: the Solid-State Drive (SSD). If you’re still running Windows on an old HDD, upgrading to an SSD is arguably the single most impactful performance enhancement you can make to your existing system. This guide will walk you through everything you need to know about installing Windows to an SSD, covering both clean installations and migration processes, ensuring your system runs at its peak potential.

Why Upgrade to an SSD? Understanding the Performance Revolution
The decision to migrate Windows to an SSD isn’t just about chasing the latest trend; it’s about fundamentally transforming your computing experience. SSDs represent a significant leap in storage technology, offering benefits that directly translate into improved productivity, responsiveness, and overall user satisfaction. For anyone invested in the “Tech” aspect of their digital life, understanding these advantages is key.
The Unmistakable Edge of Solid-State Drives
At its core, an SSD is a storage device that uses integrated circuit assemblies as memory to store data persistently, typically using flash memory, and functions as secondary storage in the hierarchy of computer storage. Unlike HDDs, which rely on spinning platters and read/write heads, SSDs have no moving parts. This fundamental difference underpins all their superior characteristics:
- Blazing Speed: This is the most noticeable benefit. SSDs offer dramatically faster boot times, application loading, and file transfers compared to HDDs. Where an HDD might take minutes to boot Windows, an SSD can do it in seconds. Programs like Adobe Photoshop or Microsoft Office launch almost instantly. For professionals and casual users alike, this reduction in wait times significantly boosts daily “Productivity.”
- Enhanced Durability: Without fragile moving parts, SSDs are far more resistant to physical shock and vibration. This makes them ideal for laptops and portable devices where accidental drops are a possibility. For those who travel or work in dynamic environments, an SSD offers peace of mind regarding data security.
- Improved Power Efficiency: SSDs consume less power than HDDs, which is a crucial factor for laptop users. Lower power consumption translates to longer battery life, a significant “Gadget” improvement for mobile computing. Even in desktops, reduced power usage can contribute to lower energy bills and a quieter system.
- Silent Operation: The absence of moving parts means SSDs operate completely silently. Gone are the whirring sounds and clicking noises often associated with HDDs. This creates a more pleasant and distraction-free computing environment, especially beneficial for creative professionals or anyone who values a quiet workspace.
- Faster Data Access: SSDs boast significantly lower access times. This means the time it takes for the drive to locate and retrieve data is drastically reduced. In scenarios involving frequent small file access, like operating system operations, this translates to a much snappier and more responsive system.
- Cooler Running Temperatures: With less power consumption and no mechanical friction, SSDs generally run cooler than HDDs. This can help extend the lifespan of other components in your system by reducing overall system heat.
Strategic Investment in Your Digital Future
From a “Money” perspective, upgrading to an SSD is one of the most cost-effective investments you can make to prolong the life and enhance the performance of an aging computer. Instead of spending hundreds or thousands on a brand-new machine, a relatively inexpensive SSD upgrade can breathe new life into an old system, potentially saving you a substantial sum.
Consider the “Return on Investment” (ROI):
- Cost vs. New PC: A 500GB or 1TB SSD can cost anywhere from $40-$100, a fraction of the price of a new computer.
- Productivity Gains: The time saved waiting for applications to load or files to transfer accumulates significantly over days, weeks, and months. For businesses or freelancers, this directly translates into more billable hours or completed tasks, reinforcing “Business Finance” principles.
- Extending Hardware Lifespan: By upgrading a key component, you extend the functional life of your entire computer, delaying the need for a full replacement. This aligns with smart “Personal Finance” decisions.
Moreover, the “Brand” of your computing experience improves. A fast, responsive system not only makes your work more efficient but also enhances your perception of your own digital tools. For content creators or professionals, a smooth-running machine can even contribute to their “Personal Branding” as someone who uses efficient and reliable technology.
Essential Preparations Before You Begin Your SSD Migration
Before diving into the installation process, thorough preparation is crucial. Rushing this stage can lead to frustrating setbacks or, worse, data loss. This section outlines the essential steps to ensure a smooth transition, covering both hardware and software aspects, and emphasizing data security – a core tenet of “Digital Security.”
Gathering Your Arsenal: Hardware and Software Essentials
Having the right tools at hand makes the process significantly easier.
- The SSD Itself: Naturally, you’ll need the SSD you intend to install. Ensure it’s compatible with your system (most modern motherboards use SATA 2.5-inch drives, while newer systems may support NVMe M.2 SSDs, which are even faster). Check your motherboard’s specifications to confirm.
- Screwdriver: A Phillips head screwdriver is typically all you need for opening your computer case and securing the SSD.
- SATA Data Cable (for Desktops): If you’re installing a 2.5-inch SATA SSD into a desktop, you’ll likely need a spare SATA data cable to connect it to your motherboard. Most motherboards come with a few extra, but it’s good to check.
- SATA Power Cable: Your power supply unit (PSU) should have extra SATA power connectors. Ensure you have one available.
- 2.5-inch to 3.5-inch Adapter (for Desktops, if needed): Many desktop cases have 3.5-inch drive bays, but 2.5-inch SSDs are smaller. An adapter bracket allows you to securely mount the SSD.
- USB to SATA Adapter/Enclosure (for Cloning): If you plan to clone your existing Windows installation, you’ll need a way to connect the new SSD to your computer externally before installing it internally. A USB to SATA adapter or external enclosure is perfect for this.
- Windows Installation Media (for Clean Install): A USB flash drive (at least 8GB) or a DVD with the Windows installation files. You can create this using Microsoft’s Media Creation Tool.
- Cloning Software (for Migration): If you’re migrating an existing system, you’ll need reputable disk cloning software. Popular free options include Macrium Reflect Free, AOMEI Backupper Standard, and EaseUS Todo Backup Free. Paid versions often offer more features but the free tiers are usually sufficient for basic cloning.
- Drivers: Have your motherboard chipset drivers, graphics card drivers, and any other critical drivers downloaded and ready on a separate USB drive. While Windows often installs generic drivers, the manufacturer-specific ones offer optimal performance.
Safeguarding Your Data: The Golden Rule
This cannot be stressed enough: Backup all your important data before you start. While the process is generally safe, unexpected issues can arise. Whether it’s a clean install or a migration, there’s always a risk of data loss. This is a fundamental “Digital Security” and “Productivity” measure. Losing critical files can lead to significant downtime and financial cost.
- Cloud Backup: Services like OneDrive, Google Drive, or Dropbox are excellent for documents, photos, and smaller files.
- External Hard Drive: For larger datasets, a physical external hard drive is often the most practical solution.
- System Image: Consider creating a full system image of your current Windows installation to an external drive. This provides a complete restore point if anything goes wrong. Windows’ built-in backup and restore utility can do this, or you can use third-party tools.
Once your data is backed up, take a moment to free up space on your current drive. Uninstall unnecessary programs, delete old files, and empty your recycle bin. If you’re cloning, a smaller source drive makes the cloning process faster and reduces the chance of running into space issues if your new SSD is only slightly larger than your used space.
Finally, ensure your computer’s BIOS/UEFI settings are configured correctly. Verify that your SATA controller mode is set to AHCI (Advanced Host Controller Interface) rather than IDE (Integrated Drive Electronics) for optimal SSD performance. Most modern systems default to AHCI, but it’s worth checking.
Method 1: The Pristine Path – Performing a Clean Windows Installation on SSD
A clean installation is often the recommended approach. It gives you a fresh start, free from old software clutter, corrupted files, or hidden performance bottlenecks. This results in the fastest, most stable Windows experience on your new SSD, maximizing your “Productivity” and digital efficiency.
Crafting Your Windows Installation Media
The first step is to create a bootable USB drive or DVD with the Windows operating system. Microsoft provides an official tool for this.
- Download the Media Creation Tool: Go to the official Microsoft website and search for “Windows Media Creation Tool.” Download and run the executable.
- Accept Terms: Agree to the license terms.
- Choose “Create installation media (USB flash drive, DVD, or ISO file) for another PC.” Click Next.
- Select Language, Architecture, and Edition: The tool will often recommend options based on your current PC. You can uncheck “Use the recommended options for this PC” if you need to choose different settings (e.g., creating a 64-bit installer on a 32-bit machine).
- Choose Media: Select “USB flash drive” and ensure your USB drive (at least 8GB, and preferably empty, as it will be formatted) is plugged in. If you prefer a DVD, choose “ISO file” and burn it to a DVD later.
- Wait for Creation: The tool will download the Windows files and create the bootable media. This can take some time depending on your internet speed.
The Step-by-Step Installation Process
Once your installation media is ready, you’re prepared for the clean install.
-
Install the SSD:
- Desktop: Power down your PC, unplug it, and open the case. Mount the SSD in an available drive bay (using an adapter if necessary), connect a SATA data cable from the SSD to a free SATA port on your motherboard, and connect a SATA power cable from your PSU to the SSD.
- Laptop: This can be more involved. Consult your laptop’s manual or an online guide for your specific model. Typically, you’ll remove the back panel, locate the old drive bay, swap the HDD for the SSD, and secure it.
- Crucially, it is often recommended to disconnect your old HDD during a clean install to prevent accidental installation onto the wrong drive and ensure the bootloader is correctly placed on the SSD.
-
Boot from Installation Media:
- Plug in your Windows installation USB drive (or insert the DVD).
- Power on your computer. As it starts, repeatedly press the key to enter your BIOS/UEFI settings or the Boot Menu (common keys are Del, F2, F10, F12 – check your motherboard/PC manual).
- In the Boot Menu, select your USB drive or DVD as the primary boot device.
- If you enter BIOS/UEFI, navigate to the Boot tab, set your USB/DVD as the first boot option, save changes, and exit.
-
Start Windows Setup:
- The Windows setup screen will appear. Select your language, time, and keyboard preferences, then click “Next.”
- Click “Install now.”
- Enter your product key if prompted (you can often click “I don’t have a product key” and activate later if Windows was previously activated on this machine or you have a digital license).
- Accept the license terms.
- Choose “Custom: Install Windows only (advanced).” This is vital for a clean installation.
-
Partition the SSD:
- You’ll see a list of available drives. Identify your new SSD. It will likely appear as “Drive 0 Unallocated Space” or similar, with its capacity matching your SSD size.
- Select the unallocated space on your SSD.
- Click “New” to create partitions. Windows will typically suggest creating system-required partitions automatically. Accept this.
- Ensure the largest partition on your SSD (the primary one where Windows will go) is selected.
- Click “Next” to begin the installation.
-
Complete Installation:
- Windows will now copy files and install the operating system. Your computer may restart several times.
- After the final restart, you’ll go through the initial setup screens: region, keyboard layout, network connection, Microsoft account login (or local account creation), privacy settings, and Cortana setup.
- Once you reach the desktop, your clean Windows installation on the SSD is complete!
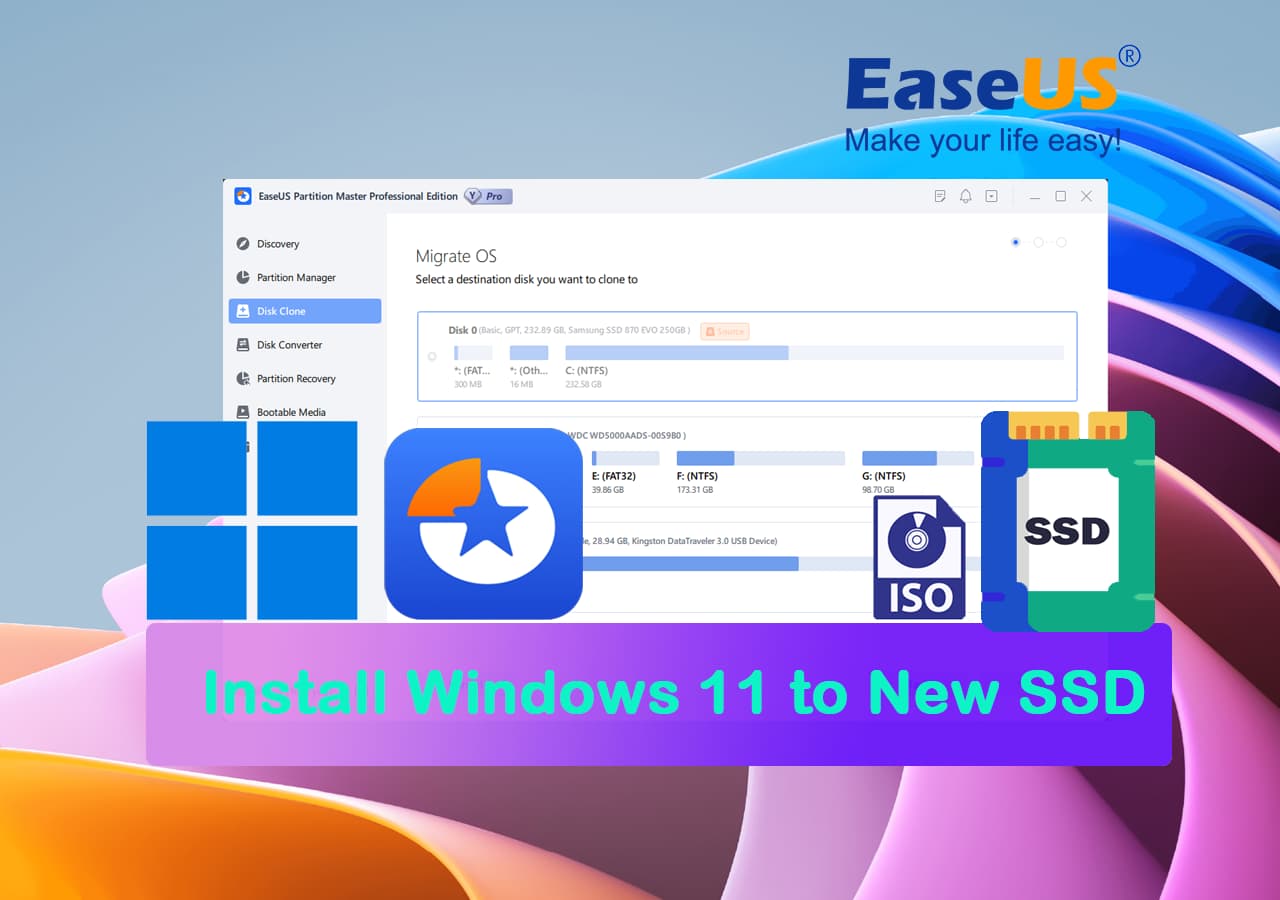
Method 2: The Seamless Transition – Cloning Your Existing Windows to SSD
If you dread the thought of reinstalling all your applications, reconfiguring settings, and transferring files, cloning your existing Windows installation is the perfect alternative. This method duplicates your entire operating system, programs, and data from your old drive to the new SSD, offering a seamless “Productivity” transition with minimal downtime.
Selecting the Right Cloning Software
Several reliable cloning tools are available, many with free versions that suffice for basic disk migration. The key is to choose software that is user-friendly and ensures proper partition alignment for SSDs.
- Macrium Reflect Free: Highly regarded for its reliability and robust features, even in its free tier. It’s often the go-to recommendation for system imaging and cloning.
- AOMEI Backupper Standard: Another popular choice offering disk clone, partition clone, and system clone functionalities. Its interface is generally intuitive.
- EaseUS Todo Backup Free: Provides similar cloning features and is known for its straightforward guided processes.
- SSD Manufacturer’s Tool: Some SSD manufacturers (e.g., Samsung with Samsung Data Migration, Western Digital with Acronis True Image WD Edition) offer their own branded cloning software, often based on commercial solutions like Acronis. These are usually optimized for their specific drives and are an excellent choice if available for your SSD.
Before starting, download and install your chosen cloning software on your current Windows installation (on the old HDD).
Executing the Clone: A Step-by-Step Walkthrough
The exact steps might vary slightly depending on the cloning software you choose, but the general workflow remains consistent.
-
Connect the New SSD:
- Since your old HDD is still in the system running Windows, you need to connect the new SSD externally. Use a USB to SATA adapter or an external SSD enclosure for this.
- Plug the SSD into the adapter/enclosure, and then plug the USB cable into your computer.
- Windows should detect the new SSD. If prompted to initialize it, do so, selecting GPT (GUID Partition Table) for modern systems (UEFI) or MBR (Master Boot Record) for older systems (BIOS). You don’t need to format it yet, as the cloning software will handle partitioning.
-
Launch Cloning Software:
- Open your chosen cloning software.
- Look for an option like “Clone Disk,” “System Clone,” or “Disk Migration.”
-
Select Source and Destination Disks:
- Source Disk: Carefully select your old HDD (the drive that currently has Windows installed) as the source disk. Double-check its capacity and label to ensure you pick the correct one.
- Destination Disk: Select your new SSD (the one you just connected via USB) as the destination disk. Be absolutely certain of this selection, as all data on the destination disk will be overwritten.
-
Configure Cloning Options (Important!):
- SSD Alignment: Most modern cloning software will automatically detect if the destination is an SSD and enable “SSD alignment” or “Optimize for SSD.” This is crucial for performance and longevity. Ensure this option is checked.
- Partition Resizing: If your new SSD is a different size than your old HDD, the software will usually allow you to resize partitions. If the new SSD is larger, expand the main Windows partition to utilize the extra space. If it’s smaller (which is not recommended unless you’ve significantly reduced the used space on the old drive to fit), ensure the used space on the source drive is less than the total capacity of the new SSD.
- Exclude Files: Some software allows you to exclude certain files or folders from the clone, which can be useful if you only want to migrate the OS and programs, leaving personal data on the old drive.
-
Start the Cloning Process:
- Review all your selections one last time.
- Click “Start Clone” or “Proceed.” The cloning process will begin. This can take anywhere from a few minutes to several hours, depending on the amount of data and the speed of your drives/USB connection.
- Do not interrupt the process.
-
Swap Drives and Boot:
- Once the clone is complete, safely remove the new SSD (and the USB adapter).
- Power down your computer, unplug it, and open the case.
- Remove the old HDD.
- Install the new SSD in its place (or in an available bay, ensuring it’s connected via SATA data and power cables).
- Crucially, it is often recommended to disconnect your old HDD entirely after cloning for the first boot from the SSD. This prevents potential boot conflicts.
- Power on your computer. It should now boot from the SSD, just as it did from the old HDD, but significantly faster.
-
Verify and Repurpose:
- Once Windows boots, verify that all your applications and files are present and working correctly.
- If everything is satisfactory, you can then decide to reconnect your old HDD. You can reformat it to use as a secondary storage drive for data (movies, photos, games – aligning with smart “Financial Tools” for maximizing hardware utility).
Post-Installation Mastery: Optimizing Your SSD for Peak Performance
Successfully installing Windows to your SSD is a major accomplishment, but the journey doesn’t end there. To truly unlock and maintain its peak performance and longevity, a few post-installation steps and optimizations are highly recommended. This ensures your investment continues to pay off in terms of “Productivity” and system responsiveness, enhancing your overall “Tech” experience.
Driver Installation and System Updates
Even with a fresh Windows installation or a cloned system, ensuring all your drivers are up-to-date is paramount. While Windows often installs generic drivers, manufacturer-specific drivers are optimized for your hardware.
- Motherboard Chipset Drivers: This is the most important. Visit your motherboard manufacturer’s website (e.g., ASUS, MSI, Gigabyte, ASRock) and download the latest chipset drivers for your specific model. Install them immediately. These drivers are critical for proper communication between your CPU, SSD, and other components.
- Graphics Card Drivers: Download the latest drivers from NVIDIA, AMD, or Intel, depending on your GPU. Up-to-date graphics drivers are essential for optimal gaming performance, video editing, and overall display stability.
- Other Peripheral Drivers: Install drivers for any other critical components or peripherals, such as network adapters, audio devices, or specialized input devices.
- Windows Updates: Run Windows Update multiple times until no more updates are available. These updates not only patch security vulnerabilities (important for “Digital Security”) but also include performance enhancements and bug fixes.
SSD-Specific Optimizations for Longevity and Speed
Modern Windows versions (Windows 10 and 11) are much better at handling SSDs automatically than their predecessors. Many common “SSD optimization” tips from the past (like disabling Superfetch or Windows Search) are no longer necessary or can even be detrimental. However, a few key settings are still worth checking:
- TRIM (Crucial!): TRIM is a command that helps an operating system tell an SSD which data blocks are no longer in use and can be wiped. This is vital for maintaining SSD performance and longevity.
- Verify TRIM Status: Open Command Prompt as an administrator and type:
fsutil behavior query DisableDeleteNotify - If the result is
DisableDeleteNotify = 0, TRIM is enabled (which is good). If it’s1, TRIM is disabled, and you should investigate why (though this is rare with modern Windows and SSDs).
- Verify TRIM Status: Open Command Prompt as an administrator and type:
- Defragmentation (Disable for SSDs): Traditional HDDs benefit from defragmentation, which reorganizes data for faster access. For SSDs, defragmentation is unnecessary, can degrade performance, and contributes to unnecessary wear.
- Windows’ “Optimize Drives” tool usually detects SSDs and performs an “optimization” (which is actually TRIM), not a defragmentation. Just ensure you’re not running third-party defragmentation tools on your SSD.
- Drive Indexing (Optional): While Windows Search indexing is generally fine on an SSD, if you rarely use Windows Search or have very specific “Productivity” workflows that don’t rely on it, you can disable indexing for the SSD partition to slightly reduce write operations.
- Right-click your SSD drive in File Explorer > Properties > uncheck “Allow files on this drive to have contents indexed in addition to file properties.” This is largely negligible for modern SSDs.
- System Restore (Optional): System Restore can create restore points that take up space. While useful for troubleshooting, if you have a robust backup strategy, you might consider limiting its space usage or disabling it entirely on your SSD to free up space. This is a “Personal Finance” choice regarding resource allocation.
- Power Management: Ensure your power plan is set to “High Performance” (or a balanced plan that doesn’t aggressively power down your SSD) to prevent it from going into a low-power state that might introduce slight delays.
Repurposing Your Old Drive: Smart Financial Moves
Don’t let your old HDD go to waste! It can still serve a valuable purpose, turning a discarded component into a useful “Financial Tool.”
- Secondary Storage: Format the old HDD and use it as a data drive for large files, backups, games, or media libraries. This offloads non-OS data from your faster SSD, ensuring the SSD remains nimble for your operating system and primary applications.
- External Drive: Purchase an inexpensive USB enclosure for your old HDD, turning it into a portable external hard drive. This is excellent for backups, transferring files between computers, or expanding storage for a laptop.
- Network Attached Storage (NAS): If you’re tech-savvy, you could use it in a DIY NAS setup for centralized home network storage.
- Selling/Donating: If it’s still in good condition and has a decent capacity, you could sell it (after securely wiping all data) or donate it, representing a small “Online Income” opportunity or a philanthropic contribution.
Troubleshooting Common Hurdles: Ensuring a Smooth Journey
Even with the best preparation, technical issues can sometimes arise. Knowing how to diagnose and resolve common problems related to SSD installation can save you significant frustration and downtime, ensuring your “Tech” journey remains positive.
When Your SSD Isn’t Detected
This is a common issue, especially during initial setup or after a clean installation attempt.
- Check Physical Connections: The most frequent culprit. Ensure the SATA data cable is firmly connected to both the SSD and the motherboard. Verify the SATA power cable is securely attached from the PSU to the SSD. If using an NVMe drive, ensure it’s seated properly in the M.2 slot and secured with its screw.
- BIOS/UEFI Settings:
- Enter your BIOS/UEFI. Look for “Storage Configuration,” “SATA Configuration,” or similar sections.
- Ensure the SATA port your SSD is connected to is enabled.
- Verify that the SATA controller mode is set to AHCI. If it’s set to IDE, the drive might not be detected or won’t perform optimally.
- Initialize and Format (New SSD Only): If it’s a brand-new SSD and you’re running Windows, it might need to be initialized and formatted.
- Right-click the Start button > Disk Management.
- Look for your SSD (it might appear as “Disk 1,” “Disk 2,” etc., and show as “Unallocated”).
- Right-click on the disk number (not the unallocated space) and select “Initialize Disk.” Choose GPT (for UEFI) or MBR (for older BIOS).
- Then, right-click the unallocated space and choose “New Simple Volume” to format it (e.g., with NTFS). This step is only necessary if you’re using the SSD as a secondary storage drive after Windows is installed elsewhere, or if you plan to install Windows on it but it wasn’t detected by the installer. During a clean install, the Windows installer usually handles this automatically.
- Try Different Cables/Ports: A faulty SATA cable or motherboard port can prevent detection. Try swapping cables or using a different SATA port.
- Update BIOS/UEFI: In rare cases, an outdated BIOS/UEFI firmware might not properly support newer SSDs. Check your motherboard manufacturer’s website for updates.
Resolving Boot Issues and Performance Glitches
You’ve installed Windows, but it’s not booting or performing as expected.
- Boot Order in BIOS/UEFI: Ensure your SSD is set as the first boot device in your BIOS/UEFI settings. If you cloned, temporarily disconnect the old HDD to ensure the system attempts to boot only from the SSD.
- “Operating System Not Found” / Boot Loop:
- If you performed a clean install, you might have forgotten to disconnect the old HDD, and the bootloader might have been written to the wrong drive.
- If cloning, ensure you selected the correct source and destination drives, and that SSD alignment was enabled.
- Use the Windows Installation Media to access “Repair your computer” options. You can try “Startup Repair” or open Command Prompt and use
bootrec /fixmbr,bootrec /fixboot,bootrec /rebuildbcdcommands.
- Slow Performance on SSD:
- Verify AHCI Mode: Double-check your BIOS/UEFI that the SATA controller is in AHCI mode. Running in IDE mode severely cripples SSD performance.
- TRIM Enabled: As mentioned, verify TRIM is enabled.
- Drivers: Ensure all chipset and storage controller drivers are installed. Generic Windows drivers might not provide optimal speed.
- Disk Space: While not as critical as with HDDs, completely filling an SSD can impact performance. Try to keep at least 10-15% of the drive free.
- Malware: Run a full scan with reputable anti-malware software. Malware can severely degrade system performance, affecting your “Digital Security.”
- Windows Activation Issues: If you performed a clean install and your Windows isn’t activating, ensure you used the correct product key or that your digital license is linked to your Microsoft account. You might need to troubleshoot through Windows’ activation settings or contact Microsoft support.
Upgrading to an SSD and installing Windows on it is a transformative experience for any computer user. By following this comprehensive guide, you’re not just installing an operating system; you’re unlocking a new level of system responsiveness, efficiency, and enjoyment, directly impacting your “Productivity” and overall “Tech” experience. Whether you opt for a pristine clean install or a seamless clone, the benefits of solid-state storage are undeniable, making it one of the best “Investments” you can make in your digital life.
aViewFromTheCave is a participant in the Amazon Services LLC Associates Program, an affiliate advertising program designed to provide a means for sites to earn advertising fees by advertising and linking to Amazon.com. Amazon, the Amazon logo, AmazonSupply, and the AmazonSupply logo are trademarks of Amazon.com, Inc. or its affiliates. As an Amazon Associate we earn affiliate commissions from qualifying purchases.