In today’s rapidly evolving digital landscape, the ability to install and run an operating system from a portable medium like a USB drive is no longer a niche technical trick but a powerful tool for various user scenarios. Whether you’re a tech enthusiast looking for a bootable diagnostic environment, a professional needing to deploy Windows across multiple machines without the hassle of optical media, or someone who simply wants a portable operating system for enhanced privacy and flexibility, installing Windows on a USB drive opens up a world of possibilities.

This comprehensive guide will walk you through the entire process, from understanding the prerequisites to troubleshooting common issues. We’ll delve into the technical nuances, explore the benefits, and provide clear, actionable steps to ensure you can successfully create and utilize a bootable Windows USB drive.
Understanding the Fundamentals: Why Install Windows on a USB?
Before we dive into the “how,” it’s crucial to understand the “why.” Installing Windows on a USB drive offers several compelling advantages that make it a valuable technique for both individuals and businesses.
1. Portability and Flexibility
The most obvious benefit is portability. A Windows installation on a USB drive essentially becomes a portable operating system. You can carry your familiar computing environment, your installed applications, and your data with you on a small, easily transportable device. This means you can boot into your personalized Windows setup on virtually any compatible computer, transforming any machine into your own workstation. This is particularly useful for:
- IT Professionals: Deploying operating systems, troubleshooting issues on client machines, or performing system maintenance without needing physical access to a server room or carrying multiple laptops.
- Students and Educators: Accessing their required software and learning environment across different labs or personal devices without the need for extensive installations on each machine.
- Travelers and Remote Workers: Maintaining a consistent and secure computing environment regardless of the host computer.
2. Diagnostic and Recovery Tools
A bootable Windows USB drive can be an indispensable tool for system diagnostics and recovery. If your primary operating system becomes corrupted or unbootable, a Windows To Go (WTG) drive or a standard Windows installation on USB can serve as a lifeline. You can boot from the USB to:
- Access System Restore: Revert your main installation to a previous working state.
- Run Command Prompt Tools: Utilize powerful command-line utilities for disk checking, file recovery, and network troubleshooting.
- Perform Antivirus Scans: Boot into a clean environment to scan your infected system without the malware interfering.
- Install or Repair Windows: Initiate a fresh installation or repair an existing one on your internal drive.
3. Enhanced Security and Privacy
For users concerned about privacy and security, a portable Windows installation can offer a higher degree of control. By running Windows from a USB, you can:
- Isolate Your Data: Keep your sensitive files and browsing history separate from the host computer’s storage.
- Minimize Footprints: Leave less of a trace on the computers you use.
- Utilize Encryption: Implement full disk encryption on your USB drive to protect your data even if the drive is lost or stolen.
4. Testing and Development
Software developers and testers can leverage bootable Windows USB drives for efficient testing of applications and operating systems across various hardware configurations. This allows for rapid deployment and testing cycles without the need to reconfigure multiple physical machines.
Prerequisites for Installing Windows on a USB Drive
Before embarking on the installation process, it’s essential to gather the necessary components and ensure your system meets the requirements. This will streamline the process and prevent potential setbacks.
1. A Suitable USB Flash Drive
The most critical component is the USB flash drive itself. Not all USB drives are created equal, and for a smooth Windows installation, you’ll need a drive with specific characteristics:
- Capacity: A minimum of 32GB is generally recommended for a standard Windows installation. However, for a more functional and less constrained experience, 64GB or even 128GB is highly advisable. Larger capacities will accommodate more applications and user data.
- Speed: Opt for a USB 3.0 or newer (USB 3.1, USB 3.2, USB4) drive. The speed difference between USB 2.0 and USB 3.0 is significant, and using an older, slower drive will result in painfully slow boot times and application performance. Look for drives with high read and write speeds, often indicated by marketing terms like “SuperSpeed” or numerical designations.
- Reliability: Invest in a reputable brand. Cheap, unbranded USB drives are prone to failure, which can lead to data corruption and a failed installation.
2. A Windows Installation Media
You will need an ISO image of the Windows version you wish to install. You can obtain this from Microsoft’s official website:
- Windows 10/11 Media Creation Tool: Microsoft provides a tool that allows you to download the latest Windows ISO file or create a bootable USB directly for installation on a PC. While this tool is primarily for installing on internal drives, the ISO it provides is what we will use.
- Volume Licensing Service Center (VLSC) or MSDN: For business users or developers with appropriate subscriptions, these platforms offer access to a wider range of Windows versions and editions.
3. A Working Computer
You’ll need a functional computer to download the necessary tools and create the bootable USB drive. This computer should:
- Have sufficient storage space: To download the Windows ISO file and any utility software.
- Have a USB port: Compatible with the speed of your chosen USB drive (preferably USB 3.0 or higher).
- Be running a compatible operating system: Windows, macOS, or Linux can all be used to prepare the USB drive.
4. Administrator Privileges
During the process of creating the bootable USB, you will likely need administrator privileges on the computer you are using to ensure that the necessary system files and boot sectors can be written to the drive.
Methods for Installing Windows on a USB Drive
There are primarily two approaches to achieving a Windows installation on a USB drive: the “Windows To Go” method (which is more geared towards a portable, pre-installed Windows environment) and a standard Windows installation that’s directed to the USB. While Windows To Go was officially discontinued by Microsoft after Windows 10, the underlying principles and alternative methods allow for a similar portable experience.
Method 1: Using Third-Party Tools for a Portable Windows Environment (Recommended for Simplicity)
This method typically leverages specialized software that automates the process of creating a bootable Windows environment on a USB drive. These tools often extract the Windows image and configure it to run from the USB.
Key Steps (General Overview – specific steps will vary by tool):

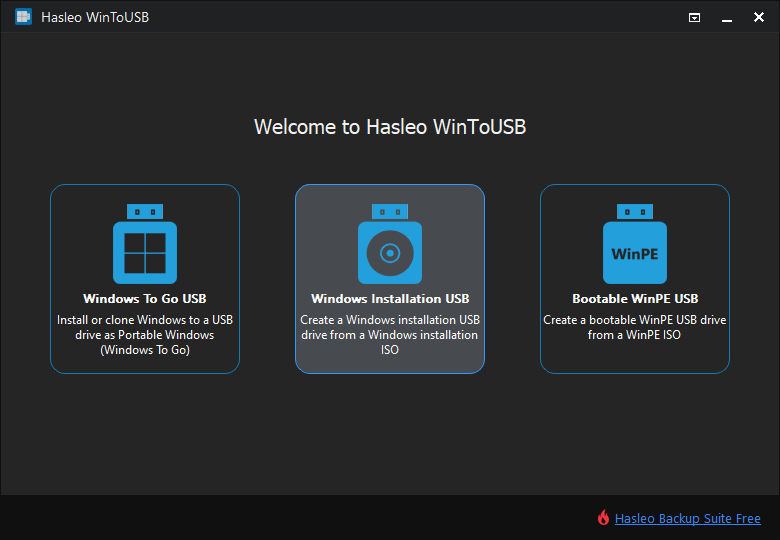
- Download and Install a Suitable Tool: Popular options include Rufus, WinToUSB, or Ventoy. Each has its own interface and specific instructions.
- Connect Your USB Drive: Ensure it’s recognized by your computer.
- Launch the Tool: Open the chosen utility.
- Select the Windows ISO: Browse and select the Windows ISO file you downloaded.
- Choose Your USB Drive: Carefully select your target USB drive. Double-check this step, as selecting the wrong drive will erase its contents.
- Configure Settings: The tool will usually offer options for partitioning, file system, and whether to create a “Windows To Go” type installation. For a portable experience, selecting the “Windows To Go” or similar option is often beneficial.
- Start the Process: Initiate the creation of the bootable USB. This can take a significant amount of time, depending on the speed of your USB drive and the size of the Windows image.
- Boot from the USB: Once the process is complete, you’ll need to configure your computer’s BIOS/UEFI settings to boot from the USB drive. This usually involves accessing the boot menu during startup (often by pressing F2, F10, F12, or Del).
Advantages of this Method:
- Ease of Use: Third-party tools often simplify a complex process into a few clicks.
- Automation: They handle the partitioning, formatting, and bootloader setup automatically.
- Windows To Go Compatibility: Many tools are designed to replicate the Windows To Go experience, ensuring better compatibility for portable use.
Method 2: Manual Installation (More Control, More Complex)
This method involves using the standard Windows installation media and manually directing the installation process to the USB drive. This gives you more granular control but requires a deeper understanding of disk partitioning and boot processes.
Key Steps (General Overview):
- Create a Standard Bootable Windows USB: Use the official Microsoft Media Creation Tool to create a standard bootable Windows USB drive (this is different from a “Windows To Go” drive).
- Prepare the Target USB Drive: Connect the USB drive where you want to install Windows. You might need to format it and create partitions using Disk Management.
- Boot from the Windows Installation USB: Restart your computer and boot from the standard Windows installation USB you just created.
- Start the Installation: Proceed through the initial setup screens until you reach the “Where do you want to install Windows?” step.
- Select the Target USB Drive: This is the critical step. Carefully identify and select the USB drive you prepared in step 2 as the installation target. Ensure you do not select your internal hard drive.
- Partitioning and Formatting: You may need to manually partition and format the target USB drive at this stage.
- Complete Installation: Let the Windows installation proceed. This will involve copying files, installing features, and restarting multiple times.
- First Boot: After the installation is complete, you’ll need to remove the original installation USB and configure your BIOS/UEFI to boot from the USB drive containing your new Windows installation.
Advantages of this Method:
- Full Control: You have complete control over partitioning and configuration.
- Standard Windows Install: Utilizes the official Windows installer, potentially leading to a more “native” installation.
Disadvantages of this Method:
- Complexity: Requires a good understanding of disk management and boot processes.
- Potential for Errors: Mistakes can easily lead to data loss or a non-bootable drive.
- Performance: May not be as optimized for portable use as a dedicated “Windows To Go” solution.
Booting from Your New Windows USB Drive
Once you have successfully created your bootable Windows USB drive, the next crucial step is to configure your computer to boot from it. This process involves accessing your computer’s BIOS or UEFI settings.
Accessing BIOS/UEFI Settings
The method for entering BIOS/UEFI varies depending on your computer’s manufacturer and model. Common keys to press during the initial boot sequence (when the manufacturer’s logo appears) include:
- Del (Delete)
- F2
- F10
- F12
- Esc (Escape)
If you’re unsure, consult your computer’s manual or search online for your specific model’s BIOS/UEFI access key.
Configuring the Boot Order
Once you are in the BIOS/UEFI settings:
- Locate the Boot Menu: Navigate through the menus to find the “Boot,” “Boot Order,” or “Boot Priority” section.
- Prioritize the USB Drive: You will see a list of bootable devices. Your goal is to move your USB drive to the top of this list, making it the first device the computer attempts to boot from.
- Save Changes and Exit: After reordering the boot devices, ensure you save your changes. There’s usually an option like “Save and Exit” or a specific key combination for this (often F10).
Your computer will then restart, and if configured correctly, it should boot from your newly created Windows USB drive.
Troubleshooting Common Issues
Even with the best preparation, you might encounter a few hiccups along the way. Here are some common issues and their solutions:
Issue 1: Computer Won’t Boot from USB
- Incorrect Boot Order: Double-check that the USB drive is indeed set as the first boot device in your BIOS/UEFI.
- USB Drive Not Recognized: Try a different USB port, preferably a USB 3.0 port if your drive is USB 3.0. Ensure the USB drive is properly seated.
- Corrupted Installation Media: Recreate the bootable USB drive using a fresh download of the Windows ISO and a reliable utility.
- BIOS/UEFI Settings: Some BIOS/UEFI settings (like Secure Boot) might interfere. Try disabling Secure Boot temporarily. For older systems, ensure CSM (Compatibility Support Module) is enabled if you’re trying to boot a legacy BIOS installation on a UEFI system, or vice versa.
- USB Drive Compatibility: While rare, some motherboards can be picky about specific USB drives.
Issue 2: Slow Performance on USB Drive
- USB 2.0 Drive: If you used a USB 2.0 drive, performance will be severely limited. Upgrade to a USB 3.0 or higher drive.
- Slow USB Drive: Even if it’s USB 3.0, some drives have poor read/write speeds. Check the drive’s specifications.
- System Resources: The host computer’s resources also play a role. Running Windows from USB will always be slower than from an SSD.
- Heavy Applications: Running resource-intensive applications will naturally strain the system.
Issue 3: Installation Fails Mid-Process
- Corrupted ISO: Download the Windows ISO again from a trusted source.
- Faulty USB Drive: The USB drive might be failing. Try a different, high-quality USB drive.
- Insufficient Power: Ensure the USB port is providing adequate power, especially if you’re using a USB hub.
- Overheating: If the USB drive or the host computer overheats during the lengthy process, it can cause failures.
Issue 4: “Windows cannot be installed to this drive” Error
- Incorrect Partitioning: The target USB drive might not be formatted correctly or may have incompatible partition structures. Use Disk Management to clean and re-partition the drive before attempting the installation.
- Drive Size Limitations: Ensure the drive is of sufficient size (32GB minimum, 64GB+ recommended).
Conclusion
Installing Windows on a USB drive is a versatile and powerful capability that can significantly enhance your computing experience. Whether you’re an IT professional, a student, a developer, or simply someone who values portability and control over their digital environment, the ability to carry a fully functional Windows installation with you opens up new avenues for productivity, security, and convenience.
By understanding the prerequisites, carefully following the steps outlined in this guide, and being prepared to troubleshoot common issues, you can confidently create and utilize your own portable Windows environment. Remember to always back up your data before undertaking any significant system changes and to invest in quality hardware for the best results. Happy computing!
aViewFromTheCave is a participant in the Amazon Services LLC Associates Program, an affiliate advertising program designed to provide a means for sites to earn advertising fees by advertising and linking to Amazon.com. Amazon, the Amazon logo, AmazonSupply, and the AmazonSupply logo are trademarks of Amazon.com, Inc. or its affiliates. As an Amazon Associate we earn affiliate commissions from qualifying purchases.