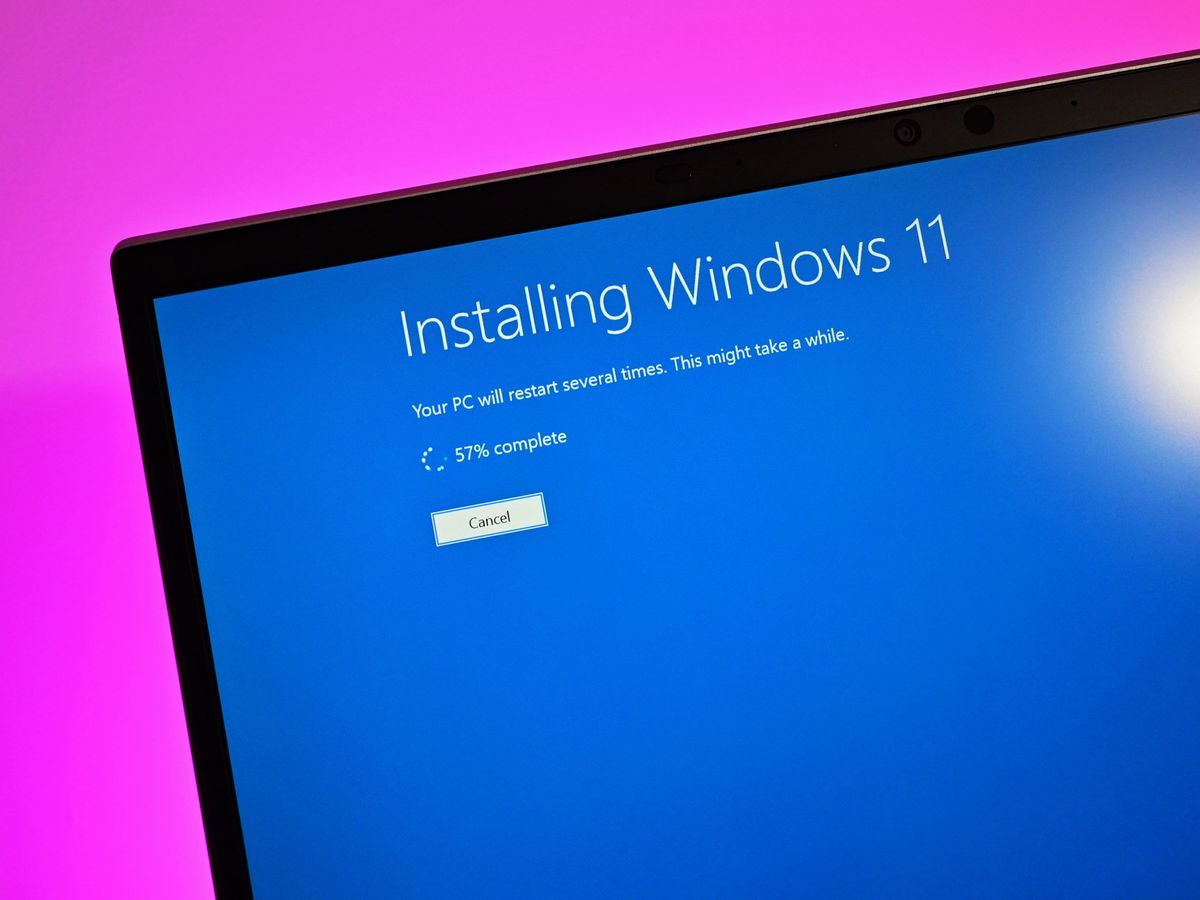
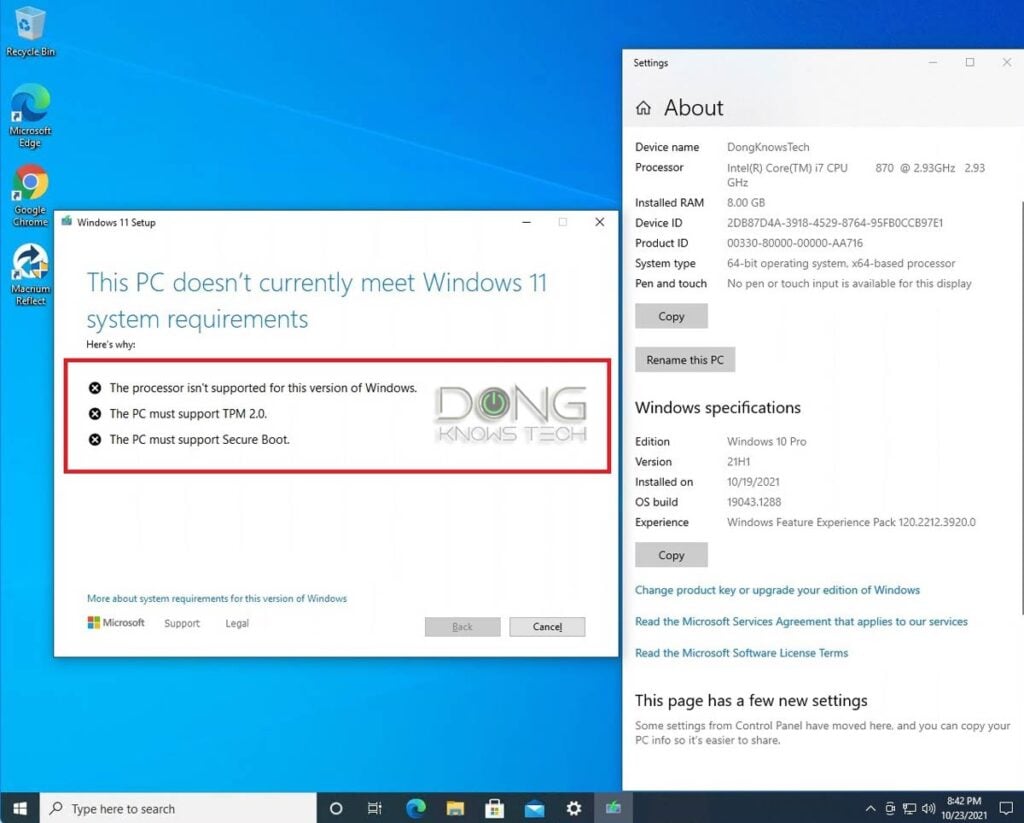
The launch of Windows 11 marked a significant shift in Microsoft’s approach to hardware standards. While previous iterations of Windows were famously backwards-compatible, Windows 11 introduced stringent system requirements—most notably the requirement for a Trusted Platform Module (TPM) 2.0 and a relatively modern CPU (Intel 8th Gen or AMD Zen 2 and newer). For millions of users with perfectly functional “legacy” hardware, these requirements created a digital divide.
However, the tech community has developed several reliable methods to bridge this gap. This guide provides a deep dive into the technical methodologies for installing Windows 11 on unsupported hardware, explaining the “why” behind the restrictions and the “how” of bypassing them safely.
Understanding the Windows 11 Hardware Barrier
Before attempting a bypass, it is crucial to understand what Microsoft is trying to achieve. The restrictions are not merely arbitrary; they are rooted in a “Zero Trust” security model that leverages hardware-level features to protect the operating system from sophisticated firmware and boot-level attacks.
The Role of TPM 2.0 and Secure Boot
The Trusted Platform Module (TPM) 2.0 is a specialized chip—either dedicated or integrated into the CPU firmware—that provides a hardware-based foundation for security tasks. It handles cryptographic keys, ensures the integrity of the boot process, and supports features like BitLocker drive encryption and Windows Hello. Secure Boot, a feature of the UEFI (Unified Extensible Firmware Interface), ensures that only digitally signed, trusted software can load during the startup process. By requiring these, Microsoft aims to mitigate rootkits and low-level malware.
The CPU Compatibility List
The processor requirements are perhaps the most controversial aspect of Windows 11. Microsoft argues that supported CPUs utilize a “Mode-based Execution Control” (MBEC) feature, which improves the performance of virtualization-based security (VBS). While older CPUs can run Windows 11, Microsoft claims they experience a significantly higher rate of kernel mode crashes (Blue Screens of Death) and lack the necessary driver support for modern power management and security protocols.
Preparing Your System for a Manual Upgrade
Installing an operating system on unsupported hardware is inherently risky. Before proceeding with any technical modifications, a systematic preparation phase is mandatory to ensure that your data remains intact and your hardware is capable of handling the new environment.
Data Redundancy and Backups
The methods used to bypass compatibility checks often involve modifying the Windows Registry or using third-party tools to alter the installation media. These processes can, in rare cases, lead to partition errors or boot loops. Always perform a full system image backup using tools like Macrium Reflect or at least back up your critical documents to an external drive or cloud service.
Verifying Hardware Limitations
Even if you bypass the TPM and CPU checks, your hardware must still meet the absolute minimums:
- RAM: At least 4GB (8GB recommended).
- Storage: 64GB or larger SSD/HDD.
- System Firmware: UEFI-capable (though some bypasses allow for Legacy BIOS, it is not recommended for Windows 11).
- Graphics: DirectX 12 compatible with a WDDM 2.0 driver.
Method 1: Using Rufus to Create Bypass Installation Media
For most tech enthusiasts, Rufus is the gold standard for creating bootable USB drives. It has integrated features specifically designed to strip away Windows 11’s hardware requirements during the creation of the installation media.
Downloading the Windows 11 ISO
The first step is to obtain a clean, official ISO file from Microsoft’s website. Avoid third-party “pre-activated” or “lite” versions of Windows found on torrent sites, as these often contain injected malware or unstable configurations. Using the official Media Creation Tool or the direct ISO download ensures you are starting with a secure foundation.

Configuring Rufus for Compatibility
Once you have the ISO, plug in a USB drive (8GB+) and open Rufus. After selecting your Windows 11 ISO, a “Windows User Experience” dialog box will appear. This is the critical juncture. You should check the following options:
- Remove requirement for 4GB+ RAM, Secure Boot and TPM 2.0: This modifies the
winpeshl.inior inserts registry keys into the pre-installation environment to skip the hardware check. - Remove requirement for an online Microsoft account: This is useful for users who prefer local accounts.
- Disable data collection (Skip privacy questions): This streamlines the final setup process.
By selecting these, Rufus creates a modified installer that ignores the hardware “gates” usually encountered at the start of the installation process.
Method 2: The Registry Bypass for In-Place Upgrades
If you are already running Windows 10 and wish to perform an in-place upgrade without formatting your drive, you can use a Registry hack. This method is actually supported (though not recommended) by Microsoft for specific testing environments.
The “AllowUpgradesWithUnsupportedTPMOrCPU” Hack
By navigating to HKEY_LOCAL_MACHINESYSTEMSetupMoSetup, users can create a DWORD (32-bit) Value named AllowUpgradesWithUnsupportedTPMOrCPU and set its value to 1. This specifically tells the Windows 11 Setup engine to ignore the CPU generation check and allow TPM 1.2 if TPM 2.0 is missing.
The LabConfig Method for Clean Installs
If you are booting from a standard, unmodified Windows 11 USB and hit the “This PC can’t run Windows 11” screen, you can intervene manually:
- Press Shift + F10 to open the Command Prompt.
- Type
regeditand hit Enter. - Navigate to
HKEY_LOCAL_MACHINESYSTEMSetup. - Create a new Key named
LabConfig. - Inside
LabConfig, create DWORD values namedBypassTPMCheck,BypassSecureBootCheck, andBypassRAMCheck, setting each to1.
Once you close the Registry Editor and go back one step in the installation wizard, the checks will be bypassed, allowing the installation to proceed on older hardware.
Post-Installation Realities: Stability and Updates
Successfully reaching the Windows 11 desktop on an unsupported machine is a victory, but it comes with long-term technical caveats that every user must be aware of.
The Windows Update Question
The primary concern for unsupported systems is the delivery of security updates. Microsoft has officially stated that they reserve the right to withhold updates from devices that do not meet system requirements. While, currently, most unsupported machines still receive standard monthly “Patch Tuesday” updates, there is no guarantee this will continue. Major feature updates (like the jump from 22H2 to 23H2) often require running the bypass methods again, as the update acts like a mini-reinstallation of the OS.
Driver Compatibility and Performance
Because Windows 11 shares much of its architecture with Windows 10, most drivers will work seamlessly. However, as the OS evolves, newer versions of Windows 11 may introduce core changes that rely on instructions only found in newer CPUs (such as the recent requirement for the PopCnt instruction in very old hardware).
Furthermore, users may experience minor performance overhead. Without the hardware-level MBEC support, the virtualization-based security (VBS) features—if enabled—can significantly slow down older processors. Many users on unsupported hardware choose to disable VBS/Core Isolation in the Windows Security settings to regain system snappiness.
Conclusion: Balancing Innovation and Obsolescence
Installing Windows 11 on unsupported hardware is a viable path for tech-savvy users looking to extend the life of their machines. Whether using the Rufus automated approach or manual Registry edits, the process allows access to the latest UI enhancements, Snap Layouts, and performance optimizations inherent in the Windows 11 kernel.
However, this path requires a proactive approach to maintenance. Users must stay informed about upcoming Windows builds and be prepared to manually intervene if automatic updates cease. In the world of technology, software will eventually outpace hardware; but for now, these bypass methods provide a powerful way to push back against planned obsolescence and keep high-quality hardware in active service. Always remember that while the software may be new, the stability of your system relies on your willingness to manage the technical trade-offs that come with running an OS outside its intended environment.
aViewFromTheCave is a participant in the Amazon Services LLC Associates Program, an affiliate advertising program designed to provide a means for sites to earn advertising fees by advertising and linking to Amazon.com. Amazon, the Amazon logo, AmazonSupply, and the AmazonSupply logo are trademarks of Amazon.com, Inc. or its affiliates. As an Amazon Associate we earn affiliate commissions from qualifying purchases.