For years, Windows 7 served as a reliable and familiar operating system for millions worldwide. Its stability and user-friendly interface made it a perennial favorite. However, with Microsoft officially ending support for Windows 7 in January 2020, continuing to use it presents significant security risks and a lack of access to modern features and software compatibility. Upgrading to Windows 10 isn’t just about getting a new look; it’s about embracing enhanced security, improved performance, and a gateway to the latest technological innovations, from advanced AI tools to a more cohesive digital ecosystem.
This comprehensive guide will walk you through the process of installing Windows 10 from your existing Windows 7 setup. While the free upgrade offer officially ended years ago, there are still legitimate pathways to transition your system, often involving the use of Microsoft’s Media Creation Tool. We’ll cover everything from essential preparations to a detailed step-by-step installation, and even what to do after your new operating system is up and running, ensuring a smooth and secure transition.
Why Upgrade to Windows 10 from Windows 7?
The decision to move on from a beloved operating system like Windows 7 can be daunting, but the benefits of upgrading to Windows 10 far outweigh the sentimentality. Beyond mere aesthetics, Windows 10 offers critical improvements that are essential for modern computing.
Enhanced Security and Support
The most compelling reason to upgrade is security. When Microsoft ceased support for Windows 7, it stopped providing security updates, bug fixes, and technical assistance. This leaves Windows 7 machines vulnerable to new viruses, malware, and exploits that cybercriminals constantly develop. Using an unsupported operating system is akin to driving a car without insurance or airbags – you’re exposed to significant risks. Windows 10, on the other hand, receives regular security patches and feature updates, ensuring your system is protected against the latest threats. Features like Windows Defender, Windows Hello for biometric authentication, and robust encryption options provide a multi-layered defense that Windows 7 simply cannot match. For anyone concerned about digital security and protecting personal data, the upgrade is non-negotiable.
Modern Features and Performance
Beyond security, Windows 10 introduces a wealth of modern features that significantly enhance productivity and user experience. The Start Menu blends the familiarity of Windows 7 with the Live Tiles of Windows 8, offering customizable access to apps and information. Cortana, Microsoft’s virtual assistant, integrates search, reminders, and voice commands directly into your workflow. Microsoft Edge, the default browser, offers improved speed, privacy features, and integration with other Microsoft services.
Furthermore, Windows 10 boasts DirectX 12 for superior gaming performance, a unified Notifications Center, Virtual Desktops for better multitasking, and the Snap Assist feature for organizing multiple windows efficiently. Compatibility with the latest hardware, software, and AI tools is another key advantage. Many new applications and games are designed exclusively for Windows 10, meaning a Windows 7 user would miss out on a significant portion of the modern software landscape. Overall, Windows 10 is designed to be faster, more responsive, and more feature-rich, providing a foundation for current and future technology trends.
Essential Preparations Before You Begin
A successful operating system upgrade isn’t just about running an installer; it’s about thorough preparation. Skipping these crucial steps can lead to data loss, frustrating errors, or a cumbersome post-installation experience. Taking the time now will save you headaches later.
Back Up Your Data – A Non-Negotiable Step
This is perhaps the most critical step. While upgrading usually aims to preserve your files, unforeseen complications can arise. A power outage during the process, a corrupted installation file, or an unexpected system crash could render your data inaccessible. Therefore, you must back up all your important documents, photos, videos, music, and other personal files before starting the upgrade.
There are several reliable ways to do this:
- External Hard Drive: This is the simplest and often fastest method. Copy and paste your essential folders (Documents, Pictures, Videos, Downloads, Desktop) to an external drive.
- Cloud Storage: Services like OneDrive, Google Drive, Dropbox, or iCloud offer convenient cloud-based backup. Many provide a free tier with sufficient space for common files.
- USB Flash Drives: Suitable for smaller sets of critical files.
- Backup Software: Windows 7 includes a built-in Backup and Restore utility, or you can use third-party software for more robust solutions.
Double-check your backup to ensure all critical files are copied and accessible. Imagine the worst-case scenario and prepare for it.
Check System Requirements and Free Up Space
Windows 10 has specific minimum system requirements. While most computers capable of running Windows 7 adequately will likely meet these, it’s wise to confirm:
- Processor: 1 GHz or faster compatible processor.
- RAM: 1 GB for 32-bit or 2 GB for 64-bit. (Realistically, 4GB+ is recommended for a good experience).
- Hard Disk Space: 16 GB for 32-bit OS or 20 GB for 64-bit OS. (Again, more is better; aim for at least 30-40 GB free for the upgrade process itself).
- Graphics Card: DirectX 9 or later with WDDM 1.0 driver.
- Display: 800×600 resolution.
Beyond the minimums, ensure you have sufficient free disk space on your primary drive (C: drive). The upgrade process will temporarily use a significant amount of space, often requiring 20-30 GB in addition to the eventual OS footprint. Uninstall any unnecessary programs, delete old downloads, and empty your Recycle Bin to free up space. You can use Windows’ Disk Cleanup utility (type “Disk Cleanup” into the Start menu search) for a more automated approach.
Gather Necessary Tools and Disconnect Peripherals
Before initiating the upgrade, gather these essentials:
- Windows 7 Product Key (Optional but Recommended): While a direct upgrade often carries over the activation, having your Windows 7 product key handy can be useful for troubleshooting activation issues or if you decide to perform a clean install later.
- Stable Internet Connection: The upgrade process will download files, so a reliable internet connection is crucial.
- Power Source: If you’re on a laptop, plug it into a power outlet. For desktops, ensure a stable power supply to prevent interruptions.
- Blank USB Flash Drive (8GB or larger) or DVD (Optional): If you opt to create installation media, you’ll need one of these.
- Disable Antivirus: Temporarily disable any third-party antivirus software. These can sometimes interfere with the upgrade process, leading to errors. Remember to re-enable it after the upgrade is complete.
- Disconnect Unnecessary Peripherals: Unplug any non-essential devices like external hard drives (other than your backup drive, which should be safely disconnected), printers, webcams, or additional monitors. This minimizes potential driver conflicts during the upgrade.
Step-by-Step Guide: Upgrading with the Media Creation Tool
The most common and straightforward method to upgrade from Windows 7 to Windows 10 is by using Microsoft’s official Media Creation Tool. This tool allows you to either upgrade your current PC directly or create bootable installation media (USB flash drive or DVD) for future use or clean installations.
Downloading and Launching the Tool
- Visit Microsoft’s Official Website: Open your web browser (Internet Explorer, Chrome, Firefox, etc.) on your Windows 7 PC and navigate to the official Windows 10 download page provided by Microsoft. Search for “Download Windows 10” and ensure you’re on a microsoft.com domain.
- Download the Media Creation Tool: Look for the section that says “Create Windows 10 installation media” and click the “Download tool now” button. Save the executable file (e.g.,
MediaCreationToolxxxx.exe) to your Downloads folder or Desktop. - Run as Administrator: Locate the downloaded file, right-click on it, and select “Run as administrator.” This ensures the tool has the necessary permissions to make changes to your system.
- Accept License Terms: The tool will start, display a “Getting a few things ready” message, and then present you with the Microsoft Software License Terms. Read them if you wish, and then click “Accept” to proceed.
Navigating the Upgrade Process
- Choose Your Option: After accepting the terms, the tool will ask, “What do you want to do?”
- “Upgrade this PC now” (Recommended for direct upgrade): Select this option if you want to upgrade your current Windows 7 installation directly to Windows 10, keeping your files, apps, and settings (if chosen later). This is the simplest path for most users. Click “Next.”
- “Create installation media (USB flash drive, DVD, or ISO file) for another PC”: Choose this if you want to perform a clean install, upgrade another PC, or simply have a bootable copy of Windows 10. If you choose this, you’ll select language, edition, and architecture, then specify if you want to save to a USB drive (ensure it’s blank and 8GB+) or an ISO file. For this guide, we’ll focus on “Upgrade this PC now.”
- Getting Ready and Downloading: The tool will spend some time “Getting a few things ready” and then begin downloading the Windows 10 installation files. This can take a considerable amount of time depending on your internet speed (potentially hours). Do not turn off your computer or disconnect from the internet during this phase.
- Create Windows 10 Media: Once downloaded, the tool will create the Windows 10 media. This involves preparing the files for installation.
- Check for Updates: Before proceeding with the actual installation, the tool might check for and download additional updates.
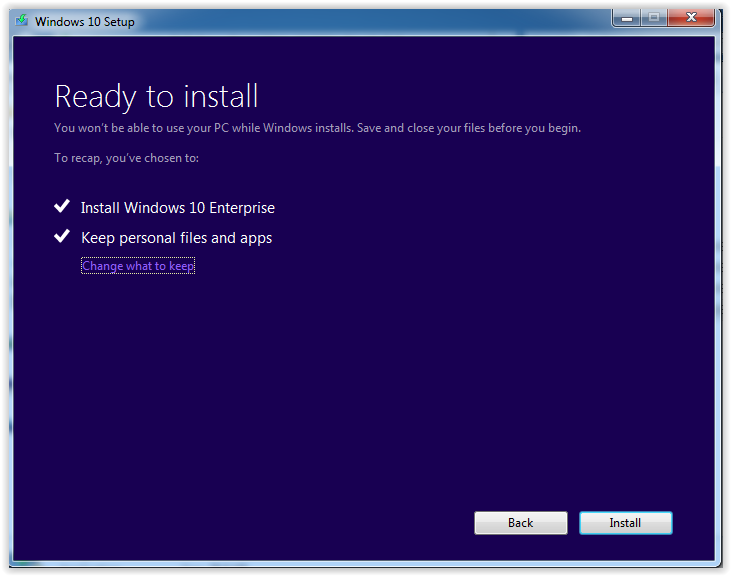
- Review Installation Options: Eventually, you’ll reach a screen titled “Ready to install.” Here, it will summarize what will be installed (Windows 10) and, crucially, “What to keep.”
- “Keep personal files and apps”: This is generally the default and recommended for an upgrade. It attempts to migrate your documents, settings, and installed programs.
- “Keep personal files only”: This will save your documents but remove all your installed applications. You’ll need to reinstall them manually.
- “Nothing”: This performs a clean install, wiping everything from your C: drive. Only choose this if you intend to start fresh and have already backed up everything.
Click “Change what to keep” to adjust this setting if needed, then click “Next.”
Completing the Installation
- Initiate Installation: Once you’ve confirmed your choices on the “Ready to install” screen, click the “Install” button.
- System Restarts: Your computer will now begin the actual installation process. This involves multiple automatic restarts. During these restarts, you might see a black screen, a Windows logo, or a progress indicator. Do not turn off your computer manually during this stage, even if it seems to be stuck. Let it run its course. This phase can take anywhere from 30 minutes to several hours, depending on your system’s speed and the amount of data being migrated.
- Welcome to Windows 10: After the final restart, you’ll be greeted with the Windows 10 setup experience. You’ll be prompted to configure basic settings like region, keyboard layout, and privacy options. Review these carefully; you can usually customize them later, but it’s good to set your preferences now.
- Sign In: If you chose to keep your personal files and apps, you might be asked to sign in with your existing user account. If it’s a new installation or you opted for “Nothing,” you’ll create a new user account or sign in with a Microsoft account.
Congratulations! You have successfully installed Windows 10 on your PC.
Post-Upgrade Checklist and Optimization
Once Windows 10 is up and running, your journey isn’t quite over. Several critical steps remain to ensure your new operating system is fully functional, secure, and optimized for your needs.
Driver Updates and Windows Activation
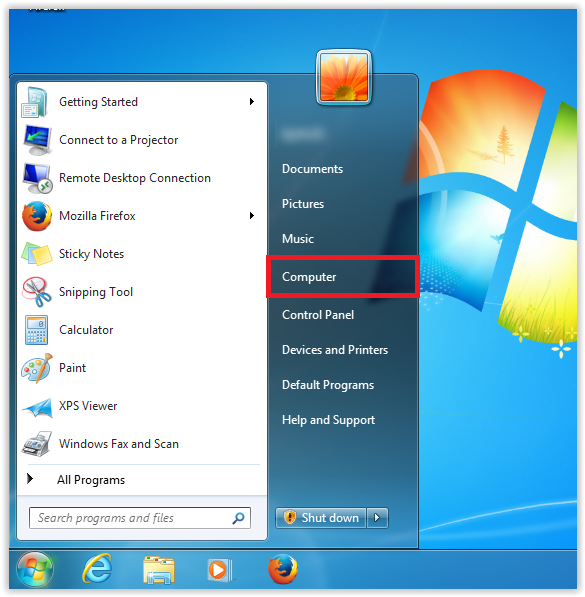
- Check for Windows Updates: The very first thing you should do is open the Start Menu, go to Settings (the gear icon), then click on “Update & Security,” and select “Windows Update.” Click “Check for updates.” Windows 10 will download and install the latest security patches, feature updates, and, crucially, updated drivers for your hardware. This can be a multi-step process, requiring several restarts, so be patient. Keeping your OS updated is paramount for security and performance.
- Verify Driver Installation: After running Windows Update, open Device Manager (search for it in the Start Menu). Look for any yellow exclamation marks next to device names. These indicate missing or problematic drivers. While Windows Update usually handles most, some older or specialized hardware might require manual driver downloads from the manufacturer’s website (e.g., graphics card, motherboard chipset, Wi-Fi adapter).
- Activate Windows 10: If you performed an in-place upgrade from an activated Windows 7, Windows 10 should automatically activate itself digitally. To check, go to Settings > Update & Security > Activation. It should show “Windows is activated with a digital license.” If it’s not activated, you might be prompted to enter your Windows 7 product key. If problems persist, ensure your internet connection is active, and try troubleshooting options provided in the Activation settings.
Personalizing Your New OS and Security Settings
- Restore Data and Reinstall Apps (If applicable): If you performed a clean install (“Nothing” option), now is the time to restore your backed-up personal files and reinstall any essential applications (Microsoft Office, photo editors, specific games, etc.).
- Configure Privacy Settings: Windows 10 offers extensive privacy controls. Go to Settings > Privacy to review and adjust settings for location, camera, microphone, notifications, account info, and more. Take the time to understand what data is being shared and make choices that align with your comfort level.
- Install Essential Software and Antivirus: Reinstall any productivity suites, creative tools, or specialized applications you use. If you disabled a third-party antivirus before the upgrade, re-enable it or install your preferred security solution. While Windows Defender is excellent, many users prefer a comprehensive third-party suite.
- Personalize Your Desktop: Make Windows 10 feel like home. Explore Settings > Personalization to change your background, colors, lock screen, themes, and Start menu layout. Pin your favorite apps to the Start Menu and Taskbar for quick access.
- Optimize Power Settings: For laptops, check power settings (Settings > System > Power & Sleep > Additional power settings) to ensure they are configured for optimal battery life or performance, depending on your needs.
Troubleshooting Common Upgrade Issues
Despite careful preparation, issues can sometimes arise during or after a Windows 10 upgrade. Knowing how to diagnose and resolve these common problems can save you considerable frustration.
Addressing Activation Problems
- Internet Connection: The most common reason for activation failure is a lack of internet connection. Ensure you’re connected.
- Wait and Retry: Sometimes, Microsoft’s activation servers are busy. Wait a few hours and check again.
- Run the Troubleshooter: In Settings > Update & Security > Activation, there’s an “Activate” button or a “Troubleshoot” link if activation fails. Use it; it can often fix minor issues automatically.
- Enter Product Key Manually: If you had a Windows 7 product key, you can try entering it in the Activation settings.
- Microsoft Account Link: If you linked your Windows 7 license to a Microsoft account previously, sign in with that account. The digital license should transfer.
- Contact Microsoft Support: If all else fails, contact Microsoft support. They can often help diagnose and resolve unique activation issues.
Resolving Driver Conflicts and Performance Glitches
- Device Manager Review: As mentioned, check Device Manager for any devices with yellow exclamation marks. Right-click on them and try “Update driver.” If that doesn’t work, visit the hardware manufacturer’s website for Windows 10 drivers.
- Roll Back Driver: If a newly installed driver causes issues, you can roll it back. In Device Manager, right-click the problematic device, go to Properties, then the Driver tab, and click “Roll Back Driver.”
- Check System Resources: If performance is slow, open Task Manager (Ctrl+Shift+Esc). Check CPU, RAM, and Disk usage. High usage by an unknown process might indicate a problem.
- Clean Boot: Perform a clean boot to identify software conflicts. Search for “msconfig” (System Configuration), go to the Services tab, check “Hide all Microsoft services,” then click “Disable all.” On the Startup tab, open Task Manager and disable all startup items. Restart your PC and see if the issue persists. Re-enable services/startup items gradually to find the culprit.
- Disk Cleanup: Run Disk Cleanup again (search for it in the Start Menu) to remove temporary files and previous Windows installation files (Windows.old folder), which can take up significant space and sometimes cause minor slowdowns.

What If Things Go Wrong? Rolling Back or Clean Install Considerations
- Roll Back to Windows 7: For a period (usually 10 days) after upgrading, Windows 10 allows you to revert to your previous version of Windows. Go to Settings > Update & Security > Recovery. Look for “Go back to the previous version of Windows 7.” This is a lifesaver if you encounter severe, unresolvable issues.
- System Restore: If you created a System Restore Point before the upgrade (a good practice!), you can use it to revert your system to an earlier working state. Search for “Create a restore point” and then “System Restore.”
- Clean Install: If the upgrade path leads to persistent problems, or if you simply desire a truly fresh start, a clean installation of Windows 10 is often the best solution. This involves formatting your primary drive and installing Windows 10 from scratch using a bootable USB drive or DVD (created with the Media Creation Tool). Remember: a clean install will erase ALL data on the selected drive, so your backup is absolutely essential.
- Seeking Professional Help: If you’re overwhelmed or unable to resolve complex issues, don’t hesitate to seek assistance from a qualified IT professional or PC repair service.
Upgrading from Windows 7 to Windows 10 is a vital step for maintaining a secure, modern, and productive computing experience. While the process requires careful preparation and attention to detail, the benefits of enhanced security, cutting-edge features, and continued software compatibility make it a worthwhile endeavor. By following this comprehensive guide, you can confidently navigate the transition and unlock the full potential of your updated system.
aViewFromTheCave is a participant in the Amazon Services LLC Associates Program, an affiliate advertising program designed to provide a means for sites to earn advertising fees by advertising and linking to Amazon.com. Amazon, the Amazon logo, AmazonSupply, and the AmazonSupply logo are trademarks of Amazon.com, Inc. or its affiliates. As an Amazon Associate we earn affiliate commissions from qualifying purchases.