Windows 10 remains a cornerstone of the modern computing landscape, powering millions of desktops, laptops, and tablets worldwide. While Windows 11 has emerged, Windows 10 continues to receive updates and support, making it a robust and reliable operating system for many users. There are numerous reasons why you might need to install Windows 10: perhaps you’re setting up a new PC, performing a clean reinstall to resolve performance issues, upgrading from an older version of Windows, or recovering from a system crash. Whatever your motivation, installing Windows 10 from a USB drive is by far the most popular, efficient, and versatile method available today.

Gone are the days when optical drives and DVDs were the standard for operating system installations. USB drives offer faster transfer speeds, greater portability, and are compatible with a vast majority of modern machines, many of which no longer even include a DVD drive. This guide will walk you through every step of the process, from preparing your USB drive to configuring your system and completing the installation, ensuring a smooth and successful transition to a fresh Windows 10 environment. We’ll delve into the necessary tools, crucial system settings, and essential post-installation tasks, providing you with a complete roadmap for a seamless upgrade or reinstallation.
Why Choose a USB Installation for Windows 10?
In the realm of operating system deployment, the USB method has superseded traditional DVD installations for several compelling reasons, aligning perfectly with modern technology trends and user expectations for efficiency and productivity.
Firstly, speed and efficiency are paramount. USB 3.0 and newer standards boast significantly faster read and write speeds compared to even the fastest optical drives. This translates directly into a quicker boot process for the installer and a dramatically reduced installation time for Windows 10 itself. For users looking to minimize downtime, especially in a productivity-focused environment, this speed advantage is invaluable.
Secondly, widespread compatibility and portability make USB drives an ideal choice. Most contemporary computers, from ultra-thin laptops to high-performance gaming rigs, are built without optical drives. USB ports, however, are ubiquitous. A single bootable USB can serve multiple machines, making it a highly portable and universally accessible installation medium. This versatility is crucial for tech enthusiasts, IT professionals, and anyone who might need to install Windows on various devices.
Thirdly, reliability and durability factor into the equation. Optical discs are susceptible to scratches, dust, and general wear and tear, which can lead to data corruption and failed installations. USB drives, being solid-state media, are far more resilient to physical damage and environmental factors, ensuring a higher success rate for your installation efforts. This robustness contributes to digital security by providing a more stable source for your operating system files.
Finally, the ease of creation and updating cannot be overlooked. Tools like Microsoft’s Media Creation Tool simplify the process of downloading the latest version of Windows 10 and directly writing it to a USB drive. This ensures you’re always installing the most up-to-date operating system, minimizing the number of post-installation updates required and enhancing initial system security. This aligns with modern software distribution models, prioritizing convenience and access to the latest software versions.
Essential Preparations Before You Begin
Before embarking on the Windows 10 installation journey, meticulous preparation is key. Rushing into the process without adequate safeguards and resources can lead to data loss or unnecessary complications. This preparatory phase is critical for ensuring a smooth, secure, and successful installation.
Gathering Your Tools and Data
- A USB Flash Drive (8GB or larger): This is non-negotiable. While 8GB is the minimum, a 16GB or 32GB drive offers more headroom and peace of mind. Ensure it’s empty, as the process of creating a bootable drive will erase all existing data on it. Choose a reputable brand for better reliability.
- A Working Computer with Internet Access: You’ll need this machine to download the Windows 10 Media Creation Tool or the Windows 10 ISO file, as well as to create the bootable USB drive. A stable internet connection is vital for these downloads.
- Your Target PC: This is the computer on which you intend to install Windows 10. Make sure it’s physically accessible and powered on.
- Windows 10 Product Key (Optional but Recommended): While you can install Windows 10 without a product key, you’ll need one to activate the operating system and unlock its full functionality. If you’re reinstalling, your digital license might automatically activate once connected to the internet. Keep your product key handy if you have one.
- Backup Your Important Data: This is arguably the most crucial step. A clean installation of Windows 10 will erase everything on the drive where Windows is being installed. Personal documents, photos, videos, music, software licenses, and any other irreplaceable files must be backed up to an external hard drive, cloud storage (like OneDrive, Google Drive, Dropbox), or another secure location. Neglecting this step can lead to permanent data loss.
- External Hard Drive (for backups): Highly recommended for securely storing your backups.
Understanding System Compatibility
Before proceeding, quickly verify that your target PC meets the minimum system requirements for Windows 10. While most modern machines will easily surpass these, it’s a quick check that can save troubleshooting headaches later.
- Processor: 1 GHz or faster compatible processor
- RAM: 1 GB for 32-bit or 2 GB for 64-bit
- Hard disk space: 32 GB or larger
- Graphics card: DirectX 9 or later with WDDM 1.0 driver
- Display: 800×600 resolution
Also, if you’re installing on an older machine or a custom-built PC, ensure you have access to the manufacturer’s website for any specific drivers (especially network and graphics drivers) that might not be included with the base Windows 10 installation. Having these downloaded to a separate USB drive can save you from being without internet access immediately after installation.
Crafting Your Bootable Windows 10 USB Drive
The process of transforming a standard USB drive into a powerful Windows 10 installation medium is straightforward, thanks to user-friendly tools provided by Microsoft and third-party developers. We’ll explore two primary methods: the official Microsoft Media Creation Tool and the popular open-source utility, Rufus.
The Microsoft Media Creation Tool: The Official Method
Microsoft’s Media Creation Tool is the recommended and simplest way to create a bootable USB drive, as it directly downloads the latest version of Windows 10 and configures the USB automatically.
- Download the Tool: On your working computer, open your web browser and navigate to the official Microsoft Windows 10 download page. Look for the section titled “Create Windows 10 installation media” and click “Download tool now.”
- Run the Tool: Once the download is complete, locate and double-click the
MediaCreationTool.exefile. You may need to grant administrator permissions. - Accept License Terms: Read and accept the applicable notices and license terms to proceed.
- Choose Your Action: When prompted, select “Create installation media (USB flash drive, DVD, or ISO file) for another PC” and click “Next.”
- Select Language, Edition, and Architecture: The tool will often suggest recommended options based on your current PC. If you’re installing on a different PC or prefer specific settings, uncheck “Use the recommended options for this PC” and choose your desired language, Windows 10 edition (Home, Pro, etc.), and architecture (64-bit is standard for most modern PCs, 32-bit for older ones with less than 4GB RAM). Click “Next.”
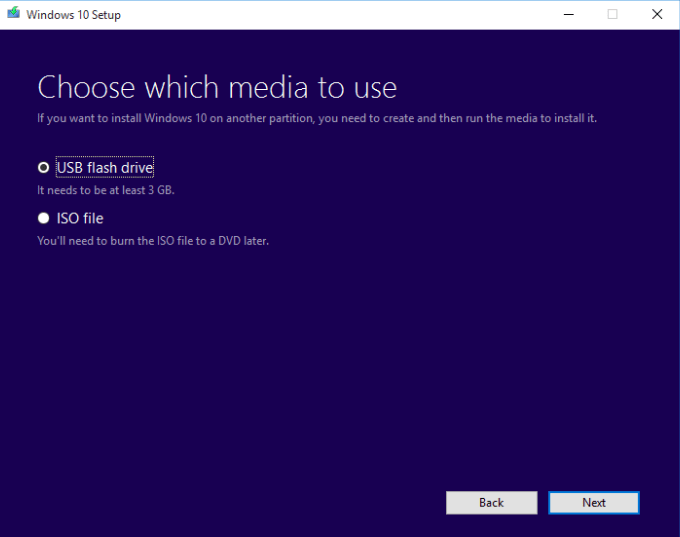
- Choose Media Type: Select “USB flash drive” as the media you want to use and click “Next.”
- Select Your USB Drive: From the list of available drives, carefully select the USB flash drive you intend to use. Double-check this step to ensure you don’t accidentally select and format an important drive. Click “Next.”
- Wait for the Process to Complete: The tool will now download the Windows 10 files and write them to your USB drive. This process can take a significant amount of time depending on your internet speed and the speed of your USB drive. Do not remove the USB drive or shut down your computer during this stage.
- Finish: Once completed, you’ll see a “Your USB flash drive is ready” message. Click “Finish.” Your bootable Windows 10 USB drive is now ready.
Rufus: For Advanced ISO Handling
Rufus is a powerful, lightweight, and open-source utility popular among advanced users for creating bootable USB drives. It’s particularly useful if you already have a Windows 10 ISO file downloaded or if you need more control over partition schemes (MBR vs. GPT) and target systems (BIOS vs. UEFI).
- Download Rufus: Visit the official Rufus website and download the latest portable version (no installation required).
- Insert USB Drive: Plug your USB flash drive into your working computer.
- Launch Rufus: Double-click the downloaded Rufus executable.
- Configure Rufus Settings:
- Device: Ensure your correct USB drive is selected from the dropdown menu. Again, be extremely careful here not to select the wrong drive.
- Boot selection: Click “SELECT” and browse to your downloaded Windows 10 ISO file.
- Image option: Usually, “Standard Windows installation” is sufficient.
- Partition scheme: This is critical.
- GPT: For newer systems that use UEFI firmware. This is the modern standard.
- MBR: For older systems that use traditional BIOS or for systems where you need to support both legacy BIOS and UEFI. If unsure, check your target PC’s boot mode or try GPT first.
- Target system: This will automatically adjust based on your partition scheme selection (UEFI (non CSM) for GPT, BIOS (or UEFI-CSM) for MBR).
- Volume label: You can give your USB drive a descriptive name (e.g., “Win10 Installer”).
- Leave other options at their default unless you have specific reasons to change them.
- Start the Process: Click the “START” button. Rufus will warn you that all data on the USB drive will be destroyed. Confirm by clicking “OK.”
- Wait for Completion: Rufus will now create the bootable USB drive. This is usually faster than the Media Creation Tool because it doesn’t need to download the OS files first.
- Close Rufus: Once the status bar indicates “READY,” you can close Rufus and safely remove your USB drive.
Guiding Your PC to Boot from USB
With your bootable USB drive prepared, the next crucial step is to instruct your target computer to start from this drive rather than its internal hard drive. This typically involves accessing your PC’s BIOS (Basic Input/Output System) or UEFI (Unified Extensible Firmware Interface) settings.
Accessing and Navigating BIOS/UEFI Settings
- Insert the Bootable USB Drive: With the target PC powered off, insert your newly created bootable Windows 10 USB drive into an available USB port. For desktop PCs, using a rear USB port directly connected to the motherboard is often more reliable.
- Restart Your PC and Enter BIOS/UEFI: Power on your PC. As soon as it starts, you need to repeatedly press a specific key to enter the BIOS/UEFI setup utility. The key varies by manufacturer:
- Dell: F2, F12
- HP: F10, Esc
- Lenovo: F1, F2, Fn+F2 (for laptops), Enter (then F1 or F2)
- Acer: F2, Del
- Asus: Del, F2
- MSI: Del
- Microsoft Surface: Volume Up button
- Custom Builds (Motherboard Specific): Del, F2
If you miss the window, simply restart and try again. You’ll usually see a message like “Press [KEY] to enter Setup” or “Press [KEY] for Boot Menu.”
- Navigate to the Boot Section: Once inside the BIOS/UEFI interface (which can look different depending on your manufacturer – some are text-based, others have a graphical interface), use your keyboard (arrow keys, Enter, Esc) or mouse to navigate to the “Boot,” “Boot Options,” or “Startup” tab/section.
- Change Boot Order: Within the boot section, you’ll find a list of boot devices. Your goal is to move your USB drive (it might be listed as “USB HDD,” “USB Device,” or by its manufacturer name) to the top of the boot order. This tells the computer to try booting from the USB drive first.
- Save and Exit: After adjusting the boot order, navigate to the “Exit” tab/section. Select “Save Changes and Exit” or “Exit Saving Changes.” Confirm your choice if prompted. Your PC will restart, and this time, it should boot from the USB drive.
Optimizing Boot Options and Secure Boot
Modern systems often feature UEFI firmware with options like Secure Boot, which enhances digital security by preventing unauthorized operating systems or software from loading during startup. While beneficial, Secure Boot can sometimes interfere with booting from third-party media, particularly if your USB drive wasn’t created with full UEFI compatibility or if you’re installing an older version of Windows.
- Secure Boot: If you encounter issues booting from USB, you might need to temporarily disable “Secure Boot” in your BIOS/UEFI settings. This option is usually found in the “Security” or “Boot” tab. Remember to re-enable it after the Windows 10 installation is complete for enhanced security.
- Legacy/CSM Mode: Some UEFI systems also offer a “Legacy Support” or “Compatibility Support Module (CSM)” option. Enabling this can help if you’re having trouble booting with UEFI mode and the USB drive was prepared using an MBR partition scheme. Generally, it’s best to stick with native UEFI if your system supports it and your USB drive is GPT-formatted.
The Step-by-Step Windows 10 Installation Process
Once your PC successfully boots from the USB drive, you’ll be greeted by the Windows Setup screen. This is where the core installation takes place, involving several critical decisions that shape your new operating system environment.
Initial Setup and Product Key Activation
- Language, Time, and Keyboard: The first screen prompts you to select your preferred language, time and currency format, and keyboard or input method. Make your selections and click “Next.”
- Install Now: On the next screen, click the large “Install now” button.
- Enter Product Key: The setup will ask for a product key.
- If you have one, enter it now and click “Next.”
- If you’re reinstalling Windows 10 on a PC that previously had an activated copy (especially if linked to a Microsoft account), you can often click “I don’t have a product key.” Windows will usually activate automatically after connecting to the internet once the installation is complete.
- If you plan to activate later, you can also select “I don’t have a product key.” You’ll choose the edition of Windows 10 you wish to install (Home, Pro, etc.) on the next screen.
- Accept License Terms: Read the Microsoft Software License Terms. If you agree, check the “I accept the license terms” box and click “Next.”
- Choose Installation Type: This is a crucial decision:
- Upgrade: Install Windows and keep files, settings, and applications: This option is for upgrading an existing Windows installation while preserving your data. However, for a truly clean and optimal installation, this is generally not recommended.
- Custom: Install Windows only (advanced): This is the option you want for a clean installation. It allows you to manage partitions and ensures no old system files or configurations carry over, leading to better performance and stability. Select this option.
Strategic Partitioning for a Clean Install
After choosing the “Custom” installation, you’ll arrive at the “Where do you want to install Windows?” screen. This is where you manage your hard drive partitions. Proceed with extreme caution here, as incorrect choices can lead to data loss.
- Identify the Target Drive: Look for the drive where you want to install Windows. It will usually be listed as “Drive 0” or “Drive 1,” followed by its total size.
- Clean Install (Deleting Partitions): For a fresh start, it’s best to delete all existing partitions on the target drive.
- Select each partition associated with your target drive (e.g., “Drive 0 Partition 1,” “Drive 0 Partition 2,” etc.) one by one.
- Click the “Delete” button below the partition list. Confirm any warnings.
- Repeat until the entire drive appears as “Drive X Unallocated Space.”
- WARNING: Deleting partitions will permanently erase all data on them. Ensure you have backed up everything important.
- Create New Partition(s) or Let Windows Do It:
- Option A (Recommended for most users): Select the “Drive X Unallocated Space” and simply click “Next.” Windows will automatically create the necessary system, recovery, and primary partitions for you and begin the installation on the largest primary partition. This is the easiest and most common approach.
- Option B (Advanced): If you want to manually create multiple partitions (e.g., a smaller partition for Windows and a larger one for data), select the “Unallocated Space,” click “New,” specify the size for your Windows partition (e.g., 200GB), click “Apply,” and then select the newly created primary partition (usually the largest one) and click “Next.”
- Begin Installation: Once you’ve selected the partition where Windows will be installed, click “Next.” The installation process will now begin, copying files, installing features, and performing initial setup. Your PC will restart multiple times during this phase.
Completing the Setup and Personalization
After the installation files are copied and the system reboots, you’ll go through the Out-of-Box Experience (OOBE) to configure your new Windows 10 environment.
- Region and Keyboard Layout: Select your region and confirm your keyboard layout. You can also add a second keyboard layout if needed.
- Network Connection: Connect to a Wi-Fi network or plug in an Ethernet cable. An internet connection is crucial for updates and activating Windows.
- Account Setup:
- Microsoft Account: Windows will encourage you to sign in with a Microsoft account. This links your PC to cloud services, OneDrive, and digital licenses.
- Offline Account (Limited Experience): If you prefer not to use a Microsoft account, look for an option like “Offline account” or “Skip for now.” Note that this might be less prominent on newer versions of Windows 10. You’ll then create a local username and password.
- Privacy Settings: Review the privacy settings (location, speech recognition, diagnostic data, tailored experiences, advertising ID). Microsoft provides options to turn these off or on. Choose what you’re comfortable with for digital security and privacy and click “Accept.”
- Cortana Setup: Decide if you want to enable Microsoft’s digital assistant, Cortana. You can choose to accept or decline.
- Final Touches: Windows will display a few more “Getting things ready” screens, which might take a few minutes. Eventually, you’ll be presented with your brand new Windows 10 desktop.

Post-Installation Essentials: Drivers, Updates, and Security
Congratulations! Windows 10 is now installed. However, your journey isn’t quite over. Several critical post-installation steps are necessary to ensure your system is fully functional, secure, and optimized for productivity. This phase is about transitioning from a bare-bones OS to a robust and ready-to-use computing environment.
- Check for Windows Updates: This is the absolute first thing you should do. Windows Update will download and install the latest security patches, bug fixes, and feature updates. This is crucial for maintaining digital security and ensuring your system has the most stable version of Windows 10.
- Go to
Start > Settings > Update & Security > Windows Update. - Click “Check for updates” and install all available updates. Be prepared for multiple restarts.
- Go to
- Install Missing Drivers: While Windows 10 is good at automatically installing generic drivers, specific hardware components often require proprietary drivers from their manufacturers for optimal performance and functionality.
- Device Manager: Open
Start, type “Device Manager,” and press Enter. Look for any devices with yellow exclamation marks. These indicate missing or problematic drivers. - Manufacturer Websites: Visit the support section of your PC manufacturer’s website (for pre-built systems) or the component manufacturers’ websites (for custom builds – e.g., NVIDIA/AMD for graphics, Intel/Realtek for chipset/audio/network). Download and install the latest drivers, particularly for:
- Graphics Card (GPU)
- Chipset
- Network Adapter (Ethernet/Wi-Fi)
- Audio
- Any specialized peripherals or input devices.
- Device Manager: Open
- Activate Windows (If Not Already): If you skipped the product key entry during installation, activate Windows now.
- Go to
Start > Settings > Update & Security > Activation. - If you have a product key, click “Change product key” and enter it.
- If your license is digital and linked to a Microsoft account, ensure you’re signed in with that account and Windows should activate automatically once connected to the internet.
- Go to
- Install Essential Software: Start installing the applications you need for work, entertainment, and productivity. This might include:
- Web browser (Chrome, Firefox, Edge, Brave)
- Office suite (Microsoft 365, LibreOffice)
- Antivirus/Security Software (if not relying solely on Windows Defender)
- Cloud storage clients (OneDrive, Google Drive, Dropbox)
- Communication tools (Zoom, Slack, Discord)
- Media players, photo editors, etc.
- Configure Security Software: Windows Defender is integrated into Windows 10 and provides robust real-time protection. Ensure it’s active and up-to-date. If you prefer a third-party antivirus solution, install it and ensure it’s running properly. Regular scans and active protection are vital for digital security.
- Create a System Restore Point: Once your system is fully updated, all drivers are installed, and your essential software is in place, creating a system restore point is a wise practice. This allows you to revert your system to this stable state if future updates or software installations cause problems.
- Search for “Create a restore point” in the Start Menu.
- In the System Properties window, ensure system protection is on for your C: drive, then click “Create…”
- Give it a descriptive name and click “Create.”
- Personalize and Optimize:
- Desktop Background and Themes: Customize your desktop to your liking.
- Power Settings: Adjust power plans for performance or battery life.
- Startup Programs: Review programs that launch with Windows and disable unnecessary ones to improve boot times and system responsiveness.
- Taskbar and Start Menu: Organize your taskbar and Start Menu for quick access to frequently used apps.
Installing Windows 10 from a USB drive is a fundamental skill for any PC user, offering a powerful way to rejuvenate an aging system, set up a new build, or troubleshoot persistent issues. By following this comprehensive guide, you’ve not only successfully installed a fresh operating system but also laid the groundwork for a secure, efficient, and personalized computing experience. Enjoy your revitalized Windows 10 system!
aViewFromTheCave is a participant in the Amazon Services LLC Associates Program, an affiliate advertising program designed to provide a means for sites to earn advertising fees by advertising and linking to Amazon.com. Amazon, the Amazon logo, AmazonSupply, and the AmazonSupply logo are trademarks of Amazon.com, Inc. or its affiliates. As an Amazon Associate we earn affiliate commissions from qualifying purchases.