Windows 11, with its sleek new interface, enhanced productivity features, and robust security architecture, represents the future of Microsoft’s operating system. Its launch brought a wave of excitement, but also a significant hurdle for many users: stringent system requirements. Unlike previous iterations, Windows 11 demands specific hardware components, most notably a Trusted Platform Module (TPM) 2.0 and Secure Boot, alongside an approved CPU. For countless PC owners whose machines are perfectly capable in every other aspect, this has led to the frustrating “This PC can’t run Windows 11” message.
But what if you’re not ready to retire your perfectly functional computer? What if you want to experience the benefits of Windows 11 without investing in a brand-new system? The good news is that for those willing to navigate a few technicalities, installing Windows 11 on unsupported hardware is entirely possible. This comprehensive guide will walk you through the process, equipping you with the knowledge and steps needed to upgrade your unsupported PC, while also highlighting the critical considerations and potential implications of doing so. We’ll delve into the ‘why’ behind Microsoft’s requirements, the ‘how’ of bypassing them, and the ‘what next’ for a smooth post-installation experience. By understanding the risks and rewards, you can make an informed decision to extend the life of your current hardware and embrace the Windows 11 era.
Understanding Windows 11’s System Requirements & Why Your PC Might Be “Unsupported”
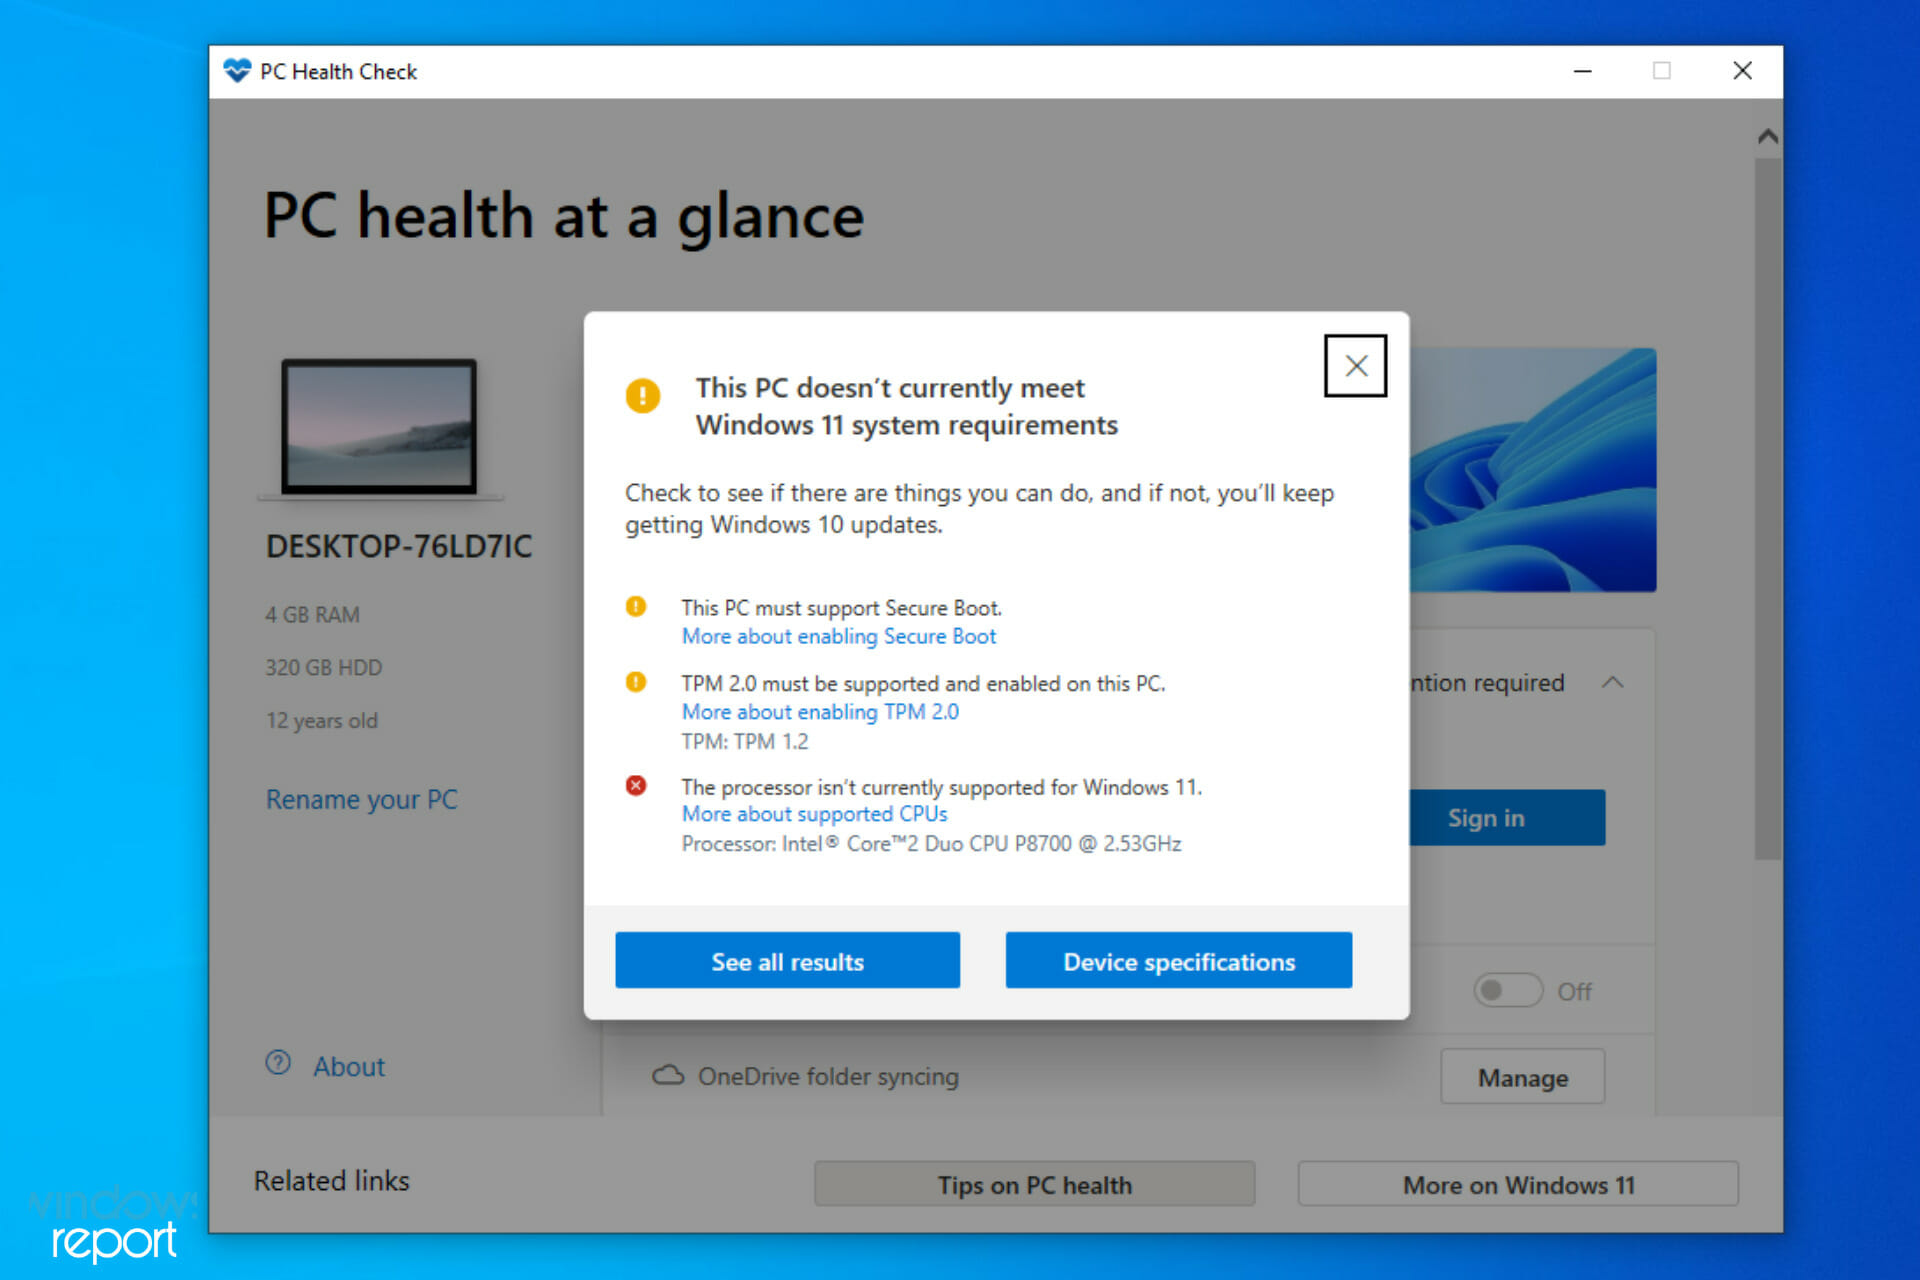
Before diving into workarounds, it’s crucial to understand precisely why your PC might be deemed “unsupported” by Microsoft. This isn’t just arbitrary; there are specific technical components that Windows 11 expects to find.
The Core Requirements: TPM 2.0, Secure Boot, and CPU Generation
Windows 11 imposes several key hardware requirements that distinguish it from its predecessors:
- Trusted Platform Module (TPM) 2.0: This is perhaps the most significant and frequently encountered hurdle. TPM is a cryptographic security processor designed to provide hardware-level security functions. It’s crucial for features like Windows Hello, BitLocker encryption, and general system integrity checks. While TPM 1.2 has been around for years, Microsoft specifically mandates version 2.0 for Windows 11. Many older motherboards or those with less emphasis on enterprise-grade security might not have a TPM 2.0 chip, or it might be disabled by default in the BIOS/UEFI settings.
- Secure Boot: This is a security standard, part of the UEFI firmware, that helps ensure your PC boots using only software trusted by the PC manufacturer. It prevents malicious software from loading before the operating system. Like TPM, Secure Boot is often disabled by default on older systems or consumer-grade motherboards.
- CPU Generation: Microsoft has published a list of approved CPUs, generally limiting Windows 11 to Intel 8th generation (Coffee Lake) and newer, AMD Zen+ (Ryzen 2000 series) and newer, and Qualcomm 7 and 8 Series. This requirement is less about raw processing power and more about specific architectural features and security enhancements present in newer generations.
- Other Basic Requirements: These are generally less problematic but still necessary: 4GB RAM, 64GB storage, DirectX 12 compatible graphics, and a 64-bit processor. Most modern PCs meet these with ease.
The Rationale Behind Microsoft’s Stance
Microsoft’s decision to implement these strict requirements wasn’t made lightly. The primary motivations are centered around:
- Enhanced Security: TPM 2.0 and Secure Boot are foundational to Windows 11’s advanced security features. They create a more secure boot path, protect against firmware attacks, and enable robust encryption, thereby safeguarding user data and the operating system itself from sophisticated threats. For users concerned with digital security in an increasingly volatile online world, these features are invaluable.
- Improved Reliability and Performance: Newer hardware, particularly modern CPUs, offers architectural improvements that contribute to better overall system stability and performance. By standardizing on newer components, Microsoft aims to ensure a smoother, more consistent user experience across the board, reducing crashes and optimizing resource management.
- Future-Proofing and Innovation: By requiring specific modern hardware, Microsoft positions Windows 11 to take full advantage of future technological advancements, especially in areas like AI, gaming, and cloud integration. This allows them to develop features that rely on these underlying hardware capabilities, ensuring the OS remains cutting-edge.
- Simplified Support and Development: Focusing on a narrower range of hardware reduces fragmentation, making it easier for Microsoft to develop, test, and support the operating system, ultimately leading to a more stable and efficient ecosystem for both users and developers.
While these reasons are valid from a corporate and technical perspective, they don’t alleviate the frustration for users with capable machines that just miss the cut.
Preparing for the Unsupported Installation – The Essential Pre-flight Checklist
Attempting to install an operating system on hardware it’s not officially designed for carries inherent risks. Thorough preparation is paramount to minimize potential issues and protect your valuable data. Think of this as your digital safety brief before liftoff.
Backup Everything: Your Digital Safety Net
This step cannot be overstressed. Installing an operating system, especially on unsupported hardware, involves partitioning drives, formatting, and making significant system changes that can lead to data loss if something goes awry.
- Full System Image Backup: Ideally, create a full disk image of your current operating system. Tools like Macrium Reflect Free, EaseUS Todo Backup, or even Windows’ built-in System Image Backup (though less robust) can achieve this. This allows you to revert your PC to its exact state before the Windows 11 installation, should you encounter unresolvable problems or decide to go back.
- Cloud Storage & External Drives: Beyond a full system image, ensure all critical documents, photos, videos, and other personal files are backed up to cloud services (OneDrive, Google Drive, Dropbox) and/or an external hard drive. Double-check that the backups are accessible and not corrupted.
Gathering Your Tools: USB Drive, ISO, and Patience
You’ll need a few essential items to perform the installation:
- A USB Flash Drive (8GB or larger): This will be used to create a bootable Windows 11 installation media. Ensure it’s empty, as its contents will be erased during the process.
- Windows 11 ISO File: Download the official Windows 11 ISO directly from Microsoft’s website. Search for “Download Windows 11 Disk Image (ISO)” on Microsoft’s support pages. Ensure you select the correct edition (Home, Pro) and language.
- Internet Connection: Required for downloading the ISO and potentially for driver updates post-installation.
- Patience: This process involves multiple steps, potential troubleshooting, and waiting for downloads and installations. A calm approach will serve you well.
Checking Your System’s Current Health & Specs
Before you begin, verify your PC’s current configuration, especially regarding TPM and Secure Boot. Often, these features are present but merely disabled in the BIOS/UEFI.
- TPM Check:
- Press
Win + R, typetpm.msc, and press Enter. - If it shows “The TPM is ready for use,” check the “Specification Version.” If it’s 2.0, you might just need to enable it. If it says “Compatible TPM cannot be found,” you likely don’t have one, or it’s severely disabled.
- Press
- Secure Boot Check:
- Press
Win + R, typemsinfo32, and press Enter. - In the System Information window, look for “Secure Boot State.” If it says “Off” or “Disabled,” you’ll need to enable it in BIOS/UEFI. If it says “Unsupported,” your hardware may not support it.
- Press
- CPU & RAM: Confirm your CPU model and RAM amount (
msinfo32also shows these). Even if unsupported, it’s good to know your baseline.
Navigating the BIOS/UEFI: Enabling TPM and Secure Boot (If Possible)
Many “unsupported” PCs actually have the necessary hardware but need a tweak in the system’s firmware settings.
- Accessing BIOS/UEFI: Restart your PC and repeatedly press the key specified by your manufacturer to enter BIOS/UEFI setup (commonly
Del,F2,F10,F12, orEsc). - Enabling TPM:
- Look for a section related to “Security,” “Boot,” or “Advanced.”
- Search for “TPM,” “Intel Platform Trust Technology (PTT),” or “AMD fTPM” (firmware TPM).
- Enable this option. Save changes and exit.
- Enabling Secure Boot:
- Navigate to “Boot,” “Security,” or “Authentication” settings.
- Find “Secure Boot” and enable it. You might first need to set the boot mode to “UEFI” instead of “Legacy” or “CSM” (Compatibility Support Module) and clear/reset Secure Boot keys before enabling it.
- Save changes and exit.
If you can successfully enable both TPM 2.0 and Secure Boot, your PC might become “supported” and you can proceed with a standard Windows 11 installation via the Media Creation Tool without needing bypass methods. If not, the bypass methods below are your next step.
The Methods: Bypassing Windows 11’s Strict Requirements
When your hardware genuinely doesn’t meet the TPM 2.0 or Secure Boot requirements (or you can’t enable them), you’ll need to employ a bypass method. These methods essentially trick the Windows 11 installer into ignoring these checks.
Method 1: The Registry Hack (During Installation)
This is one of the most common and Microsoft-acknowledged methods for bypassing the checks. It involves modifying the Windows Registry during the installation process.
- Create a Bootable USB: Use Microsoft’s Media Creation Tool or Rufus (see Method 2) to create a standard bootable Windows 11 USB drive from your ISO.
- Start Installation: Boot your PC from the newly created USB drive.
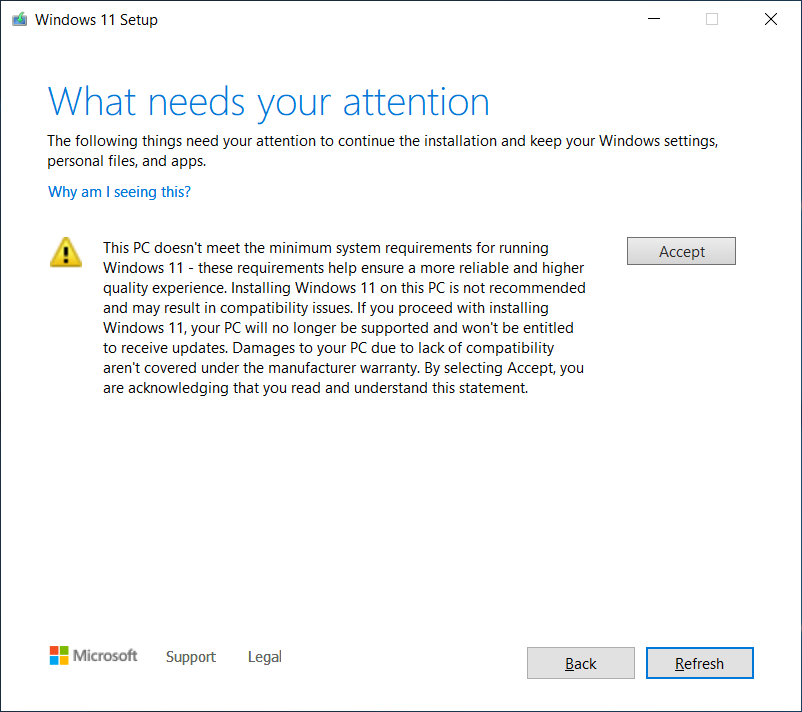
- Reach the “This PC can’t run Windows 11” Screen: Proceed through the initial setup screens (language, time, currency). When you encounter the dreaded “This PC can’t run Windows 11” message, do not close it.
- Open Command Prompt: Press
Shift + F10on your keyboard to open a Command Prompt window. - Launch Registry Editor: Type
regeditand press Enter. - Navigate and Create Key: In the Registry Editor, navigate to:
HKEY_LOCAL_MACHINESYSTEMSetup
Right-click onSetup, selectNew > Key, and name itLabConfig. - Create DWORD Values: Inside the newly created
LabConfigkey, right-click in the empty space, selectNew > DWORD (32-bit) Value, and create the following three values, setting theirValue datato1for each:BypassTPMCheckBypassSecureBootCheckBypassRAMCheck(Optional, but good practice if you’re close to 4GB or just want to ensure all checks are bypassed)
- Close and Continue: Close the Registry Editor and the Command Prompt. Click the back arrow in the Windows 11 installer (on the “This PC can’t run Windows 11” screen).
- Try Again: Proceed with the installation. The checks should now be bypassed, allowing you to select an installation type (Upgrade or Custom) and continue.
Method 2: The “Rufus” Method (Third-Party Tool)
Rufus is a popular utility for creating bootable USB drives. It has a built-in feature to automatically strip out the Windows 11 requirements during the bootable drive creation process, making the installation much simpler.
- Download Rufus: Go to the official Rufus website (rufus.ie) and download the latest version.
- Download Windows 11 ISO: Ensure you have the Windows 11 ISO file downloaded from Microsoft.
- Prepare USB Drive: Insert your 8GB+ USB flash drive into your PC.
- Launch Rufus: Open Rufus. It should automatically detect your USB drive.
- Select ISO: Click the “SELECT” button next to “Boot selection” and browse to your downloaded Windows 11 ISO file.
- Choose Installation Options: Once the ISO is loaded, a new set of options will appear under “Image Option.” Select “Extended Windows 11 Installation (no TPM/no Secure Boot/8GB- RAM).”
- Start Creation: Click “START.” Rufus will warn you that all data on the USB drive will be destroyed. Confirm, and it will begin creating the modified bootable USB.
- Install: Once complete, boot your unsupported PC from this Rufus-created USB drive. The Windows 11 installer will proceed without performing the TPM, Secure Boot, or RAM checks.
Method 3: Replacing a File (Advanced)
This method involves replacing a specific file in the Windows 11 ISO with one from Windows 10, which lacks the stringent checks. While effective, it’s more involved and carries a slightly higher risk of error for general users.
- Mount ISOs: Mount both your Windows 11 ISO and a Windows 10 ISO (if you have one) as virtual drives.
- Locate File: Navigate to the
sourcesfolder on your mounted Windows 10 ISO. Copy theappraiserres.dllfile. - Replace File in Win 11 ISO: Create a copy of your Windows 11 ISO’s contents into a new folder on your hard drive. Then, navigate to the
sourcesfolder within this new Windows 11 folder and replace itsappraiserres.dllwith the one you copied from Windows 10. - Create New ISO/Bootable USB: Use a tool like Rufus or the
oscdimgcommand-line tool (advanced) to create a new ISO or bootable USB from this modified Windows 11 folder. - Install: Boot from your newly created media. The installation should proceed without the hardware checks.
Recommendation: For most users, Method 1 (Registry Hack) or Method 2 (Rufus) are the safest and most straightforward options.
Post-Installation Considerations & Living with Windows 11 on Unsupported Hardware
Successfully installing Windows 11 on an unsupported PC is a significant achievement, but it’s not the end of the journey. There are several important considerations for long-term usage.
Driver Installation & Compatibility Checks
While Windows 11 often has built-in drivers for a wide range of hardware, some components on older or niche systems might require specific drivers.
- Check Device Manager: After installation, open Device Manager (
Win + X, then selectDevice Manager). Look for any devices with yellow exclamation marks. These indicate missing or problematic drivers. - Manufacturer Websites: Visit your PC or motherboard manufacturer’s website. Even if they don’t explicitly list Windows 11 drivers for your older model, Windows 10 drivers are often compatible. Download and install them.
- Third-Party Tools (Use with Caution): Driver update utilities exist, but always exercise extreme caution. Stick to official sources whenever possible. Incorrect drivers can cause system instability.
- Integrated Graphics/Sound: Pay particular attention to graphics and audio drivers, as these are common culprits for poor performance or lack of functionality.
Updates and Potential Roadblocks
This is arguably the most significant long-term concern for unsupported installations. Microsoft has stated that unsupported PCs may not receive critical security updates.
- Current Situation: As of now, many unsupported Windows 11 installations continue to receive security and feature updates. However, this is not guaranteed to last. Microsoft could, at any point, decide to block updates for non-compliant systems.
- Security Risk: If updates are eventually blocked, your system could become vulnerable to new exploits and malware, severely compromising your digital security. This is a critical trade-off to consider for the “Money” aspect of extending hardware life – saving money now might cost you later in terms of data breaches or system compromise.
- Feature Updates: Major feature updates (like 23H2 or future versions) might re-enable the hardware checks, potentially breaking your installation or blocking the update entirely. You might need to re-apply the bypass methods for each major feature update.
Performance Expectations & Real-World Usage
While your unsupported PC might run Windows 11, manage your expectations regarding performance.
- Varying Performance: Performance will depend heavily on your specific hardware. A robust CPU (even if “unsupported”) with sufficient RAM and an SSD will likely perform well. A system struggling with Windows 10 will likely struggle more with Windows 11 due to its slightly higher resource demands.
- SSD is Key: If your system still uses an HDD, upgrading to an SSD is the single most impactful performance upgrade you can make, regardless of Windows version. It dramatically improves boot times, application loading, and overall system responsiveness.
- Smoothness vs. Snappiness: The Windows 11 interface feels modern and smooth, but expect some minor slowdowns or longer loading times on older hardware compared to a fully supported, newer PC. This impacts “Productivity” if you’re constantly waiting.
Security Implications & Best Practices
Bypassing TPM 2.0 and Secure Boot fundamentally compromises some of Windows 11’s core security features.
- Reduced Hardware-Level Security: Without TPM 2.0, features like enhanced Windows Hello security, BitLocker encryption (hardware-backed), and Virtualization-based Security (VBS) might be unavailable or less robust.
- Increased Malware Risk: Secure Boot prevents malicious rootkits and boot-level malware. Bypassing it makes your system more susceptible to these advanced threats.
- Strong Software Security: To compensate, it becomes even more critical to employ robust software security practices:
- High-Quality Antivirus: Invest in a reputable antivirus solution and keep it updated.
- Firewall: Ensure Windows Defender Firewall is active and configured correctly.
- Browser Security: Use browsers with strong privacy and security features.
- Prudent Browsing: Be cautious about opening suspicious attachments, clicking unknown links, and downloading software from untrusted sources.
- Regular Backups: Continue your diligent backup routine, as this is your last line of defense against data loss.
The Verdict: Is It Worth It? Weighing the Pros and Cons
Deciding whether to install Windows 11 on an unsupported PC is a personal choice with clear advantages and disadvantages. This section helps you weigh them.
Advantages
- Modern User Experience: Access to Windows 11’s refreshed UI, redesigned Start Menu, snap layouts, widgets, and improved multitasking features can significantly enhance your daily computing experience. This aligns with “Tech” trends and “Productivity” improvements.
- Extended Hardware Lifespan (Cost Saving): By keeping your current PC relevant with the latest OS, you avoid the immediate financial outlay of purchasing a new system. This directly impacts your “Money” aspect, offering a short-term saving.
- Access to New Features: Benefit from new features and applications that may eventually require Windows 11, such as direct storage, improved gaming capabilities, and enhanced app compatibility.
- Familiarity with the Future: Get acquainted with the direction Microsoft is taking its operating system, preparing you for when you eventually do upgrade to new hardware.
Disadvantages
- Potential Instability & Performance Issues: While often stable, there’s always a risk of encountering unexpected bugs, crashes, or performance bottlenecks due to unsupported hardware, potentially hindering “Productivity.”
- Lack of Official Support: Microsoft clearly states that unsupported systems will not receive official support. If you encounter a problem, you’re largely on your own, relying on community forums.
- Uncertainty of Updates: The biggest concern remains the potential cessation of security and feature updates. This could leave your system vulnerable and unable to access future enhancements, impacting long-term usability and “Digital Security.”
- Compromised Security: Bypassing TPM and Secure Boot inherently reduces the hardware-level security protections of Windows 11, making your system potentially more susceptible to sophisticated attacks. This is a critical “Digital Security” trade-off.
- Compatibility Issues: While rare, some software or peripherals might not function correctly on an unsupported Windows 11 installation.
Alternatives
If the risks outweigh the benefits, or if you simply prefer a fully supported experience, consider these alternatives:
- Stay on Windows 10: Windows 10 remains a stable and fully supported operating system until October 14, 2025. It will continue to receive security updates, making it a safe and reliable choice for the foreseeable future. Many productivity tools and apps work perfectly well on Windows 10.
- Consider a New PC: If your budget allows and your current PC is genuinely showing its age (slow, poor battery life, incapable of running modern applications), upgrading to a new PC that natively supports Windows 11 is the most straightforward and secure path. This is a “Money” investment but ensures full “Tech” support and “Digital Security.”
Conclusion
Installing Windows 11 on an unsupported PC is a viable option for tech-savvy users looking to extend the life of their current hardware and experience Microsoft’s latest operating system. The process, while requiring careful attention to detail, is achievable through methods like the registry hack or using tools like Rufus.
However, this journey is not without its caveats. While you gain access to a modern interface and new features, you implicitly accept potential risks related to long-term stability, driver compatibility, and, most critically, the uncertainty of future updates and inherent security compromises from bypassing core security features. Your diligence in maintaining robust software security, regular backups, and managing performance expectations becomes paramount.
Before you embark on this upgrade, carefully weigh the advantages of saving money and enjoying new features against the potential disadvantages of reduced security and uncertain future support. For some, the thrill of leveraging existing technology and exploring the bleeding edge of software makes it a worthwhile endeavor. For others, the peace of mind offered by a fully supported Windows 10 installation or the seamless experience of a new, Windows 11-ready PC will be the preferred path. Ultimately, the decision rests on your comfort level with technical challenges and your personal priorities regarding security, performance, and financial investment in your computing experience.
aViewFromTheCave is a participant in the Amazon Services LLC Associates Program, an affiliate advertising program designed to provide a means for sites to earn advertising fees by advertising and linking to Amazon.com. Amazon, the Amazon logo, AmazonSupply, and the AmazonSupply logo are trademarks of Amazon.com, Inc. or its affiliates. As an Amazon Associate we earn affiliate commissions from qualifying purchases.