In the constantly evolving landscape of technology, the need for efficient, versatile tools is paramount. For anyone who regularly deals with operating systems, system repairs, software installations, or even just exploring different Linux distributions, the concept of a bootable USB drive is not new. Traditionally, creating a bootable USB involved a painstaking process: downloading an ISO file, using a specialized tool to burn that ISO to a USB drive, and often formatting the drive in the process. This meant that if you wanted to boot another operating system or utility, you’d have to repeat the entire process, effectively wiping your previous bootable drive. This tedious cycle often led to a collection of single-purpose USB drives or a perpetual re-burning ritual.
However, the advent of Ventoy has revolutionized this entire workflow. Ventoy is an open-source tool that transforms a USB drive into a multi-boot solution, allowing you to simply copy multiple ISO, WIM, IMG, VHD(x), and EFI files directly onto it. Once Ventoy is installed on a USB drive, you never have to format it again. You just drag and drop your desired bootable files, and Ventoy automatically presents them in a boot menu when you start your computer from the USB. This profound simplification not only saves time and effort but also consolidates your entire collection of bootable media into a single, highly efficient device. For tech enthusiasts, IT professionals, system administrators, or even students and casual users who want to experiment with different operating systems, Ventoy is an indispensable asset, seamlessly fitting into the “Tech” category by enhancing productivity, streamlining software management, and offering robust digital security capabilities through its ability to host recovery tools.
Understanding Ventoy: A Game-Changer for Bootable Media
Before diving into the installation process, it’s crucial to grasp what Ventoy is and why it has become such a celebrated utility in the tech community. Understanding its core functionality and the unparalleled advantages it offers will underscore its value and help you leverage its full potential.
What is Ventoy and How Does It Work?
At its heart, Ventoy is a bootable USB solution designed to simplify the management of multiple operating system installers, live environments, and utility tools. Unlike traditional methods that “burn” a single ISO image to a USB drive, rendering it exclusively for that one purpose, Ventoy takes a different approach. When you install Ventoy onto a USB drive, it partitions the drive in a specific way:
- A small FAT partition (VTOY_EFI): This partition contains the Ventoy bootloader, which is responsible for presenting the boot menu and initiating the booting process for the selected ISO.
- A larger data partition (VTOY_USB): This is where you simply copy all your ISO, WIM, IMG, VHD(x), and EFI files. Ventoy does not modify these files; it merely reads them as-is.
When your computer boots from the Ventoy USB drive, the Ventoy bootloader takes over. It scans the data partition, detects all the supported bootable image files you’ve copied, and presents them in a user-friendly menu. You then simply select the desired operating system or tool from the list, and Ventoy handles the rest, booting it as if it were a dedicated, single-purpose bootable USB. This “boot from file” mechanism is what makes Ventoy incredibly powerful and flexible, supporting over 1100 ISO files, including Windows, various Linux distributions, VMware ESXi, ChromeOS, and numerous utility disks. This fundamental shift from “burning” to “copying” is the essence of its revolutionary design.
The Unparalleled Advantages of Ventoy
The benefits of integrating Ventoy into your tech toolkit are numerous and profound, touching upon aspects of productivity, flexibility, and convenience:
- Multi-Boot Capability: This is Ventoy’s headline feature. Store dozens of different operating systems (Windows, Linux distros, macOS installers, various PE environments) and utility tools (disk cloners, antivirus rescue disks, password reset tools) on a single USB drive. No more juggling multiple USBs or re-creating them.
- Simple “Copy-Paste” Operation: Once Ventoy is installed on your USB, adding a new ISO is as simple as copying the file from your computer to the Ventoy data partition. There’s no need for special software or complex burning processes.
- Persistent Storage Support: For many Linux live environments, Ventoy offers the option to create persistent storage. This means any changes you make, files you save, or software you install while running a live Linux session from the Ventoy USB can be preserved for future sessions, transforming a live environment into a semi-permanent, portable workspace.
- Direct Boot from ISO Files: Ventoy eliminates the need to extract or modify ISO files. It boots directly from the unmodified ISO, ensuring integrity and reducing potential issues.
- Automatic OS Detection: It intelligently scans your USB drive and automatically lists all compatible ISOs, making the boot menu creation process entirely automated.
- Secure Boot Support: Ventoy fully supports Secure Boot for both UEFI and Legacy BIOS, a critical feature for modern systems that often have Secure Boot enabled by default, enhancing digital security without compromising functionality.
- Easy Updates: When a new version of Ventoy is released, you can update the Ventoy bootloader on your USB drive without losing any of your existing ISO files or data. This ensures long-term compatibility and access to new features.
- Cross-Platform Compatibility: Ventoy supports a wide range of operating systems, including Windows, Linux, and FreeBSD, making it a universally applicable tool.
- Large File Support: It handles ISO files larger than 4GB, which is a common limitation for FAT32 formatted drives.
- Customization Options: While simple by default, Ventoy also offers advanced users the ability to customize the boot menu theme, background image, and other parameters, personalizing their multi-boot experience.
In essence, Ventoy transforms a humble USB stick into an incredibly powerful and flexible diagnostic, installation, and recovery tool, significantly boosting productivity for anyone working with computers.
Pre-Installation Checklist: Preparing Your Digital Toolkit
Before you embark on the Ventoy installation process, a few preparatory steps are necessary. Ensuring you have the right tools and have taken appropriate precautions will make the installation smooth and hassle-free.
Essential Requirements
- A USB Drive: This is the most critical component.
- Capacity: The size of your USB drive depends on how many ISOs you plan to store. A 16GB drive might hold a few operating systems, while a 64GB, 128GB, or even larger drive will accommodate an extensive library. Consider what you’ll typically need.
- Speed: A faster USB 3.0 or 3.1 drive will significantly improve boot times and file transfer speeds, enhancing your overall experience, especially when dealing with larger operating systems.
- Data Backup Warning: ALL DATA ON THE SELECTED USB DRIVE WILL BE ERASED DURING THE VENTOY INSTALLATION. This is crucial. If your USB drive contains any important files, photos, or documents, make sure to back them up to another location (your computer’s hard drive, cloud storage, external SSD) before proceeding. There is no recovery once the installation begins.
- Internet Connection: Required to download the Ventoy installer.
- Administrator/Root Privileges: You’ll need these to run the Ventoy installer on both Windows and Linux, as it modifies disk partitions.
Acquiring the Ventoy Installer
The Ventoy installer is freely available from its official website. Always download software from official sources to ensure authenticity and avoid potential security risks like malware or corrupted files.
- Visit the Official Ventoy Website: Open your web browser and navigate to
www.ventoy.net. - Locate the Download Section: Look for the “Download” or “Get Ventoy” link, usually prominent on the homepage or in the navigation menu.
- Choose the Correct Version: Ventoy provides different packages for Windows and Linux.
- For Windows users, download the file named
ventoy-x.x.xx-windows.zip. - For Linux users, download
ventoy-x.x.xx-linux.tar.gz. - (Replace
x.x.xxwith the latest version number).
- For Windows users, download the file named
- Verify the Download (Optional but Recommended): For maximum digital security, you can verify the integrity of the downloaded file using its SHA-256 checksum, which is usually provided on the download page. This ensures the file hasn’t been tampered with during download. Tools like
certutilon Windows orsha256sumon Linux can perform this check.
Once the appropriate Ventoy package is downloaded, you’re ready to proceed with the installation on your chosen operating system.
Step-by-Step Installation Guides
The installation process for Ventoy is straightforward on both Windows and Linux, requiring only a few steps. Follow the instructions carefully for your respective operating system.
Installing Ventoy on Windows
The Ventoy installation on Windows is facilitated by a graphical user interface (GUI), making it very user-friendly.
- Downloading and Extracting:
- Locate the
ventoy-x.x.xx-windows.zipfile you downloaded. - Right-click on the zip file and select “Extract All…” or use an archiving tool like 7-Zip or WinRAR to extract its contents to a folder on your desktop or in your Downloads directory.
- Locate the
- Running the Installer (Ventoy2Disk.exe):
- Navigate into the extracted Ventoy folder.
- Locate
Ventoy2Disk.exe. - Right-click on
Ventoy2Disk.exeand select “Run as administrator.” This is crucial for the program to have the necessary permissions to modify your USB drive. A User Account Control (UAC) prompt may appear; click “Yes” to allow it.
- Selecting Your USB Drive:
- In the Ventoy2Disk GUI window, you’ll see a “Device” dropdown menu.
- Carefully select your target USB drive from this list. Double-check that you’ve selected the correct drive, as installing Ventoy on the wrong drive (e.g., your main system drive) will lead to data loss and potential system issues. You can usually identify your USB by its drive letter, size, or description.
- Executing the Installation:
- Once the correct USB device is selected, click the “Install” button.
- Ventoy will display two separate warning messages confirming that all data on the selected disk will be lost. Read them carefully and click “Yes” on both prompts to proceed.
- The installation process will begin. It typically takes a minute or two, depending on the speed of your USB drive and system.
- Verifying the Installation:
- After the installation completes, Ventoy will display a “Congratulations!” message.
- You can then close the Ventoy2Disk window.
- Open “File Explorer” (Windows Key + E). You should now see your USB drive listed, possibly with a new label like “Ventoy.” It will also show significantly less free space than its total capacity; this is normal, as Ventoy creates a small partition for itself and leaves the rest for your ISO files.
Installing Ventoy on Linux
Installing Ventoy on Linux typically involves using a terminal, but it’s equally straightforward.
- Downloading and Extracting:
- Locate the
ventoy-x.x.xx-linux.tar.gzfile you downloaded. - Open a terminal.
- Navigate to the directory where you downloaded the file (e.g.,
cd ~/Downloads). - Extract the archive using the command:
tar -zxvf ventoy-x.x.xx-linux.tar.gz - This will create a new directory (e.g.,
ventoy-x.x.xx) containing the installation scripts.
- Locate the
- Opening a Terminal:
- If you closed your terminal, open a new one.
- Navigate into the extracted Ventoy directory:
cd ventoy-x.x.xx
- Identifying Your USB Device:
- It’s crucial to correctly identify your USB device path (e.g.,
/dev/sdb,/dev/sdc). Incorrectly identifying the device can lead to data loss on other drives. - Plug in your USB drive.
- Run the command:
lsblkorsudo fdisk -l - Look for your USB drive based on its size and any existing partitions. For example, a 64GB USB drive might appear as
/dev/sdbor/dev/sdc. Pay very close attention to this step.
- It’s crucial to correctly identify your USB device path (e.g.,
- Running the Installation Script (
Ventoy2Disk.sh):- Once you’ve confidently identified your USB device (e.g.,
/dev/sdb), execute the Ventoy installation script with root privileges:
sudo sh Ventoy2Disk.sh -i /dev/sdb- Replace
/dev/sdbwith the actual path to your USB device. - The
-iflag indicates an “install” operation.
- Replace
- Ventoy will prompt you with two warning messages confirming that all data on the target device will be overwritten. Type
yand press Enter for both prompts to confirm and proceed.
- Once you’ve confidently identified your USB device (e.g.,
- Confirmation and Completion:
- The script will then proceed with the installation. Once complete, you’ll see a success message.
- You can verify the installation by unplugging and re-plugging the USB drive. It should now appear with a label like “Ventoy,” and its partition structure will have changed.
With Ventoy successfully installed on your USB drive, the hard part is over. Now comes the incredibly easy and fun part: populating it with all your desired operating systems and tools.
Populating Your Ventoy Drive: Adding ISOs and Beyond
This is where Ventoy truly shines and dramatically simplifies your workflow. Unlike traditional methods, there’s no complex “burning” or specialized software needed.

The Simplicity of Adding Operating Systems and Utilities
Once Ventoy is installed on your USB drive, adding ISOs, WIMs, IMG files, or other supported bootable images is incredibly straightforward:
- Open Your File Manager: In Windows, open “File Explorer.” In Linux, open your preferred file manager (e.g., Nautilus, Dolphin, Thunar).
- Navigate to Your Ventoy USB Drive: Locate and open the “Ventoy” or “VTOY_USB” partition of your Ventoy USB drive.
- Copy Your ISO Files: Simply drag and drop (or copy-paste) your desired ISO files (e.g.,
Windows11.iso,ubuntu-22.04-desktop-amd64.iso,memtest86.iso) into the root directory of the Ventoy partition. You can also create subfolders (e.g.,Windows,Linux,Utilities) to organize your files, and Ventoy will still detect them. - Repeat as Needed: Continue copying as many ISOs as your USB drive’s capacity allows.
That’s it! When you boot from the Ventoy USB drive, Ventoy will automatically detect all the compatible ISOs you’ve copied and present them in a boot menu. This simplicity makes Ventoy an ultimate productivity tool for anyone managing multiple operating systems or recovery tools.
Exploring Advanced Features
While the basic copy-paste functionality is powerful, Ventoy also offers advanced features for users who require more control or specific functionalities.
Creating Persistent Storage (for Linux Live Environments)
Persistence allows you to save changes, files, and installed software when running a live Linux distribution from your Ventoy USB. This effectively turns your live USB into a portable, personalized operating system.
- Download VentoyPlugson: This is a separate GUI tool available on the Ventoy website, which helps configure advanced features. Download and extract the version corresponding to your OS.
- Create a Persistence File:
- Boot from your Ventoy USB drive.
- When the Ventoy menu appears, select the Linux ISO you want to enable persistence for.
- Press
F4for Localboot, then selectvtoy_persist_create.img. This will open a utility to create a persistence image file. - Specify the size of your persistence file (e.g., 4096MB for 4GB).
- This will create a
.imgfile (e.g.,persistence.img) on your USB drive.
- Configure Ventoy for Persistence:
- Go to the
ventoyfolder in your Ventoy USB drive. - Create a folder named
ventoy. - Inside the
ventoyfolder, create a JSON file namedventoy.json. - Use VentoyPlugson (the GUI tool) or manually edit
ventoy.jsonto define the persistence configuration. A common configuration would link a specific ISO to a specific persistence file. - Example
ventoy.jsonsnippet for Ubuntu with persistence:
json

{

    "persistence": [

        {

            "img": "/persistence/ubuntu_persist.img",

            "path": "/ubuntu-22.04-desktop-amd64.iso"

        }

    ]

}
- Place the
ubuntu_persist.imgfile in a/persistencefolder (or any path specified in theimgfield ofventoy.json).
- Go to the
- Boot with Persistence: When you next boot the specified Linux ISO from Ventoy, you’ll be prompted to choose whether to boot normally or with persistence.
Enabling Secure Boot Support
Ventoy natively supports Secure Boot, a security feature that helps prevent malicious software from loading during the startup process.
- When you first install Ventoy, it typically installs the necessary Secure Boot components.
- If Secure Boot is enabled on your system, and you encounter issues, Ventoy might prompt you during the boot process to “Enroll Hash” or “Enroll Key.” Follow the on-screen instructions to enroll the Ventoy MOK (Machine Owner Key), which allows Ventoy to function with Secure Boot enabled. This is usually a one-time process.
Customizing the Boot Menu
Ventoy allows for a degree of customization for its boot menu, including themes, background images, and menu configurations.
ventoy.jsonfor Configuration: Most customizations are managed through theventoy.jsonfile in theventoyfolder on your Ventoy USB.- Using VentoyPlugson: The
VentoyPlugson.exe(Windows) orVentoyPlugson.sh(Linux) tool provides a user-friendly interface to configure various options, including:- Theme: Change the appearance of the boot menu (background, font, colors).
- Boot Menu Language: Set the default language.
- Resolution: Adjust the display resolution of the boot menu.
- Menu Options: Control how ISOs are listed and sorted.
- Simply run VentoyPlugson, load the configuration from your Ventoy USB, make your desired changes, and save them back to the
ventoy.jsonfile.
These advanced features extend Ventoy’s utility, transforming it from a simple multi-boot loader into a highly configurable and robust tool suitable for a wide array of tech tasks, from system recovery to portable development environments.
Booting from Your Ventoy USB and Maintaining Your Drive
Once your Ventoy USB drive is set up and loaded with your favorite ISOs, the final steps involve booting from it and understanding how to keep it updated for future compatibility and features.
Accessing the Boot Menu (BIOS/UEFI Settings)
To use your Ventoy USB drive, you need to instruct your computer to boot from it rather than its internal hard drive. This usually involves entering your system’s BIOS or UEFI settings or using a one-time boot menu.
- Connect the Ventoy USB: Ensure your Ventoy USB drive is plugged into an available USB port on your computer before powering it on.
- Restart Your Computer: Power on or restart your computer.
- Access Boot Menu or BIOS/UEFI:
- As soon as the manufacturer’s logo appears (e.g., Dell, HP, Lenovo, ASUS, Acer), repeatedly press the designated hotkey to enter the one-time boot menu. Common keys include
F2,F10,F12,ESC, orDEL. The exact key varies by motherboard manufacturer. - Alternatively, you might need to enter the full BIOS/UEFI setup utility (often
DEL,F2, orF1on startup) and then navigate to the “Boot” tab or “Boot Order” section.
- As soon as the manufacturer’s logo appears (e.g., Dell, HP, Lenovo, ASUS, Acer), repeatedly press the designated hotkey to enter the one-time boot menu. Common keys include
- Select Your USB Drive:
- In the boot menu or boot order list, you should see your Ventoy USB drive listed, often by its manufacturer name (e.g., “Generic USB Device,” “Kingston DataTraveler”) or as “Ventoy.”
- Select it and press Enter.
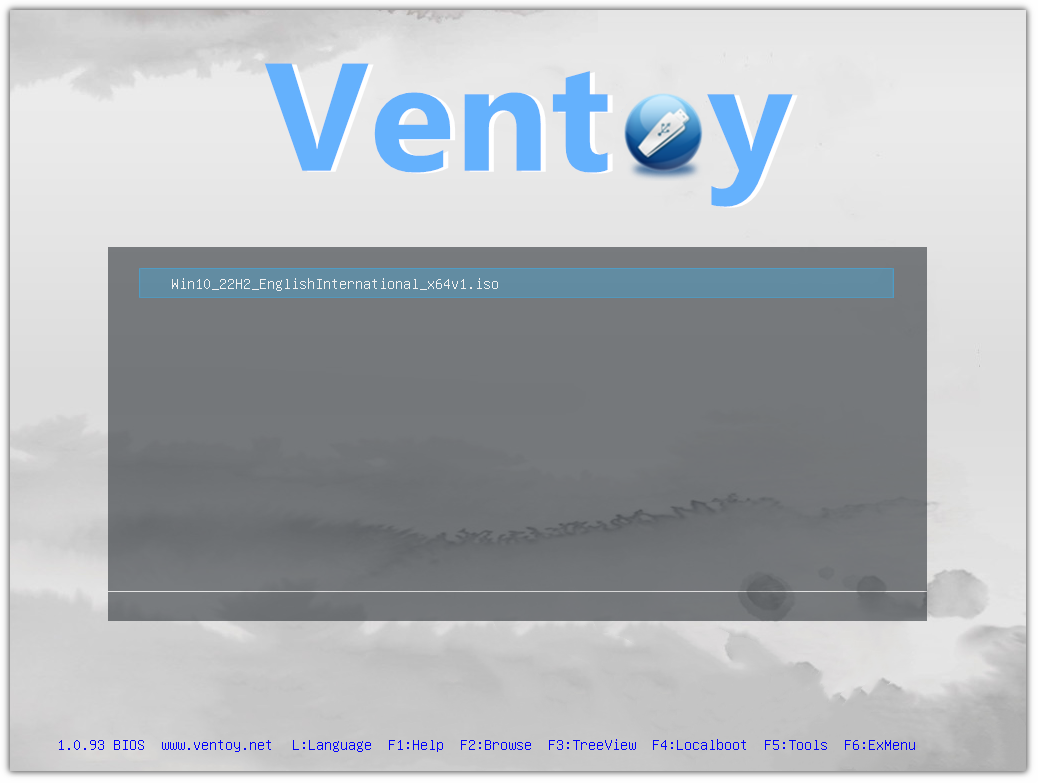
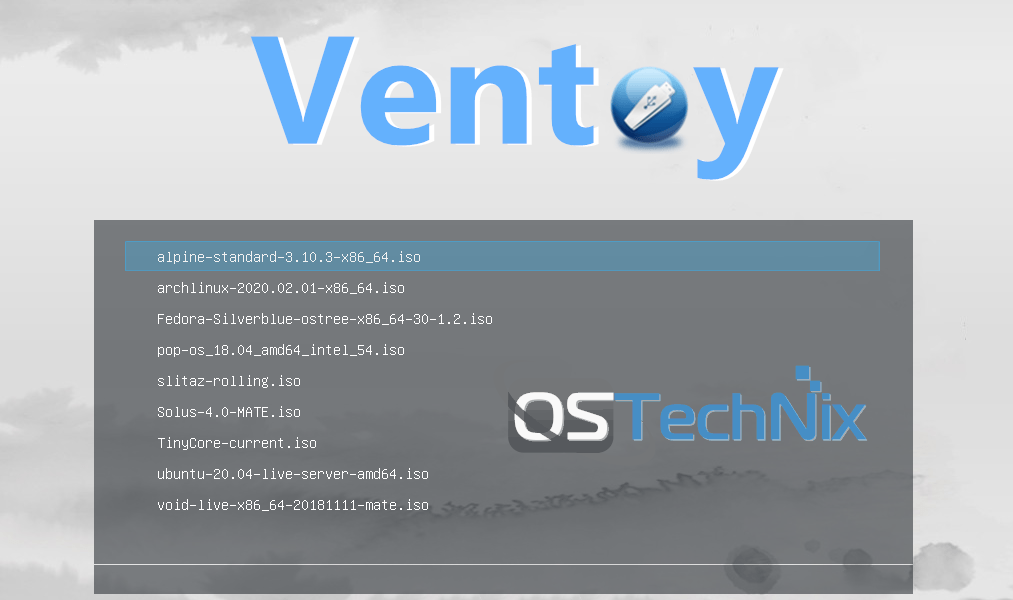
- Ventoy Boot Menu: Your computer will then boot from the Ventoy USB, and you will be presented with the Ventoy boot menu listing all the ISO files you copied. Use the arrow keys to navigate and Enter to select your desired operating system or utility.
Updating Ventoy for Future Compatibility
One of Ventoy’s excellent features is its ability to be updated without losing your data or ISO files on the USB drive. This ensures you always have the latest features, bug fixes, and compatibility with new operating systems.
- Download the Latest Ventoy Release: Visit
www.ventoy.netand download the newestventoy-x.x.xx-windows.ziporventoy-x.x.xx-linux.tar.gzpackage. - Extract the New Release: Extract the contents of the downloaded archive to a new folder.
- Run the Updater:
- Windows: Navigate to the extracted folder, right-click
Ventoy2Disk.exe, and select “Run as administrator.” - Linux: Open a terminal, navigate to the extracted folder, and run
sudo sh Ventoy2Disk.sh -u /dev/sdb(replace/dev/sdbwith your Ventoy USB device path).
- Windows: Navigate to the extracted folder, right-click
- Select Your Ventoy USB: In the Ventoy utility, ensure your existing Ventoy USB drive is selected.
- Click “Update”: Instead of “Install,” click the “Update” button.
- Confirm Update: You will be prompted to confirm the update. Since this is an update and not a fresh install, your ISO files and data on the VTOY_USB partition should remain intact. Click “Yes.”
- Completion: The update process is quick. Once finished, your Ventoy drive will be running the latest version, ready for new ISOs and features.
Troubleshooting Common Issues
While Ventoy is generally reliable, you might encounter minor issues. Here are a few common ones and their solutions:
- USB Drive Not Recognized by Ventoy:
- Ensure the USB drive is properly inserted.
- Try a different USB port.
- On Windows, make sure you’re running
Ventoy2Disk.exeas administrator. - On Linux, ensure you have correctly identified the device path (
/dev/sdb, etc.).
- Cannot Boot from Ventoy USB:
- Verify your BIOS/UEFI settings: ensure USB booting is enabled and that you’ve selected the correct boot device.
- Try different USB ports (especially if some are USB 2.0 and others USB 3.0).
- If Secure Boot is enabled, ensure Ventoy is configured to support it (as described in the advanced features section). You might need to enroll Ventoy’s MOK.
- Re-install Ventoy on the USB drive (remembering to back up your ISOs first if you want to save them) to rule out a corrupted installation.
- ISO File Not Appearing in Ventoy Menu:
- Ensure the ISO file is copied directly to the Ventoy partition (VTOY_USB) or a subfolder within it.
- Check if the ISO file is corrupted. Try re-downloading it.
- Verify that Ventoy supports the specific type of image file (while it supports over 1100, extremely rare or proprietary formats might not work).
- Ensure the ISO file name does not contain unusual characters that might confuse the bootloader.
- Slow Boot Times:
- Use a faster USB 3.0/3.1 drive in a compatible port.
- Some older computers have slower USB controllers.
- The speed of your ISO files’ integrity checks might also play a small role.
Ventoy’s design for simplicity and robustness means most issues are easily resolved by double-checking the basics: correct drive selection, proper file placement, and appropriate boot settings.
Conclusion
Ventoy stands as a testament to intelligent software design, effectively transforming a traditionally cumbersome and repetitive task into an elegant and efficient workflow. For anyone deeply involved in the world of technology—whether you’re an IT professional juggling countless system images, a developer testing various operating environments, a student exploring different Linux distributions, or simply a tech-savvy individual who likes to be prepared for any eventuality—Ventoy is an indispensable asset. It collapses an entire arsenal of bootable media onto a single, portable USB drive, embodying the core principles of productivity, versatility, and digital readiness that define modern tech usage.
By following the simple installation guides for Windows or Linux, you can quickly set up your Ventoy drive, freeing yourself from the limitations of single-purpose bootable media. The ability to simply copy-paste ISOs, coupled with robust features like persistence and Secure Boot support, means you’re equipped for virtually any scenario, from rapid OS installations and system diagnostics to running portable, personalized environments. Embrace Ventoy, and unlock a new level of efficiency and control over your digital toolkit. It’s more than just a utility; it’s a fundamental enhancement to how we interact with and manage our computing environments, solidifying its place as a must-have tool in every tech enthusiast’s repertoire.
aViewFromTheCave is a participant in the Amazon Services LLC Associates Program, an affiliate advertising program designed to provide a means for sites to earn advertising fees by advertising and linking to Amazon.com. Amazon, the Amazon logo, AmazonSupply, and the AmazonSupply logo are trademarks of Amazon.com, Inc. or its affiliates. As an Amazon Associate we earn affiliate commissions from qualifying purchases.