In the rapidly evolving landscape of modern technology, the ability to run multiple operating systems on a single physical machine is no longer just a luxury for IT professionals—it is a necessity for developers, cybersecurity enthusiasts, and digital entrepreneurs alike. Oracle VM VirtualBox, commonly known as VirtualBox, stands as one of the most powerful, open-source virtualization tools available today. Whether you are looking to test new software, isolate your financial activities for better security, or build a personal brand by mastering cross-platform development, learning how to install and configure VirtualBox is a foundational skill.
This guide provides a comprehensive walkthrough of the installation process, while exploring how virtualization intersects with your productivity, digital security, and professional growth.
Understanding the Power of Virtualization in Tech and Business
Before diving into the technical steps of installation, it is important to understand why VirtualBox is a staple in the tech community. Virtualization allows you to create a “Virtual Machine” (VM), which acts like a completely separate computer running inside your host operating system.
For those focused on Tech Trends, VirtualBox is the ultimate playground. It allows you to test the latest Linux distributions or beta versions of Windows without risking your primary workstation. From a Brand Strategy perspective, developers use VMs to ensure their software or website looks and functions perfectly across different environments, ensuring a consistent user experience that protects their corporate identity. Furthermore, in the realm of Money and Personal Finance, virtualization offers a “sandbox” environment. By running sensitive banking apps or testing new online income tools within a VM, you add a robust layer of digital security that keeps your primary data isolated from potential threats.
Preparing Your System for VirtualBox Installation
A smooth installation begins with proper preparation. Because VirtualBox shares your physical hardware resources (CPU, RAM, and Disk Space) with the guest operating system, your host machine must meet certain requirements.
Hardware Requirements and BIOS Settings
To run VirtualBox effectively, your computer should ideally have:
- A Multi-core Processor: At least a quad-core CPU is recommended to allocate cores to the guest OS.
- Sufficient RAM: While VirtualBox itself is lightweight, the guest OS (like Windows 11) might require 4GB to 8GB of RAM. Your host should have at least 16GB for a fluid experience.
- Disk Space: SSDs are highly recommended. Each virtual machine can take up anywhere from 20GB to 100GB of space.
Crucial Step: Enabling Virtualization in BIOS/UEFI
Most modern CPUs support virtualization (Intel VT-x or AMD-V), but it is often disabled by default in the BIOS. Before installing VirtualBox, restart your computer, enter the BIOS menu (usually by pressing F2, F10, or Del), and ensure that “Virtualization Technology” is set to Enabled. Without this, you may encounter errors or be unable to run 64-bit guest operating systems.
Choosing the Right Version for Your OS
VirtualBox is cross-platform. Whether you are building a tech-heavy setup on Windows, a creative brand environment on macOS, or a secure server on Linux, there is a version for you. Always ensure you are downloading the “Platform Package” that matches your current host operating system.
Step-by-Step Guide to Installing VirtualBox
The installation process is straightforward, but paying attention to the details during the setup wizard can prevent networking and driver issues later on.
Downloading the Official Installer
- Navigate to the official website:
virtualbox.org. - Click on the “Download VirtualBox” button.
- Select the link for your host operating system (e.g., “Windows hosts” or “macOS / Arm64 builds”).
- Wait for the executable file to download.
Running the Installation Wizard
Once the download is complete, locate the file and run it as an administrator.
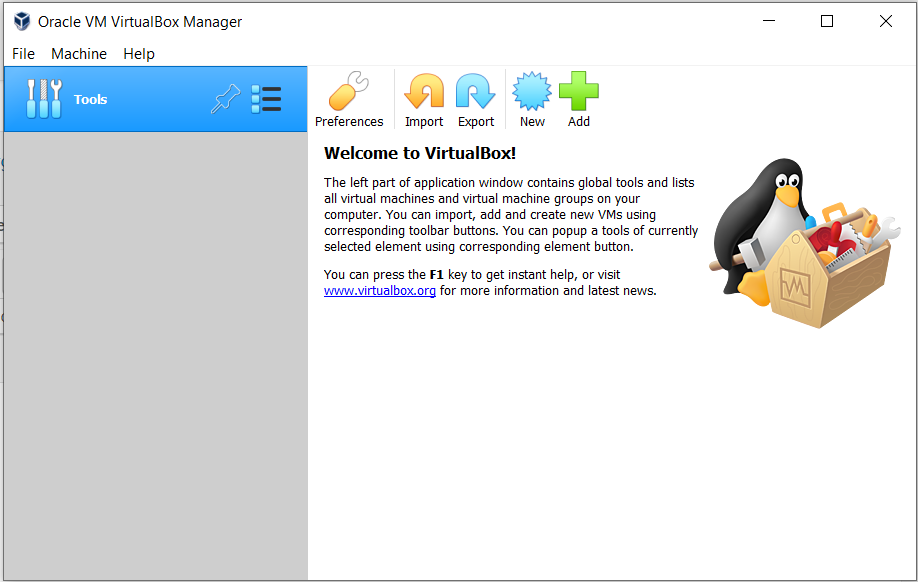
- Welcome Screen: Click “Next” to begin.
- Custom Setup: You will see a list of features like “VirtualBox USB Support” and “VirtualBox Networking.” It is highly recommended to leave these as default to ensure full functionality. You can also choose the installation path here; if your C: drive is full, moving it to a high-speed secondary SSD is a smart move for performance.
- Network Warning: During installation, VirtualBox will temporarily reset your network connection to install the necessary virtual network drivers. Do not be alarmed if your internet drops for a few seconds.
- Dependencies: If you are on Windows, the installer might notify you about missing “Python Core” or “Win32 API” dependencies. You can allow the installer to install these automatically or manually update your Python environment later.
- Finalize: Click “Install” and wait for the progress bar to finish. Once done, click “Finish” to launch the application.
Post-Installation Essentials: Extension Packs and Guest Additions
Installing the main VirtualBox application is only the first half of the journey. To truly leverage this tool for high-level productivity and digital security, you must install two additional components.
The VirtualBox Extension Pack
The Extension Pack is a single file that adds advanced features to all your virtual machines. It is essential for:
- USB 2.0 and 3.0 Support: Allows you to plug a physical thumb drive into your computer and have it recognized by the guest OS.
- VirtualBox Remote Desktop Protocol (VRDP): Useful for accessing your VM from another device.
- Disk Encryption: A vital feature for those handling sensitive financial data or proprietary brand assets.
To install it, download the “All supported platforms” Extension Pack from the VirtualBox website, open VirtualBox, go to File > Tools > Extension Pack Manager, and click “Install.”
Guest Additions: The Key to User Experience
After you create a Virtual Machine and install an operating system (like Ubuntu or Windows), you will notice the screen resolution might be small or the mouse movement feels “laggy.” To fix this, you must install Guest Additions.
While the Guest OS is running, go to the “Devices” menu at the top of the VM window and select “Insert Guest Additions CD Image.” Follow the on-screen prompts within the Guest OS to install the drivers. This enables:
- Shared Clipboard: Copy text on your host and paste it into your VM.
- Drag and Drop: Move files effortlessly between the two environments.
- Auto-Resize Guest Display: The VM window will automatically adjust its resolution when you resize the window.
Maximizing VirtualBox for Productivity and Online Income
Now that VirtualBox is installed, how can you use it to enhance your “Money” and “Brand” goals? Virtualization is more than just a tech hobby; it is a professional utility.
Creating a Secure Environment for Financial Operations
If you are involved in online income streams—such as crypto trading, affiliate marketing, or managing multiple e-commerce stores—security is paramount. You can create a “Clean VM” solely for financial transactions. By not browsing the general web or downloading unknown files on this VM, you significantly reduce the risk of keyloggers or malware stealing your credentials. This isolated “Digital Vault” is a top-tier strategy for protecting your personal finance.
Testing Software and Protecting Your Brand Reputation
For those building a personal brand or a corporate identity, consistency is key. Before launching a new app, a software update, or a website redesign, you can use VirtualBox to test how your project behaves on different operating systems.
Furthermore, the Snapshot feature is a lifesaver. Before making a major change to your project or installing a risky piece of software, take a “Snapshot” of your VM. If something breaks, you can revert to that exact moment in time with a single click. This ensures your workflow remains uninterrupted and your professional reputation for reliability stays intact.

Conclusion
Mastering how to install VirtualBox is the first step toward a more flexible, secure, and professional digital life. By following this guide, you have not only installed a powerful piece of software but have also opened the door to advanced technical experimentation and enhanced digital security.
In the world of Tech, VirtualBox keeps you at the cutting edge. In the world of Brand, it ensures your work is polished and cross-platform compatible. And in the world of Money, it provides the isolation needed to manage your wealth with peace of mind. As you begin creating your first virtual machines, remember to allocate your resources wisely and always keep your Guest Additions updated to maintain peak productivity.
aViewFromTheCave is a participant in the Amazon Services LLC Associates Program, an affiliate advertising program designed to provide a means for sites to earn advertising fees by advertising and linking to Amazon.com. Amazon, the Amazon logo, AmazonSupply, and the AmazonSupply logo are trademarks of Amazon.com, Inc. or its affiliates. As an Amazon Associate we earn affiliate commissions from qualifying purchases.