Adding a spoiler to your car is one of the most popular aftermarket modifications, offering both aesthetic enhancement and, in some cases, functional aerodynamic benefits. Whether you’re aiming for a sportier look, improved high-speed stability, or simply want to personalize your ride, installing a spoiler can be a rewarding DIY project. While the process requires precision, patience, and the right tools, it’s a task well within the capabilities of many car enthusiasts. This comprehensive guide will walk you through everything you need to know, from understanding spoiler types and preparing your vehicle to the step-by-step installation and crucial post-installation checks, ensuring your new addition looks fantastic and performs as intended.

Understanding Spoilers: More Than Just Aesthetics
Before you even pick up a tool, it’s vital to understand what a spoiler does, the various types available, and how to select one that’s perfect for your specific vehicle and goals. This foundational knowledge will not only help you make an informed purchase but also appreciate the engineering behind this seemingly simple car accessory.
The Aerodynamics Behind the Design
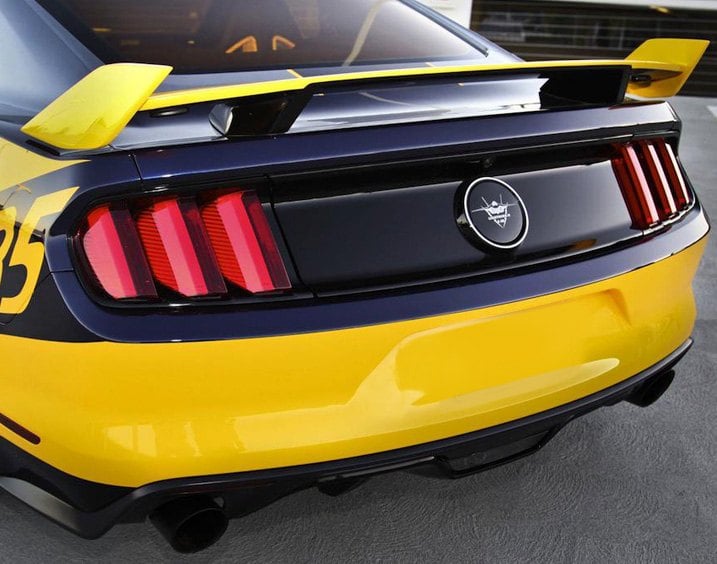
While many consider spoilers purely a visual upgrade, their primary function on performance vehicles is aerodynamic. At higher speeds, air flowing over a car can create “lift,” reducing traction and handling stability. A spoiler is designed to disrupt this airflow, typically by creating downforce. By generating a localized area of high pressure above the spoiler and low pressure beneath it, the spoiler effectively pushes the rear of the car downwards. This increased downforce enhances grip, especially during cornering and braking, leading to better control and a more stable ride. For most street cars, the aerodynamic benefit is minimal at legal speeds, but the design principles remain the same, contributing to the overall aggressive or sporty aesthetic.
Types of Spoilers and Their Functions
Spoilers come in a wide array of designs, each with its unique look and, in some cases, specific functional attributes. Understanding these types will help you choose wisely:
- Lip Spoilers: These are subtle, low-profile additions that typically extend slightly from the edge of the trunk lid. They offer a modest aesthetic upgrade and minimal aerodynamic benefit, often serving as an elegant accent.
- Pedestal Spoilers: Mounted on pedestals (or “risers”) that elevate the main wing element above the trunk lid, these are perhaps the most common type. They are more visually prominent and can offer significant downforce on performance vehicles, especially when designed with a specific angle of attack.
- Whale Tail Spoilers: Characterized by their large, often curved profile, these were popular on classic sports cars and offer substantial downforce.
- Wing Spoilers (GT Wings): These are aggressive, often very large, and feature an airfoil design similar to an airplane wing (but inverted). They are typically found on track-focused cars and provide maximum downforce for high-speed performance.
- Active Spoilers: Found on some high-end sports cars, these spoilers automatically adjust their angle or deploy at certain speeds to optimize downforce and reduce drag. While complex, they represent the pinnacle of spoiler technology.
Choosing the Right Spoiler for Your Vehicle
Selecting the right spoiler involves balancing aesthetics, functionality, and compatibility. Firstly, consider your car’s make and model. Many aftermarket spoilers are designed specifically for certain vehicles, ensuring a perfect fit and seamless integration. Universal spoilers exist, but they may require more customization and careful measurement. Think about the material: fiberglass (durable, paintable), ABS plastic (lightweight, impact-resistant), and carbon fiber (lightweight, high strength, premium look) are common options.
Beyond fitment and material, reflect on your personal style and your car’s existing design language. Do you want a subtle accent or a bold statement? A spoiler should complement, not overpower, your vehicle’s lines. Finally, consider its intended use. If you’re building a track car, aerodynamic performance will be a top priority. For daily drivers, the visual appeal often takes precedence, but ensuring the spoiler won’t obstruct your rear view or interfere with the trunk operation is crucial. Researching reputable manufacturers and reading reviews will help ensure you’re investing in a quality product that will last.
Preparation is Key: Tools and Pre-Installation Steps
A successful spoiler installation hinges on thorough preparation. Gathering the right tools and meticulously preparing your vehicle’s surface will streamline the process, prevent errors, and ensure a secure, long-lasting attachment. Skipping these vital steps can lead to misalignment, damage, or even a spoiler detaching at speed, making a careful approach non-negotiable.
Essential Tools and Materials
Having all your tools and materials ready before you begin will save you time and frustration. Here’s a list of what you’ll likely need:
- The Spoiler: Ensure it’s the correct model, undamaged, and includes all mounting hardware.
- Measuring Tape/Ruler: For precise positioning.
- Painter’s Tape: To mark drill points and protect paint.
- Masking Tape: For securing templates or marking.
- Drill: A cordless drill is ideal for maneuverability.
- Drill Bits: A set of sharp metal drill bits, sized according to the spoiler’s mounting hardware. Start with a smaller pilot bit, then progressively increase to the final size.
- Center Punch: To create a small indent for the drill bit, preventing it from “walking.”
- Marker/Grease Pencil: For marking precise drill locations.
- Rubbing Alcohol or Wax/Grease Remover: For thorough surface cleaning.
- Clean Microfiber Cloths: For cleaning and drying.
- Automotive-Grade Silicone Sealant: Crucial for preventing water leaks into the trunk.
- Ratchet and Sockets/Wrenches: To tighten mounting bolts (sizes will depend on your spoiler hardware).
- Screwdriver Set: If your spoiler uses screws.
- Safety Glasses and Gloves: Essential for personal protection.
- Shop Vacuum: To clean up metal shavings after drilling.
- A Second Pair of Hands: While not a tool, an assistant can be invaluable for positioning and holding the spoiler steady.
Pre-Installation Inspection and Surface Preparation
Once you have your spoiler and tools, the next step is to prepare both the spoiler and your car. First, inspect the spoiler for any manufacturing defects or shipping damage. If painting is required, do it now and allow ample time for curing. Next, thoroughly clean the area of the trunk lid where the spoiler will be mounted. Use a good automotive cleaner to remove all dirt, dust, wax, and grease. Rubbing alcohol or a dedicated wax/grease remover will ensure the surface is perfectly clean, allowing for proper adhesion of any sealing materials and accurate marking. A pristine surface is paramount for a professional finish and secure attachment.
Planning the Installation: Measurements and Marking
This is arguably the most critical step, especially for drill-mount spoilers. Precision here determines the final look and integrity of your installation.
- Read the Instructions: Always start by thoroughly reading the spoiler manufacturer’s instructions. They often contain specific measurements, templates, and warnings unique to their product.
- Trial Fit: Gently place the spoiler on the trunk lid without any adhesive or fasteners. This allows you to visualize its position, identify any potential clearance issues, and ensure it aligns with the car’s contours.
- Create a Template (if not provided): If your spoiler didn’t come with a template, you’ll need to create one. You can use large sheets of paper or cardboard. Carefully place the spoiler upside down and mark the exact locations of the mounting holes onto your template.
- Position and Mark: With the template or spoiler (if light enough) carefully positioned on the trunk lid, use painter’s tape to secure it. Double-check all measurements to ensure the spoiler is perfectly centered and aligned. Measure from the edges of the trunk, ensuring symmetry. Once satisfied, use your center punch to make a small indent through the template’s drill points (or directly through the spoiler’s mounting holes if using the spoiler itself as a guide) into the trunk lid’s surface. These indents will guide your drill bit. Remove the spoiler/template once all points are marked.
Remember, measure twice, drill once. There’s no turning back after drilling, so invest the time upfront to ensure perfect placement.
Step-by-Step Installation Guide
With all preparations complete, it’s time for the actual installation. This section breaks down the process into manageable steps, guiding you from initial placement to final securement, ensuring a robust and professional installation.
Initial Placement and Securement
Before any drilling, a final dry run of placement is highly recommended, especially if you’re not using a full template.
- Re-verify Marks: After marking with the center punch, step back and visually confirm the marked points look symmetrical and correctly positioned relative to the trunk lid’s edges and the car’s overall lines. Use a measuring tape to re-check distances from the trunk’s side edges and front/rear edges to each marked point.
- Protect the Paint: Place painter’s tape around the marked drill points. This acts as an extra layer of protection against accidental scratches from the drill or tools, and it also helps prevent paint chipping around the drill hole edges.
- Prepare the Trunk Interior: If possible, remove any trim panels from the underside of the trunk lid to gain clear access to the drilling area. This is essential for proper bolt access and for cleaning up metal shavings later.
Drilling (If Required) and Sealing
This is the most nerve-wracking part for many DIYers, but with proper technique, it’s straightforward.
- Start with a Pilot Bit: Using your smallest pilot drill bit and applying light, steady pressure, begin drilling at each center-punched mark. Keep the drill perfectly perpendicular to the trunk surface. Drilling slowly helps prevent the bit from “walking” and creates a cleaner hole.
- Progressive Drilling: Once pilot holes are through, switch to progressively larger drill bits, gradually widening the holes until you reach the final required size for your spoiler bolts. This gradual approach minimizes the risk of tearing or deforming the sheet metal.
- Clean Up Shavings: Immediately after drilling each hole, use a shop vacuum to suck up all metal shavings. These tiny fragments can cause rust if left on the paint or inside the trunk cavity. You can also use a magnet wrapped in a cloth to pick up any stubborn pieces.
- Deburr the Holes: Use a deburring tool or a larger drill bit rotated by hand to gently ream the edges of the drilled holes. This removes any sharp burrs that could cut into the sealant or paint later.
- Apply Rust Protection: For long-term durability, apply a small amount of automotive primer or rust-inhibiting paint to the bare metal edges of each drilled hole. This is a critical step to prevent rust from forming, especially if you live in a humid or coastal climate. Allow this to dry thoroughly.
- Seal the Holes: Before installing the spoiler, apply a generous bead of automotive-grade silicone sealant around the perimeter of each drilled hole, both on the top and underside of the trunk lid. This creates a waterproof barrier, preventing moisture from entering your trunk and causing leaks or rust.
Final Fastening and Testing
With the holes drilled and sealed, you’re ready to secure your spoiler.
- Position the Spoiler: Carefully place the spoiler over the drilled holes, aligning the mounting studs or bolt holes on the spoiler with the holes in your trunk lid. This might be easier with a helper.
- Insert Fasteners: From the underside of the trunk lid, feed the bolts through the drilled holes and into the spoiler’s mounting points. If your spoiler has studs, position it and then attach nuts from the underside.
- Hand-Tighten First: Hand-tighten all bolts or nuts first. This allows for minor adjustments if needed. Ensure the spoiler is sitting flush and evenly on the trunk lid.
- Evenly Tighten: Once satisfied with the alignment, use your ratchet and socket/wrench to gradually tighten the fasteners. Work in a crisscross or star pattern, tightening each bolt a little bit at a time. This ensures even pressure distribution and prevents distortion of the spoiler or trunk lid. Do not overtighten, as this can strip threads or crack the spoiler material. Tighten until snug and secure.
- Clean Excess Sealant: If any silicone sealant squeezed out, carefully wipe it away with a clean cloth before it cures.
- Final Checks: Gently test the spoiler’s stability by trying to wiggle it. It should feel firmly attached with no movement. Close the trunk lid slowly to ensure there’s no interference with the spoiler or its operation. Visually inspect the overall alignment and ensure no gaps exist where water could penetrate.
Common Pitfalls and Troubleshooting
Even with careful preparation, issues can arise during or after installation. Knowing how to anticipate and address common problems can save you headaches and ensure the longevity of your spoiler.
Addressing Misalignment and Imperfections
Misalignment is the most common issue in DIY spoiler installations. If the spoiler isn’t perfectly centered or appears crooked:
- Before Drilling: This is why trial fitting and meticulous marking are so crucial. If you notice misalignment during marking, adjust your template or marks before drilling.
- After Drilling (Minor): If the holes are only slightly off, some spoiler designs might allow for a tiny bit of play in the mounting hardware. You might be able to gently shift the spoiler during the initial hand-tightening phase to compensate. If the misalignment is significant, you might need to slightly enlarge the holes (very carefully, to avoid compromising structural integrity) or, in worst-case scenarios, consider filling the old holes and re-drilling.
- Surface Imperfections: If the spoiler doesn’t sit flush against the trunk lid due to minor curvature differences, you might need to use additional automotive-grade double-sided tape (specifically designed for exterior use) in conjunction with the bolts, or apply a slightly thicker bead of sealant to fill minor gaps. However, significant gaps usually indicate an ill-fitting spoiler that might need to be returned.
Preventing Water Leaks and Damage
Water leaks into the trunk are a frustrating outcome of a poor installation and can lead to rust and mildew.
- Sealant is Paramount: As mentioned, generous application of automotive-grade silicone sealant around each drilled hole, both on the top and underside of the trunk, is non-negotiable. Ensure complete coverage.
- Check After Rain/Wash: After your first car wash or significant rainfall, open your trunk and carefully inspect the interior, especially around the mounting points. Look for any signs of moisture.
- Re-apply If Needed: If you find a leak, identify the exact source, allow the area to dry thoroughly, and then apply more sealant. You may need to remove the spoiler partially to get adequate access.
- Tighten Securely: Loose bolts can create pathways for water. Ensure all fasteners are snug, but not overtightened.
- Avoid Over-Tightening: Overtightening bolts can crack the spoiler or deform the trunk lid, creating weak points that can lead to leaks or structural damage over time.
Maintenance for Longevity
Once installed, a spoiler generally requires minimal maintenance, but a few practices can ensure its longevity:
- Regular Cleaning: Wash your spoiler regularly, just like the rest of your car, to prevent dirt and grime buildup.
- Waxing/Sealing: If your spoiler is painted, apply wax or a paint sealant periodically to protect its finish from UV rays and environmental contaminants.
- Check Fasteners: Every few months, or after significant vibrations (e.g., long road trips on bumpy roads), gently check the tightness of the mounting bolts/nuts to ensure they haven’t loosened.
- Inspect for Cracks: Periodically inspect the spoiler material, especially around the mounting points, for any hairline cracks or signs of stress. Address these early to prevent them from worsening.
The Broader Impact: Tech, Brand, and Money Considerations
Installing a spoiler isn’t just a mechanical task; it touches upon broader themes relevant to technology, branding, and personal finance. Understanding these dimensions can enhance your appreciation for the project and inform future decisions.
Tech Innovations in Aftermarket Parts
The aftermarket automotive industry is constantly evolving, driven by technological advancements. Spoilers themselves benefit from:
- Advanced Materials: Modern spoilers increasingly utilize lightweight yet incredibly strong materials like carbon fiber composites, forged carbon, and advanced ABS plastics. These materials not only improve durability and reduce vehicle weight but also allow for more intricate and aerodynamically efficient designs.
- CAD/CAM Design: Computer-Aided Design (CAD) and Manufacturing (CAM) tools enable manufacturers to create spoilers with precise fitment, optimal aerodynamic profiles, and seamless integration with specific vehicle models. This level of digital precision makes DIY installation more predictable.
- 3D Printing: Rapid prototyping through 3D printing allows designers to quickly test various spoiler designs and perfect their aesthetics and fit before mass production, accelerating innovation.
- Digital Tutorials and AI Tools: The proliferation of high-quality video tutorials, online forums, and even AI-powered diagnostic tools makes complex DIY tasks like spoiler installation more accessible to the average car owner, bridging knowledge gaps.
Branding Your Ride: Personalization and Resale Value
Your car is an extension of your personal brand. Adding a spoiler is a powerful statement of personalization:
- Aesthetic Branding: A well-chosen spoiler instantly changes your car’s profile, conveying sportiness, aggression, or refined elegance. It projects an image and sets your vehicle apart, contributing to your personal brand identity.
- Reputation and Perception: A tastefully installed, high-quality spoiler can enhance the perceived value and desirability of your car. Conversely, a poorly chosen or shoddily installed spoiler can detract from its appeal and signal carelessness, potentially harming your car’s “brand” and your own.
- Resale Value: While often a personal mod, a popular and well-integrated spoiler can sometimes increase a car’s resale value, especially if it enhances the vehicle’s sporty appeal. However, overly aggressive or niche designs might limit the pool of potential buyers. The quality of installation is key: a professional-looking DIY job adds value, while visible flaws detract from it.
The Financial Aspect: DIY vs. Professional Installation
The “Money” aspect is a significant driver for many DIY projects, and spoiler installation is no exception.
- Cost Savings: The most obvious financial benefit of DIY installation is saving on labor costs. Professional installation can range from $100 to $500 or more, depending on the complexity and shop rates. Doing it yourself can keep that money in your pocket.
- Tool Investment: While DIY saves on labor, it might require an initial investment in tools you don’t already own (e.g., a good drill, drill bits, sealant). However, these tools become assets for future projects.
- Potential Risks: The financial risk of a DIY installation involves potential mistakes. Drilling in the wrong spot, damaging the paint, or causing leaks could lead to costly repairs by a professional, negating any initial savings. This underscores the importance of careful preparation and execution.
- Insurance Implications: In very rare cases, significant aftermarket modifications could affect your insurance premiums or coverage if not disclosed. Always check with your insurance provider, although a standard spoiler is generally not considered a high-risk modification.
- Return on Investment (ROI): For many, the ROI isn’t purely financial but includes the satisfaction of a job well done, the enhanced aesthetic appeal, and the pride of driving a personalized vehicle.
In conclusion, installing a spoiler on your car is a rewarding endeavor that combines mechanical skill with personal expression. By carefully planning, utilizing the right tools, and executing each step with precision, you can achieve a professional-looking result that not only enhances your car’s appearance but also stands as a testament to your DIY capabilities. Remember to factor in the broader implications concerning technology, brand, and money, ensuring your project is a truly informed and successful one.
aViewFromTheCave is a participant in the Amazon Services LLC Associates Program, an affiliate advertising program designed to provide a means for sites to earn advertising fees by advertising and linking to Amazon.com. Amazon, the Amazon logo, AmazonSupply, and the AmazonSupply logo are trademarks of Amazon.com, Inc. or its affiliates. As an Amazon Associate we earn affiliate commissions from qualifying purchases.