As homeowners increasingly prioritize security and peace of mind, the demand for smart home surveillance solutions has surged. SimpliSafe, a well-regarded name in DIY home security, offers robust and user-friendly systems, and their Outdoor Camera is a valuable addition to any property. Whether you’re looking to deter potential intruders, keep an eye on package deliveries, or simply monitor your yard, the SimpliSafe Outdoor Camera provides a reliable and accessible option. This guide will walk you through the entire installation process, from unboxing to final setup, ensuring you can confidently enhance your home’s security.
Our focus today aligns perfectly with the “Tech” aspect of our website, specifically delving into gadgets, tutorials, and digital security. We’ll be exploring the practicalities of integrating a smart security device into your home, offering a hands-on approach to understanding its functionality and installation. While the “Brand” and “Money” sections of our website cover broader strategic and financial considerations, this article zeroes in on the tangible technology and the straightforward process of setting it up.
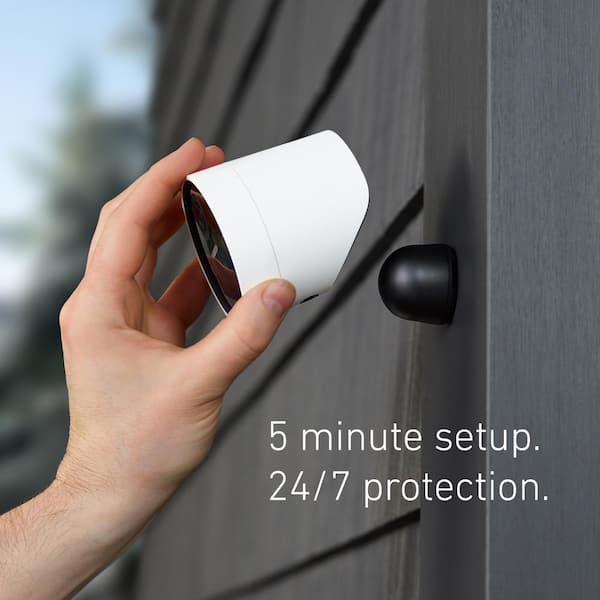
Before You Begin: Unboxing and Preparation
Before diving into the physical installation, it’s crucial to ensure you have everything you need and to understand the components of your new SimpliSafe Outdoor Camera. This preparation phase is key to a smooth and efficient setup, minimizing potential frustrations.
What’s in the Box?
Upon opening your SimpliSafe Outdoor Camera package, you should find the following items:
- SimpliSafe Outdoor Camera: The primary unit.
- Mounting Bracket: This is what attaches the camera to your wall or eave.
- Mounting Screws and Anchors: Hardware for securing the bracket.
- Power Cable: A weather-resistant cable to power the camera.
- User Manual and Quick Start Guide: Essential for reference.
- Drill Bit Template: Helps in accurately marking screw hole locations.
- Optional Accessories: Depending on your purchase, you might find extension cables or other specialized mounting hardware.
Important Note on Power: The SimpliSafe Outdoor Camera is a wired device. This means it requires a continuous power source. While it’s designed to be plugged into a standard outdoor electrical outlet, you’ll need to ensure one is accessible at your desired camera location. If you don’t have one, you may need to consult an electrician for installation.
Tools You’ll Need
To successfully install your camera, gather these common household tools:
- Drill: With appropriate drill bits (often a Phillips head and a masonry bit if mounting on brick or stucco).
- Screwdriver: A Phillips head screwdriver is usually sufficient.
- Level: To ensure the camera is mounted straight.
- Pencil or Marker: For marking screw holes.
- Ladder: For reaching higher mounting locations. Ensure it’s stable and used safely.
- Wire Strippers/Cutters (Optional but Recommended): If you need to route the power cable neatly through a small opening or trim it to a specific length.
- Caulking Gun and Exterior Caulk: To seal any drill holes for weatherproofing.
Choosing the Right Location
The placement of your outdoor camera significantly impacts its effectiveness. Consider the following when deciding where to mount it:
- Field of View: Think about what you want to monitor. Common locations include above the front door to capture visitors and package deliveries, overlooking a driveway, or covering a backyard entrance.
- Power Source Accessibility: As mentioned, a nearby outdoor electrical outlet is essential. Plan your cable routing to minimize exposure and ensure it’s discreet.
- Height: Mount the camera high enough to be out of easy reach (around 6-10 feet is a good range) but not so high that facial recognition becomes difficult.
- Lighting Conditions: Avoid pointing the camera directly at bright lights, such as the sun or strong outdoor lamps, as this can degrade image quality. Conversely, ensure there’s enough ambient light for the camera’s night vision to be effective.
- Weather Protection: While the camera is weather-resistant, choosing a spot that offers some natural protection from direct rain and harsh sun can prolong its lifespan. Eaves and overhangs are ideal.
- Wi-Fi Signal Strength: The camera relies on your home’s Wi-Fi network. Before permanently mounting, test the Wi-Fi signal strength at your chosen location using your smartphone. A weak signal will result in poor performance, dropped connections, and an unreliable camera.
Step-by-Step Installation Process
With your tools and chosen location ready, it’s time to physically install the SimpliSafe Outdoor Camera. Follow these steps carefully for a secure and functional setup.

Mounting the Bracket
- Position the Template: Hold the drill bit template against the wall or mounting surface at your chosen location. Use a level to ensure it’s perfectly horizontal. Mark the center of the screw holes with a pencil or marker.
- Drill Pilot Holes: Based on the template markings, drill pilot holes for the mounting screws. The size of the drill bit will depend on the type of wall material (wood, brick, stucco) and the screws provided. If you’re mounting on brick or stucco, you’ll likely need to use the included wall anchors. Insert the anchors into the drilled holes.
- Attach the Bracket: Align the mounting bracket with the pilot holes (or anchors). Use the provided screws to securely fasten the bracket to the wall. Ensure the bracket is snug and doesn’t move.
Connecting and Routing the Power Cable
- Prepare the Cable: The SimpliSafe Outdoor Camera comes with a power cable designed for outdoor use. You’ll need to route this cable from the camera’s mounting location to the nearest outdoor electrical outlet.
- Route the Cable Discreetly: Plan the path of the cable. You can run it along the side of the house, under eaves, or through a small opening if necessary. For a cleaner look and better weatherproofing, consider using cable clips or conduit. If you need to drill a hole through a wall to bring the cable inside, ensure it’s a small, discreet hole that can be properly sealed afterward.
- Connect to Power: Once the cable is routed, connect it to the power port on the back of the SimpliSafe Outdoor Camera. Ensure the connection is secure.
- Plug into Outlet: Plug the other end of the power cable into your outdoor electrical outlet. Do not plug it in until the camera is mounted and connected to the bracket.
Attaching the Camera to the Bracket
- Align the Camera: The SimpliSafe Outdoor Camera has a mounting mechanism that connects to the bracket. This is typically a screw-on or clip-on system. Align the camera with the bracket according to the instructions in your user manual.
- Secure the Camera: Gently twist or push the camera onto the bracket until it clicks into place or is securely fastened. Ensure it’s firmly attached and won’t easily detach.
- Adjust the Angle: Once the camera is mounted, you can typically adjust its angle to achieve the desired field of view. Loosen any adjustment screws or joints on the bracket, position the camera, and then re-tighten them. Use your level again to ensure it’s positioned correctly.
Setting Up Your SimpliSafe Outdoor Camera in the App
With the physical installation complete, the next crucial step is to integrate the camera into your SimpliSafe system and configure its settings via the SimpliSafe mobile app. This is where the “Tech” aspect truly comes into play, leveraging software and digital connectivity.
Connecting to Wi-Fi and the SimpliSafe System
- Download and Open the App: If you haven’t already, download the SimpliSafe mobile app from your device’s app store (iOS or Android) and log in to your account.
- Add a New Device: Within the app, navigate to the section for adding new devices. Select “Outdoor Camera” from the list of available SimpliSafe products.
- Follow In-App Prompts: The app will guide you through the pairing process. This usually involves pressing a sync button on the camera (often located on the back or bottom) and waiting for it to connect to your SimpliSafe base station.
- Wi-Fi Connection: You will then be prompted to connect the camera to your home Wi-Fi network. Select your network from the list and enter your Wi-Fi password. Ensure you are connecting to a 2.4GHz network, as many IoT devices do not support 5GHz.
Configuring Camera Settings
Once the camera is successfully connected to your Wi-Fi and SimpliSafe system, you can customize its behavior through the app:
- Motion Detection Zones: Define specific areas within the camera’s view where you want it to detect motion. This helps reduce false alerts from passing cars or swaying trees.
- Sensitivity Levels: Adjust how sensitive the motion detection is. Higher sensitivity will detect smaller movements, while lower sensitivity will ignore minor disturbances.
- Recording Preferences: Configure when you want the camera to record. Options typically include recording on motion detection, continuous recording (if supported and a subscription is active), or recording only when the alarm system is armed.
- Notification Settings: Choose how you want to be alerted when motion is detected. You can opt for push notifications to your smartphone, email alerts, or both.
- Video Quality: Select the desired video resolution for recordings. Higher resolutions provide clearer images but consume more bandwidth and storage.
- Night Vision: Customize the night vision settings, often including an “auto” mode that activates when light levels drop.
- Audio Settings: Enable or disable audio recording as per your preference and local regulations.

Testing and Fine-Tuning
After configuring the settings, it’s essential to thoroughly test your SimpliSafe Outdoor Camera:
- Walk Test: Have someone walk in front of the camera to trigger motion detection. Check if you receive alerts and if the camera records as expected.
- Review Recordings: Watch the recorded footage to assess the video quality, clarity, and whether the motion detection accurately captured the event.
- Adjustments: Based on your testing, you may need to fine-tune the camera’s angle, motion detection zones, or sensitivity levels. Revisit the app settings and make any necessary adjustments.
- Weatherproofing: If you drilled any holes for the power cable, ensure they are properly sealed with exterior caulk to prevent water ingress.
By following these steps, you’ll have successfully installed and configured your SimpliSafe Outdoor Camera, significantly enhancing your home’s security and providing valuable visual oversight of your property. This DIY approach empowers you to take control of your home security with a reliable and technologically advanced solution.
aViewFromTheCave is a participant in the Amazon Services LLC Associates Program, an affiliate advertising program designed to provide a means for sites to earn advertising fees by advertising and linking to Amazon.com. Amazon, the Amazon logo, AmazonSupply, and the AmazonSupply logo are trademarks of Amazon.com, Inc. or its affiliates. As an Amazon Associate we earn affiliate commissions from qualifying purchases.