In the ever-evolving landscape of online gaming, fair play and competitive integrity are paramount. Cheating not only ruins the experience for honest players but also undermines the spirit of competition that games are built upon. To combat this pervasive issue, Riot Games, the powerhouse behind titles like League of Legends and Valorant, developed Riot Vanguard. This robust anti-cheat system is a crucial component for anyone looking to dive into the tactical shooter world of Valorant, and increasingly, it plays a role in safeguarding other Riot titles.
This comprehensive guide will walk you through the process of installing Riot Vanguard, from initial preparation to troubleshooting common issues, ensuring you can enjoy a secure and fair gaming experience. For enthusiasts and casual players alike, understanding how this vital piece of software integrates with your system is key to seamless gameplay and digital security.
The Sentinel of Fair Play: Understanding Riot Vanguard
Before we delve into the mechanics of installation, it’s essential to grasp what Riot Vanguard is and why it’s a non-negotiable part of playing Valorant. Far more than just another background application, Vanguard is a kernel-level anti-cheat system designed to detect and prevent cheating at its root.
What is Riot Vanguard?
Riot Vanguard is a proprietary anti-cheat software developed by Riot Games. It consists of two main components: a client that runs while Valorant is active, and a kernel-mode driver that runs from system startup. The kernel-mode driver is the most significant aspect, as it operates at the deepest level of your operating system, giving it a comprehensive view of all processes and actions taking place on your computer. This deep integration allows Vanguard to detect cheating software and illicit modifications to the game client more effectively than user-mode anti-cheat systems.
While primarily known for its integral role in Valorant, Vanguard’s underlying principles contribute to Riot Games’ broader digital security strategy across its ecosystem. Its proactive approach aims to identify and ban cheaters before they can impact legitimate players, fostering a healthier and more enjoyable competitive environment.
Why is it Necessary for Fair Play?
The necessity of a system like Vanguard stems from the sophisticated nature of modern cheating tools. Cheaters often employ complex software designed to bypass detection, granting them unfair advantages such as aimbots, wallhacks, or speed hacks. Traditional anti-cheat methods, which often operate at a higher level of the operating system, can be outmaneuvered by these tools.
Vanguard’s kernel-level access allows it to monitor system processes at a foundational level, making it incredibly difficult for cheats to operate undetected. This proactive surveillance is crucial for maintaining the integrity of competitive play, particularly in a high-stakes tactical shooter like Valorant, where split-second decisions and precise aim are paramount. Without such a stringent system, the game would quickly become unplayable for the vast majority of honest players, leading to frustration and a decline in its player base. Ultimately, Vanguard acts as a digital guardian, ensuring that skill and strategy, not illicit software, determine the outcome of a match.
A Brief History and Evolution
When Riot Vanguard was first introduced alongside Valorant’s closed beta, its kernel-level access sparked considerable debate among players regarding privacy and system security. Operating at the kernel level means Vanguard has extensive permissions, akin to that of your operating system itself. Concerns were raised about potential vulnerabilities or misuse of such deep system access.
Riot Games proactively addressed these concerns by providing detailed explanations of Vanguard’s architecture, its strict privacy policies, and its commitment to system security. They emphasized that Vanguard only runs while Valorant is active or after a system restart to prevent cheats from loading before the game. Furthermore, it operates with a bug bounty program, inviting security researchers to identify and report any vulnerabilities, reinforcing their dedication to a secure experience. Over time, as players understood the necessity and safeguards in place, the initial apprehension largely subsided, and Vanguard became an accepted and essential part of the Riot gaming experience. Its evolution continues, with Riot regularly updating the system to counter new cheating methods and enhance its own security.
Preparing Your System: Pre-Installation Essentials
A smooth installation process for Riot Vanguard, and by extension Valorant, begins with proper system preparation. Ensuring your computer meets the necessary requirements and is in optimal condition can prevent many common headaches and error messages.
Meeting the Minimum Requirements
While Riot Vanguard itself is relatively lightweight, it installs alongside Valorant, so you’ll need to ensure your system can handle the game. Fortunately, Valorant is designed to be accessible on a wide range of hardware.
- Operating System: Riot Vanguard and Valorant require Windows 10 (64-bit, Version 1709 or newer) or Windows 11. Support for older Windows versions has been phased out, primarily due to security enhancements and API compatibility.
- Processor: Intel Core i3-370M (or equivalent) or better is recommended for smooth performance. For the bare minimum, even older CPUs can run it, but performance might suffer.
- RAM: At least 4GB of RAM is necessary. 8GB is highly recommended for a better overall experience, especially if you run other applications in the background.
- Storage: Valorant requires around 30-40GB of available disk space, and this number can grow with updates. Ensure you have ample room on your primary drive.
- Graphics Card: Any integrated graphics solution from Intel (HD 3000), AMD (R5 200), or Nvidia (GeForce GT 730) will suffice for the minimum settings. For competitive frame rates, a dedicated GPU is preferable.
- Internet Connection: A stable broadband internet connection is crucial for downloading the game and for online multiplayer.
Before initiating the download, take a moment to check your system specifications. You can usually find this information by right-clicking “This PC” or “My Computer” and selecting “Properties” (on Windows 10/11, go to Settings > System > About).
Ensuring a Clean Slate
Optimizing your system before installation can prevent conflicts and ensure Vanguard operates without issues.
- Closing Background Applications: Many programs, especially those running in the background, can consume resources or potentially conflict with an installation process. Close any unnecessary applications, especially those that might interfere with system processes or have overlay features (like some streaming software or other gaming clients).
- Updating Drivers: Outdated graphics card drivers, chipset drivers, or network drivers can lead to unexpected errors, performance issues, or even prevent games from launching. Visit your GPU manufacturer’s website (Nvidia, AMD, Intel) to download and install the latest drivers. You can also check for Windows updates, as these often include driver updates.
- Temporarily Disabling Antivirus/Firewall (Caution Advised): While generally not recommended for extended periods, some overly aggressive antivirus or firewall software can sometimes flag parts of the Vanguard or Valorant installation as suspicious, leading to corrupted files or blocked processes. If you encounter persistent installation errors, you might temporarily disable your antivirus/firewall just for the duration of the installation process. Remember to re-enable them immediately afterward to maintain your digital security. Only do this if you are confident in your download source (the official Riot Games website).
- Checking for Existing Installations: If you’ve previously installed Valorant or Vanguard and encountered issues, it’s wise to perform a clean uninstallation before attempting a new one. Navigate to “Add or Remove Programs” in Windows settings and uninstall both “Riot Vanguard” and “Valorant” if they are listed. This ensures no corrupted files or registry entries interfere with the fresh installation.
By taking these preparatory steps, you significantly increase the chances of a smooth and successful Riot Vanguard and Valorant installation, setting the stage for uninterrupted gaming.
The Core Installation Process: Step-by-Step Guide
The good news is that installing Riot Vanguard is typically a straightforward process, as it is bundled directly with the Valorant game client. This integration simplifies things considerably, ensuring both components are installed and configured correctly to work in tandem.
Downloading the Valorant Client
The journey begins with acquiring the official Valorant installer.
- Visit the Official Riot Games Website: The safest and most reliable place to download Valorant is directly from Riot Games. Open your web browser and navigate to playvalorant.com.
- Locate the Download Button: On the Valorant homepage, you’ll typically find a prominent “Play Now” or “Download Game” button. Click on it.
- Create or Log In to Your Riot Account: You’ll be prompted to create a new Riot Games account or log in with an existing one. A Riot account is mandatory to play Valorant and other Riot titles. Follow the on-screen instructions to complete this step.
- Download the Installer: After logging in or creating your account, you’ll be redirected to a page where you can download the Valorant installer (usually a small
.exefile, often named “Install VALORANT.exe”). Save this file to a location you can easily find, such as your Downloads folder or desktop.
Running the Installer
Once the installer is downloaded, it’s time to initiate the installation process.
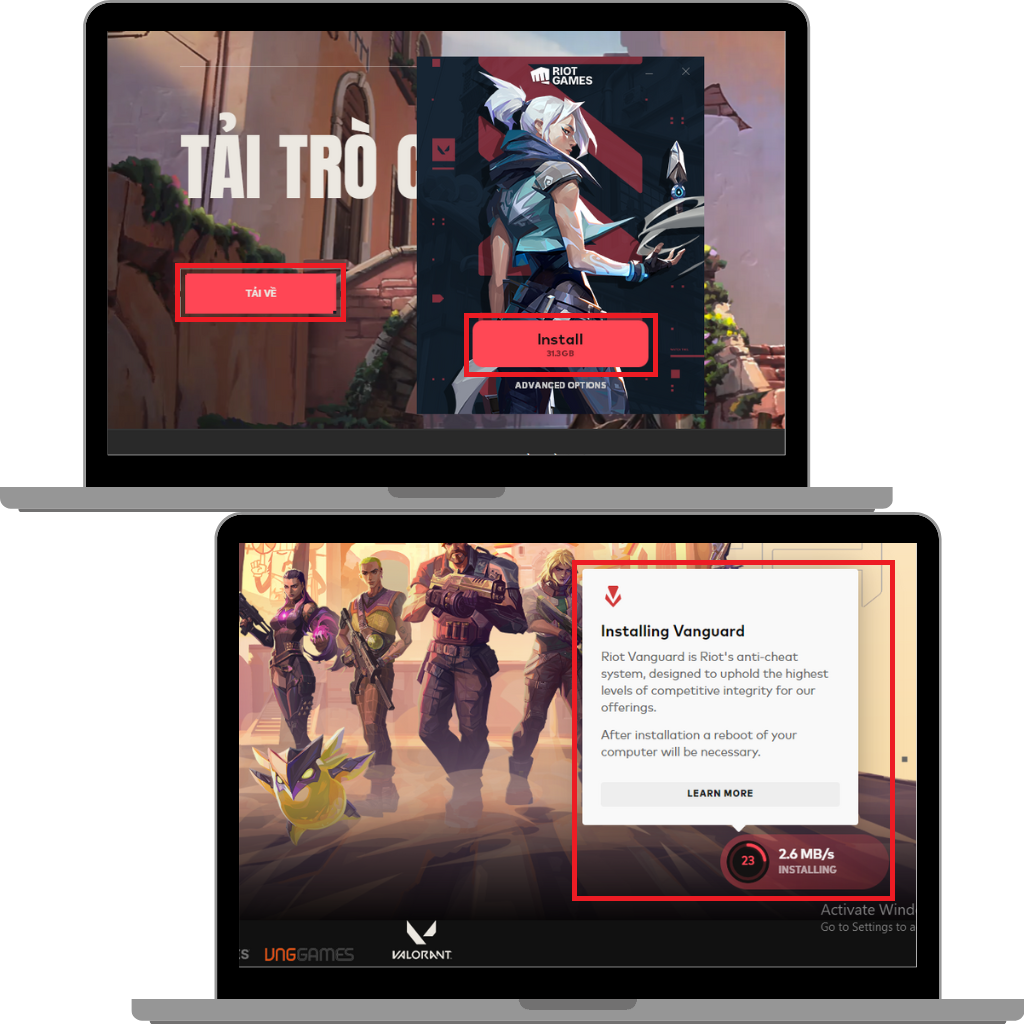
- Locate and Run the Installer: Navigate to where you saved the “Install VALORANT.exe” file. Right-click on it and select “Run as administrator.” This is an important step as it ensures the installer has the necessary permissions to make system-level changes, including installing Vanguard’s kernel-mode driver.
- User Account Control (UAC) Prompt: If you see a User Account Control prompt asking if you want to allow the app to make changes to your device, click “Yes.”
- Choose Installation Location: The Valorant installer will launch. You’ll be given the option to choose the installation directory for Valorant. The default location is usually sufficient, but if you prefer to install it on a different drive (e.g., an SSD for faster loading times), you can click “Advanced Options” or “Change Path” and select your preferred location.
- Accept Terms and Conditions: Read through the terms and conditions if you wish, then accept them to proceed.
- Initiate Installation: Click the “Install” or “Install Valorant” button. The installer will then begin downloading and installing the main Valorant game files. Crucially, Riot Vanguard is automatically installed alongside Valorant. You won’t see a separate prompt or installation wizard for Vanguard itself; it’s seamlessly integrated into the Valorant installation package. The installer will display progress bars for both the game files and, implicitly, Vanguard’s components.
The Crucial Reboot
After the installation process completes, there’s one vital step you must not skip:
- Restart Your Computer: The installer will typically prompt you to restart your computer. This restart is absolutely mandatory for Riot Vanguard to properly initialize and load its kernel-mode driver. Without this reboot, Vanguard will not be active, and you will encounter an error message (often VAN 1067) preventing you from launching Valorant. Go ahead and restart your system.
Verifying Successful Installation
Once your computer has restarted, you can quickly verify that Riot Vanguard is running correctly.
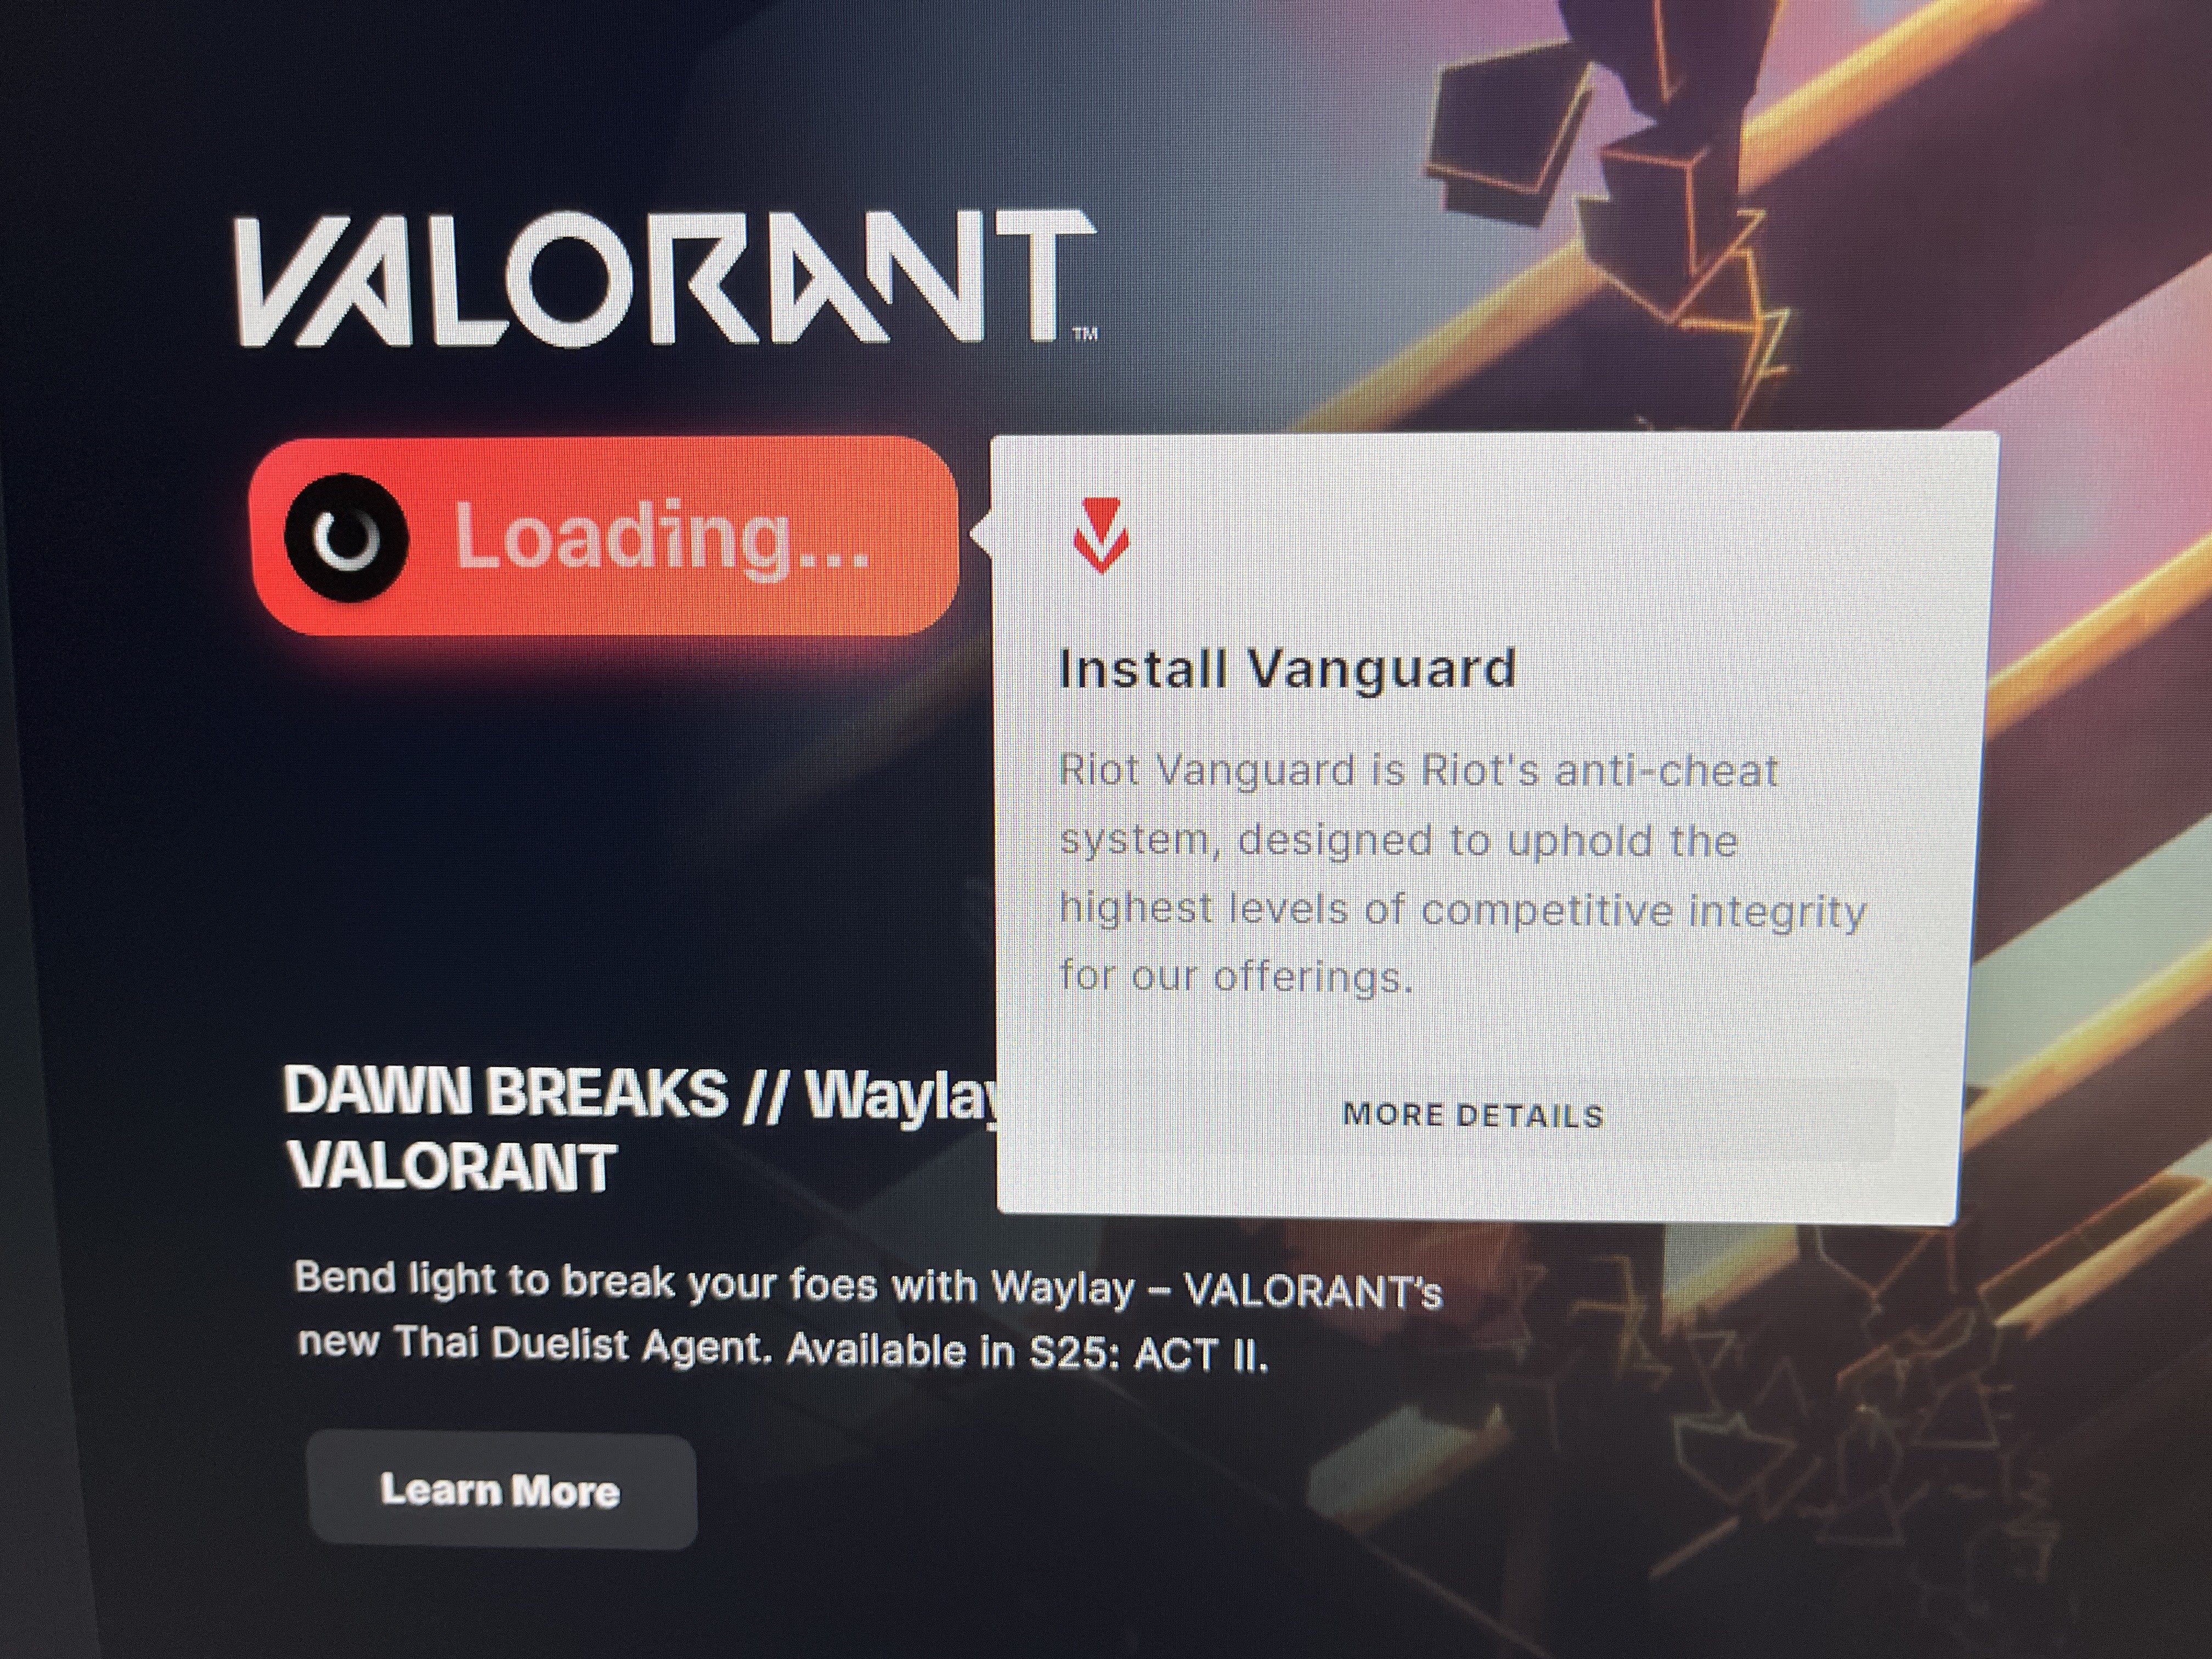
- Check the System Tray Icon: After your system boots up, look in the system tray (the area on the right side of your Windows taskbar, near the clock). You should see a small red “Riot Vanguard” shield icon. If it’s there, it indicates that Vanguard has successfully loaded.
- Confirm Services (Optional, for advanced users): For a deeper check, you can open the “Services” application in Windows (type “services” into the Windows search bar). Look for a service named “vgc.” Ensure its “Status” is “Running” and its “Startup type” is “Automatic.” This confirms the Vanguard service is active.
- Launch Valorant: The ultimate test is to launch Valorant itself. If Vanguard is installed and running correctly, the game should launch without any anti-cheat-related error messages. If you can access the main menu and queue for a game, you’re all set!
By following these steps, you should have Riot Vanguard and Valorant successfully installed and ready for action. Should you encounter any issues, the next section will guide you through common troubleshooting methods.
Navigating Challenges: Troubleshooting Common Vanguard Issues
While the installation process is generally smooth, technology can sometimes be unpredictable. You might encounter error messages or issues with Riot Vanguard. Don’t worry, many common problems have straightforward solutions.
Installation Failures and Error Codes
One of the most frustrating experiences is when the installation fails or Valorant refuses to launch due to a Vanguard error.
- Generic Reinstallation Steps: The most common fix for installation woes is a clean reinstallation.
- Go to “Add or Remove Programs” in Windows Settings.
- Uninstall “Riot Vanguard” first, then “Valorant.”
- Restart your computer.
- Download a fresh installer from
playvalorant.comand run it as administrator. - Crucially, restart your computer again after the installation is complete.
- Specific Error Code Meanings: Riot Games has provided a list of common error codes related to Valorant and Vanguard.
- VAN 1067, VAN 128: These often indicate that Vanguard failed to initialize or isn’t running. The primary fix is almost always to restart your computer. If the problem persists, ensure the “vgc” service is set to “Automatic” and is “Running” in Windows Services (as described in the verification step).
- VAN 6: Often a connection issue. Check your internet, firewall, and router settings.
- VAN 81: Usually indicates a connectivity problem to Riot services.
- For any specific error code, a quick search on Riot Games’ support website or a general web search for “Valorant VAN [error code]” will usually lead to the most up-to-date solutions.
- Running as Administrator: Always ensure you run the Valorant installer and, if needed, Valorant itself, as an administrator. Right-click the executable and select “Run as administrator.” This prevents permission issues.
Vanguard Not Activating or Running
Sometimes Vanguard installs but doesn’t seem to kick in, preventing Valorant from launching.
- Checking
vgcService Status:- Press
Win + R, typeservices.msc, and press Enter. - Scroll down to find “vgc” (Riot Vanguard).
- Right-click on it, go to “Properties.”
- Ensure “Startup type” is set to “Automatic.”
- If the “Service status” is not “Running,” click “Start.”
- Apply changes and restart your computer.
- Press
- Reinstalling Vanguard Separately (Rare but possible): In rare cases where Valorant runs but Vanguard somehow doesn’t, you might need to manually ensure Vanguard is installed. While usually bundled, if there’s a standalone Vanguard installer from Riot’s support page, follow its instructions. More often, reinstalling Valorant completely addresses this.
- BIOS Settings: Secure Boot and TPM 2.0: With the advent of Windows 11 and ongoing security enhancements, Riot Vanguard has increased its reliance on certain BIOS/UEFI settings for system integrity.
- Secure Boot: Ensure Secure Boot is enabled in your UEFI/BIOS settings. This prevents unauthorized operating systems or software from loading during startup.
- TPM 2.0: Trusted Platform Module 2.0 is a security chip that provides hardware-level security functions. For Windows 11 users, enabling TPM 2.0 is often a prerequisite for Vanguard.
- How to check/enable: Access your computer’s BIOS/UEFI settings during startup (usually by pressing Del, F2, F10, or F12 repeatedly after powering on). The exact location of Secure Boot and TPM 2.0 settings varies by motherboard manufacturer, but they are typically found under “Boot,” “Security,” or “Advanced” options. Proceed with caution when changing BIOS settings, and only if you are comfortable doing so. Incorrect settings can prevent your computer from booting.
- If you’re unsure, consult your motherboard manual or look up guides specific to your PC model.
Performance Impacts and Conflicts
Vanguard is designed to be lightweight, but sometimes conflicts or performance issues can arise.
- Monitoring System Resources: If you notice unusual slowdowns, use Task Manager (
Ctrl + Shift + Esc) to monitor CPU, RAM, and disk usage. See if Vanguard (vgc.exeorRiotVanguard.exe) is consuming excessive resources. While normal for a brief spike during startup, sustained high usage is unusual. - Identifying Conflicting Software: Other anti-cheat programs, specific overlays, or even some virtual machine software can conflict with Vanguard. Try temporarily disabling other gaming-related background applications if you suspect a conflict.
- Reporting Issues to Riot Support: If you’ve exhausted all troubleshooting steps and still face persistent issues, the best course of action is to contact Riot Games Player Support. Provide them with detailed information about your system, the error codes you’re encountering, and the steps you’ve already taken. They have specialized tools and knowledge to diagnose more complex problems.
By systematically working through these troubleshooting steps, you can resolve most common issues related to Riot Vanguard installation and operation, getting you back into the game faster.
Maintaining and Managing Vanguard: Uninstallation and Best Practices
Understanding how to install Riot Vanguard is just one part of the equation; knowing how to manage it, including its uninstallation, is equally important for complete control over your system. Furthermore, it’s worth revisiting Riot’s commitment to user privacy and security, as these concerns are often at the forefront when discussing kernel-level anti-cheat.
How to Properly Uninstall Riot Vanguard
There might come a time when you no longer play Valorant, need to perform a clean reinstallation, or simply wish to remove Vanguard from your system. It’s crucial to follow the correct uninstallation procedure to avoid leaving behind residual files or services.
- Uninstall Riot Vanguard First: Before uninstalling Valorant, always uninstall Riot Vanguard.
- Open your Windows Start Menu and type “Add or remove programs” or navigate to “Settings” > “Apps” > “Apps & features.”
- Scroll down the list of installed applications and locate “Riot Vanguard.”
- Click on “Riot Vanguard” and then select “Uninstall.”
- You will receive a confirmation prompt; confirm the uninstallation.
- Restart your computer immediately after uninstalling Vanguard. This is crucial for the kernel-mode driver to be fully removed from your system. If you don’t restart, you might find residual files or the service still active.
- Uninstall Valorant (Optional): If you no longer wish to play Valorant, you can then proceed to uninstall the game itself.
- In the same “Apps & features” list, locate “Valorant.”
- Click on “Valorant” and select “Uninstall.”
- Follow any on-screen prompts to complete the game’s removal.
- Another restart is generally a good idea after a major game uninstallation to ensure all temporary files and processes are cleared.
Riot’s Stance on Privacy and Security
The primary concern for users regarding kernel-level anti-cheat software like Vanguard is often privacy and potential security risks. Riot Games has been transparent and proactive in addressing these concerns:
- Addressing Kernel-Level Concerns: Riot has repeatedly clarified that Vanguard is designed with user privacy and system stability as top priorities. The kernel-mode driver is specifically engineered to interact only with game-related processes and to detect known cheating methods. It does not monitor personal files, browse your web history, or collect unnecessary personal data. Its scope is strictly limited to identifying and preventing cheating within the Riot ecosystem.
- Data Collection Policies: Riot’s privacy policy explicitly outlines what data is collected and how it’s used. Data collected by Vanguard is primarily system information relevant to anti-cheat functionality, such as process lists and hardware identifiers, to detect and ban cheaters. This data is handled in accordance with global data protection regulations.
- Transparency and Trust: Riot Games has maintained an open dialogue with its player base and the broader security community. They’ve published articles detailing Vanguard’s technical workings and launched a bug bounty program, inviting security researchers to scrutinize the software for vulnerabilities. This commitment to transparency and external validation helps build trust and ensures that Vanguard remains a secure and effective anti-cheat solution without compromising user privacy.

Conclusion: Securing Your Gaming Experience
Installing Riot Vanguard is an essential step for anyone looking to enjoy Valorant’s intense tactical gameplay. While its kernel-level access might initially seem daunting, Riot Games has implemented robust safeguards and maintained transparency to ensure it operates securely and with respect for user privacy. By following the clear steps outlined in this guide, from initial system checks to the core installation and crucial post-installation reboot, you can ensure Vanguard integrates seamlessly with your system.
Should you encounter any hiccups along the way, the troubleshooting section offers practical solutions for common errors, from simple restarts to advanced BIOS configurations. Remember, a clean installation, updated drivers, and an understanding of your system’s settings are your best tools for a smooth experience. Ultimately, Riot Vanguard stands as a testament to Riot Games’ dedication to fair play, protecting the competitive integrity of their titles, and fostering a gaming environment where skill and strategy truly shine. With Vanguard properly installed, you’re not just playing a game; you’re contributing to a community committed to a level playing field.
aViewFromTheCave is a participant in the Amazon Services LLC Associates Program, an affiliate advertising program designed to provide a means for sites to earn advertising fees by advertising and linking to Amazon.com. Amazon, the Amazon logo, AmazonSupply, and the AmazonSupply logo are trademarks of Amazon.com, Inc. or its affiliates. As an Amazon Associate we earn affiliate commissions from qualifying purchases.