In the ever-evolving landscape of technology, Python stands as a towering pillar, renowned for its versatility, readability, and expansive ecosystem. From powering the backbone of web applications and sophisticated data science models to driving artificial intelligence breakthroughs and automating mundane tasks, Python has cemented its status as a must-have skill for modern developers, researchers, and tech enthusiasts. For Mac users, integrating Python into their development workflow is a straightforward process, yet one that benefits from a clear, step-by-step guide to ensure optimal setup and avoid common pitfalls.
This article delves into the various methods of installing Python on a macOS system, emphasizing best practices and offering practical advice to get your development environment up and running smoothly. Whether you’re a seasoned developer or just embarking on your coding journey, understanding the nuances of Python installation on your Mac is fundamental to leveraging its full potential.
Why Python on Your Mac? Unlocking Development Potential
macOS, with its Unix-based foundation, provides an exceptionally robust and developer-friendly environment. Its powerful command-line interface, coupled with an intuitive graphical user experience, makes it an ideal platform for Python development. But why exactly should you prioritize setting up Python on your Mac?
Firstly, Python’s appeal lies in its sheer breadth of applications. With Python installed, your Mac transforms into a potent machine capable of:
- Web Development: Frameworks like Django and Flask enable the creation of dynamic, scalable web applications.
- Data Science and Machine Learning: Libraries such as NumPy, Pandas, Scikit-learn, and TensorFlow are cornerstones for data analysis, visualization, and building intelligent systems.
- Automation and Scripting: Python’s simplicity makes it perfect for automating repetitive tasks, managing files, and creating custom scripts to enhance productivity.
- Desktop Applications: Frameworks like PyQt and Kivy allow for the development of cross-platform graphical user interface (GUI) applications.
- Educational Tool: Its gentle learning curve makes Python an excellent first language for aspiring programmers.
Furthermore, macOS often comes with a pre-installed version of Python. However, this is typically an older version (Python 2.x) and is integral to the operating system’s functionality. Modifying or relying on this system Python can lead to system instability, which is why a dedicated, clean installation of Python 3.x is not just recommended, but essential for modern development. By carefully installing and managing your Python versions, you ensure a stable and efficient development environment that can tackle any project.
Pre-Installation Checks: What You Need to Know
Before diving into the installation process, it’s crucial to understand a few foundational concepts and perform some preliminary checks. These steps will help you avoid conflicts and ensure a clean setup.
Understanding Python Versions: System Python vs. Your Python
As mentioned, your Mac likely has a version of Python pre-installed. You can check this by opening your Terminal application (found in Applications/Utilities/Terminal) and typing:
python --version
If you see Python 2.x.x, that’s your system’s Python. Historically, macOS relied heavily on Python 2 for various internal scripts. It is critical that you DO NOT modify, update, or remove this system Python. Doing so can destabilize your operating system and lead to unexpected issues.
For all modern development, you will want Python 3.x. Python 2 officially reached its end-of-life in 2020, meaning it no longer receives official support or security updates. All new projects should be started with Python 3, and most contemporary libraries and frameworks are built exclusively for Python 3. Our goal is to install Python 3 alongside Python 2, ensuring that your development environment correctly defaults to Python 3 without interfering with the system’s needs.
Installing Homebrew: The Mac Package Manager
For installing third-party software on macOS, Homebrew is unequivocally the recommended tool. It’s a free and open-source package manager that simplifies the installation and management of various development tools, libraries, and applications not natively provided by Apple. Think of it as an app store for your command line.
If you don’t already have Homebrew installed, you can install it by pasting the following command into your Terminal and pressing Enter:
/bin/bash -c "$(curl -fsSL https://raw.githubusercontent.com/Homebrew/install/HEAD/install.sh)"
You might be prompted to enter your macOS password. Follow the on-screen instructions. This process will also likely install Xcode Command Line Tools, which are essential development utilities that include git, compilers, and other necessary components. If it doesn’t, you can install them separately with xcode-select --install.
Once Homebrew is installed, it’s good practice to run brew doctor to check for any potential issues and brew update to ensure Homebrew itself is up to date. Homebrew will be our primary method for installing Python, offering an easy way to manage versions and dependencies.
Method 1: The Recommended Way – Installing Python with Homebrew
Using Homebrew to install Python 3 is the most common and generally recommended method for Mac users. It offers several advantages, including easy updates, dependency management, and minimal interference with your system.
Step-by-Step Installation with Homebrew
-
Open Terminal: Launch your Terminal application.
-
Update Homebrew (Optional but Recommended): Ensure Homebrew is up to date before installing new packages.
brew update -
Install Python 3: Now, instruct Homebrew to install Python 3.
brew install python3Homebrew will download and install the latest stable version of Python 3, along with
pip(Python’s package installer),setuptools, andwheel. It will also manage linking the correct executables into your/usr/local/bindirectory, makingpython3andpip3available globally. -
Verify the Installation: After the installation completes, verify that Python 3 has been correctly installed and that your system is pointing to the Homebrew-installed version.
python3 --versionYou should see output similar to
Python 3.x.x(wherex.xrepresents the specific version number, e.g.,Python 3.10.6). If you only typepython --version, it will likely still show Python 2. This distinction is crucial.Also, verify
pip, which is Python’s package installer:pip3 --versionThis should show
pip 2x.x.x from /usr/local/lib/python3.x/site-packages/pip (python 3.x). This confirmspip3is linked to your Homebrew-installed Python 3.
Managing Your PATH for Homebrew Python
Homebrew usually handles the PATH configuration automatically. When you install Python 3 via Homebrew, it creates symbolic links in /usr/local/bin (or /opt/homebrew/bin for Apple Silicon Macs) which are typically included in your shell’s PATH environment variable. This ensures that when you type python3 or pip3, your system finds the Homebrew-installed version.
If, for some reason, your system isn’t finding python3 or you’re still hitting the system’s Python 2 when you type python, you might need to adjust your shell’s PATH.
For Zsh (default for macOS Catalina and later):
Edit ~/.zshrc:
nano ~/.zshrc
Add (or ensure exists) the following line, typically at the beginning or end:
export PATH="/usr/local/bin:$PATH"
# For Apple Silicon Macs, use:
# export PATH="/opt/homebrew/bin:$PATH"
Save and exit (Ctrl+X, Y, Enter). Then, apply the changes:
source ~/.zshrc
For Bash (older macOS versions):
Edit ~/.bash_profile or ~/.bashrc:
nano ~/.bash_profile
Add (or ensure exists) the following line:
export PATH="/usr/local/bin:$PATH"
Save and exit. Then, apply the changes:
source ~/.bash_profile
After adjusting your PATH, reopen your Terminal or source the file, then verify your Python 3 installation again.
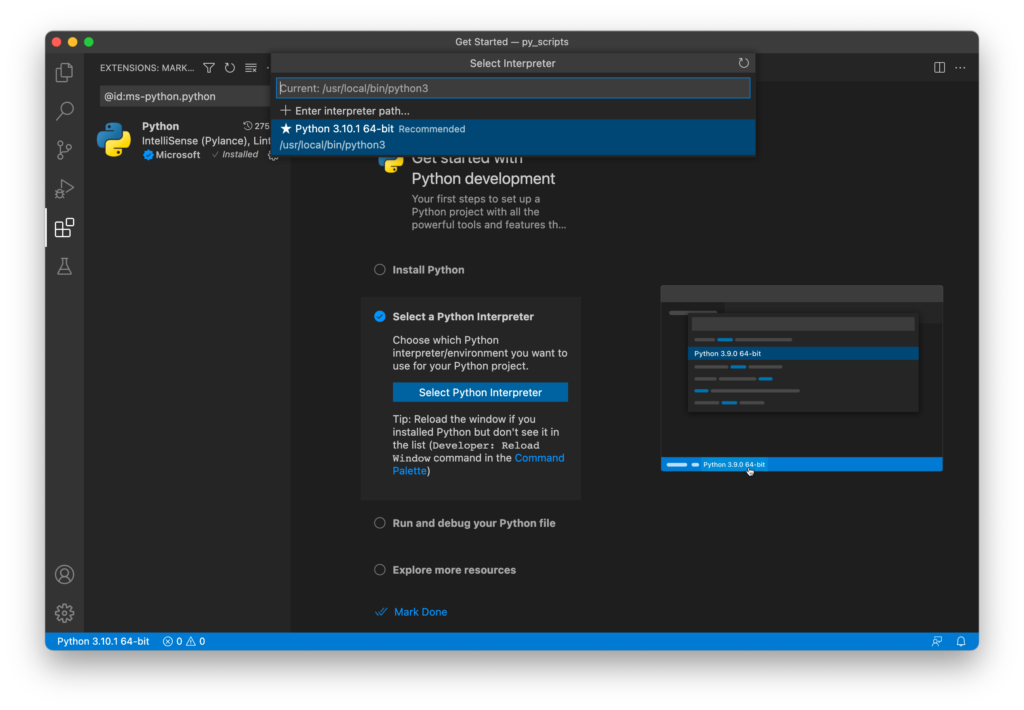
Method 2: Official Python Installer from Python.org
While Homebrew is the preferred method for many developers, installing Python directly from the official Python.org website is another valid and reliable approach, especially if you prefer a traditional installer experience or need a very specific version not readily available via Homebrew.
Step-by-Step Installation with the Official Installer
-
Visit Python.org: Open your web browser and navigate to the official Python website: https://www.python.org/downloads/macos/
-
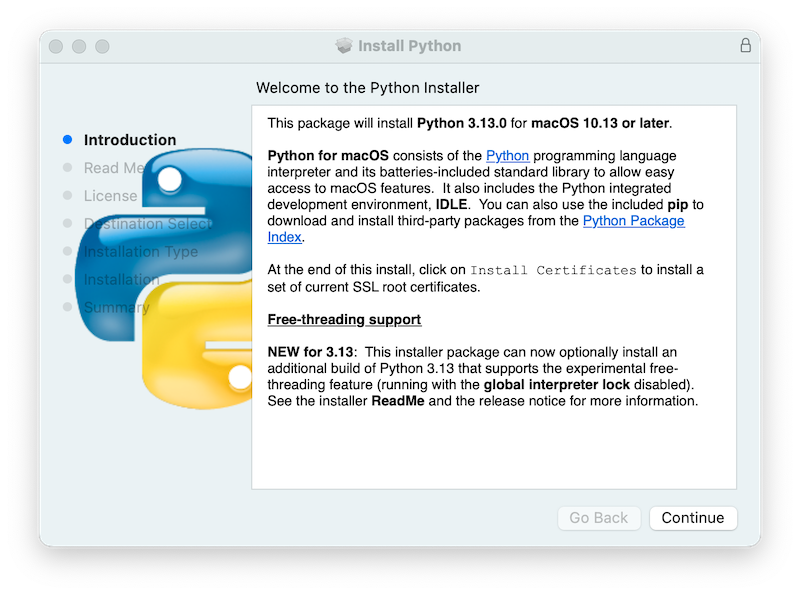
Download the Installer: On the download page, locate the latest stable Python 3 release for macOS. Click on the appropriate macOS installer link (e.g., “macOS 64-bit universal2 installer” for Apple Silicon or Intel Macs). This will download a
.pkgfile to your Downloads folder. -
Run the Installer:
- Once the download is complete, open the
.pkgfile. - The Python installer wizard will guide you through the process. Click “Continue” on the introduction, read the important information and license agreement (if desired), and then click “Continue” again.
- Agree to the terms and choose the installation location (usually the default, which is
/Library/Frameworks/Python.framework/Versions/3.x). - Click “Install.” You’ll be prompted to enter your macOS password.
- The installation will proceed, copying necessary files to your system.
- Upon successful completion, a “Summary” screen will appear. This screen often provides crucial information about where Python has been installed and how to manage your PATH. Pay close attention to any notes about modifying your
~/.zprofileor~/.bash_profile.
- Once the download is complete, open the
-
Verify the Installation:
-
Open your Terminal application.
-
The installer typically updates your PATH automatically. You should be able to type:
python3 --version
-
    And see the newly installed Python 3 version. If `python` still points to Python 2, use `python3` explicitly.
*   Verify `pip` as well:

    ```bash
    pip3 --version
    ```

If your PATH hasn't been updated, you'll need to manually add the Python 3 bin directory to your shell's PATH variable, similar to the Homebrew instructions, but pointing to the official installer's location (e.g., `/Library/Frameworks/Python.framework/Versions/3.x/bin`). The installer often provides the exact line to add.
Method 3: Xcode Command Line Tools (Complementary)
While not a direct method for installing Python 3 itself, the Xcode Command Line Tools are an indispensable collection of utilities for any developer on macOS. They provide essential tools like git (for version control), clang (a C/C++/Objective-C compiler), and various Unix tools that are often prerequisites or beneficial for Python development and dependency compilation.
You likely installed these when setting up Homebrew. However, if you chose the official installer method or are having issues, you can explicitly install them via:
xcode-select --install
This command will open a dialog box, guiding you through the installation process. Even if you install Python via Python.org, having these tools ensures that many Python packages that require compilation (e.g., those with C extensions) can be installed successfully via pip.
Post-Installation Essentials: Setting Up Your Environment
Once Python 3 is installed, there are a few crucial steps to ensure your development environment is robust and well-organized.
Understanding pip: Python’s Package Installer
pip is the standard package manager for Python. It allows you to install and manage libraries and modules that aren’t part of the Python standard library. When you installed Python 3 (either via Homebrew or the official installer), pip3 was installed alongside it.
To install a package, you use the command pip3 install [package-name]. For example, to install the popular requests library:
pip3 install requests
To see what packages you have installed:
pip3 list
To upgrade a package:
pip3 install --upgrade [package-name]
Remember to always use pip3 to ensure you’re installing packages for your Python 3 installation, not the system’s Python 2 pip.
Introduction to Virtual Environments
One of the most critical best practices in Python development is the use of virtual environments. A virtual environment is an isolated Python environment that allows you to manage dependencies for different projects separately. This prevents conflicts between packages required by different projects. For instance, Project A might need Django==3.2, while Project B requires Django==4.0. Without virtual environments, installing these conflicting versions globally would cause issues.
Python 3 comes with a built-in module called venv (virtual environment) that makes creating and managing these isolated environments straightforward.
How to Use venv
-
Navigate to your Project Directory:
First, change your directory in Terminal to where you store your project files. For example:cd ~/Documents/MyPythonProjects/MyWebApp -
Create a Virtual Environment:
Inside your project directory, create a virtual environment. It’s common practice to name the virtual environment folder.venvorvenv.python3 -m venv .venvThis command creates a new directory named
.venv(or whatever you chose) within your project folder. This directory contains a copy of the Python interpreter,pip, and other necessary files. -
Activate the Virtual Environment:
Before working on your project, you must activate the virtual environment.source .venv/bin/activateYou’ll notice your terminal prompt changes, usually by prepending
(.venv)(or the name of your virtual environment) to indicate that you are now working inside the activated environment. -
Install Project Dependencies:
With the virtual environment activated, anypip installcommands you run will install packages into this isolated environment, rather than globally.pip install django requests beautifulsoup4Now, if you run
pip list, it will only show packages installed in this specific virtual environment. -
Deactivate the Virtual Environment:
When you’re finished working on your project, you can deactivate the environment:deactivateYour terminal prompt will return to its normal state.
-
Deleting a Virtual Environment:
If you no longer need a virtual environment, simply delete its directory:rm -rf .venvVirtual environments are crucial for maintaining a clean and manageable Python development workflow. Always create and activate one for each new project.
Troubleshooting Common Python Installation Issues on Mac
Even with careful steps, you might encounter issues during or after installation. Here are some common problems and their solutions:
1. python3: command not found or Still Using Python 2
- PATH Issue: This is almost always a PATH environment variable problem. Your shell isn’t looking in the correct directories for the
python3executable.- Solution: Revisit the “Managing Your PATH” section. Ensure
/usr/local/bin(or/opt/homebrew/binfor Apple Silicon) is at the beginning of your PATH in your~/.zshrcor~/.bash_profile. After editing, runsource ~/.zshrc(or~/.bash_profile) and reopen Terminal.
- Solution: Revisit the “Managing Your PATH” section. Ensure
- Homebrew Linkage: If you used Homebrew, ensure Python was properly linked. Run
brew doctorandbrew link python3. Ifbrew doctorsuggests fixing permissions for/usr/local, follow its instructions.
2. Permissions Errors (Permission denied)
- When installing via
pip: If you seePermission deniederrors when trying topip installpackages globally, it means you’re trying to write to a system-protected directory.- Solution: NEVER use
sudo pip installglobally. This is a bad practice and can lead to broken permissions or overwrite system files. The correct solution is to use a virtual environment. Once activated, you’ll have full permissions within that environment. If you insist on a global installation (though not recommended), consider usingpip install --user [package-name], which installs packages into your user directory.
- Solution: NEVER use
3. Conflicting Python Versions
- Having multiple Python 3 installations (e.g., one from Homebrew, one from Python.org) can sometimes cause confusion.
- Solution: Stick to one primary installation method. If you’ve installed both, decide which one you want to keep. You can use
which python3to see which executable your shell is finding. To uninstall Homebrew Python:brew uninstall python3. To uninstall Python.org Python, look for an uninstaller in/Applications/Python 3.x/or manually remove theFrameworksentry and PATH modifications. Always use virtual environments to isolate project dependencies regardless of how many Python versions you have.
- Solution: Stick to one primary installation method. If you’ve installed both, decide which one you want to keep. You can use
4. pip Issues (e.g., pip not found, pip linked to wrong Python)
- Solution: Always use
pip3explicitly to ensure you’re interacting with the Python 3 package installer. Ifpip3itself is not found, it’s likely a PATH issue as described above. Ifpip3 --versionshows it’s linked to the wrong Python, you might have conflicting installations. Verifywhich pip3and ensure it points to your desired Python 3 installation (e.g.,/usr/local/bin/pip3).
5. Compiling C Extensions Failed
- Some Python packages (especially in data science) require C compilers to install.
- Solution: Ensure Xcode Command Line Tools are installed:
xcode-select --install. After installation, try reinstalling the problematic package.
- Solution: Ensure Xcode Command Line Tools are installed:
6. Homebrew Python Not Updating
- If
brew upgrade python3doesn’t seem to update Python to the very latest version, it might be due to Homebrew’s internal caching or tap updates.- Solution: Run
brew updatefirst to ensure Homebrew’s package definitions are current, thenbrew upgrade python3. Sometimes, completely uninstalling and reinstalling (brew uninstall python3thenbrew install python3) can force the latest version, but this should be a last resort.
- Solution: Run
Conclusion: Empowering Your Mac for Python Development
Installing Python on your Mac is the gateway to a world of powerful development possibilities. By understanding the distinction between system Python and your development Python, leveraging the efficiency of Homebrew, and meticulously managing dependencies with virtual environments, you lay a solid foundation for any project. Whether you’re building sophisticated web applications, crunching vast datasets, diving into machine learning, or simply automating daily tasks, your Mac, powered by Python, becomes an incredibly versatile and capable workstation.
Take the time to set up your environment correctly from the outset. This not only streamlines your workflow but also prevents headaches down the line, allowing you to focus on what truly matters: writing impactful code and bringing your innovative ideas to life. With Python 3 now firmly established on your macOS machine, you’re well-equipped to explore its boundless potential and contribute to the ever-expanding digital landscape. Happy coding!
aViewFromTheCave is a participant in the Amazon Services LLC Associates Program, an affiliate advertising program designed to provide a means for sites to earn advertising fees by advertising and linking to Amazon.com. Amazon, the Amazon logo, AmazonSupply, and the AmazonSupply logo are trademarks of Amazon.com, Inc. or its affiliates. As an Amazon Associate we earn affiliate commissions from qualifying purchases.