Pip, the package installer for Python, is an indispensable tool for any developer working with the Python ecosystem. Whether you’re diving into web development with frameworks like Django or Flask, engaging in data science with libraries like Pandas and NumPy, or exploring the cutting edge of artificial intelligence with TensorFlow and PyTorch, pip is your gateway to a vast universe of pre-built modules and tools. For Mac users, ensuring pip is correctly installed and up-to-date is a crucial first step in unlocking the full potential of Python.

This guide will walk you through the process of installing and managing pip on your macOS system. We’ll cover everything from verifying your existing installation to troubleshooting common issues, ensuring you have a smooth and productive experience.
Understanding Pip and Its Importance in the Python Ecosystem
Before we get into the installation process, it’s essential to understand what pip is and why it’s so vital. Pip stands for “Pip Installs Packages.” It’s the de facto standard package manager for Python. Think of it as an app store for Python libraries. Instead of manually downloading and configuring every single Python package you need, pip automates this entire process.
Key benefits of using pip include:
- Easy Installation: Pip allows you to install packages with a simple command, like
pip install package_name. It handles downloading the package, its dependencies, and placing them in the correct locations for your Python interpreter to find. - Dependency Management: Most Python packages rely on other packages to function. Pip automatically identifies and installs these dependencies, saving you considerable time and effort in resolving complex interdependencies.
- Version Control: Pip allows you to specify and install particular versions of packages, which is critical for maintaining compatibility and reproducibility in your projects.
- Upgrading and Uninstalling: Managing your installed packages is straightforward with pip. You can easily upgrade to the latest versions or remove packages that are no longer needed.
- Virtual Environments: While not directly part of pip’s core function, pip integrates seamlessly with Python’s virtual environment tools (like
venvandvirtualenv). These environments isolate project dependencies, preventing conflicts between different projects that might require different versions of the same package.
For anyone working with Python on a Mac, having a functional pip is non-negotiable. It streamlines development, reduces errors, and allows you to leverage the incredible power of the Python community’s contributions.
Installing Pip on Your Mac: Step-by-Step
The installation process for pip on macOS can vary slightly depending on how Python itself was installed on your system. Historically, older macOS versions came with Python 2 pre-installed, and pip might have been bundled or needed a separate installation. However, modern macOS systems, and especially if you’ve installed Python 3 yourself, pip is often included by default.
The first step is always to check if pip is already installed.
Verifying Your Pip Installation
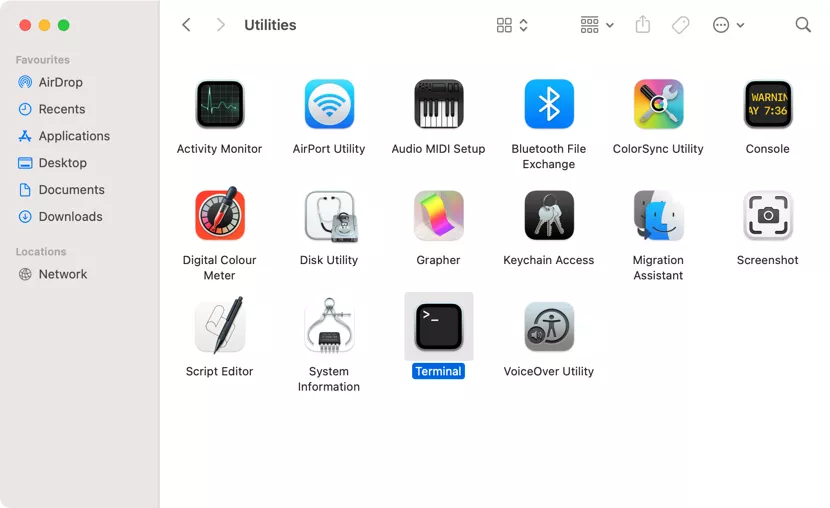
Open your Terminal application (you can find it in Applications > Utilities, or by searching with Spotlight). Once the Terminal is open, type the following command and press Enter:
pip --version
If pip is installed, you’ll see output similar to this:
pip 23.2.1 from /Library/Frameworks/Python.framework/Versions/3.10/lib/python3.10/site-packages/pip (python 3.10)
This output tells you the version of pip you have and the Python version it’s associated with.
What if you see an error?
If you receive an error message like “command not found: pip,” it means pip is either not installed or not accessible in your system’s PATH.
Important Note on Python 2 vs. Python 3:
If you are using an older system with Python 2 installed, you might need to use pip2 --version to check for pip associated with Python 2. For modern development, always prioritize Python 3. If you see an output for pip --version that refers to Python 2, and you intend to use Python 3, you should be using pip3 --version to check for pip associated with your Python 3 installation.
Let’s assume for the rest of this guide that you are primarily concerned with Python 3, which is the current standard.
Installing Pip with Python 3 (Recommended Method)
If you installed Python 3 on your Mac using the official installer from python.org, pip is almost certainly included.
1. Download and Install Python 3:
If you don’t have Python 3 installed, the best way to get it is by downloading the latest stable version from the official Python website:
- Go to https://www.python.org/downloads/macos/
- Download the latest macOS installer.
- Run the installer package and follow the on-screen instructions.
During the installation process, ensure that the option to install pip and the Python launcher is selected. This is usually enabled by default.
2. Verify Installation After Python 3 Installation:
After installing Python 3, open a new Terminal window and run:
python3 --version
This should show you the version of Python 3 you installed. Then, try checking for pip again, specifically for Python 3:
pip3 --version
If this command still returns “command not found,” don’t worry. We can proceed to install it using the ensurepip module.
Using ensurepip to Install Pip (If Not Included)
Python 3.4 and later versions come with a module called ensurepip which can be used to install pip if it’s missing.
Open your Terminal and run the following command:
python3 -m ensurepip --upgrade
python3 -m ensurepip: This tells your system to run theensurepipmodule using your Python 3 interpreter.--upgrade: This flag ensures that if pip is already partially installed, it will be upgraded to the latest available version.
After running this command, you should see output indicating that pip has been installed or upgraded. You can then verify the installation with:
pip3 --version
If the command pip3 is still not recognized, you might need to restart your Terminal session or even your computer for the changes to take effect in your shell’s PATH.
Installing Pip Using Homebrew (Alternative Method)
Homebrew is a popular package manager for macOS that simplifies the installation of software. If you use Homebrew for managing your development tools, you can use it to install Python and pip.
1. Install Homebrew (if you don’t have it):
Open your Terminal and paste the following command, then press Enter:
/bin/bash -c "$(curl -fsSL https://raw.githubusercontent.com/Homebrew/install/HEAD/install.sh)"
Follow the on-screen prompts to complete the Homebrew installation.
2. Install Python 3 with Homebrew:
Once Homebrew is installed, you can install Python 3 with:
brew install python
Homebrew will download and install the latest stable version of Python 3, and importantly, it will also install pip along with it.
3. Verify Installation:

After the Homebrew installation completes, you can verify your Python and pip installation:
python3 --version
pip3 --version
Homebrew typically handles setting up your PATH correctly, so these commands should work immediately.
Managing Your Pip Installation
Once pip is installed, you’ll want to know how to keep it updated and manage packages effectively.
Upgrading Pip to the Latest Version
It’s crucial to keep pip itself updated to benefit from the latest features, security patches, and bug fixes.
To upgrade pip, use the following command (again, using pip3 for Python 3):
pip3 install --upgrade pip
This command tells pip to install the latest version of itself, effectively upgrading your current installation. After running this, you can check the version again with pip3 --version to confirm the upgrade.
Installing and Managing Python Packages
With pip installed and updated, you can now start installing libraries.
1. Installing a Package:
To install a package, use the install command followed by the package name:
pip3 install requests
This command will download the requests library (a popular HTTP library) and its dependencies from the Python Package Index (PyPI) and install them into your Python environment.
2. Installing a Specific Version of a Package:
If your project requires a specific version of a package for compatibility reasons, you can specify it:
pip3 install requests==2.28.1
Or to install a version greater than or equal to a specific version:
pip3 install requests>=2.28.1
3. Listing Installed Packages:
To see all the packages currently installed in your Python environment, use the list command:
pip3 list
This will display a table of package names and their installed versions.
4. Uninstalling a Package:
If you no longer need a package, you can uninstall it using the uninstall command:
pip3 uninstall requests
Pip will prompt you to confirm the uninstallation.
The Importance of Virtual Environments
While not strictly a pip installation step, understanding and using virtual environments is paramount for responsible Python development. A virtual environment creates an isolated Python installation for a specific project. This means that packages installed within a virtual environment do not affect your global Python installation or other projects.
Why use virtual environments?
- Dependency Isolation: Projects often have conflicting dependencies. For example, Project A might need library X version 1.0, while Project B needs library X version 2.0. Virtual environments prevent these conflicts.
- Reproducibility: You can easily generate a list of all packages and their versions used in a virtual environment, making it simple for others (or yourself in the future) to set up the exact same environment.
- Cleanliness: Keeps your global Python installation clean and uncluttered.
Creating and Activating a Virtual Environment (using venv):
Python 3.3+ includes the venv module for creating virtual environments.
- Navigate to your project directory:
bash

cd /path/to/your/project
- Create the virtual environment:
bash

python3 -m venv .venv
This command creates a directory named.venv(you can name it anything, but.venvis a common convention) containing the virtual environment files. - Activate the virtual environment:
- On macOS/Linux:
bash

source .venv/bin/activate
- Your terminal prompt will change to indicate that the virtual environment is active (e.g.,
(.venv) your_username@your_mac ~ %).
- On macOS/Linux:
Now, any pip3 install commands you run will install packages only within this .venv environment.
Deactivating the Virtual Environment:
When you’re done working on your project, you can deactivate the environment by simply typing:
deactivate
Your terminal prompt will return to its normal state.
Troubleshooting Common Pip Installation Issues on Mac
Even with straightforward methods, you might encounter issues. Here are some common problems and their solutions:
command not found: pip or command not found: pip3
- Cause: Pip is not installed, or its executable is not in your system’s PATH.
- Solution:
- Re-run
ensurepip:python3 -m ensurepip --upgrade - Install Python 3 with Homebrew:
brew install python - Check your PATH: Ensure the
bindirectory of your Python installation is in your$PATHenvironment variable. If you installed Python from python.org, the installer usually handles this. If you installed manually or used another method, you might need to edit your shell’s configuration file (e.g.,~/.zshrcor~/.bash_profile). A common entry looks like:
bash

export PATH="/Library/Frameworks/Python.framework/Versions/3.10/bin:$PATH"
(Replace3.10with your Python version). After editing, either restart your Terminal or runsource ~/.zshrc(or your relevant file).
- Re-run
zsh: command not found: pip3 (or similar for bash)
- Cause: Your shell configuration hasn’t been updated to recognize the new command.
- Solution:
- Restart Terminal: Close and reopen your Terminal application.
- Source your shell configuration: If you’ve edited files like
~/.zshrcor~/.bash_profile, runsource ~/.zshrc(or the appropriate file) in your current Terminal session.
Permission Errors (Permission denied)
- Cause: You are trying to install packages globally without the necessary administrative privileges, or your Python installation has incorrect file permissions.
- Solution:
- Use Virtual Environments (Highly Recommended): This is the best solution. Installing packages into a virtual environment circumvents the need for administrative privileges as the environment is created within your user-owned directories.
- Avoid
sudo pip install: Usingsudo pip installis generally discouraged as it can lead to conflicts and security issues. If you absolutely must install globally and are facing permission issues, ensure your Python installation itself has correct ownership, or consider reinstalling Python with appropriate permissions.
Pip Installing to the Wrong Python Version
- Cause: You have multiple Python versions installed, and
piporpip3is pointing to an unintended one. - Solution:
- Be Explicit: Always use
python3 -m pip install package_nameto ensure pip operates with the correct Python 3 interpreter. This is the most robust way to manage packages when multiple Python versions are present. - Check Aliases and PATH: Review your shell configuration for any aliases or PATH entries that might be overriding the intended Python and pip executables.
- Be Explicit: Always use
Conclusion
Pip is an indispensable tool for any Python developer on macOS. By following this guide, you should be able to confidently install, upgrade, and manage pip on your system. Remember the importance of keeping pip updated and, most importantly, embracing virtual environments for clean, reproducible, and conflict-free Python development. With pip at your fingertips, you’re well-equipped to explore the vast and exciting world of Python libraries and frameworks, accelerating your journey into technology, branding innovation, or financial mastery.
aViewFromTheCave is a participant in the Amazon Services LLC Associates Program, an affiliate advertising program designed to provide a means for sites to earn advertising fees by advertising and linking to Amazon.com. Amazon, the Amazon logo, AmazonSupply, and the AmazonSupply logo are trademarks of Amazon.com, Inc. or its affiliates. As an Amazon Associate we earn affiliate commissions from qualifying purchases.