In the rapidly evolving world of technology, Python has solidified its position as one of the most versatile and widely-used programming languages. From web development and data science to artificial intelligence and automation, Python’s extensive ecosystem of libraries and frameworks empowers developers to build incredible applications. At the heart of managing this ecosystem, especially for those working on a Windows operating system, lies Pip.
Pip, the package installer for Python, is an indispensable tool that simplifies the process of installing, upgrading, and managing Python packages. For anyone diving into Python development on Windows, understanding how to properly install and utilize Pip is not just a convenience—it’s a foundational skill that unlocks immense productivity and access to countless community-contributed tools. Without Pip, navigating Python’s vast array of external libraries would be a tedious and often frustrating manual process.
This comprehensive guide will walk you through everything you need to know about installing Pip on your Windows machine. We’ll cover the standard methods, troubleshooting common issues, and even delve into best practices that will enhance your development workflow and ensure a secure, efficient environment. By the end of this article, you’ll be fully equipped to manage Python packages like a seasoned professional, ready to leverage the full power of Python’s incredible library ecosystem.
Understanding Pip and Python’s Ecosystem
Before we delve into the installation specifics, it’s crucial to grasp what Pip is and why it holds such a pivotal role in the Python development landscape. This foundational understanding will underscore the importance of its proper installation and integration into your workflow, particularly within a Windows environment.
What is Pip? The Package Installer for Python
Pip stands for “Pip Installs Packages,” a recursive acronym that perfectly encapsulates its primary function. Essentially, Pip is a command-line utility that allows you to install and manage additional libraries and dependencies that are not part of the Python standard library. These external packages, often developed by the community, extend Python’s capabilities significantly, enabling developers to tackle a wide range of tasks without having to write every piece of code from scratch.
When you install Python, you get a core set of functionalities. However, real-world projects almost always require specialized tools—think web frameworks like Django or Flask, data analysis libraries like Pandas or NumPy, or machine learning toolkits like TensorFlow or scikit-learn. Pip is the bridge that connects your Python installation to these thousands of freely available packages, hosted on the Python Package Index (PyPI). It automates the process of downloading, compiling (if necessary), and integrating these packages into your Python environment, managing dependencies along the way.
Why is Pip Crucial for Developers? Enhancing Productivity and Capability
For any serious Python developer, especially those operating within the Windows ecosystem, Pip is more than just a convenience; it’s a cornerstone of productivity and project management.
- Access to a Rich Ecosystem: The primary benefit of Pip is granting access to PyPI, which hosts over 400,000 Python packages. This vast repository means that for almost any problem you encounter, there’s likely a well-tested, open-source solution already available. This saves countless hours of development time and allows you to focus on the unique logic of your application rather than reinventing the wheel.
- Simplified Dependency Management: Complex projects often rely on multiple packages, each with its own set of dependencies. Manually tracking and installing these could be a nightmare. Pip handles this automatically, resolving dependencies and ensuring that all necessary components are installed in compatible versions. This is critical for maintaining stable and reproducible development environments, contributing directly to developer productivity.
- Version Control and Upgrades: Pip allows you to specify exact package versions for your projects, ensuring consistency across different development environments or team members. It also provides straightforward commands to upgrade or uninstall packages, keeping your environment clean and up-to-date with the latest features and security patches.
- Community and Collaboration: The ability to easily share and install packages fosters a vibrant and collaborative Python community. Developers can publish their own tools to PyPI, making them accessible to others worldwide, further accelerating innovation and problem-solving across various domains.
Prerequisites: Ensuring Python is Installed Correctly
Before you can install and use Pip, Python itself must be properly installed on your Windows system. Modern Python installers for Windows typically include Pip by default, which simplifies the process considerably. However, it’s always good practice to verify your Python installation and ensure it’s correctly configured, especially concerning system PATH variables.
-
Check for Python Installation: Open your Command Prompt or PowerShell (search for “cmd” or “powershell” in the Windows search bar) and type:
python --versionor
py --versionIf Python is installed and correctly added to your system’s PATH, you will see the installed Python version (e.g.,
Python 3.9.7). If you get an error like'python' is not recognized as an internal or external command, operable program or batch file., it means Python is either not installed or not properly configured in your system’s PATH. -
Downloading Python (If Needed): If Python isn’t installed, or you wish to update to a newer version, visit the official Python website at
python.org/downloads/. Download the latest stable release for Windows. During the installation process, pay close attention to an important checkbox.Crucial Step During Python Installation: When running the Python installer, ensure you check the box that says “Add Python X.X to PATH” (where X.X is your Python version). This step is absolutely critical as it allows you to run Python and Pip commands directly from any directory in your Command Prompt or PowerShell, saving you from navigating to specific Python installation folders. Skipping this step is the most common reason for “Pip not recognized” errors later on.
Once Python is installed and its path is configured, you’re ready to proceed with verifying and potentially installing Pip.
The Standard Method: Installing Pip with Python (and Verifying)
For the vast majority of users, installing Pip in Windows is an almost effortless process, as it comes bundled with recent Python installations. This section details how to confirm its presence and keep it updated.
Fresh Python Installation: Pip Included by Default
Since Python 3.4, Pip has been included by default with the Python installer. This means that if you’ve recently downloaded and installed a modern version of Python from python.org, Pip is most likely already present and ready to use. This streamlined approach significantly reduces the complexity that developers once faced, allowing them to jump straight into package management.
Steps for a Clean Python Installation:
- Download the Installer: Go to
python.org/downloads/windows/and download the appropriate installer for your system (e.g., “Windows installer (64-bit)” for most modern PCs). - Run the Installer: Double-click the downloaded
.exefile. - Crucial Checkbox: On the first screen of the installer, ensure the “Add Python X.X to PATH” checkbox is checked. This is arguably the most important step for a hassle-free experience with both Python and Pip.
- Proceed with Installation: Choose “Install Now” for a standard installation or “Customize installation” if you need to adjust specific components or the installation path. For most users, “Install Now” is sufficient and includes Pip.
- Complete Installation: Follow the on-screen prompts until the installation is complete. You might see a “Disable path length limit” option; it’s generally safe to click this if you encounter it, as it helps prevent potential issues with deeply nested file paths later on.
Once Python is installed, you can proceed to verify Pip’s presence and functionality.
Verifying Pip Installation
After installing Python, or if you believe Pip should already be installed, verifying its presence is a straightforward command-line check.
- Open Command Prompt/PowerShell: Search for “cmd” or “powershell” in the Windows search bar and open the application.
- Verify Python: First, confirm Python is accessible by typing:
bash

python --version
or
bash

py --version
You should see your Python version. If this command fails, refer back to the “Prerequisites” section regarding Python installation and PATH configuration. - Verify Pip: Once Python is confirmed, verify Pip by typing:
bash

pip --version
If Pip is successfully installed and its path is correctly configured, you will see output similar to:
pip 22.0.4 from C:Python39libsite-packagespip (python 3.9)
This output confirms the Pip version and the Python version it’s associated with. If you get a “command not found” error, it usually indicates a PATH issue or that Pip wasn’t installed (perhaps with an older Python version).
Troubleshooting: What if pip command is not found?
If pip --version results in an error, try using the python -m invocation, which explicitly tells Python to run the Pip module:
python -m pip --version
If this command works, it means Pip is installed, but its executable directory (C:PythonXXScripts) might not be in your system’s PATH environment variable. In such cases, you can generally use python -m pip for all your Pip commands, or you can manually add the Scripts directory to your PATH (explained in a later section).
Upgrading Pip to the Latest Version
Even if Pip is installed, it’s a good practice to ensure you have the latest version. Newer versions of Pip often include bug fixes, performance improvements, and new features that enhance its reliability and security. Regularly updating your tools is a fundamental aspect of maintaining a robust development environment, especially from a digital security standpoint, as it helps patch potential vulnerabilities.
To upgrade Pip, open your Command Prompt or PowerShell and execute the following command:
python -m pip install --upgrade pip
Explanation of the command:
python -m pip: This tells Python to run the Pip module. It’s the most robust way to invoke Pip, ensuring you’re using the Pip associated with your current Python installation, especially if you have multiple Python versions.install: This is the Pip command to install packages.--upgrade: This flag tells Pip to upgrade the specified package if it’s already installed.pip: This is the package name we want to install/upgrade (in this case, Pip itself).
After running this command, Pip will download and install the latest version of itself. You should see output indicating a successful upgrade. You can then run pip --version again to confirm the new version.
Manual Installation of Pip (For Older Python Versions or Special Cases)
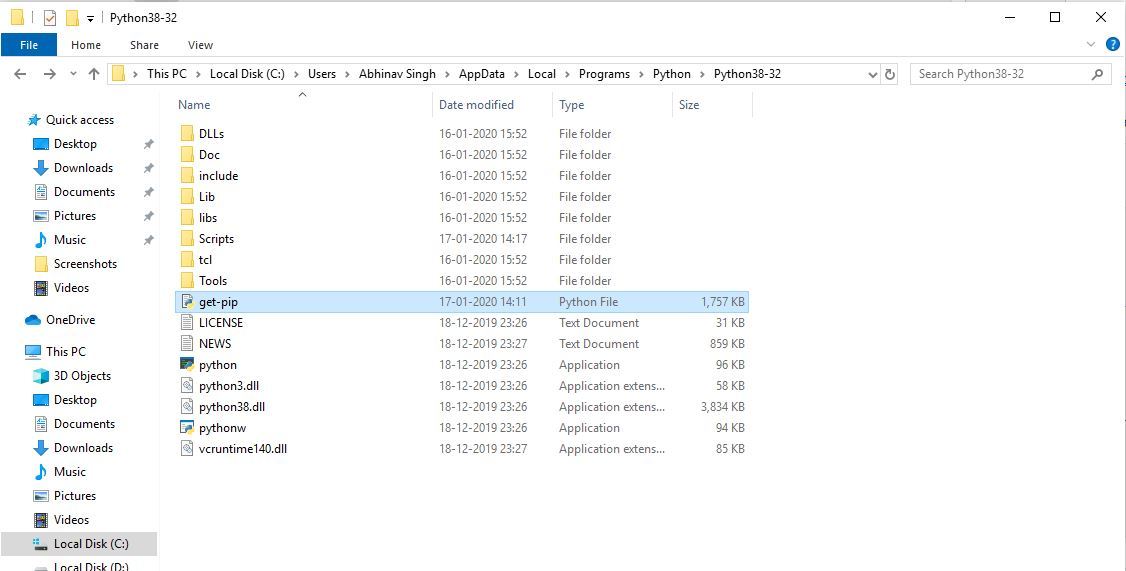
While modern Python installations include Pip, there might be scenarios where you need to install it manually. This typically applies to older Python versions (pre-3.4) or in environments where the standard installer wasn’t used, or if for some reason Pip got corrupted. This method involves downloading a get-pip.py script and executing it.
Downloading get-pip.py
The get-pip.py script is a bootstrapping utility provided by the Pip developers to install Pip into a Python environment.
- Open Command Prompt/PowerShell:
- Navigate to a temporary directory: It’s good practice to download utility scripts into a temporary location. For example:
bash

cd C:Temp
(You might need to create theC:Tempdirectory first if it doesn’t exist). - Download the script: You can download
get-pip.pyusing a web browser by navigating tohttps://bootstrap.pypa.io/get-pip.pyand saving the file, or more conveniently, directly from your command line usingcurl:
bash

curl https://bootstrap.pypa.io/get-pip.py -o get-pip.py
Ifcurlis not available, you can use PowerShell’sInvoke-WebRequest:
powershell

Invoke-WebRequest -Uri https://bootstrap.pypa.io/get-pip.py -OutFile get-pip.py
Make sure theget-pip.pyfile is successfully downloaded into your current directory.
Running get-pip.py to Install Pip
Once the get-pip.py script is downloaded, you can execute it using Python to install Pip.
-
Ensure you are in the directory where
get-pip.pyis saved. (e.g.,C:Temp). -
Run the script using Python:
python get-pip.pyor, if you have multiple Python versions and want to target a specific one:
py -3.9 get-pip.py(Replace
3.9with your desired Python version).The script will output a series of messages as it installs Pip and its dependencies (like
setuptoolsandwheel). If successful, you will see messages indicating that Pip has been installed.

- Verify Pip: After the script finishes, try verifying Pip installation as described in the previous section:
bash

pip --version
or
bash

python -m pip --version
Adding Pip to System PATH (If Not Automatically Added)
Occasionally, even after installing Pip, the pip command might not be directly recognized from the command line, especially if you installed Python without adding it to PATH or if you used the manual get-pip.py method and it didn’t configure PATH automatically. This means the directory containing the pip.exe executable isn’t included in your system’s list of searchable locations.
Understanding the PATH Variable: The system PATH environment variable is a list of directories where the operating system looks for executable files when you type a command. If an executable’s directory is not in PATH, you have to type its full path to run it, which is inconvenient.
Steps to Manually Add Pip to PATH:
-
Locate Pip’s Script Directory: Pip executables are typically found in the
Scriptssubfolder of your Python installation. For example, if Python 3.9 is installed inC:Python39, Pip will be inC:Python39Scripts.- To find your Python installation path, open Command Prompt and type
where python. This will show you the path to yourpython.exe. TheScriptsdirectory will be in the same parent folder.
- To find your Python installation path, open Command Prompt and type
-
Open Environment Variables:
- Right-click on “This PC” (or “My Computer”) on your desktop or in File Explorer, and select “Properties.”
- Click on “Advanced system settings” on the left pane.
- In the “System Properties” window, click the “Environment Variables…” button.
-
Edit System PATH:
- Under “System variables” (the bottom section), find the variable named
Pathand select it. - Click “Edit…”.
- In the “Edit environment variable” window, click “New” and add the path to your Python’s
Scriptsdirectory (e.g.,C:Python39Scripts). - Also, ensure that your Python installation’s main directory (e.g.,
C:Python39) is also present in the PATH. If not, add it as well. - Click “OK” on all open windows to save the changes.
- Under “System variables” (the bottom section), find the variable named
-
Restart Command Prompt/PowerShell: For the changes to take effect, you must close and reopen any Command Prompt or PowerShell windows you have open.
-
Verify Pip: Open a new Command Prompt and try
pip --versionagain. It should now work.
Common Pitfalls and Troubleshooting
Installing Pip in Windows is usually straightforward, but sometimes issues arise. Knowing how to diagnose and resolve these common problems can save significant time and frustration, maintaining your development productivity.
“pip is not recognized…” Error
This is by far the most frequent issue encountered by new users. It almost always boils down to problems with the system’s PATH environment variable.
- Reiterate PATH Issues: As discussed, if the directory containing
pip.exe(usuallyC:PythonXXScripts) is not in your system’s PATH, Windows won’t know where to find thepipcommand. Refer to the “Adding Pip to System PATH” section above for detailed steps on how to fix this. Remember to close and reopen your command prompt after making changes to the PATH. - Use
python -m pip: Even ifpipdirectly doesn’t work,python -m pipoften will. This is becausepython -mexplicitly tells your Python interpreter to execute a module (in this case,pip), bypassing the need forpipitself to be in the system PATH. It’s a robust workaround and often considered a best practice, especially when dealing with multiple Python versions. - Verify Python Installation: Ensure Python itself is correctly installed and its main directory is in PATH. If
python --versiondoesn’t work, then Pip won’t either.
Proxy Settings
If you are behind a corporate proxy or a network that requires proxy configuration, Pip might fail to download packages from PyPI.
- Configure Proxy for Pip: You can configure Pip to use a proxy by setting environment variables or by passing options directly to the
pipcommand.- Environment Variables:
bash

set HTTP_PROXY=http://username:password@proxyserver:port

set HTTPS_PROXY=https://username:password@proxyserver:port
(Replaceusername,password,proxyserver, andportwith your actual proxy details.)
These variables need to be set in your Command Prompt session before running Pip commands, or permanently set in your system’s Environment Variables. - Direct Command Line Options:
bash

pip install <package_name> --proxy http://username:password@proxyserver:port
- Environment Variables:
Permission Errors (e.g., “Permission denied”)
When Pip tries to install packages globally (into the Python installation directory), it might encounter permission issues, especially if your user account doesn’t have administrative privileges for that directory.
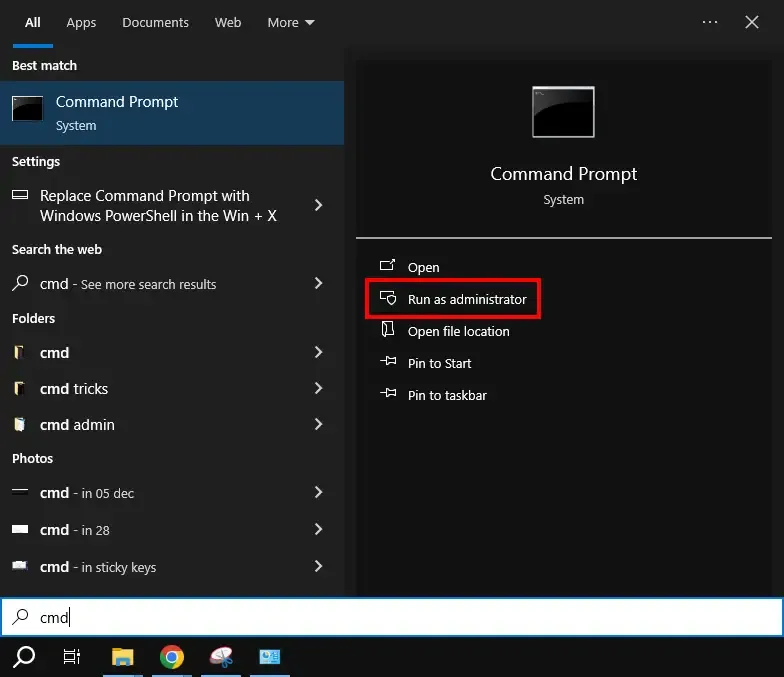
- Run Command Prompt as Administrator: The simplest solution is often to run your Command Prompt or PowerShell with administrative privileges. Right-click on the Command Prompt/PowerShell icon and select “Run as administrator.” Then, retry your Pip command.
- Use the
--userflag: If running as administrator isn’t feasible or desired, you can instruct Pip to install packages into your user directory instead of the system-wide Python installation. This typically doesn’t require administrator privileges.
bash

pip install <package_name> --user
Packages installed with--userare placed in a user-specific site-packages directory (e.g.,%APPDATA%PythonPythonXXsite-packageson Windows).
Outdated Pip Version Issues
An old version of Pip might have bugs or lack compatibility with newer packages or Python versions. This can lead to installation failures or unexpected behavior.
- Always Upgrade Pip First: Before troubleshooting other package installation issues, ensure your Pip version is up-to-date. As mentioned earlier, run:
bash

python -m pip install --upgrade pip
An outdated Pip might also warn you about itself, usually with a message indicating a newer version is available and suggesting the upgrade command. Heed these warnings!
Leveraging Pip for Development Productivity and Security
Once Pip is successfully installed and functioning, you unlock a powerful suite of tools that significantly boost your development productivity and enable more secure coding practices. Understanding how to use Pip effectively goes beyond just installing packages; it involves managing your project dependencies and maintaining a healthy development environment.
Basic Pip Commands: The Essentials
Mastering these fundamental Pip commands will empower you to manage your Python projects efficiently.
-
pip install <package_name>: This is the most common command, used to install a package and its dependencies from PyPI.- Example:
pip install requests(to install the HTTP library) - To install a specific version:
pip install requests==2.27.1 - To install a range of versions:
pip install 'requests>=2.27.0,<2.28.0'
- Example:
-
pip uninstall <package_name>: Removes an installed package and its associated files. Pip will usually ask for confirmation before proceeding.- Example:
pip uninstall requests
- Example:
-
pip list: Displays a list of all installed packages in your current environment, along with their versions. This is incredibly useful for getting an overview of what’s available. -
pip freeze > requirements.txtandpip install -r requirements.txt: These commands are crucial for project management and reproducibility.pip freeze > requirements.txt: Generates arequirements.txtfile containing all installed packages and their exact versions in your current environment. This file is essential for sharing your project’s dependencies with others or for recreating your environment later.pip install -r requirements.txt: Installs all packages listed in therequirements.txtfile. This allows you to set up a new environment with the exact same dependencies as a previous one, ensuring consistency across different machines or development stages.
Virtual Environments: Best Practices for Project Isolation
While installing packages globally works, it’s generally considered a poor practice for real-world projects. The best practice for managing dependencies is to use virtual environments. A virtual environment is an isolated Python environment that allows you to install packages for a specific project without affecting other projects or the global Python installation. This is vital for avoiding dependency conflicts (e.g., Project A needs packageX==1.0, while Project B needs packageX==2.0).
-
Why use
venvorvirtualenv?- Isolation: Each project gets its own set of installed packages.
- Dependency Conflict Prevention: Prevents “dependency hell” where different projects require conflicting versions of the same library.
- Cleanliness: Keeps your global Python installation lean and clean.
- Reproducibility: Easier to share and replicate project environments using
requirements.txt.
-
Commands for Creating and Activating a Virtual Environment:
- Navigate to your project directory:
bash

cd C:UsersYourUserDocumentsMyPythonProject
- Create a virtual environment:
bash

python -m venv venv
(This creates a directory namedvenvinside your project folder, containing a new, isolated Python installation.) - Activate the virtual environment:
bash

.venvScriptsactivate
You’ll know it’s active when your command prompt changes to include(venv)at the beginning of the line. - Install packages within the virtual environment: Now, any
pip installcommands you run will install packages only into this specific virtual environment.
bash

(venv) pip install django

(venv) pip install pandas
- Deactivate the virtual environment: When you’re done working on the project, simply type:
bash

deactivate
- Navigate to your project directory:
Embracing virtual environments is a huge step towards professional Python development, significantly enhancing your productivity and reducing potential headaches down the line.
Security Considerations with Package Management
In the realm of digital security, neglecting package management can open doors to vulnerabilities. Pip, while incredibly useful, also needs to be used with a security-conscious mindset.
- Only Install from Trusted Sources (PyPI): The Python Package Index (PyPI) is the official and most trusted repository for Python packages. While it has mechanisms to filter malicious packages, caution is always advised. Avoid downloading
.whlfiles or other package archives from unofficial or unknown sources. - Regularly Update Packages: Outdated packages can contain known security vulnerabilities. Regularly checking for and applying updates to your project’s dependencies is crucial.
- Use
pip list --outdatedto see which packages have newer versions available. - Then,
pip install --upgrade <package_name>for each, or consider tools likepip-toolsfor more advanced dependency synchronization.
- Use
- Be Mindful of Package Dependencies: When you install a package, Pip automatically installs its dependencies. These sub-dependencies can also have vulnerabilities. While you can’t manually vet every single dependency, using trusted, well-maintained top-level packages reduces risk.
- Audit Dependencies for Vulnerabilities: For critical applications, consider integrating tools that scan your
requirements.txtfile for known vulnerabilities (e.g.,safetyfrom PyPI). This proactive approach is a key component of modern software supply chain security.
By adhering to these best practices, you can leverage Pip’s power securely, ensuring your Python applications remain robust and protected against common threats.
Conclusion
Installing Pip in Windows is a fundamental step for any aspiring or experienced Python developer. This comprehensive guide has walked you through the process, from understanding Pip’s crucial role in the Python ecosystem to executing the standard installation, tackling manual setups, and troubleshooting common issues. We’ve also emphasized the importance of best practices like upgrading Pip, utilizing virtual environments for project isolation, and adhering to security considerations when managing packages.
By mastering Pip, you unlock the full potential of Python’s vast library of packages, significantly boosting your productivity and enabling you to build more complex and powerful applications. Whether you’re venturing into data science, web development, automation, or AI, Pip will be your constant companion, ensuring that you have access to the tools you need. Keep your Pip up-to-date, manage your environments wisely, and explore the endless possibilities that Python and its rich package ecosystem offer. Happy coding!
aViewFromTheCave is a participant in the Amazon Services LLC Associates Program, an affiliate advertising program designed to provide a means for sites to earn advertising fees by advertising and linking to Amazon.com. Amazon, the Amazon logo, AmazonSupply, and the AmazonSupply logo are trademarks of Amazon.com, Inc. or its affiliates. As an Amazon Associate we earn affiliate commissions from qualifying purchases.