In the vast landscape of digital image manipulation, Paint.NET stands out as a remarkably powerful, free, and intuitive raster graphics editor. Developed by Microsoft, it offers a sophisticated balance between user-friendliness and a robust feature set, making it a favorite among hobbyists, students, and professionals who need a capable tool without the hefty price tag of commercial alternatives. While Paint.NET provides a comprehensive array of built-in features for photo retouching, drawing, and graphic design, its true potential for customization and enhanced productivity is unlocked through its extensive plugin ecosystem.
Plugins are essentially small software modules that extend the functionality of a parent application. For Paint.NET, these community-driven add-ons can introduce everything from new artistic effects and advanced adjustments to support for additional file formats and specialized tools. Learning how to properly install and manage these plugins is not just about adding new features; it’s about transforming your workflow, expanding your creative horizons, and tailoring the software to perfectly match your specific needs as a digital artist or image editor. This comprehensive guide will walk you through everything you need to know about installing Paint.NET plugins, ensuring you can harness their full power to elevate your digital creations.
Understanding Paint.NET Plugins: The Power of Customization
Before diving into the installation process, it’s crucial to grasp what Paint.NET plugins are, why they are so valuable, and the different forms they might take. This foundational understanding will help you navigate the plugin library effectively and make informed choices that best suit your creative and technical requirements.
What are Paint.NET Plugins?
At their core, Paint.NET plugins are dynamic-link library (DLL) files, specifically designed to integrate seamlessly with the Paint.NET application. These DLLs contain code that, when loaded by Paint.NET, introduces new functionalities that aren’t natively available in the standard software package. Unlike some complex software architectures where plugins might require extensive setup or their own interfaces, Paint.NET plugins are typically straightforward to install and use, often appearing directly within the program’s existing menus.
The beauty of Paint.NET’s plugin architecture lies in its open nature, allowing a vibrant community of developers to create and share an astonishing variety of extensions. This collective effort ensures that Paint.NET remains adaptable and capable of meeting evolving user demands and creative trends, making it a living, breathing tool that continuously grows and improves beyond its core development.
Why Use Plugins? Unleashing Creative Potential
The immediate question for many new users might be: “Why bother with plugins when Paint.NET already does so much?” The answer lies in the concept of tailored enhancement and expanded capability. While the core Paint.NET application is excellent, plugins offer several compelling advantages:
- Unleashing New Effects: Imagine needing a specific artistic filter, a unique distortion, or an advanced rendering effect that isn’t built-in. Plugins often provide a treasure trove of such creative tools, from simulating oil paintings and watercolors to generating complex fractal patterns or sophisticated lighting effects.
- Enhanced Adjustments: While Paint.NET has standard brightness, contrast, and color balance tools, plugins can introduce more granular control. This could mean advanced curves and levels adjustments, specialized sharpening algorithms, intelligent noise reduction, or highly customizable color grading options that allow for professional-grade image refinement.
- Broader File Format Support: Out-of-the-box, Paint.NET supports many common image formats. However, designers often encounter less common or proprietary formats, such as Photoshop Document (PSD) files with layers, DirectDraw Surface (DDS) files for game textures, or animated GIFs with advanced frame control. Plugins bridge these gaps, enabling seamless workflow integration with other software and industries.
- Specialized Tools and Utilities: Beyond effects and adjustments, some plugins introduce entirely new tools or utilities. While less common, these might include specialized selection methods, text manipulation enhancements, or batch processing capabilities that significantly boost productivity for repetitive tasks.
By embracing plugins, you effectively transform Paint.NET from a capable editor into a highly personalized creative powerhouse, optimized for your specific projects and artistic vision.
Types of Paint.NET Plugins
Paint.NET plugins generally fall into a few distinct categories, which also dictates where their respective .dll files need to be placed during installation:
- Effects Plugins: These are the most common type. They appear under the “Effects” menu in Paint.NET and are used to apply various visual transformations to your image. This includes artistic filters, distortions, blur effects, sharpening tools, and procedural generators. Examples often include “Sharpen+,” “Gaussian Blur+,” or various artistic filters that mimic traditional media.
- Adjustments Plugins: These plugins are designed to modify the color, tone, contrast, and other photographic qualities of an image. They typically appear under the “Adjustments” menu. While similar to effects, their focus is on correcting or enhancing image quality rather than applying stylistic transformations. “Curves+” and “Levels+” are classic examples, offering more advanced control than their built-in counterparts.
- File Type Plugins: These plugins enable Paint.NET to open and save image files in formats not natively supported. Once installed, they typically integrate directly into the “File” > “Open” and “File” > “Save As” dialogs. The “PSD Plugin” (for Photoshop files) and the “DDS Plugin” are prime examples, crucial for workflows involving game development or professional design exchanges.
- Tools Plugins: While less prevalent than effects or adjustments, some plugins might introduce entirely new tools to the Paint.NET toolbox. These might offer specialized selection methods, drawing aids, or other interactive functionalities. Their integration point can vary, sometimes appearing in the Tools window or as a new menu item.
Understanding these categories is vital, as it directly influences where you need to place the plugin files to ensure they are correctly detected and loaded by Paint.NET.
Preparing for Plugin Installation: Essential Prerequisites and Best Practices
Before you embark on the exciting journey of expanding Paint.NET’s capabilities, a few preparatory steps and best practices are essential. These measures ensure a smooth installation process, mitigate potential issues, and safeguard your system and existing work.
Ensuring You Have Paint.NET Installed
This might seem obvious, but it’s the fundamental prerequisite. Ensure you have a stable, up-to-date version of Paint.NET installed on your system. You can always download the latest official version from the official Paint.NET website (getpaint.net). Running the most current version minimizes compatibility issues with newer plugins and ensures you benefit from the latest performance enhancements and bug fixes. If you’re using an older version, consider updating it before adding new plugins, as some newer plugins might require specific functionalities present only in recent releases.
Understanding the Plugin Folder Structure
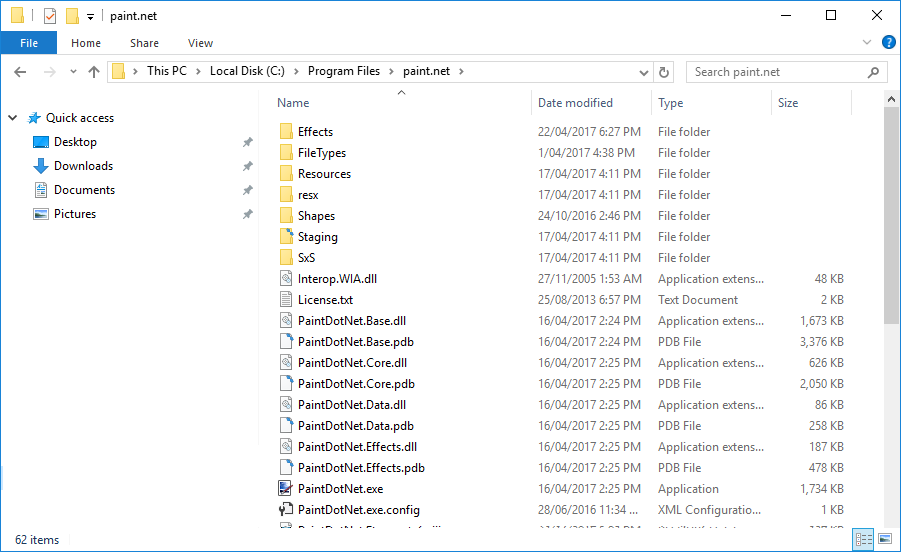
Paint.NET organizes its plugins into specific subfolders within its installation directory. Knowing where these folders are and what they’re for is critical for correct plugin placement:
EffectsFolder: This is where you’ll place plugins that appear under the “Effects” menu or “Adjustments” menu. Most effect and adjustment plugins will go here. The typical path isC:Program Filespaint.netEffects.FileTypesFolder: This folder is exclusively for plugins that add support for new image file formats. The typical path isC:Program Filespaint.netFileTypes.
It’s important to note that the exact path might vary slightly if you installed Paint.NET to a custom location. You can usually find the installation directory by right-clicking on your Paint.NET shortcut and selecting “Open file location” or by navigating to C:Program Filespaint.net or C:Program Files (x86)paint.net on a 64-bit system.
Safety First: Downloading Plugins Responsibly
The vast majority of Paint.NET plugins are developed by passionate community members and are safe to use. However, as with any software downloaded from the internet, exercising caution is paramount:
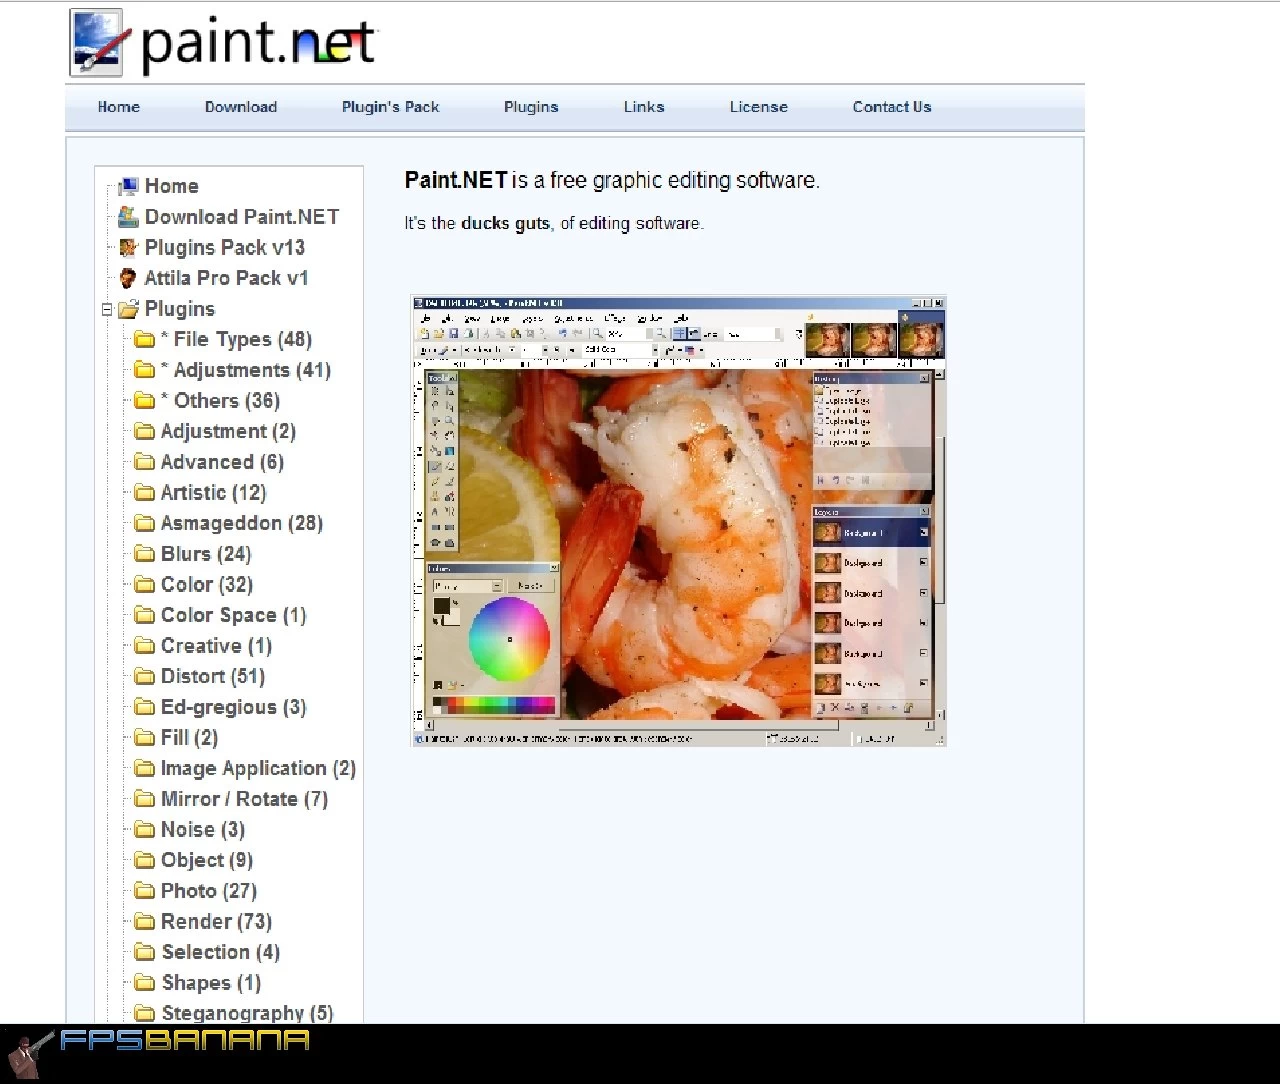
- Trusted Sources: Always download plugins from reputable sources. The official Paint.NET forum (forums.getpaint.net) is the primary and most trustworthy hub for plugin development and distribution. Developers often maintain dedicated threads for their plugins, providing details, updates, and user feedback. Avoid random, unofficial websites that claim to offer “plugin packs” or “premium plugins” unless they link directly back to the original developer’s thread on the official forum.
- Check Dates and Compatibility: Before downloading, check the plugin’s release date and any mentioned compatibility requirements. An old plugin might not work with the latest version of Paint.NET, or it might introduce instability.
- Antivirus Software: Ensure your antivirus software is active and up-to-date. While rare for legitimate Paint.NET plugins, malicious software can sometimes be disguised as useful utilities. Scan any downloaded ZIP files before extracting and installing.
- Read Reviews: Look for user feedback and comments on the plugin thread. This can offer valuable insights into its stability, performance, and whether other users have encountered issues.
Backup Your Work (and Paint.NET Settings)
While plugin installation is generally safe, it’s always good practice to perform a quick backup, especially if you’re installing many plugins or those from less familiar developers:
- Current Projects: Save and backup any ongoing Paint.NET projects before you start modifying the software.
- Paint.NET Installation Folder: If you’re particularly cautious, you could create a copy of your entire
paint.netinstallation folder before adding new plugins. This allows for a quick rollback if something goes wrong. - User Data: Paint.NET stores some user preferences and custom palettes. While plugins rarely affect these, knowing where they are (usually in your
AppDatafolder) can be useful for troubleshooting.
These preparatory steps might seem extensive, but they lay the groundwork for a secure, efficient, and hassle-free plugin installation experience, ensuring your creative workflow remains uninterrupted.
Step-by-Step Guide: Installing Your First Paint.NET Plugin
With your preparations complete, you’re ready to add new capabilities to Paint.NET. This section provides a clear, step-by-step guide to downloading, extracting, and installing plugins, making the process straightforward even for first-time users.
Locating and Downloading Plugins
The first step is to find the plugins that interest you. As mentioned, the official Paint.NET forum is your go-to resource:
- Navigate to the Forum: Open your web browser and go to
forums.getpaint.net. - Browse the Plugin Section: Look for the “Plugins” or “Plugin Index” section. This area often has subcategories or a comprehensive list of available plugins.
- Search for Specific Functionality: If you’re looking for something specific (e.g., “sharpening plugin,” “PSD support”), use the forum’s search function.
- Open Plugin Threads: Click on the thread for a plugin that catches your eye. Read the description, view screenshots, and check the developer’s instructions.
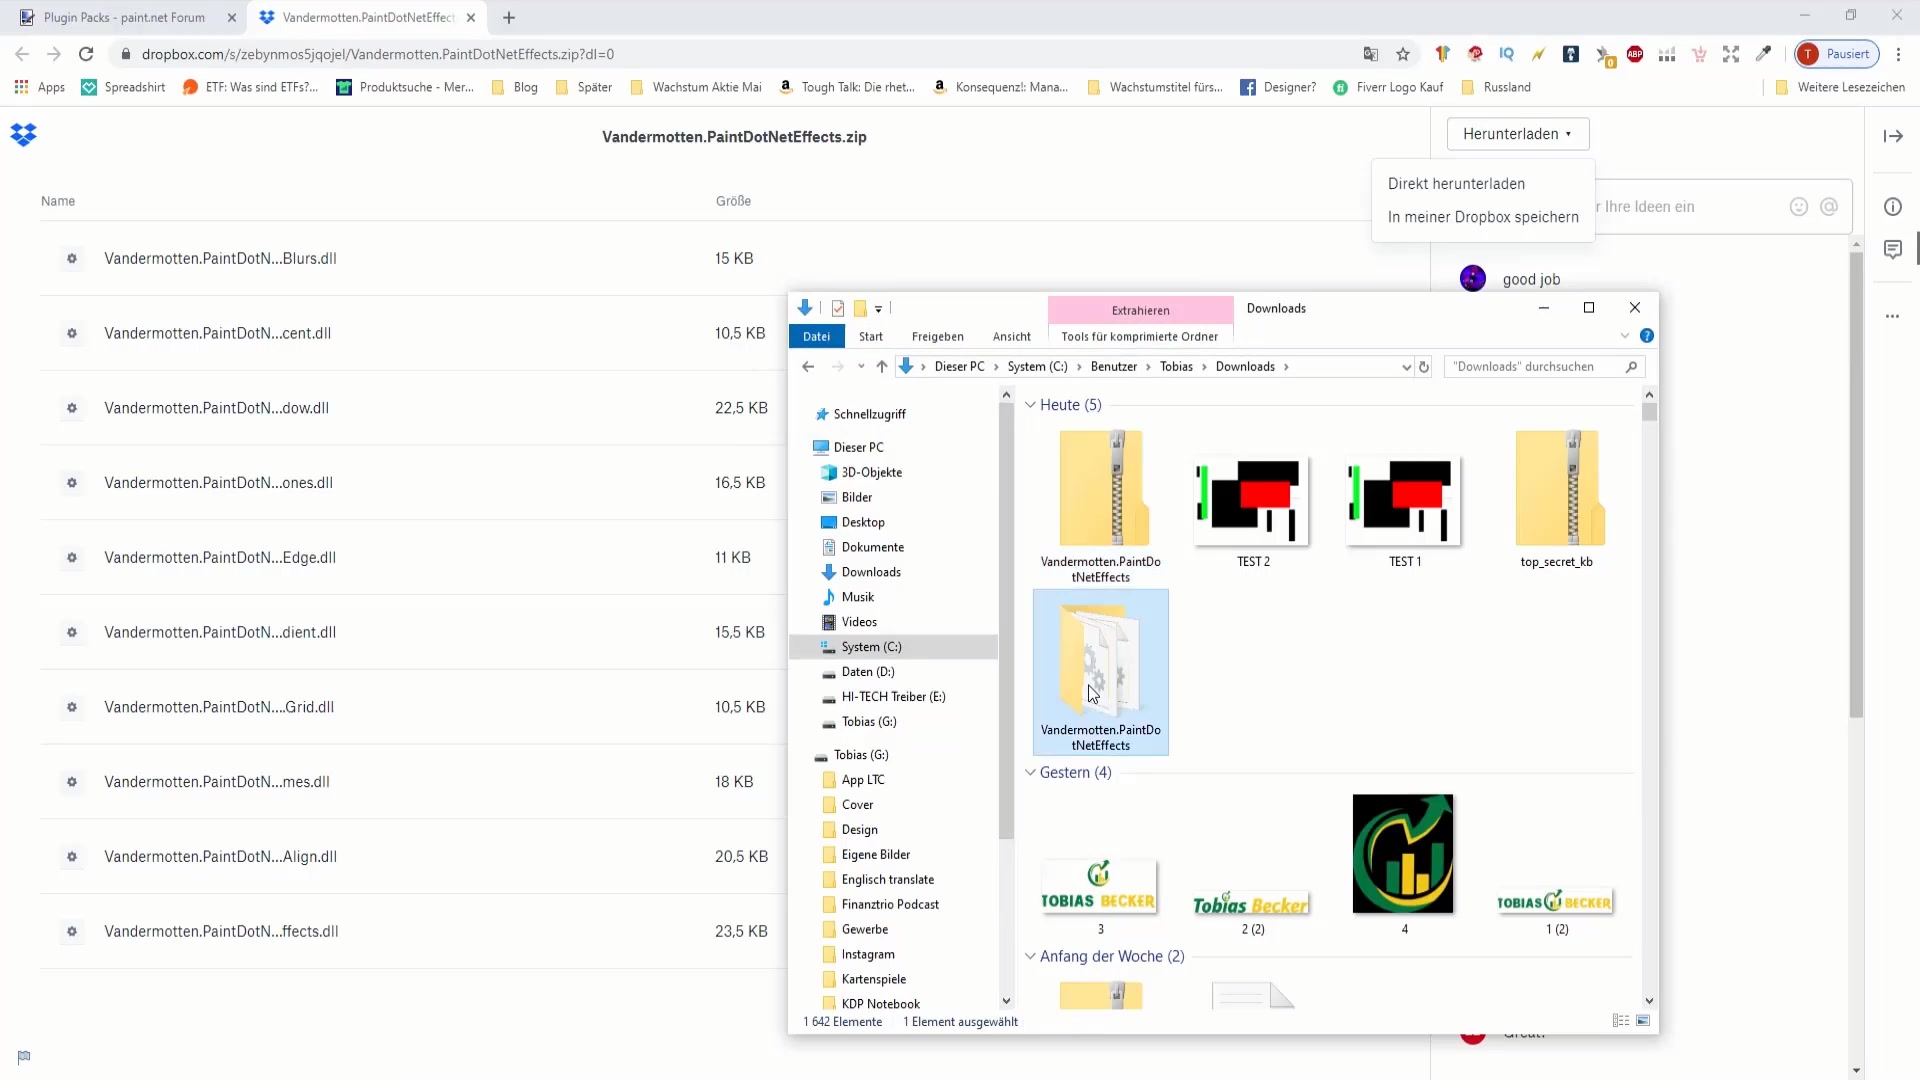
- Download the Plugin Package: Most plugins are distributed as
.zipfiles. Locate the download link within the plugin’s thread (often at the top or bottom of the initial post). Click the link to download the compressed file to your computer.
Always remember to download from the original developer’s link on the forum to ensure you get the legitimate, most up-to-date, and secure version of the plugin.
Extracting Plugin Files
Once you’ve downloaded the plugin’s .zip file, you need to extract its contents. Windows has a built-in extractor, but you can also use third-party tools like 7-Zip or WinRAR for more advanced options.
- Locate the Downloaded
.zipFile: By default, downloaded files go into your “Downloads” folder. - Right-Click the
.zipFile:- Windows Built-in: Select “Extract All…” from the context menu. This will open a dialog asking for an extraction destination.
- 7-Zip/WinRAR: You’ll usually see options like “Extract Files…” (which prompts for a destination) or “Extract Here” (which extracts directly into the current folder). “Extract Here” is often convenient for plugins.
- Extract the Contents: Choose a temporary location for extraction, such as your desktop or a new folder within your “Downloads” directory.
- Identify the
.dllFile(s): After extraction, you’ll typically find one or more.dllfiles (e.g.,MyPlugin.dll,PluginEffect.dll). Some plugins might include additional files likeREADME.txt, images, or configuration files, but the.dllis the essential component for Paint.NET. It’s rare for Paint.NET plugins to require more than a single.dllfile, but if there are multiple, they usually all belong in the same Paint.NET plugin folder.
Placing Plugin Files in the Correct Directory
This is the most critical step, ensuring Paint.NET can find and load your new plugin.
- Open Paint.NET’s Installation Folder:
- Navigate to
C:Program Filespaint.net(orC:Program Files (x86)paint.netfor 32-bit installations on 64-bit systems, or your custom installation path). - Alternatively, right-click your Paint.NET shortcut and choose “Open file location.”
- Navigate to
- Identify the Target Plugin Folder: Based on the type of plugin you’re installing:
- For Effects or Adjustments plugins, open the
Effectsfolder within the Paint.NET installation directory. - For File Type plugins, open the
FileTypesfolder.
- For Effects or Adjustments plugins, open the
- Copy the
.dllFile(s): Drag and drop or copy (Ctrl+C) the extracted.dllfile(s) from your temporary extraction location into the correct Paint.NET plugin folder (EffectsorFileTypes). - Handle Administrator Permissions: Because you’re modifying files within the “Program Files” directory, Windows will likely prompt you for Administrator permissions. Click “Continue” or “Yes” when prompted. If Paint.NET is currently running, you might encounter an “Access Denied” error. Ensure Paint.NET is completely closed before attempting to copy files into its installation directory.
Restarting Paint.NET to Activate Plugins
Paint.NET only scans for and loads new plugins when it starts up. Therefore, after placing the .dll files in the correct directory, you must restart the application:
- Close Paint.NET: If it was open during the installation process, close it completely.
- Relaunch Paint.NET: Open Paint.NET as you normally would.
- Verify Installation:
- Effects/Adjustments: Look under the “Effects” menu or “Adjustments” menu. Your new plugin should now be listed, often under a specific category or directly by its name.
- File Types: Try “File” > “Open” or “File” > “Save As.” You should see the newly supported file format as an option in the “Files of type” dropdown menu.
Congratulations! You’ve successfully installed your first Paint.NET plugin. You can now begin experimenting with its new capabilities and integrating them into your image editing workflow.
Advanced Plugin Management and Troubleshooting
As your plugin collection grows, managing it effectively becomes crucial. Moreover, encountering an issue during or after installation is not uncommon. This section provides insights into organizing your plugins and offers solutions to common problems, ensuring a smooth and productive experience.
Managing Your Plugin Collection
A robust plugin ecosystem means you’ll likely accumulate many powerful additions. Keeping them organized and functional is key to maintaining a streamlined workflow.
- Organizing within Paint.NET: Some developers design their plugins to appear under a specific sub-menu within the “Effects” or “Adjustments” menus (e.g., “Effects” > “Render” > “Fractal”). If a plugin doesn’t do this automatically, it will likely appear at the top level of the menu.
- Subfolders (Use with Caution): While you can create subfolders within the
EffectsorFileTypesdirectories (e.g.,C:Program Filespaint.netEffectsMy Artistic Filters), Paint.NET’s ability to recognize plugins within these subfolders can vary depending on the plugin’s code. Some plugins will appear in a sub-menu that matches your folder name, while others might not be recognized at all if nested too deeply. It’s generally safer to place.dllfiles directly into theEffectsorFileTypesfolder unless a plugin’s instructions specifically recommend a subfolder. - Deleting Unwanted Plugins: To remove a plugin, simply navigate to the
EffectsorFileTypesfolder within Paint.NET’s installation directory, locate the plugin’s.dllfile, and delete it. Remember to restart Paint.NET for the change to take effect. - Keeping Plugins Updated: Developers frequently release updates to their plugins, offering bug fixes, performance improvements, and new features. Periodically check the plugin threads on the Paint.NET forum for updates. To update, download the new
.zipfile, extract the.dll, and replace the old.dllfile in the Paint.NET plugin folder with the new one. Always close Paint.NET before updating a plugin.
Common Installation Issues and Solutions
Even with careful planning, issues can arise. Here are some of the most common problems users encounter and how to resolve them:
-
Plugin Not Appearing in Menus:
- Paint.NET Not Restarted: This is the most frequent culprit. Always restart Paint.NET after installing any new plugin.
- Incorrect Folder: Double-check that you placed the
.dllfile in the correct folder (Effectsfor effects/adjustments,FileTypesfor file type support). - Corrupted Download: The
.zipfile or.dllmight have been corrupted during download. Try downloading the plugin again from the official source. - Incompatible Version: The plugin might be too old or too new for your specific Paint.NET version. Check the plugin’s documentation for compatibility requirements.
- Missing Dependencies: Very rarely, a complex plugin might require additional software or libraries to be installed on your system. This would usually be explicitly stated by the developer.
- Incorrect File Type: Ensure you’re copying the
.dllfile and not a.txtor other file by mistake.
-
Paint.NET Crashing After Plugin Installation:
- Incompatible Plugin: The plugin might be incompatible with your version of Paint.NET or your operating system, or it might contain a bug.
- Outdated Plugin: An old plugin might not handle new Paint.NET features correctly, leading to crashes.
- Corrupted Plugin File: A partially downloaded or corrupted
.dllcan cause instability. - Solution: The quickest way to isolate the issue is to remove the last plugin you installed. Close Paint.NET, go to the
EffectsorFileTypesfolder, and delete the suspicious.dll. Then restart Paint.NET. If it runs stably, you’ve found the culprit. Report the issue on the plugin’s forum thread.
-
“Access Denied” When Copying Files:
- Administrator Privileges: You need administrator rights to modify files in the
Program Filesdirectory. Ensure you’re logged in as an administrator or provide administrator credentials when prompted by Windows. - Paint.NET is Running: As mentioned, you cannot modify files that are currently in use by a running application. Close Paint.NET completely before copying or deleting plugin files. Check Task Manager to ensure no Paint.NET processes are still active.
- Administrator Privileges: You need administrator rights to modify files in the
-
Plugin Dialog Box Appears Blank or Doesn’t Function:
- This can sometimes be due to graphics driver issues, .NET Framework conflicts, or very specific plugin bugs. Ensure your graphics drivers are up to date. If the problem persists, try a different plugin to see if it’s an isolated issue or a broader system problem.
Exploring Essential Plugins for Every User
To kickstart your plugin journey, here are a few highly recommended and widely used plugins that significantly enhance Paint.NET’s capabilities and are generally stable and well-supported:
- Pyrochild’s Plugins: A collection of incredibly useful effects and adjustments, including advanced color balance, dithering, film grain, and intricate randomization tools. This pack is almost a mandatory install for serious Paint.NET users.
- BoltBait’s Plugins: Another massive collection covering a wide range of functionalities, from selection tools and object alignment to advanced blurring and sharpening effects. BoltBait is a prolific developer, and many of his plugins become indispensable.
- TR’s Pixel Tools / PDN Alpha Square: Excellent for pixel artists or anyone needing precise control over individual pixels, including tools for creating seamless textures and removing anti-aliasing.
- PSD Plugin: Absolutely essential for anyone needing to work with Photoshop Document (.psd) files, allowing Paint.NET to open and save PSDs with layer support. This bridges a critical gap for collaborative workflows.
- DDS Plugin: Vital for game modders and developers, this plugin adds support for the DirectDraw Surface (.dds) file format, commonly used for game textures.
These examples represent just the tip of the iceberg. The Paint.NET community continues to innovate, offering a vast array of tools to explore and integrate into your digital art and image editing projects.
Conclusion
Paint.NET, a robust and user-friendly image editor, gains an incredible boost in power, versatility, and efficiency through its vibrant plugin ecosystem. By understanding what plugins are, why they matter, and how to properly install and manage them, you unlock a new dimension of creative control and productivity within the software. From advanced artistic effects and granular image adjustments to crucial file format support, plugins empower you to tailor Paint.NET to your exact needs, transforming it into an even more formidable tool in your digital arsenal.
The process of installing plugins is straightforward: download from trusted sources, extract the .dll files, place them in the correct Effects or FileTypes directory, and restart Paint.NET. While occasional troubleshooting might be necessary, the rewards of an expanded and customized Paint.NET experience far outweigh any minor hurdles. Embracing plugins is not just about adding features; it’s about embracing continuous innovation, community-driven enhancements, and the limitless potential of digital creativity. So, dive in, explore the vast library of Paint.NET plugins, and start elevating your digital art and image editing today.