In the ever-evolving landscape of technology, enthusiasts and professionals alike are constantly seeking ways to optimize and enhance their hardware. For QNAP NAS (Network Attached Storage) users, this often translates to exploring alternative firmware options that offer greater flexibility, advanced features, and a more open ecosystem. OpenWrt, a highly customizable Linux distribution for embedded devices, has emerged as a popular choice for those looking to push their QNAP devices beyond their out-of-the-box capabilities. This comprehensive guide will walk you through the intricate process of installing OpenWrt firmware onto your QNAP NAS, unlocking a world of possibilities for networking, storage management, and beyond.
The allure of OpenWrt lies in its powerful command-line interface, extensive package repository, and the ability to fine-tune nearly every aspect of your device’s operation. While QNAP’s proprietary QTS operating system is robust and user-friendly, OpenWrt caters to users who crave deeper control, the ability to run specialized applications, and the potential to breathe new life into older hardware. This installation process, however, requires a degree of technical proficiency and a careful approach to ensure the integrity and functionality of your QNAP device.
Understanding the Why: Benefits of OpenWrt on QNAP
Before diving into the technicalities, it’s crucial to understand why you might want to install OpenWrt on your QNAP NAS. This decision is typically driven by a desire for enhanced functionalities that QNAP’s native OS might not readily offer or might restrict.
Enhanced Networking Capabilities
One of the primary drivers for adopting OpenWrt on a NAS device is its unparalleled networking flexibility. OpenWrt is renowned for its robust routing and firewall capabilities. This means your QNAP NAS, equipped with OpenWrt, can transform into a sophisticated network gateway.
- Advanced Routing: Go beyond basic network configuration. OpenWrt allows for complex routing policies, load balancing across multiple WAN connections, and sophisticated traffic shaping to prioritize certain types of data. This is particularly beneficial for users with multiple internet connections or those running demanding network applications.
- Powerful Firewall: OpenWrt’s firewall is highly configurable, offering granular control over network traffic. You can implement intricate rules, VPN passthrough, and advanced security measures that surpass the standard offerings of many consumer-grade routers.
- VPN Server/Client: Whether you need to securely access your home network remotely or route all your internet traffic through a VPN provider for enhanced privacy, OpenWrt excels. It natively supports a wide range of VPN protocols, making it an ideal platform for setting up your own VPN server or client.
- Intrusion Detection/Prevention: With the vast package repository, you can install tools like Snort or Suricata to monitor your network for malicious activity and implement immediate countermeasures.
Extended Software and Application Support
The OpenWrt ecosystem is vast, offering access to a plethora of open-source software packages that can be installed directly onto your NAS. This extends the functionality of your QNAP device far beyond its original purpose.
- Ad-Blocking at the Network Level: Install AdGuard Home or Pi-hole directly on your NAS to block ads and trackers across your entire home network, improving browsing speed and privacy.
- Custom Server Applications: Run lightweight web servers, media servers (beyond what QNAP offers natively), IoT platforms, or even develop and deploy your own custom applications.
- Package Management: OpenWrt’s
opkgpackage manager makes it simple to install, update, and remove software, akin to managing applications on a desktop Linux system. - Scripting and Automation: Leverage the full power of Linux scripting to automate tasks, integrate with other services, and create a truly personalized NAS experience.
Resource Optimization and Performance
For users with older QNAP models that might be struggling with newer QTS versions or resource-intensive applications, OpenWrt can offer a lighter and more efficient operating environment.
- Reduced Resource Footprint: OpenWrt is designed to be lean, consuming fewer system resources (CPU and RAM) compared to more feature-rich proprietary operating systems. This can lead to improved performance and responsiveness.
- Overclocking and Performance Tuning: For advanced users, OpenWrt provides the tools to experiment with hardware overclocking (if supported by the hardware and firmware) and fine-tune system parameters for maximum performance.
- Extended Hardware Lifespan: By installing OpenWrt, you can effectively extend the useful life of your QNAP NAS, preventing premature obsolescence and maximizing your investment.
Prerequisites for Installation
Embarking on the OpenWrt installation journey requires careful preparation. Skipping these steps or proceeding without the necessary knowledge can lead to a bricked device – a NAS that is no longer functional.
Hardware Compatibility and Model Identification
The most critical prerequisite is ensuring your specific QNAP NAS model is compatible with OpenWrt. OpenWrt development is community-driven, and support for various hardware architectures and specific devices varies.
- Identify Your QNAP Model: This is usually found on a sticker on the bottom or back of your QNAP device, or within the QNAP QTS interface. Note down the exact model number (e.g., TS-251, TS-453B).
- Check the OpenWrt Table of Hardware (ToH): Visit the official OpenWrt website and navigate to their “Table of Hardware.” Search for your QNAP model. The ToH will indicate if there’s official or community support for your device.
- Understand Device-Specific Instructions: Even if your model is listed, pay close attention to any specific installation notes or warnings associated with it. Some models may require particular bootloader modifications or have known limitations.
- Determine the Target Architecture: The ToH will also specify the processor architecture (e.g., ARMv7, x86_64). This is crucial for downloading the correct OpenWrt firmware image.
Essential Tools and Downloads
You’ll need a set of tools and the correct firmware image to perform the installation.
- OpenWrt Firmware Image: Download the appropriate OpenWrt firmware image for your QNAP model. This will typically be in
.imgor.binformat. Crucially, ensure you download the correct image for your device’s architecture and the specific installation method (e.g., “initramfs” for initial flashing, “sysupgrade” for upgrades). Look for releases on the official OpenWrt downloads page or the relevant device-specific forum thread. - TFTP Server: A TFTP (Trivial File Transfer Protocol) server is often required for the initial flashing process. This allows you to transfer the OpenWrt image from your computer to the QNAP NAS during the boot sequence. Popular TFTP servers include:
- Tftpd64 (Windows): A free and easy-to-use TFTP server for Windows.
- atftpd (Linux): A widely used TFTP server on Linux systems.
- macOS built-in
tftpd: Can be configured for use.
- Serial Console Access (Highly Recommended): Accessing the serial console provides direct command-line access to the device’s bootloader and kernel messages. This is invaluable for debugging, recovery, and understanding the boot process. You will need:
- USB-to-TTL Serial Adapter: A common module like the FTDI FT232RL or CP2102.
- Jumper Wires: To connect the adapter to the QNAP’s serial header pins (TX, RX, GND).
- Terminal Emulation Software: PuTTY (Windows), screen (Linux/macOS), or CoolTerm.
- Locate the Serial Port: You’ll need to identify the serial port pins on your QNAP’s motherboard. This often requires disassembling the NAS and consulting hardware hacking resources or forums specific to your QNAP model.
- Ethernet Cable: For connecting your computer to the QNAP NAS.
- Static IP Address Configuration: Your computer will need a static IP address on the same subnet as the QNAP NAS will be assigned during the TFTP transfer.
- Patience and Attention to Detail: This is not a plug-and-play process. Follow instructions meticulously.
The Installation Process: A Step-by-Step Guide
The installation of OpenWrt on a QNAP NAS can generally be divided into two main phases: initial flashing (often via TFTP and serial console) and the subsequent system upgrade or installation.
Phase 1: Initial Flashing via TFTP and Serial Console
This is the most critical and potentially hazardous part of the process. It involves interrupting the QNAP’s normal boot sequence to load OpenWrt.
1. Prepare the TFTP Server and Firmware
- Install and Configure TFTP Server: Set up your chosen TFTP server software on your computer. Ensure it’s running and configured to serve files from a specific directory.
- Place Firmware Image: Copy the downloaded OpenWrt firmware image (e.g.,
openwrt-xxx-xxx-qnap_xxx-initramfs-kernel.bin) into the TFTP server’s root directory. Rename it to a simple, easily recognizable name for the bootloader to fetch, such asinitramfs.bin. - Configure Network: Assign a static IP address to your computer (e.g.,
192.168.1.100) with a subnet mask (e.g.,255.255.255.0). The QNAP NAS will likely be assigned an IP in the192.168.1.xrange during this process.
2. Establish Serial Console Connection
- Disassemble QNAP (if necessary): Carefully open your QNAP NAS to access the motherboard.
- Locate Serial Pins: Identify the TX, RX, and GND pins for the serial console. This often requires consulting online guides specific to your QNAP model or motherboard.
- Connect Serial Adapter: Connect your USB-to-TTL adapter to the identified pins on the QNAP motherboard and to your computer’s USB port. Ensure correct polarity (TX to RX, RX to TX, GND to GND).
- Configure Terminal Emulator: Open your terminal emulation software (e.g., PuTTY). Configure it to connect to the COM port assigned to your USB-to-TTL adapter, set the baud rate (commonly 115200), data bits (8), parity (None), and stop bits (1).
3. Interrupt Bootloader and Initiate TFTP Transfer
- Power On QNAP: With the serial console connected and your TFTP server running, power on your QNAP NAS.
- Watch Boot Messages: In your terminal emulator, you should start seeing bootloader messages.
- Interrupt Bootloader: As soon as you see bootloader messages (often U-Boot), you’ll need to press a specific key (e.g.,
Spacebar,Enter,Esc) to interrupt the automatic boot process and enter the bootloader command prompt. The exact key and timing are crucial and may be indicated in the boot messages or require experimentation. - Set Bootloader Environment Variables: Once in the bootloader prompt, you’ll need to configure network settings and the TFTP server address. This typically involves commands like:
setenv ipaddr 192.168.1.2(Assign an IP to the QNAP)setenv serverip 192.168.1.100(Your computer’s TFTP server IP)setenv bootfile initramfs.bin(The name of your firmware file)saveenv(To save these settings)
- Initiate TFTP Download and Boot: Use a command to trigger the TFTP download and boot the kernel. This might look something like:
tftpbootorbootmfollowed by the memory address where the kernel will be loaded. The specific command and address will depend on your device’s bootloader and firmware.
4. Verify OpenWrt Boot
- Observe Boot Process: If successful, you will see OpenWrt kernel messages in your serial console. The device will attempt to boot into the initial OpenWrt RAM disk.
- Access OpenWrt via SSH (Initial): Once OpenWrt has booted from RAM, it will typically start an SSH server. You should be able to connect to the QNAP’s IP address (e.g.,
192.168.1.2) using SSH from your computer. The default username isrootand there’s no password initially.
Phase 2: Flashing the Permanent OpenWrt Image
The initramfs image loaded from TFTP is a temporary environment. To make OpenWrt permanent, you need to flash the final firmware image to the device’s internal storage.
1. Prepare for System Upgrade
- Download the Sysupgrade Image: On the OpenWrt website, find the
sysupgradeimage for your QNAP model. This is the file that will be permanently installed. - Transfer Image to QNAP: Use SCP (Secure Copy Protocol) to transfer the
sysupgradeimage from your computer to the QNAP NAS’s temporary storage (e.g.,/tmp/). You can do this from your computer’s terminal with a command like:
bash

scp /path/to/your/openwrt-xxx-sysupgrade.bin root@192.168.1.2:/tmp/
2. Perform the Sysupgrade
- SSH into QNAP: Connect to your QNAP NAS via SSH as
root. - Execute Sysupgrade Command: Navigate to the
/tmp/directory and execute thesysupgradecommand. It is highly recommended to use the--ubiformator--sysupgrade-alloptions for a clean install, as this will repartition and format the flash memory, ensuring a fresh start.
bash

cd /tmp

sysupgrade -v -u /tmp/openwrt-xxx-sysupgrade.bin
Note: Always consult the OpenWrt documentation for your specific device and firmware version for the most accurate and safest sysupgrade command. Using the wrong command or options can lead to data loss or a bricked device. - Wait for Reboot: The device will flash the new firmware and then reboot automatically. This process can take several minutes. Do not power off the QNAP during this stage.
3. Initial OpenWrt Configuration
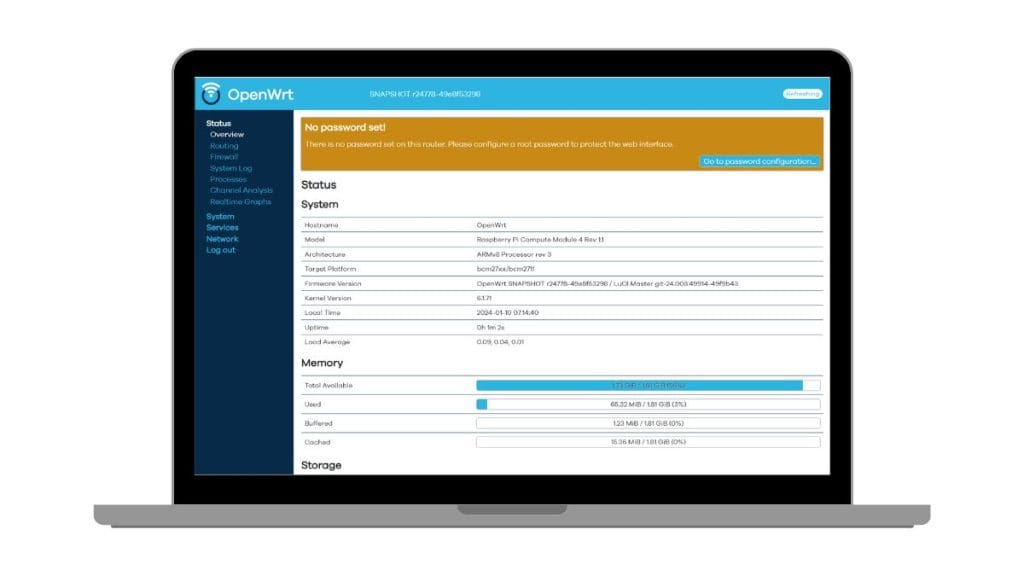
- Access OpenWrt Web Interface (LuCI): After the reboot, OpenWrt will have its permanent firmware installed. You can now access the LuCI web interface by navigating to the QNAP’s IP address (which might have changed, so check your router’s DHCP leases or use network scanning tools) in your web browser. The default IP is often
192.168.1.1. - Set Root Password: The first thing you should do is set a strong password for the
rootuser. - Configure Network Settings: Adjust the network interface settings (LAN, WAN) to match your home network setup. Assign a static IP address to your QNAP if desired.
- Install Packages: Begin installing the desired OpenWrt packages from the web interface’s “Software” section or via SSH using
opkg.
Troubleshooting and Recovery
Even with meticulous preparation, issues can arise. Knowing how to troubleshoot and recover is essential.
- Boot Loop: If the QNAP repeatedly reboots, it likely indicates a corrupted firmware image, incorrect flashing, or a hardware compatibility issue. Revisit the TFTP and serial console steps to re-flash the initramfs.
- No Network Connectivity: Verify your network cable connections, TFTP server configuration, and static IP settings. Check the serial console for network-related error messages.
- Bricked Device: If the device fails to boot entirely, shows no serial console output, or does not respond to TFTP, it might be bricked. In severe cases, JTAG or other low-level hardware flashing methods might be required, which are advanced and risky. Often, a “soft brick” can be recovered via TFTP.
- Seek Community Support: The OpenWrt forums and specific device sub-forums are invaluable resources. Search for your QNAP model and the issue you’re encountering. Experienced users can provide guidance and solutions.

Conclusion
Installing OpenWrt on your QNAP NAS is a rewarding endeavor that transforms a capable storage device into a powerful and highly customizable network appliance. By following this comprehensive guide, understanding the prerequisites, and proceeding with caution, you can unlock the full potential of your QNAP hardware. Remember that this process requires a commitment to learning and a willingness to troubleshoot. The rewards, however, are a network environment tailored precisely to your needs, enhanced security, and the satisfaction of mastering your technology. Always prioritize backups of your data before undertaking any firmware modifications, and consult the official OpenWrt documentation for the most up-to-date and device-specific information. The journey of customizing your QNAP with OpenWrt is just the beginning of a world of advanced networking and computing possibilities.
aViewFromTheCave is a participant in the Amazon Services LLC Associates Program, an affiliate advertising program designed to provide a means for sites to earn advertising fees by advertising and linking to Amazon.com. Amazon, the Amazon logo, AmazonSupply, and the AmazonSupply logo are trademarks of Amazon.com, Inc. or its affiliates. As an Amazon Associate we earn affiliate commissions from qualifying purchases.