The allure of lightning-fast boot times, near-instant application loading, and dramatically reduced file transfer durations has made NVMe SSDs the undisputed champions of storage speed. If you’re still relying on traditional Hard Disk Drives (HDDs) or even older SATA SSDs, upgrading to an NVMe drive can feel like injecting a shot of pure adrenaline into your computer’s performance. But the prospect of physically opening up your machine and installing new hardware can seem daunting. Fear not, intrepid tech enthusiast! This comprehensive guide will demystify the process, walking you through every step of installing an NVMe SSD, from understanding what you need to getting it up and running like a pro.
Understanding the NVMe Advantage
Before we dive into the installation itself, it’s crucial to grasp why NVMe SSDs are so significantly faster than their predecessors. The acronym NVMe stands for Non-Volatile Memory Express. This isn’t just a fancy name; it represents a fundamental shift in how storage devices communicate with your computer’s CPU.
The Bottleneck of the Past: SATA
For years, the SATA (Serial ATA) interface has been the standard for connecting storage drives. While it brought significant improvements over IDE, SATA has inherent limitations. It was originally designed for mechanical hard drives, and its architecture creates a bottleneck for the much faster speeds that solid-state storage is capable of. Think of it like putting a Formula 1 engine into a minivan – the engine is capable of incredible speed, but the chassis and supporting systems simply can’t keep up.
The NVMe Revolution: Direct PCIe Communication
NVMe, on the other hand, was designed from the ground up for flash-based storage. It leverages the PCIe (Peripheral Component Interconnect Express) interface, which is the same high-speed connection used by graphics cards. PCIe offers a direct, unhindered pathway between the NVMe SSD and the CPU, bypassing the SATA controller and its inherent latency. This direct communication allows NVMe SSDs to achieve sequential read/write speeds that are often 5 to 10 times faster than even the quickest SATA SSDs. This translates to tangible benefits for your daily computing experience.
- Blazing Fast Boot Times: Your operating system will load in seconds, not minutes.
- Rapid Application Launch: Programs will open almost instantaneously.
- Seamless Large File Transfers: Moving massive video files or game installations will be a breeze.
- Improved Gaming Performance: Games will load levels and assets much faster, reducing or eliminating in-game stuttering.
- Enhanced Productivity: Professionals working with large datasets, video editing, or complex simulations will see a dramatic boost in their workflow.
Preparing for Installation: What You’ll Need
Before you start wielding screwdrivers, a little preparation goes a long way. Gathering the right tools and ensuring your system is compatible will make the installation process smooth and stress-free.
Checking Compatibility: The Crucial First Step
Not all computers can accommodate an NVMe SSD. The primary compatibility factor is the presence of an M.2 slot on your motherboard that supports the NVMe protocol.
- Motherboard Support: Most modern motherboards (typically those released in the last 5-7 years) will have at least one M.2 slot. However, you need to verify if this slot is configured for NVMe. Some M.2 slots might be limited to SATA speeds, or they might share bandwidth with other components, which can reduce performance.
- How to Check: Consult your motherboard’s manual or visit the manufacturer’s website. You’ll be looking for specifications that mention “M.2 Slot (PCIe Gen X, NVMe supported)”. The “Gen X” refers to the PCIe generation (e.g., Gen 3, Gen 4, Gen 5), with higher generations offering faster speeds.
- BIOS/UEFI Settings: Even if your motherboard has an NVMe-compatible M.2 slot, you might need to ensure that your system’s BIOS/UEFI is configured correctly. Modern systems usually handle this automatically, but it’s worth checking the settings for any specific NVMe or M.2 configuration options.
- Operating System: You’ll need a modern operating system that supports NVMe drives. Windows 8.1 and Windows 10 (and later) natively support NVMe. Older operating systems might require specific drivers or may not support them at all.
Choosing Your NVMe SSD
NVMe SSDs come in various form factors, capacities, and performance tiers.
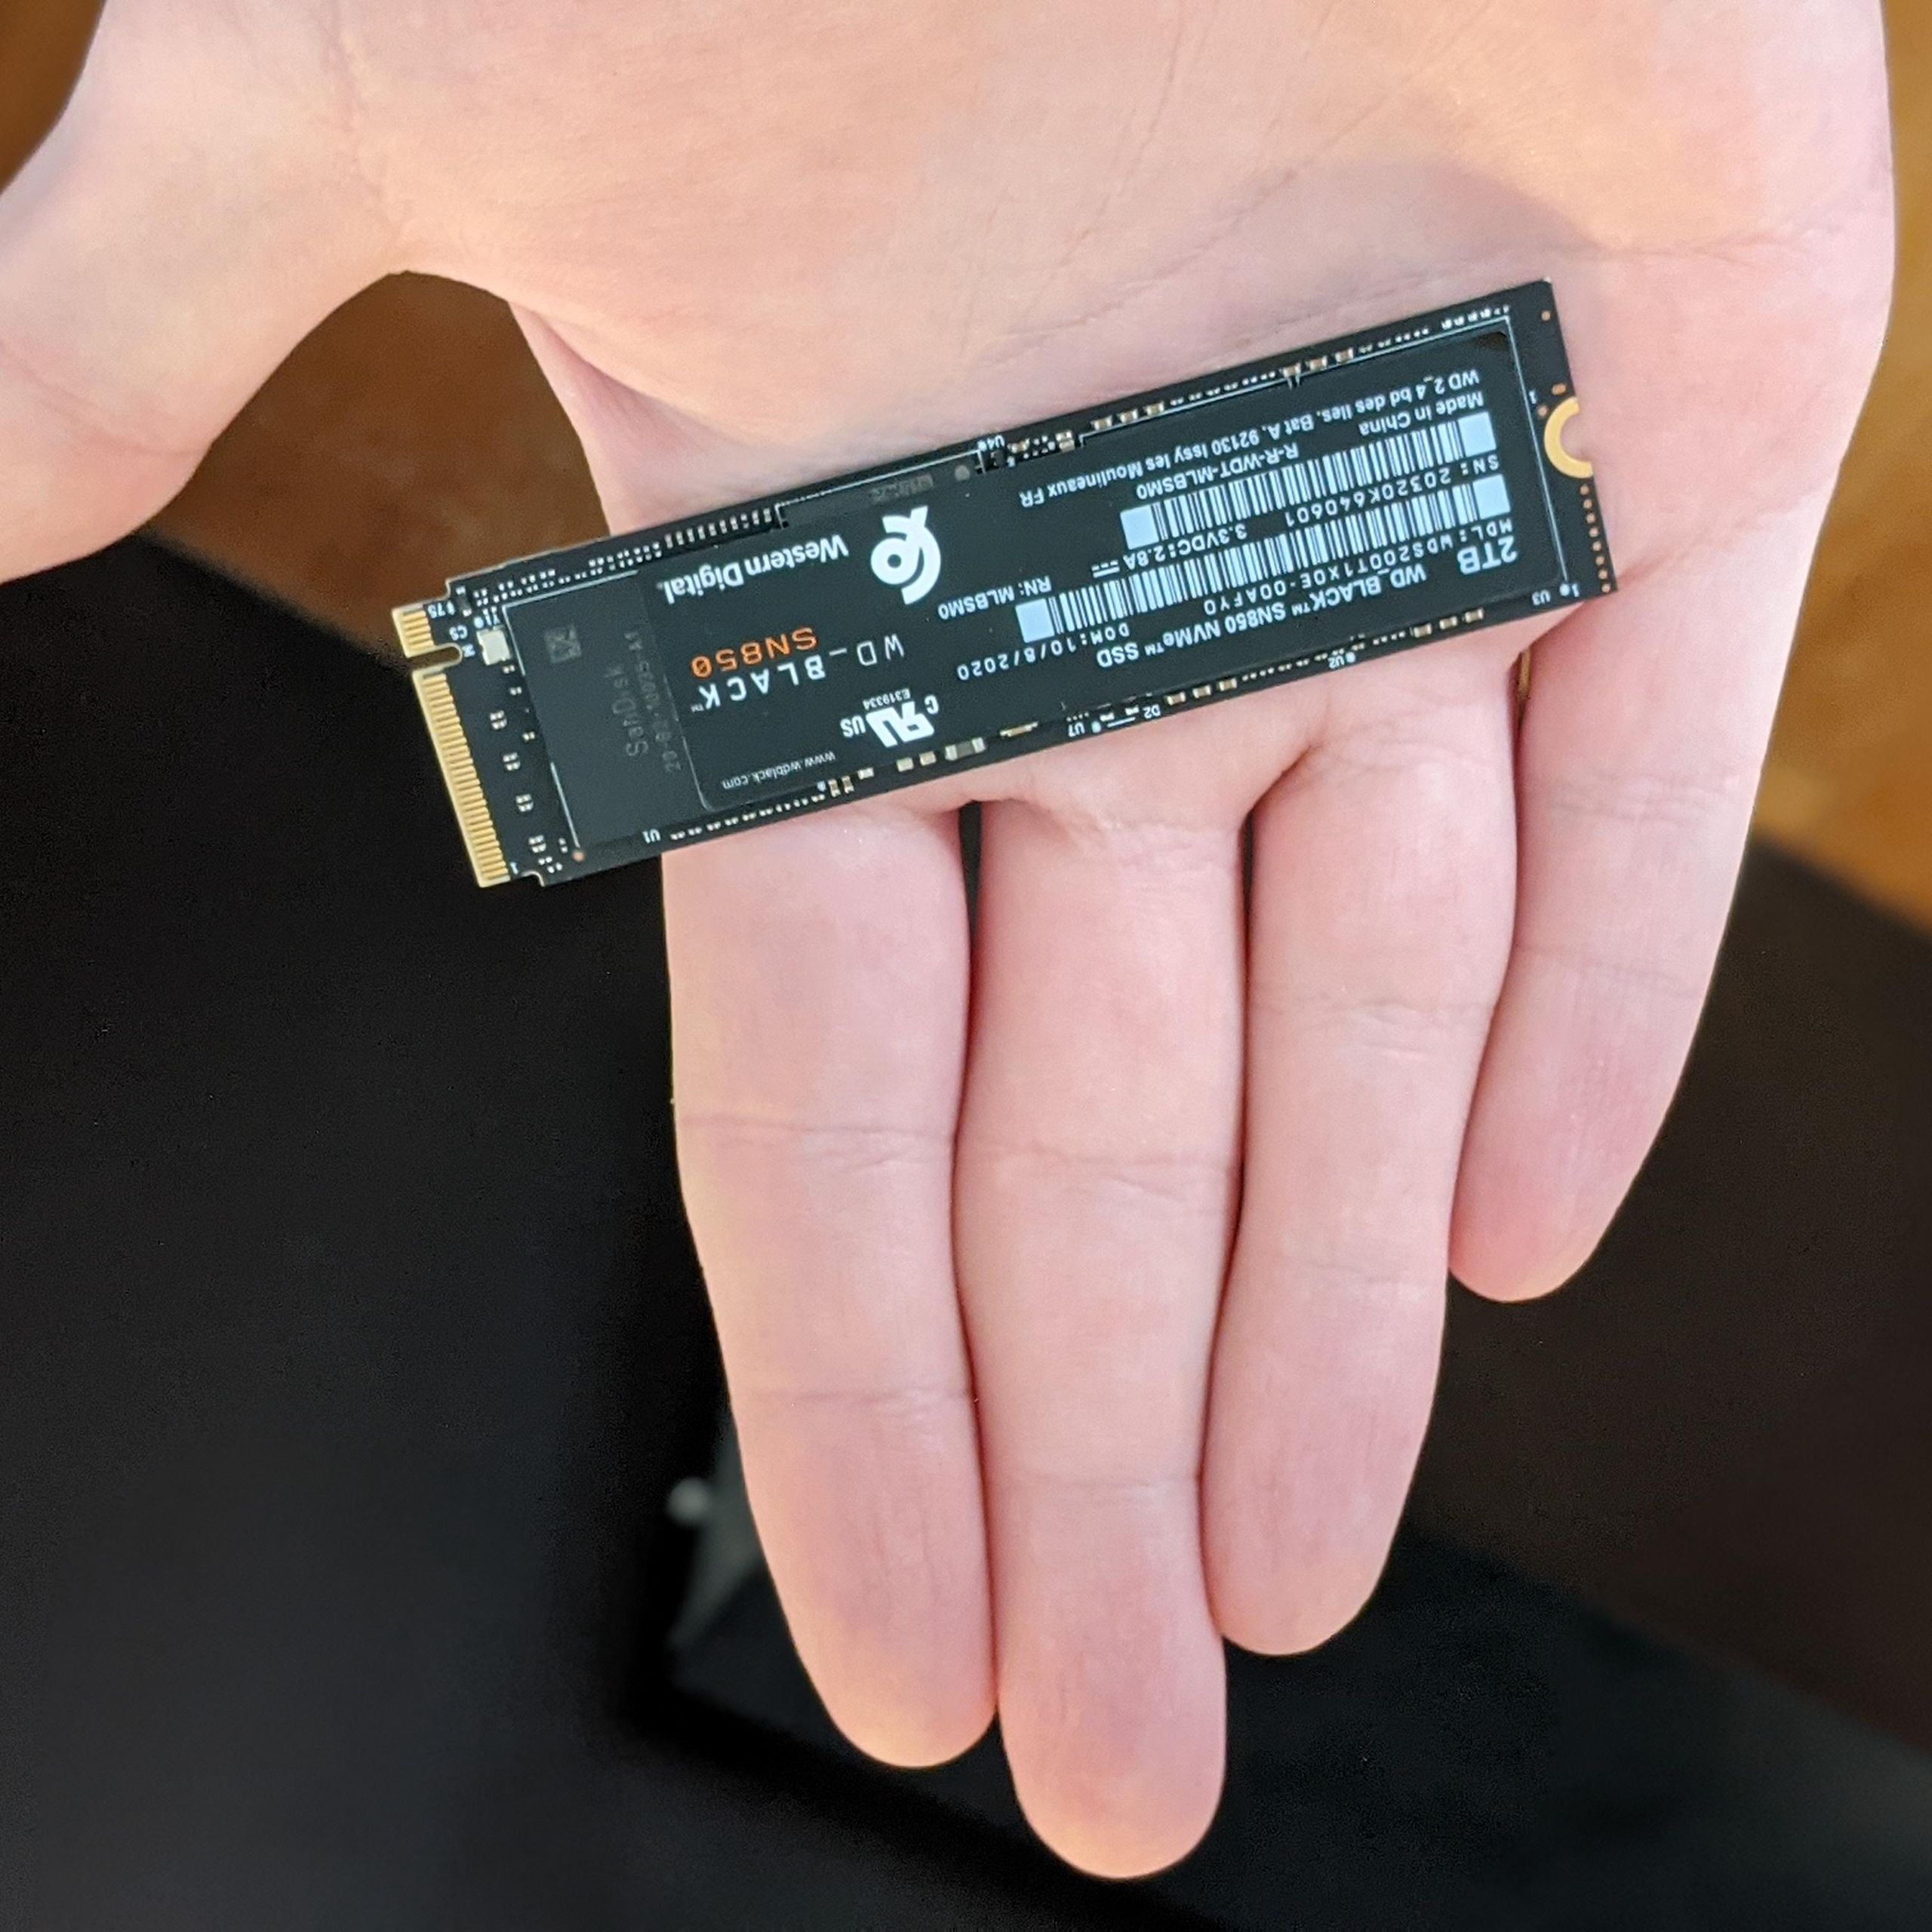
- Form Factor: The most common form factor for NVMe SSDs is M.2 2280. The “22” refers to the width in millimeters (22mm), and “80” refers to the length in millimeters (80mm). This is the standard size you’ll find in most motherboards. Other form factors exist (like M.2 2242, 2260, 22110), but 2280 is by far the most prevalent.
- PCIe Generation: As mentioned, NVMe SSDs utilize PCIe lanes. You’ll see drives advertised as PCIe Gen 3, Gen 4, or even Gen 5.
- PCIe Gen 3: Offers speeds up to around 3,500 MB/s. Still very fast and a significant upgrade from SATA.
- PCIe Gen 4: Doubles the bandwidth of Gen 3, offering speeds up to 7,000 MB/s and beyond.
- PCIe Gen 5: The latest generation, pushing speeds even further (over 10,000 MB/s), though only compatible with the newest motherboards.
- Compatibility Note: An NVMe SSD will work in a slower PCIe generation slot, but it will be limited to that slot’s speed. Conversely, a faster NVMe SSD in a slower slot will also be bottlenecked. For optimal performance, match your SSD’s PCIe generation to your motherboard’s capabilities.
- Capacity: NVMe SSDs are available in a wide range of capacities, from 250GB to several terabytes. Consider your needs:
- Operating System and Core Applications: 500GB to 1TB is generally sufficient for most users.
- Gaming and Large Media Libraries: 1TB, 2TB, or more might be necessary.
- DRAM Cache: Look for NVMe SSDs with a DRAM cache. This dedicated cache significantly improves random read/write performance and the drive’s overall responsiveness, especially under heavy load.
Essential Tools
- Anti-Static Wrist Strap: This is crucial to prevent electrostatic discharge (ESD) from damaging your computer’s delicate components. Always wear it and connect it to a grounded metal object (like the unpainted metal part of your computer case).
- Screwdriver Set: You’ll likely need a Phillips head screwdriver, often a small one. Some NVMe drives come with their own tiny screws.
- Your Motherboard Manual: Invaluable for identifying the M.2 slot and understanding any specific installation procedures.
- Flashlight (Optional but helpful): To illuminate dark corners inside your computer case.
- Container for Screws: A small bowl or magnetic tray to keep track of tiny screws.
The Physical Installation Process
With your tools and NVMe SSD ready, it’s time to get your hands dirty. Remember, patience and care are key.
Step 1: Power Down and Disconnect
- Safely Shut Down: Completely shut down your computer through the operating system. Do not just put it to sleep or hibernate.
- Unplug Power: Disconnect the power cable from the back of your computer.
- Discharge Static: Put on your anti-static wrist strap and connect it to a grounded metal object.
Step 2: Open Your Computer Case
The method for opening your computer case varies depending on whether you have a desktop or a laptop.
- Desktop: Most desktop cases have side panels that are secured with thumbscrews or regular screws on the back. Remove these screws and slide or lift off the side panel to gain access to the internals.
- Laptop: Laptop disassembly is more varied. You’ll typically need to remove screws from the bottom of the laptop. Some models may have a dedicated access panel for storage. Consult your laptop’s manual or manufacturer’s website for specific instructions. Be extremely careful with laptops, as internal components are more tightly packed.
Step 3: Locate the M.2 Slot
Once your case is open, you’ll need to find the M.2 slot on your motherboard.
- Motherboard Manual: Your motherboard manual is the best resource for identifying the M.2 slot. It’s usually a small, horizontal connector, often near the CPU socket or RAM slots.
- Labeling: M.2 slots are typically labeled “M.2.” You might also see specifications like “PCIe” or the slot’s length (e.g., M.2 2280).
- Existing Drives: If you already have a SATA drive installed, don’t confuse the M.2 slot with SATA ports, which are wider and have a different shape.
Step 4: Install the NVMe SSD
This is the core of the installation.
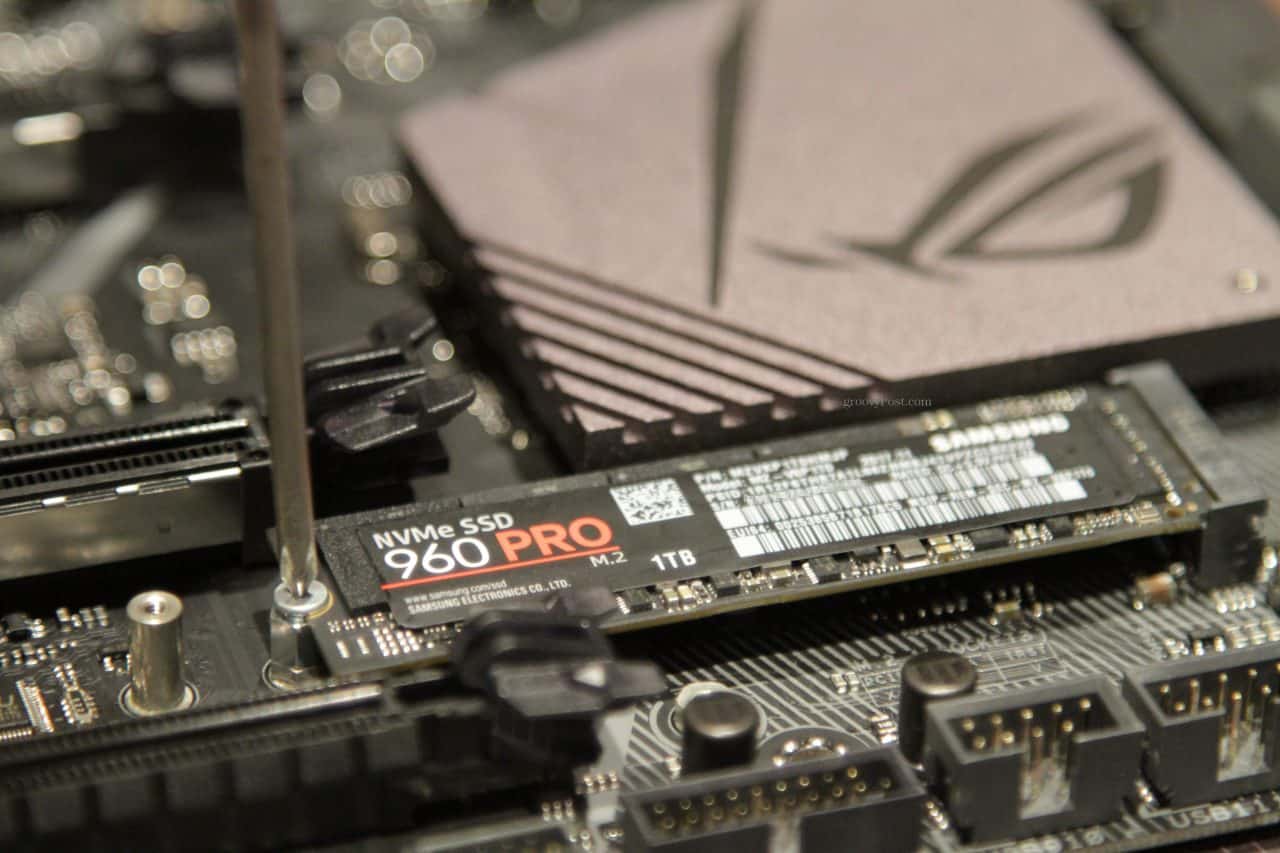
- Remove the Retention Screw: Most M.2 slots have a small screw that secures the SSD. This screw is usually located at the opposite end of the slot from where the SSD will plug in. You might need to remove this screw first. Some motherboards have a tool-less retention system.
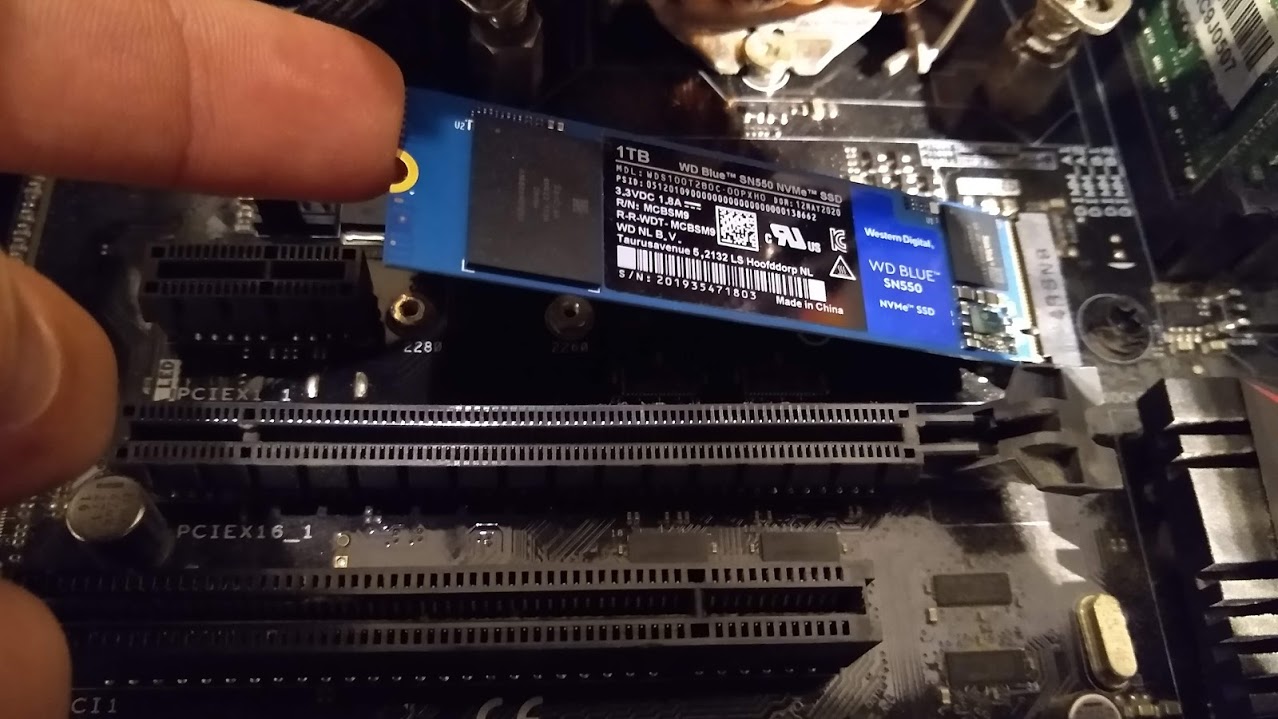
- Insert the SSD: Gently insert the M.2 NVMe SSD into the slot at an angle of approximately 30 degrees. Ensure the connector aligns properly.
- Press Down and Secure: Once inserted, gently press the SSD down so it lies flat against the motherboard. Align the screw hole on the SSD with the screw hole on the motherboard.
- Reinstall the Retention Screw: Secure the NVMe SSD with the retention screw you removed earlier (or the one that came with your SSD/motherboard). Do not overtighten. A snug fit is sufficient.
- Heatsinks: Some motherboards come with pre-installed M.2 heatsinks, or you might have purchased an NVMe SSD with an integrated heatsink. If so, follow the specific instructions for installing the heatsink over the SSD. These help dissipate heat, which can be crucial for high-performance NVMe drives, especially under sustained load.
Step 5: Close Up and Reconnect
- Replace the Case Panel: Carefully reattach the side panel of your computer case and secure it with its screws.
- Reconnect Peripherals: Plug your power cable, monitor, keyboard, mouse, and any other peripherals back into your computer.
Post-Installation: Booting Up and Configuration
You’ve done the physical part! Now it’s time to bring your new NVMe SSD to life within your operating system.
Step 1: Booting into BIOS/UEFI
- Power On: Turn on your computer.
- Access BIOS/UEFI: Immediately upon startup, you’ll need to press a specific key to enter your system’s BIOS or UEFI settings. Common keys include Delete (Del), F2, F10, or F12. Your motherboard’s boot screen will usually indicate which key to press.
- Verify Detection: Within the BIOS/UEFI, navigate to the storage or boot order section. Your new NVMe SSD should be recognized. If it’s not, double-check your physical installation and motherboard compatibility. You may need to adjust settings related to M.2 or PCIe mode.
Step 2: Booting from Your Existing Drive (If Migrating) or Installing a New OS
There are two primary scenarios here:
Scenario A: Migrating Your Existing Operating System
This is the most common approach if you’re upgrading your primary drive.
- Cloning Software: You’ll need specialized software to clone your existing operating system, applications, and data from your old drive to your new NVMe SSD. Many SSD manufacturers provide free cloning software (e.g., Samsung Data Migration, Crucial’s Acronis True Image). Alternatively, third-party tools like Macrium Reflect Free or Clonezilla are available.
- Cloning Process: Connect both your old drive and the new NVMe SSD to your system. Run the cloning software and follow its instructions to copy the entire contents of your old drive to the new NVMe SSD. This process can take some time, depending on the amount of data.
- Set Boot Order: After cloning, boot back into BIOS/UEFI. You’ll need to set your new NVMe SSD as the primary boot device. This ensures your computer starts from the cloned operating system on the faster drive.
- Boot Up: Save your BIOS/UEFI settings and restart your computer. It should now boot from the NVMe SSD.
- Verify: Once Windows (or your OS) loads, check File Explorer to ensure all your files and applications are present. You can then consider formatting and reusing your old drive as secondary storage.
Scenario B: Performing a Clean Operating System Installation
This is often recommended for the best performance and a fresh start.
- Create Bootable Media: You’ll need a USB drive (at least 8GB) and a tool like the Windows Media Creation Tool (for Windows) to create a bootable installation USB drive with your desired operating system.
- Boot from USB: Insert the bootable USB drive into your computer, boot into BIOS/UEFI, and set the USB drive as the primary boot device.
- Follow Installation Prompts: The operating system installer will launch. When asked where to install the OS, select your new NVMe SSD. You may need to format it if prompted.
- Complete Installation: Follow the on-screen instructions to complete the operating system installation.
- Install Drivers: After the OS is installed, it’s crucial to install the latest drivers for your motherboard, chipset, and especially your NVMe controller. You can usually find these on your motherboard manufacturer’s website.
Step 3: Optimizing NVMe Performance
Once your NVMe SSD is up and running, there are a few final tweaks to ensure you’re getting the most out of it.
- Trim Command: The Trim command is essential for maintaining SSD performance over time. Modern operating systems (like Windows 10/11) enable Trim automatically for SSDs. You can verify this by searching for “Defragment and Optimize Drives” in Windows. Ensure your NVMe SSD is listed as an SSD and that optimization is scheduled.
- Driver Updates: Keep your NVMe controller drivers and motherboard chipset drivers updated. Manufacturers often release updates that can improve performance and stability.
- Firmware Updates: Occasionally, SSD manufacturers release firmware updates for their drives. These can address bugs, improve performance, or add new features. Check your SSD manufacturer’s website for any available updates.
- Avoid Fragmentation: While less of a concern for SSDs than HDDs, consistently filling up your drive to capacity can slightly impact performance. Try to maintain some free space.
Troubleshooting Common Issues
While the installation process is generally straightforward, here are a few common hiccups and how to resolve them:
- NVMe Drive Not Detected:
- Physical Connection: Re-seat the NVMe SSD. Ensure it’s fully seated in the M.2 slot.
- BIOS/UEFI Settings: Double-check that the M.2 slot is enabled and configured for NVMe mode in your BIOS/UEFI. Some motherboards have settings to disable certain M.2 slots when specific SATA ports are in use, or vice-versa.
- Motherboard Compatibility: Verify that your motherboard explicitly supports NVMe in the M.2 slot you’re using.
- Slow Performance:
- PCIe Generation Mismatch: Ensure your NVMe SSD is installed in a slot that supports its PCIe generation (e.g., a Gen 4 SSD in a Gen 3 slot will perform at Gen 3 speeds).
- Drivers: Make sure you have the latest NVMe controller and chipset drivers installed.
- Thermals: If performance drops under sustained load, your NVMe SSD might be overheating. Ensure it has adequate airflow or consider installing a heatsink if it doesn’t have one.
- Cannot Boot After Cloning:
- Boot Order: Verify that the NVMe SSD is set as the primary boot device in your BIOS/UEFI.
- Cloning Errors: The cloning process might have encountered an error. Try re-cloning the drive.
- UEFI vs. Legacy Boot: Ensure your BIOS/UEFI is set to the correct boot mode (UEFI is generally preferred for NVMe drives) and that your cloning software was used with appropriate settings.
Conclusion
Upgrading to an NVMe SSD is one of the most impactful performance enhancements you can make to your computer. By following this guide, you can confidently tackle the physical installation and software configuration, unlocking the full potential of your system. The speed gains are not just noticeable; they are transformative, making your digital life faster, smoother, and more productive. So, go forth and install that NVMe SSD – your computer (and your patience) will thank you for it.
aViewFromTheCave is a participant in the Amazon Services LLC Associates Program, an affiliate advertising program designed to provide a means for sites to earn advertising fees by advertising and linking to Amazon.com. Amazon, the Amazon logo, AmazonSupply, and the AmazonSupply logo are trademarks of Amazon.com, Inc. or its affiliates. As an Amazon Associate we earn affiliate commissions from qualifying purchases.