In today’s rapidly evolving tech landscape, the pursuit of speed and efficiency is paramount. For anyone looking to significantly boost their computer’s performance, upgrading to an NVMe (Non-Volatile Memory Express) Solid State Drive (SSD) is one of the most impactful steps they can take. Unlike traditional SATA SSDs or even older Hard Disk Drives (HDDs), NVMe SSDs utilize a direct connection to the CPU via the PCIe bus, unlocking unparalleled transfer speeds. This means faster boot times, quicker application loading, and a generally snappier user experience. Whether you’re a gamer demanding lightning-fast load times, a content creator wrestling with massive files, or simply a power user seeking the pinnacle of responsiveness, understanding how to install an NVMe drive is an invaluable skill.
This guide will walk you through the entire process, from ensuring compatibility to the final software configurations, making the installation of your NVMe SSD a smooth and rewarding experience. We’ll delve into the technicalities just enough to empower you, without overwhelming you. By the end of this article, you’ll be equipped with the knowledge to confidently upgrade your system and unlock its full storage potential.
Understanding NVMe and Its Advantages
Before we dive into the installation itself, it’s crucial to understand what makes NVMe so revolutionary. The “Non-Volatile Memory Express” protocol was specifically designed for SSDs, leveraging the low latency and high parallelism of flash memory. This is a significant departure from SATA (Serial ATA), which was originally designed for much slower mechanical hard drives.
The PCIe Interface: The Superhighway for Data
The key to NVMe’s speed lies in its connection. NVMe drives connect directly to the motherboard via the PCIe (Peripheral Component Interconnect Express) interface. Think of PCIe as a high-speed data highway, with multiple lanes that can transfer data simultaneously. The more lanes and the higher the PCIe generation (e.g., PCIe 3.0, PCIe 4.0, PCIe 5.0), the faster the potential data transfer rates. This direct connection bypasses the SATA controller, which can become a bottleneck for high-performance storage.
A Leap in Performance Metrics
The tangible benefits of NVMe are evident in its performance metrics:
- Sequential Read/Write Speeds: This refers to the speed at which the drive can read or write large, contiguous blocks of data. NVMe SSDs can achieve sequential read speeds of over 7,000 MB/s, and write speeds approaching similar figures, dwarfing the ~550 MB/s limit of SATA SSDs.
- Random Read/Write Speeds: This measures the drive’s ability to access and transfer small, scattered pieces of data. NVMe excels here too, leading to significantly faster access times for operating system files, applications, and frequently accessed data.
- IOPS (Input/Output Operations Per Second): This metric indicates how many read/write operations a drive can perform in a second. NVMe drives boast much higher IOPS ratings than SATA drives, which translates to a more responsive system under heavy multitasking loads.
Form Factors: M.2 is King
While NVMe is a protocol, the physical form factor you’ll most commonly encounter is M.2. M.2 is a small, gumstick-like connector that plugs directly into a dedicated slot on your motherboard. It’s important to note that not all M.2 slots support NVMe. Some M.2 slots are designed for SATA SSDs, which will limit their performance. Always check your motherboard’s specifications to confirm if it supports NVMe M.2 drives.
Preparing for Installation: Compatibility and Prerequisites
Before you get your hands dirty, a bit of preparation will ensure a smooth installation process. This involves checking your system’s compatibility, gathering the necessary tools, and deciding on the type of NVMe drive you need.
Ensuring Motherboard and System Compatibility
This is arguably the most critical step. Installing an NVMe drive is only possible if your motherboard and system support it.
Checking Motherboard Support
- Motherboard Manual: The definitive source of information is your motherboard’s manual. It will clearly state which M.2 slots are available and whether they support NVMe SSDs. Look for specifications mentioning “NVMe” or “PCIe M.2.”
- Motherboard Specifications Online: If you don’t have the physical manual, search for your motherboard model on the manufacturer’s website. The product page will list detailed specifications, including M.2 slot capabilities.
- BIOS/UEFI Settings: Even if your motherboard has an NVMe-compatible slot, you might need to enable NVMe support in your BIOS/UEFI settings. This is usually a straightforward toggle.
Understanding PCIe Generation and Lanes
NVMe drives are rated for specific PCIe generations (e.g., PCIe 3.0 x4, PCIe 4.0 x4, PCIe 5.0 x4). Your motherboard’s M.2 slot will also have a specific PCIe generation and number of lanes it supports.
- Backward Compatibility: Newer generation NVMe drives are generally backward compatible with older generation slots, but they will operate at the slower speed of the slot. For example, a PCIe 4.0 NVMe drive in a PCIe 3.0 slot will perform at PCIe 3.0 speeds.
- Optimal Performance: To get the most out of a high-end NVMe drive, ensure your motherboard’s M.2 slot supports the same or a higher PCIe generation.
- Number of Lanes: Most NVMe M.2 slots utilize 4 PCIe lanes (x4), which is standard for achieving high speeds. If a slot is rated for fewer lanes (e.g., x2), performance will be reduced.
Boot Drive Considerations
If you plan to install an NVMe SSD as your primary boot drive, you’ll need to ensure your motherboard’s BIOS/UEFI supports booting from NVMe. Most modern motherboards do, but older ones might require a BIOS update or may not support it at all.
Choosing the Right NVMe Drive
NVMe drives come in various capacities and performance tiers. Consider your needs and budget:
- Capacity: NVMe drives are available in capacities ranging from 250GB to several terabytes. Choose a size that accommodates your operating system, applications, and frequently accessed files.
- Performance Tier:
- Entry-level (PCIe 3.0): Excellent for general use, gaming, and everyday productivity.
- Mid-range (PCIe 4.0): Offers a noticeable step up in speed, beneficial for content creators and demanding users.
- High-end (PCIe 5.0): For bleeding-edge performance enthusiasts, professional workloads, and future-proofing.
- DRAM Cache: Drives with a DRAM cache generally offer better sustained performance and longevity, as they can buffer frequently accessed data.
Tools and Materials
You’ll need a few basic tools for the installation:
- Phillips Head Screwdriver: A magnetic tip can be very helpful.
- Anti-static Wrist Strap (Recommended): To prevent electrostatic discharge (ESD) from damaging your components.
- NVMe SSD: Your chosen drive.
- Motherboard Manual: For reference.
- Flashlight (Optional): To illuminate the M.2 slot.
The Installation Process: Physical Drive Mounting
This section covers the physical steps of installing the NVMe drive into your motherboard.
Powering Down and Disconnecting
Safety first! Before opening your computer, ensure it’s completely powered off.
- Shut Down Your Computer: Perform a full shutdown from your operating system.
- Unplug Power Cable: Disconnect the main power cord from the back of the power supply unit (PSU).
- Disconnect Peripherals: Unplug all external devices (keyboard, mouse, monitor, USB drives, etc.).
- Ground Yourself: Wear an anti-static wrist strap and attach it to a grounded metal object (like the unpainted metal chassis of your computer case) to prevent ESD. If you don’t have a wrist strap, periodically touch a grounded metal object before handling components.
Locating the M.2 Slot
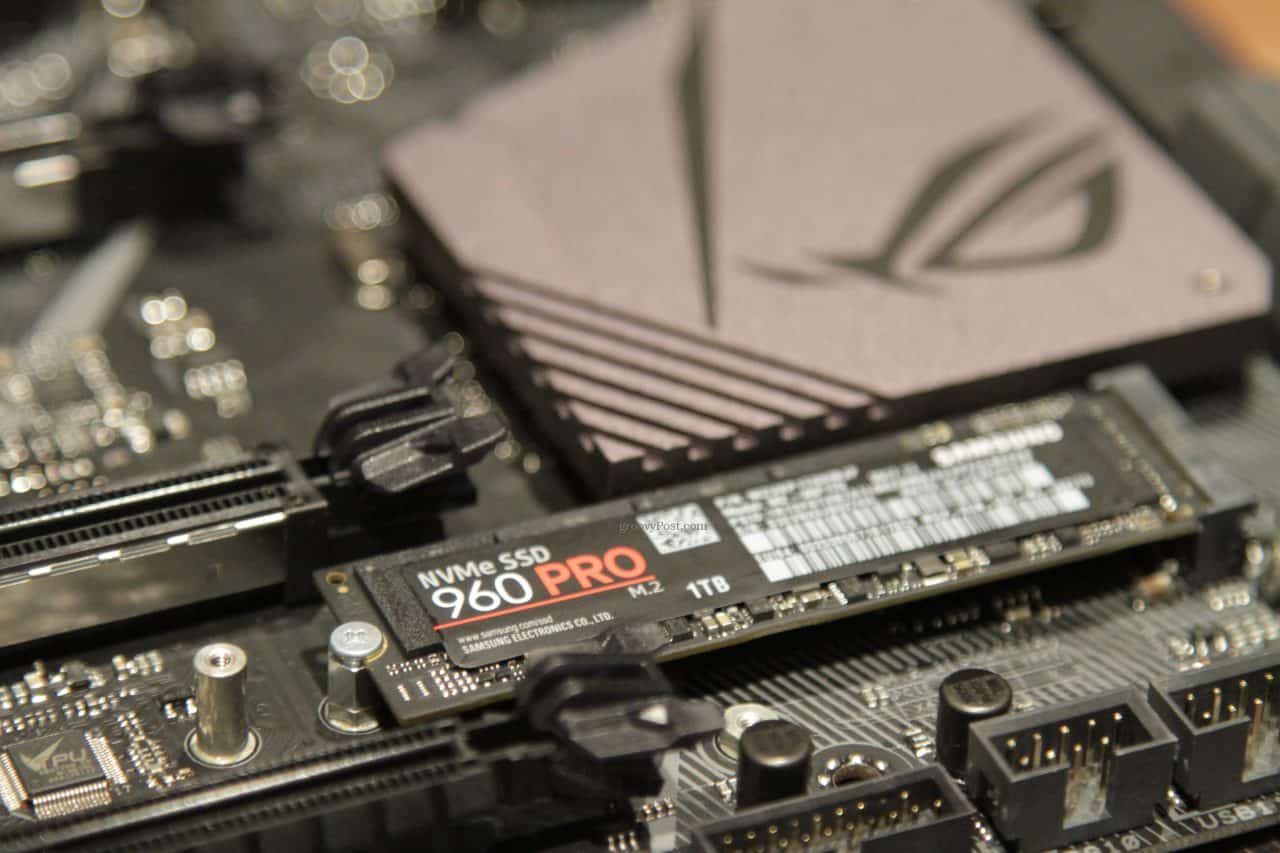
Consult your motherboard manual to precisely locate the M.2 slot(s). They are usually small, horizontal slots, often near the CPU socket or between PCIe expansion slots. Some motherboards have heatsinks over the M.2 slots; you may need to remove these first.
Installing the NVMe Drive
- Remove M.2 Slot Screw: Most M.2 slots have a small screw that holds the drive in place. Locate this screw and carefully remove it. Some motherboards have a small standoff for the screw; keep track of it.
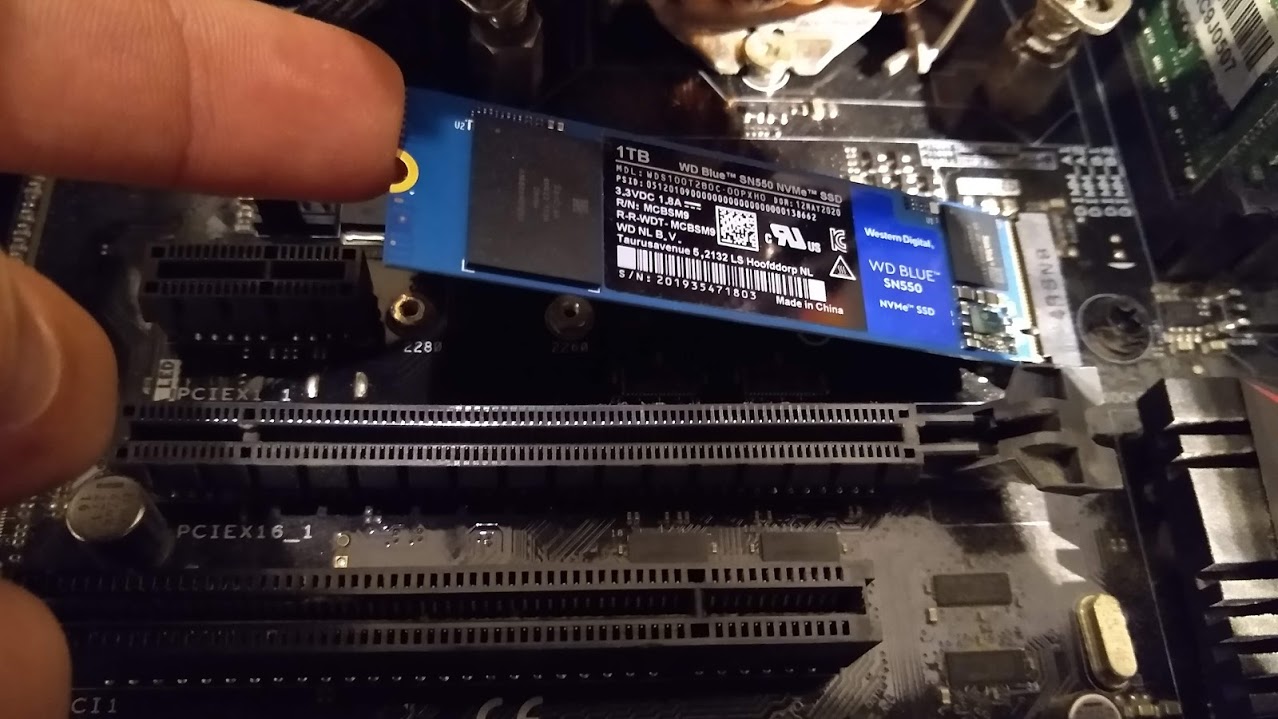
- Insert the NVMe Drive: Gently insert the notched end of the NVMe SSD into the M.2 slot at an angle (typically around 30 degrees). The drive should slide in smoothly.
- Press Down and Secure: Once inserted, gently press the other end of the NVMe drive down towards the motherboard. It should sit flush.
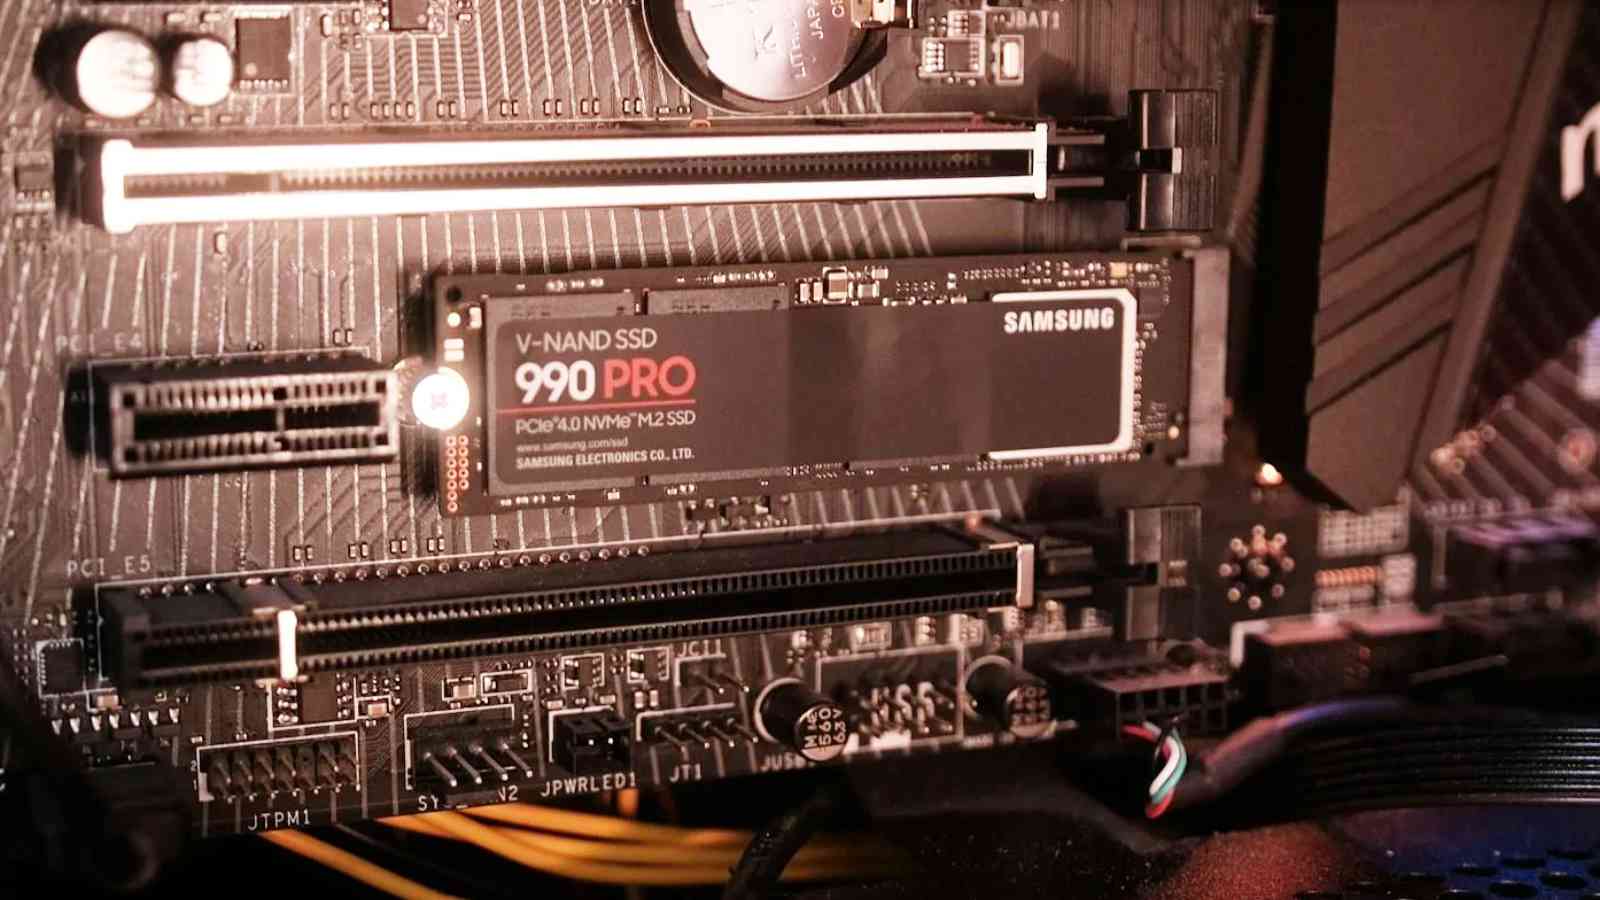
- Secure with Screw: Re-insert the M.2 slot screw to hold the drive firmly in place. Do not overtighten.
- Reinstall Heatsink (If Applicable): If your motherboard had an M.2 heatsink, reinstall it according to your motherboard’s manual.
Closing Up and Powering On
- Close the Case: Reattach your computer’s side panel.
- Reconnect Peripherals and Power: Plug in your monitor, keyboard, mouse, and the main power cable.
- Power On: Boot up your computer.
Post-Installation: BIOS, OS Recognition, and Formatting
Once the physical installation is complete, you need to ensure your system recognizes the new drive and prepare it for use.
Accessing BIOS/UEFI and Verifying Detection
The first step after booting up is to confirm that your system’s BIOS/UEFI sees the new NVMe drive.
- Enter BIOS/UEFI: Immediately after powering on your computer, repeatedly press the designated key to enter BIOS/UEFI setup. This key is usually displayed on the boot screen and is commonly
Del,F2,F10, orF12. Refer to your motherboard manual if unsure. - Locate Storage Devices: Navigate through the BIOS/UEFI menus to find a section listing your connected storage devices. This might be under “System Information,” “Storage Configuration,” “SATA Configuration,” or a similar heading.
- Verify NVMe Drive: You should see your newly installed NVMe SSD listed among your other drives. Note its name and capacity to confirm it’s detected.
- Check Boot Order (If Applicable): If you’re installing the NVMe as your boot drive, ensure it’s set as the primary boot device in the boot order settings.
Formatting and Initializing the NVMe Drive (Windows)
If your NVMe drive is not your boot drive, or if you’re installing a new operating system on it, you’ll need to format and initialize it.
Using Disk Management
- Launch Disk Management: Right-click on the Windows Start button and select “Disk Management.”
- Initialize Disk: You might be prompted to initialize the disk immediately upon opening Disk Management. If not, locate the new NVMe drive (it will likely show as “Unallocated space”). Right-click on the disk and select “Initialize Disk.” Choose GPT (GUID Partition Table) for modern systems, especially if the drive is larger than 2TB or if you’re using UEFI booting.
- Create New Simple Volume: Right-click on the “Unallocated” space of your NVMe drive and select “New Simple Volume.”
- Follow the Wizard: The New Simple Volume Wizard will guide you through:
- Specifying Volume Size: Use the maximum available space for a single partition, or divide it as needed.
- Assigning Drive Letter: Choose an available drive letter (e.g., D:, E:).
- Formatting: Select NTFS as the file system (standard for Windows). Choose “Perform a quick format” for speed, and you can optionally enable “Perform a full format” for a more thorough check of the drive. Set an appropriate “Allocation unit size” (usually default is fine).
- Volume Label: Give your drive a descriptive name (e.g., “Games,” “Projects,” “Storage”).
- Complete: Click “Finish.” Disk Management will format the drive, and it will appear as a usable drive in File Explorer.
If Installing an OS on the NVMe Drive
If you’re installing Windows on your new NVMe drive, the process is integrated into the Windows installation.
- Boot from Installation Media: Boot your computer from your Windows installation USB or DVD.
- Custom Installation: When prompted to choose an installation type, select “Custom: Install Windows only (advanced).”
- Select NVMe Drive: You will see a list of available drives. Identify your NVMe SSD (it should be the one without any partitions, or you can delete existing partitions to prepare it). Select the NVMe drive and click “New” to create partitions, or simply click “Next” to let the installer partition it automatically.
- Continue Installation: The Windows installer will then proceed to install the operating system onto your NVMe drive.
Driver Installation and Optimization
While most modern operating systems have built-in NVMe drivers, it’s often beneficial to install the specific drivers from the NVMe manufacturer.
- Manufacturer Drivers: Visit the website of your NVMe SSD manufacturer (e.g., Samsung, Crucial, WD, Kingston) and download the latest drivers or management software for your specific model.
- Firmware Updates: These management tools often include firmware updates for your NVMe drive, which can improve performance, stability, and fix potential bugs.
- TRIM Enablement: Ensure TRIM is enabled. TRIM is a command that allows the operating system to tell the SSD which data blocks are no longer in use and can be erased. This is crucial for maintaining SSD performance over time. Windows typically enables TRIM automatically for NVMe drives. You can check its status in PowerShell by running
fsutil behavior query DisableDeleteNotify. If the value is 0, TRIM is enabled.
By following these steps, you’ll have successfully installed and configured your NVMe SSD, paving the way for a significantly faster and more responsive computing experience. Enjoy the speed!
aViewFromTheCave is a participant in the Amazon Services LLC Associates Program, an affiliate advertising program designed to provide a means for sites to earn advertising fees by advertising and linking to Amazon.com. Amazon, the Amazon logo, AmazonSupply, and the AmazonSupply logo are trademarks of Amazon.com, Inc. or its affiliates. As an Amazon Associate we earn affiliate commissions from qualifying purchases.