In the ever-evolving landscape of web development, managing different Node.js versions can quickly become a significant hurdle. Whether you’re working on multiple projects, experimenting with new frameworks, or ensuring compatibility with legacy systems, the need to switch between Node.js environments is a common requirement. This is precisely where the Node Version Manager (NVM) shines. NVM is an indispensable command-line tool that empowers developers to install, manage, and switch between various Node.js versions on their systems with remarkable ease.
This guide will walk you through the entire process of installing and configuring NVM, from understanding its purpose to troubleshooting common issues. We’ll delve into the core functionalities and showcase how NVM can streamline your development workflow, ultimately boosting your productivity and ensuring smoother project execution.
Understanding the Need for Node Version Management
Before we dive into the installation process, it’s crucial to grasp why NVM is so valuable. Node.js, like many software projects, undergoes continuous development. New versions are released regularly, introducing new features, performance improvements, and bug fixes. However, not all projects can immediately adopt the latest Node.js version.
The Challenges of Multiple Node.js Versions
- Project Dependencies: Many projects rely on specific Node.js versions. Updating Node.js globally for all projects can lead to unexpected breakages if older projects are not compatible with the newer runtime.
- Framework and Library Compatibility: Certain frameworks or libraries might be optimized for or even require a particular Node.js version. Staying on a single global version can limit your ability to use the latest advancements or maintain older, stable projects.
- Experimentation and Learning: Developers often want to explore new features introduced in recent Node.js releases or test out different versions for performance benchmarks. Managing these experiments without interfering with production-ready projects is essential.
- Team Collaboration: In team environments, ensuring all developers are using the same Node.js version for a specific project is vital for consistent builds and predictable behavior.
How NVM Solves These Problems
NVM acts as a lightweight, script-based solution that allows you to install multiple Node.js versions in isolated directories. It then provides simple commands to set which version should be active in your current shell session. This means you can have Node.js v14.x for one project, v16.x for another, and the latest v18.x for your newest endeavor, all without conflict.
Installing NVM on Your System
The installation process for NVM varies slightly depending on your operating system. The most common approach involves downloading and executing an installation script.
Installing NVM on macOS and Linux
For macOS and Linux users, the recommended installation method is through curl or wget to download and run the official install script from the NVM GitHub repository.
Step 1: Open Your Terminal
Launch your preferred terminal application.
Step 2: Download and Run the NVM Installation Script
You can find the latest installation script on the official NVM GitHub repository. It’s generally recommended to use the latest stable version. Visit the NVM GitHub page (https://github.com/nvm-sh/nvm) and look for the “Install & Update Script” section.
As of this writing, a common command to install NVM looks like this:
curl -o- https://raw.githubusercontent.com/nvm-sh/nvm/v0.39.5/install.sh | bash
curl -o-: This part downloads the script and outputs its content to standard output.https://raw.githubusercontent.com/nvm-sh/nvm/v0.39.5/install.sh: This is the URL of the installation script. Always check the NVM GitHub repository for the most up-to-date version number (v0.39.5in this example) to ensure you’re installing the latest stable release.| bash: This pipes the downloaded script directly into thebashinterpreter, executing it.
Alternatively, if you prefer wget:
wget -qO- https://raw.githubusercontent.com/nvm-sh/nvm/v0.39.5/install.sh | bash
The script will:
- Clone the NVM repository to
~/.nvm. - Attempt to add the necessary source lines to your shell profile files (e.g.,
~/.bashrc,~/.zshrc,~/.profile). These lines are crucial for making thenvmcommand available in your terminal.
Step 3: Configure Your Shell Profile
After the script runs, it will typically instruct you to close and reopen your terminal or to source your profile file. This is because the changes made to your shell profile need to be loaded for the nvm command to be recognized.
If you are using Bash, you might need to run:
source ~/.bashrc
If you are using Zsh (common on newer macOS versions):
source ~/.zshrc
If you’re unsure which shell you’re using, you can often find out by running echo $SHELL.
Step 4: Verify the Installation
To confirm that NVM has been installed correctly, run the following command:
command -v nvm
If NVM is installed and configured properly, this command should output nvm. If it doesn’t, double-check that you’ve sourced your profile file or closed and reopened your terminal.
Installing NVM on Windows
Managing Node.js versions on Windows requires a different approach. While NVM itself is a shell script and not directly compatible with Windows Command Prompt or PowerShell, there are excellent alternatives. The most popular and recommended is nvm-windows.
Step 1: Download the Latest Release
Visit the nvm-windows releases page on GitHub: https://github.com/coreybutler/nvm-windows/releases.
Download the latest installer executable file (nvm-setup.zip or similar).
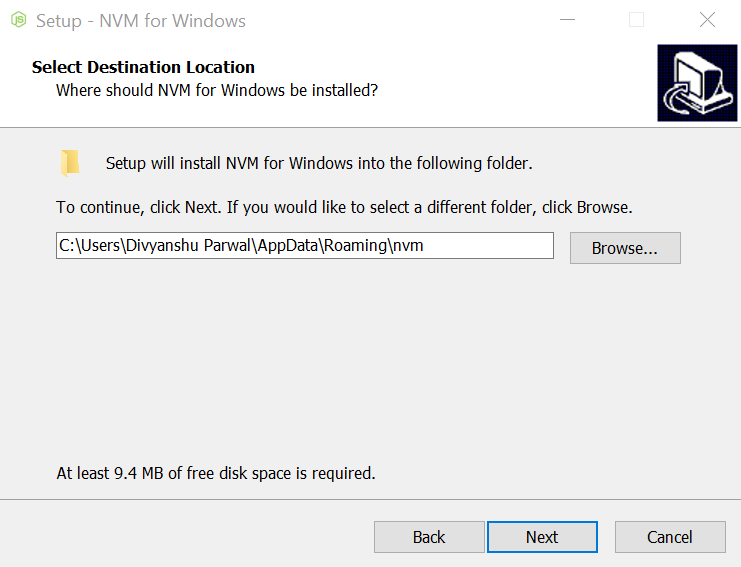
Step 2: Run the Installer
Extract the downloaded ZIP file and run the nvm-setup.exe installer. Follow the on-screen prompts. The installer will guide you through the process of installing nvm-windows and setting up the necessary environment variables.
Step 3: Open a New Command Prompt or PowerShell Window
After installation, it’s crucial to open a new Command Prompt or PowerShell window. Existing windows will not recognize the newly installed nvm command.
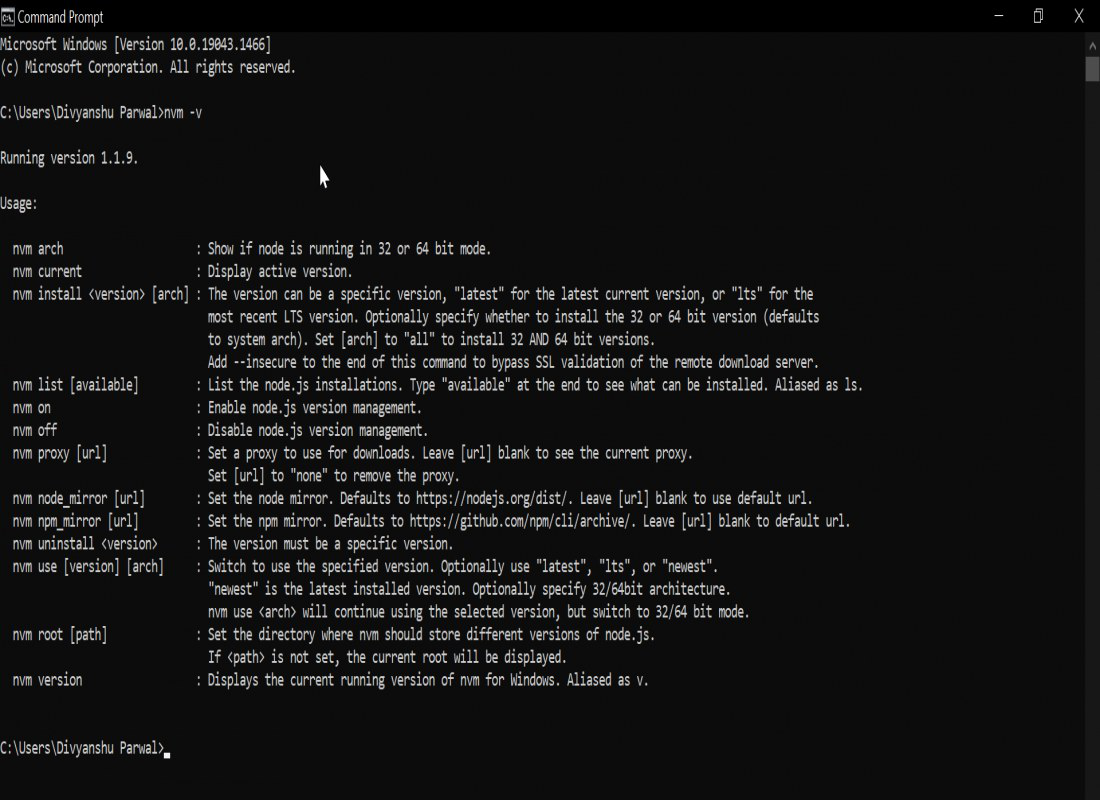
Step 4: Verify the Installation
In your new terminal window, run:
nvm version
This command should display the installed version of nvm-windows, confirming a successful installation.
Managing Node.js Versions with NVM
Once NVM is installed, you can start leveraging its power to manage your Node.js environments. The core commands are intuitive and straightforward.
Installing Node.js Versions
The primary function of NVM is to install different Node.js versions. You can install specific versions or the latest available versions.
1. Install a Specific Node.js Version:
To install a particular version (e.g., Node.js v16.14.0):
nvm install 16.14.0
2. Install the Latest LTS (Long-Term Support) Version:
LTS versions are recommended for most production environments due to their stability and extended support.
nvm install --lts
3. Install the Latest Current Version:
This installs the most recent release, which might include newer features but could be less stable than LTS versions.
nvm install node
NVM will download, compile (if necessary), and install the requested Node.js version in its designated directory.
Switching Between Node.js Versions
After installing multiple Node.js versions, you’ll need to tell NVM which version you want to use for your current shell session.
1. Use a Specific Installed Version:
To switch to Node.js v16.14.0:
nvm use 16.14.0
2. Use the Latest LTS Version:
If you have installed an LTS version and want to use it:
nvm use --lts
3. Use the Latest Installed Version:
This command will activate the most recently installed Node.js version.
nvm use node
When you run nvm use <version>, NVM updates your shell’s environment variables so that the node and npm commands point to the executables of the selected version.
Listing Installed Versions
To see all the Node.js versions you have installed via NVM:
nvm ls
This command will output a list of installed versions, with an arrow (->) indicating the currently active version.
Setting a Default Node.js Version
You can set a default Node.js version that will be automatically used whenever you open a new terminal session. This is particularly useful for ensuring your primary development environment is always ready.
nvm alias default <version>
For example, to set Node.js v16.14.0 as the default:
nvm alias default 16.14.0
Uninstalling Node.js Versions
If you no longer need a specific Node.js version, you can uninstall it to free up disk space.
nvm uninstall <version>
For example, to uninstall Node.js v14.17.0:
nvm uninstall 14.17.0
Advanced NVM Usage and Troubleshooting
While the basic commands cover most use cases, understanding some advanced features and common troubleshooting steps can further enhance your NVM experience.
Managing Global NPM Packages
Each Node.js version installed by NVM has its own independent set of global NPM packages. This is a significant advantage, as it prevents version conflicts for globally installed tools like nodemon, create-react-app, or webpack-cli.
When you install a package globally using npm install -g <package-name>, it gets installed for the currently active Node.js version. If you switch to a different Node.js version, you will need to reinstall any global packages you want to use with that version.
Troubleshooting Common Issues
nvm: command not found: This is the most common error and usually means NVM is not correctly configured in your shell profile.- Solution: Ensure you have sourced your shell profile (
source ~/.bashrcorsource ~/.zshrc) or closed and reopened your terminal after installation. Verify that the NVM lines were correctly added to your profile file.
- Solution: Ensure you have sourced your shell profile (
- Permission Errors During Installation: Sometimes, you might encounter permission issues when NVM tries to create directories or install Node.js.
- Solution: Ensure your user has the necessary write permissions for the NVM installation directory (
~/.nvm) and the Node.js version directories. You might need to adjust permissions usingchmodif this is the case, though NVM typically handles this during its initial setup.
- Solution: Ensure your user has the necessary write permissions for the NVM installation directory (
npmandnodeNot Found After Switching: In rare cases, especially after a fresh installation or system update, your shell might not pick up the changes immediately.- Solution: Try running
nvm use <version>again. If that doesn’t work, restart your terminal or even your computer. For nvm-windows, ensure you are opening a new terminal window after installation or switching versions.
- Solution: Try running
- Issues with
.nvmrcFiles: Many projects use a.nvmrcfile to specify the required Node.js version. You can use NVM to automatically switch to the version defined in this file.- Usage: Navigate to your project directory in the terminal and run
nvm use. NVM will look for a.nvmrcfile in the current directory or its parent directories and automatically select the specified Node.js version.
- Usage: Navigate to your project directory in the terminal and run
NVM for Different Environments
- Development: NVM is essential for developers to easily switch between Node.js versions required by different projects.
- Testing: When testing applications across various Node.js versions, NVM simplifies the setup and execution of test suites.
- CI/CD Pipelines: While CI/CD platforms often have their own Node.js version management, understanding NVM principles can help in configuring these environments. You can use NVM within your CI scripts to install and select specific Node.js versions.
Conclusion
The Node Version Manager (NVM) is a powerful and essential tool for any developer working with Node.js. By providing a flexible and straightforward way to manage multiple Node.js versions, NVM eliminates common compatibility headaches, streamlines project setup, and significantly enhances developer productivity.
Whether you’re a seasoned developer juggling numerous projects or a beginner exploring the vast world of JavaScript, integrating NVM into your workflow is a crucial step towards a more efficient and error-free development experience. Follow the installation steps for your operating system, experiment with the commands, and make NVM your go-to solution for all your Node.js version management needs.
aViewFromTheCave is a participant in the Amazon Services LLC Associates Program, an affiliate advertising program designed to provide a means for sites to earn advertising fees by advertising and linking to Amazon.com. Amazon, the Amazon logo, AmazonSupply, and the AmazonSupply logo are trademarks of Amazon.com, Inc. or its affiliates. As an Amazon Associate we earn affiliate commissions from qualifying purchases.