In the rapidly evolving landscape of technology, where data reigns supreme and artificial intelligence reshapes industries, Python has emerged as a dominant force. Its versatility, readability, and extensive ecosystem of libraries make it the go-to language for everything from web development to complex scientific computing. At the heart of Python’s prowess in data science, machine learning, and numerical analysis lies a library that is often described as the “backbone” – NumPy.
NumPy, short for Numerical Python, is an open-source library that provides support for large, multi-dimensional arrays and matrices, along with a collection of high-level mathematical functions to operate on these arrays. It’s an indispensable tool for anyone working with numerical data in Python, offering significant performance advantages over standard Python lists due to its implementation in C. Whether you’re crunching numbers for financial models, processing images, building machine learning algorithms, or simulating complex scientific phenomena, NumPy is the foundational library that makes these tasks efficient and manageable. Its integration with other crucial libraries like SciPy, Matplotlib, and Pandas further solidifies its position as an essential component in the modern data science toolkit.
This comprehensive guide will walk you through the process of installing NumPy in your Python environment. We’ll cover the necessary prerequisites, various installation methods suitable for different user needs, how to verify a successful installation, and common troubleshooting steps to ensure you’re ready to harness the full power of Numerical Python.
Understanding the Prerequisites: Paving the Way for Seamless Installation
Before diving into the installation commands, it’s crucial to ensure your system is set up correctly. A few fundamental components are necessary for a smooth NumPy installation, preventing many common issues down the line.
Python: The Essential Interpreter
The first and most obvious prerequisite is Python itself. NumPy is a Python library, so you need a working Python installation on your system.
- Version Recommendation: While NumPy supports various Python versions, it’s always recommended to use a recent stable release of Python 3.x (e.g., Python 3.8, 3.9, 3.10, or newer). Older Python 2.x versions are deprecated and should not be used for new projects.
- Checking Your Python Installation: Open your terminal or command prompt and type:
bash

python --version
or
bash

python3 --version
If Python is installed, you’ll see its version number. If not, or if you see an error like “command not found,” you’ll need to download and install Python from the official website (python.org). During installation, especially on Windows, remember to check the “Add Python to PATH” option.
Pip: Python’s Package Powerhouse
Pip is Python’s standard package installer. It allows you to install and manage additional libraries and dependencies that aren’t part of the Python standard library. NumPy is distributed as a package, making pip the primary tool for its installation for most users.
- How Pip Works: When you use
pip install, it connects to the Python Package Index (PyPI), downloads the specified package, and installs it into your Python environment. - Ensuring Pip is Up-to-Date: Pip is usually installed automatically with modern Python versions. However, it’s good practice to ensure it’s up-to-date to benefit from the latest features and bug fixes. You can upgrade pip by running:
bash

python -m pip install --upgrade pip
Thepython -m pipsyntax is generally preferred as it ensures you’re using the pip associated with your specific Python interpreter, especially if you have multiple Python installations.
The Case for Virtual Environments
One of the most critical best practices in Python development, often overlooked by beginners, is the use of virtual environments. A virtual environment is an isolated Python environment that allows you to manage dependencies for different projects independently.
- Why Use Them?
- Dependency Isolation: Prevents conflicts between different projects that might require different versions of the same library. For example, Project A might need NumPy 1.20, while Project B needs NumPy 1.22. Without virtual environments, installing one might break the other.
- Cleanliness: Keeps your global Python installation clean, avoiding a tangled web of project-specific libraries.
- Reproducibility: Makes it easier to share your project with others, ensuring they can set up an identical environment.
- How to Create and Activate a Virtual Environment:
- Navigate to your project directory:
bash

cd my_project_folder
- Create a virtual environment (e.g., named ‘venv’):
bash

python -m venv venv
This creates a folder namedvenvin your project directory containing a copy of the Python interpreter and pip, isolated from your main Python installation. - Activate the virtual environment:
- On Windows:
bash

.venvScriptsactivate
- On macOS/Linux:
bash

source venv/bin/activate
Once activated, your terminal prompt will typically show(venv)or a similar indicator, signifying that you are now working within that isolated environment. Any packages you install viapipwill now be installed into this specificvenvenvironment. Always activate your virtual environment before installing NumPy or any other project-specific libraries.
- On Windows:
- Navigate to your project directory:
Step-by-Step Installation Methods for NumPy
With your prerequisites in place, let’s explore the primary methods for installing NumPy. Each method caters to slightly different needs and user preferences.
Method 1: The Standard Approach with Pip (Recommended for Most Users)
For the majority of Python developers, using pip within a virtual environment is the most straightforward and recommended way to install NumPy.
-
Activate your virtual environment: (If you haven’t already)
- Windows:
.venvScriptsactivate - macOS/Linux:
source venv/bin/activate
- Windows:
-
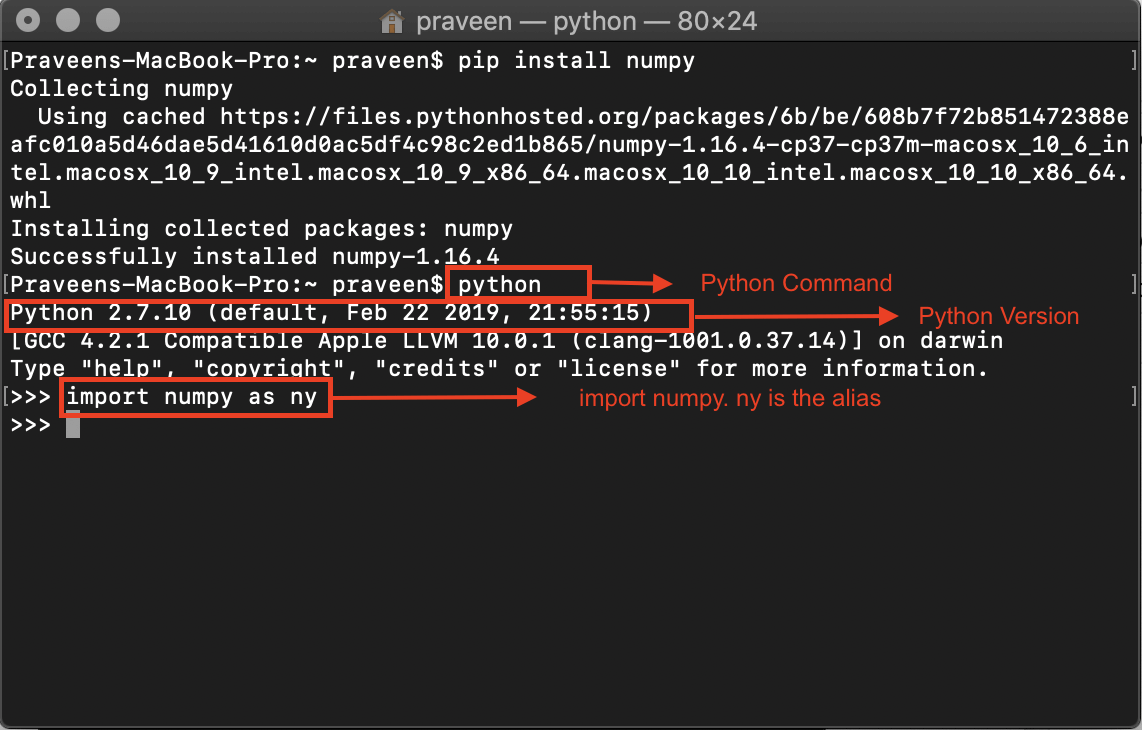
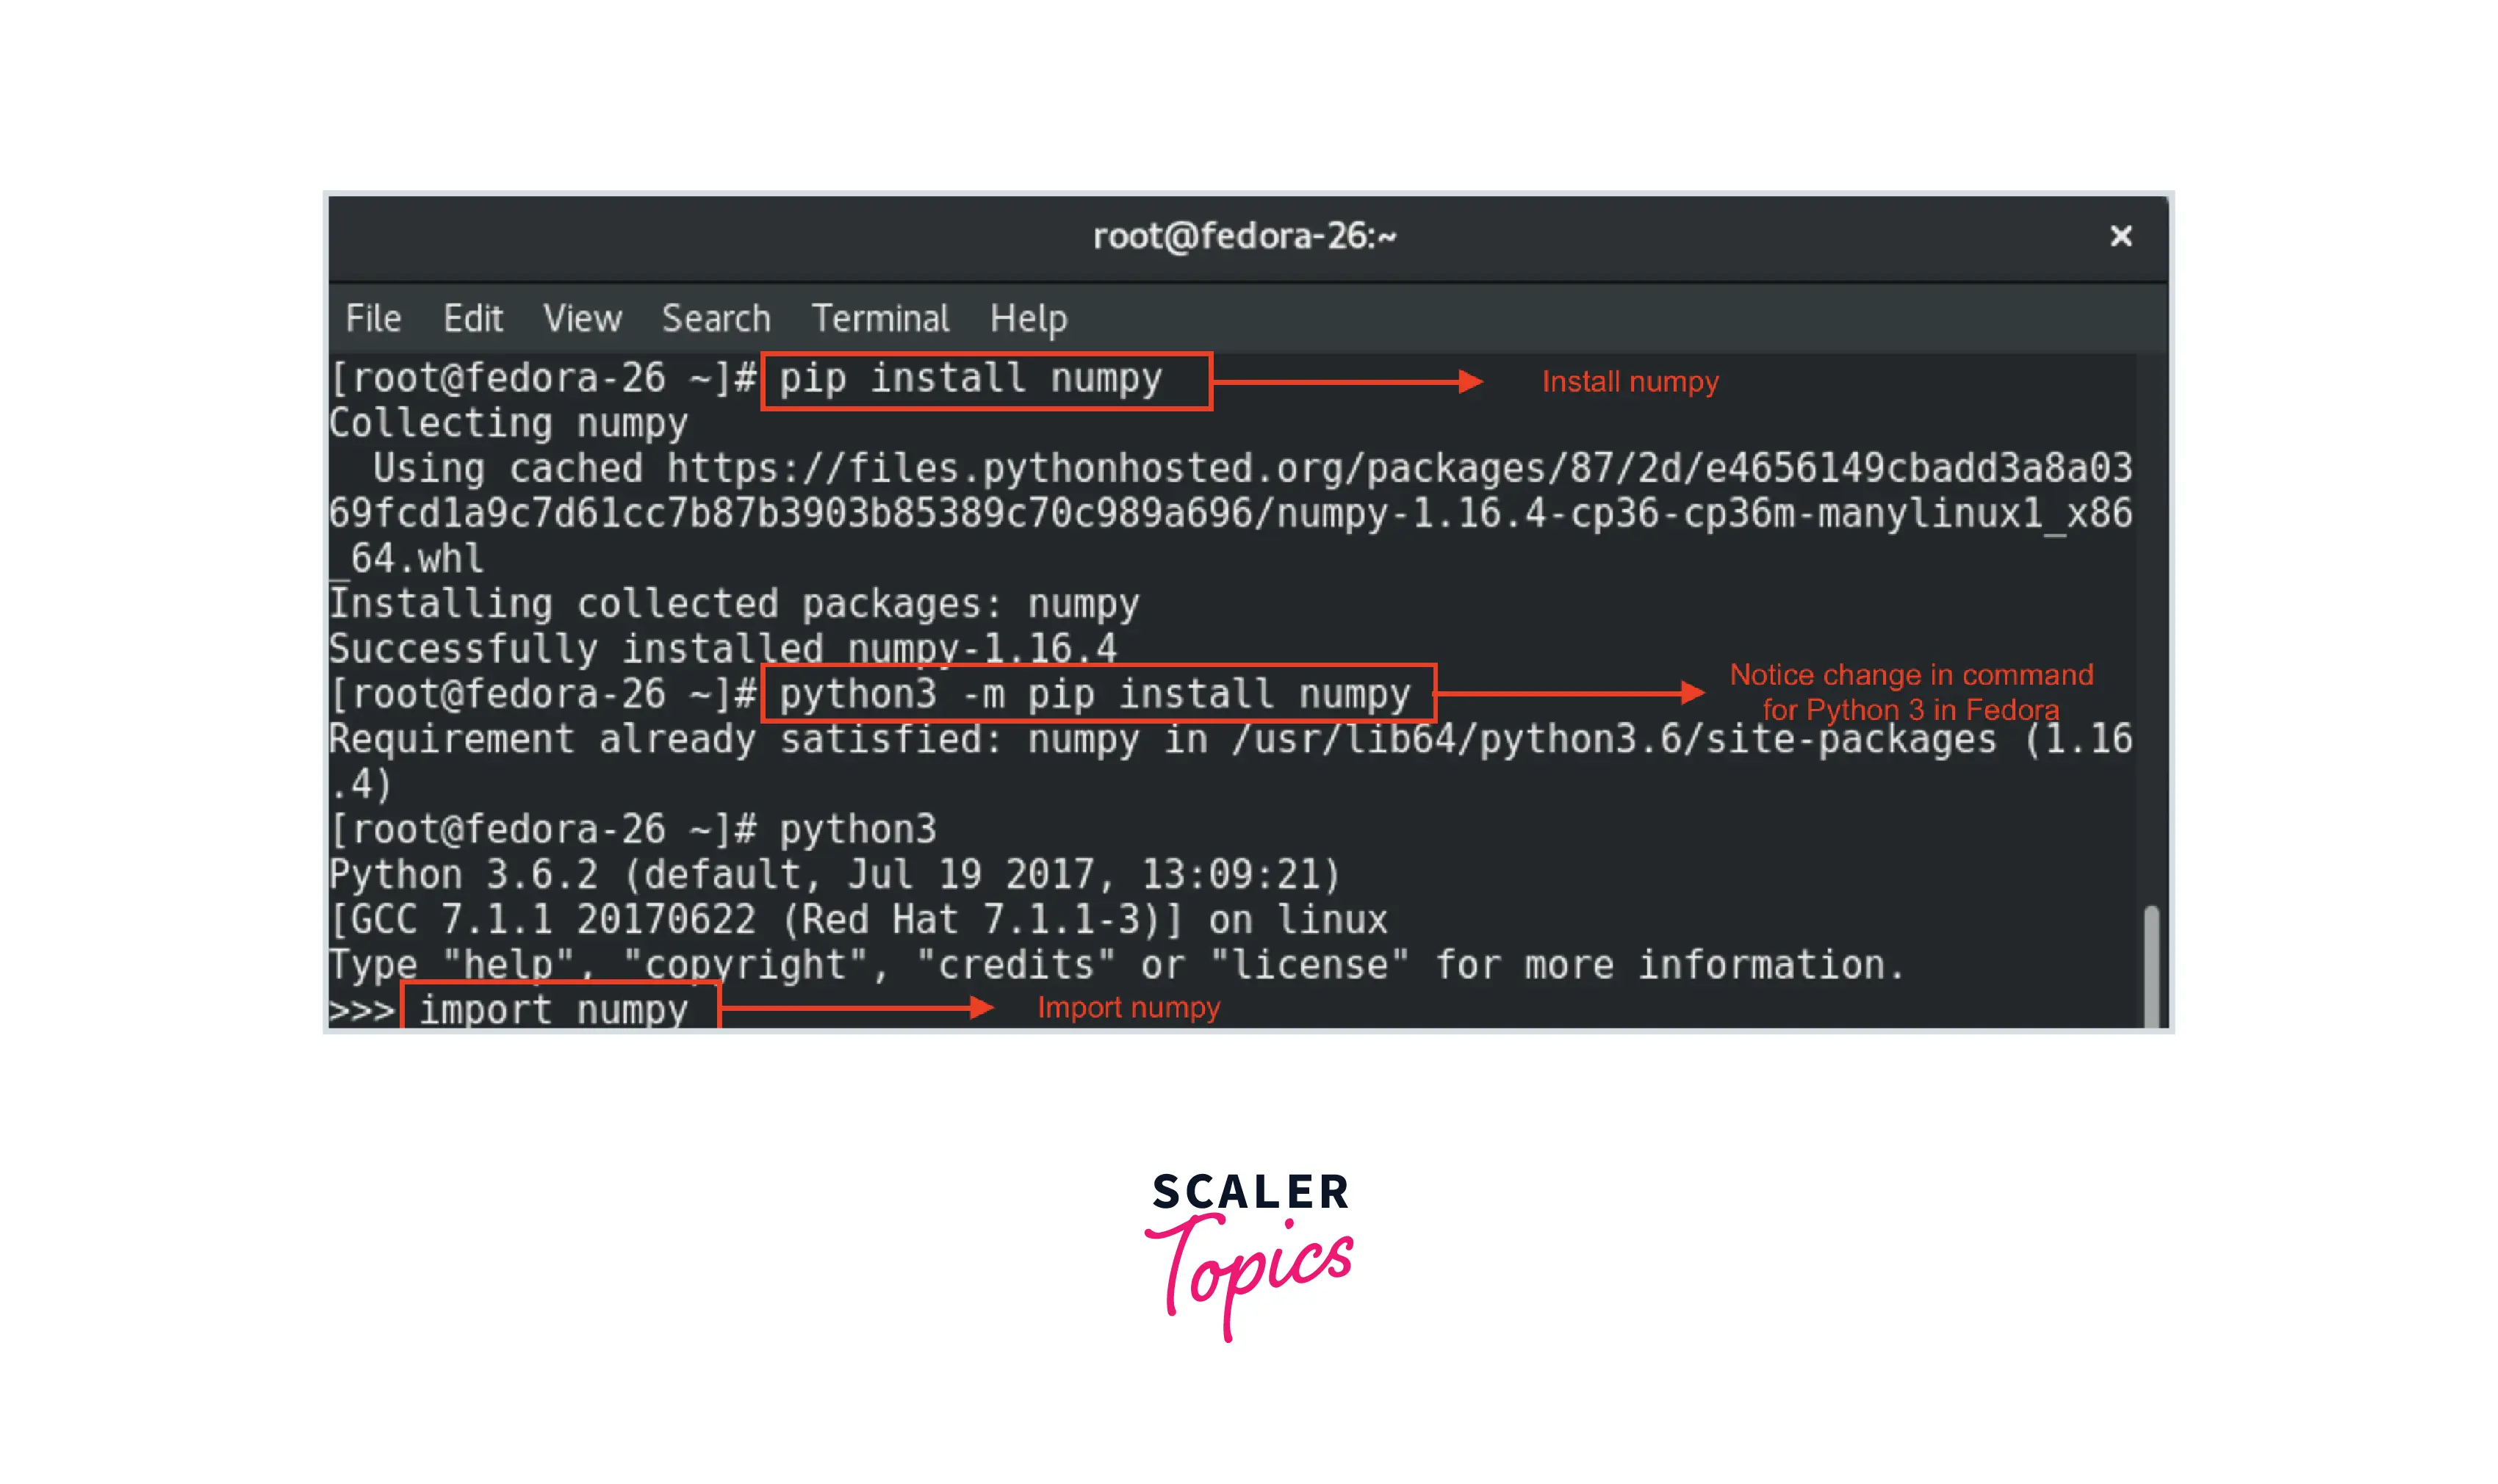
Install NumPy: Once your virtual environment is active, simply run the following command:
pip install numpyWhat happens: Pip will connect to PyPI, download the latest stable version of NumPy compatible with your Python interpreter, and install it. NumPy often comes as a “wheel” package (.whl file), which is a pre-compiled distribution, making the installation process very fast and efficient as it bypasses the need for local compilation.
-
Installing a Specific Version: Sometimes, you might need a particular version of NumPy for compatibility with other libraries or older projects. You can specify the version like this:
pip install numpy==1.22.0(Replace
1.22.0with your desired version number). -
Upgrading NumPy: If you already have NumPy installed and want to upgrade to a newer version, use the
--upgradeflag:
bash

pip install --upgrade numpy
This command will fetch the latest version of NumPy and replace your existing installation.
Method 2: Leveraging Anaconda/Miniconda (Ideal for Data Scientists & ML Engineers)
Anaconda and Miniconda are popular Python distributions, especially among data scientists, machine learning practitioners, and academic researchers. They come with their own package manager called conda and often pre-package many scientific computing libraries, including NumPy.
- Anaconda: A comprehensive distribution that includes Python,
conda, and hundreds of pre-installed scientific packages (NumPy, SciPy, Pandas, Matplotlib, Jupyter, etc.). It’s a large download but offers an out-of-the-box experience for data science. - Miniconda: A smaller, minimalist version of Anaconda that includes Python,
conda, and essential packages. You then install other libraries as needed. It’s preferred if you want more control over your environment size.
Why use Anaconda/Miniconda?
- Environment Management:
condais excellent for creating and managing isolated environments, similar tovenvbut often more powerful for scientific stack dependencies. - Pre-compiled Binaries:
condaoften provides highly optimized, pre-compiled binaries for numerical libraries, which can simplify installation and improve performance, especially on complex systems. - Cross-platform Compatibility: Excellent support across Windows, macOS, and Linux.
Installation with Conda:
- Install Anaconda or Miniconda: If you don’t have it, download and install either from the official Anaconda website.
- Open Anaconda Prompt (Windows) or Terminal (macOS/Linux):
- Create a new
condaenvironment (optional but recommended):
bash

conda create --name myenv python=3.9
(Replacemyenvwith your desired environment name and3.9with your preferred Python version). - Activate the
condaenvironment:
bash

conda activate myenv
- Install NumPy:
bash

conda install numpy
condawill resolve all necessary dependencies and install NumPy into your active environment. If you want to install NumPy into your base Anaconda environment (not recommended for project isolation), simply skip steps 3 and 4.
Method 3: Building from Source (For Advanced Scenarios)
Installing NumPy from its source code is generally not recommended for beginners or most users. This method requires a C compiler (like GCC on Linux/macOS or MSVC on Windows) and typically specific development headers and libraries (like BLAS and LAPACK).
- When is it used? This approach is usually reserved for:
- Developers contributing to NumPy.
- Users who need the very latest unreleased features.
- Those requiring highly specific optimizations or custom builds that aren’t available as pre-compiled binaries.
- Process Overview:
- Download the NumPy source code from GitHub or PyPI.
- Ensure you have a suitable C compiler and necessary build tools installed.
- Configure your build environment, potentially linking to specific BLAS/LAPACK libraries for performance.
- Run
python setup.py installorpip install .from the source directory.
Given the complexity and potential for error, it’s strongly advised to stick with pip or conda unless you have a specific, advanced reason to build from source.
Verifying Your NumPy Installation: Ensuring Everything is in Place
After installing NumPy using any of the methods above, it’s crucial to verify that the installation was successful and that Python can locate and import the library.
-
Activate your environment: Ensure you are in the virtual environment (if used) where you installed NumPy.
-
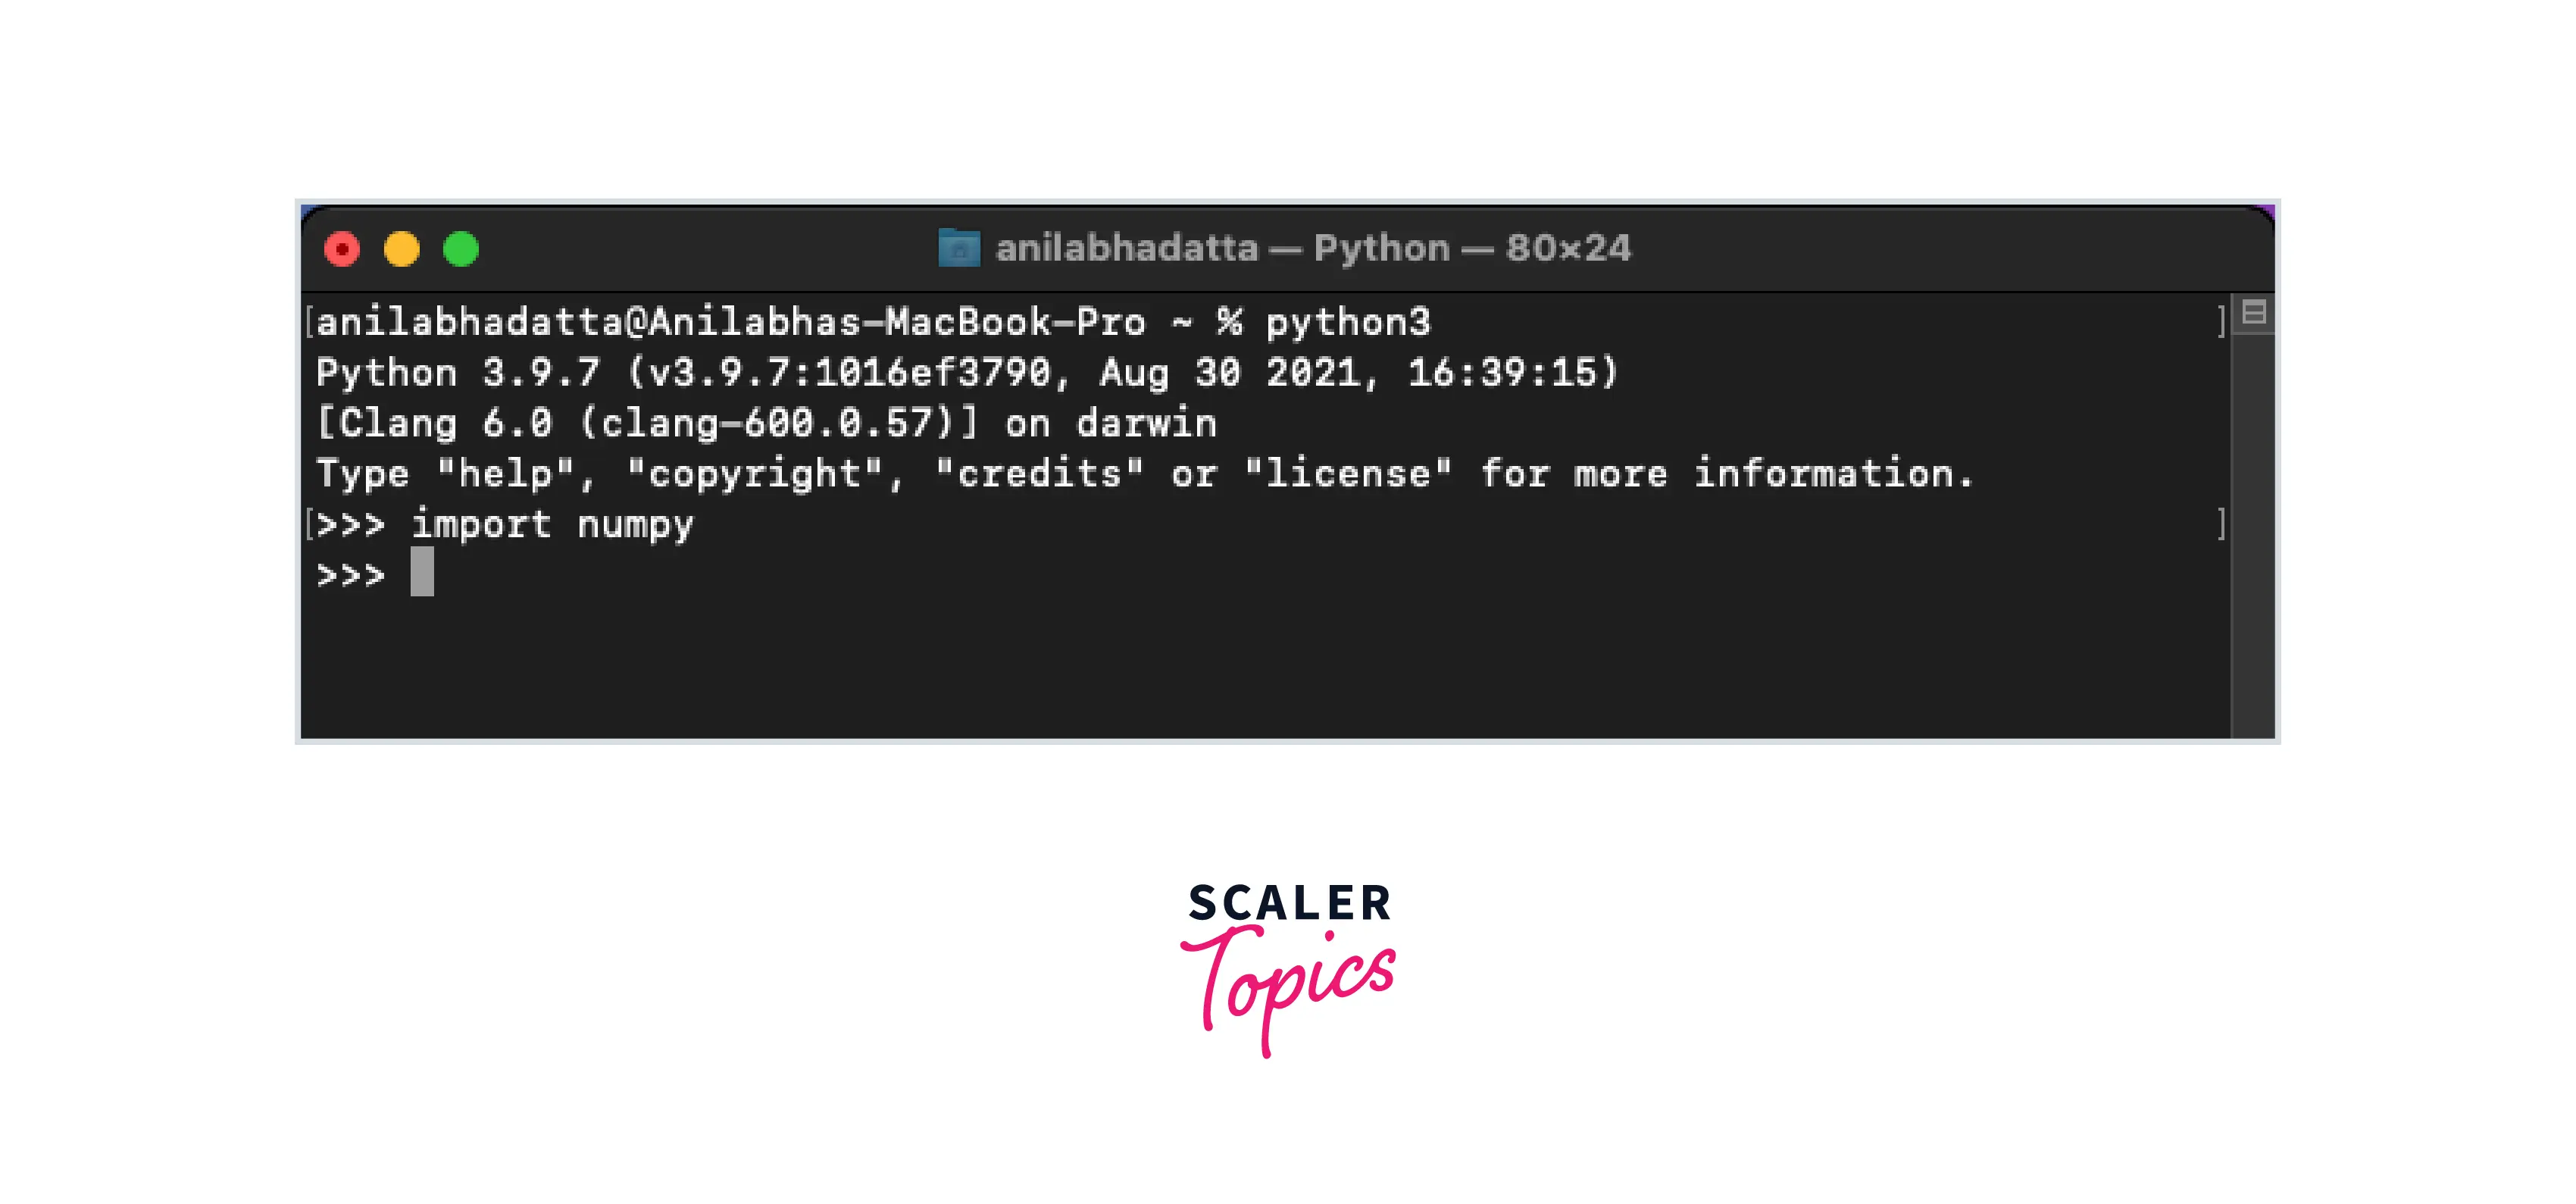
Open a Python interpreter: Type
pythonorpython3in your terminal and press Enter. This will open an interactive Python session. -
Import NumPy and check its version:
Inside the Python interpreter, type the following commands:import numpy as np print(np.__version__)If NumPy is installed correctly, you should see its version number printed to the console (e.g.,
1.24.2). If you get anModuleNotFoundError: No module named 'numpy', it means NumPy was not installed in the currently active Python environment, or there was an issue during installation. -
Perform a simple operation (optional but recommended): To further confirm that NumPy is fully functional, try creating a simple array:
python

print(np.zeros(5))
This command will create and print a NumPy array of five zeros. The expected output would be:
[0. 0. 0. 0. 0.]
If both the version check and the simple operation work without errors, congratulations! NumPy is successfully installed and ready for use.
Navigating Common Hurdles: Troubleshooting NumPy Installation Issues
Even with careful preparation, you might encounter issues during installation. Here are some common problems and their solutions:
“pip” Command Not Found or Not Recognized
- Cause: This usually means Python’s
Scriptsdirectory (wherepipresides) is not in your system’s PATH environment variable, or you’re trying to usepipin an environment where it’s not directly accessible. - Solution:
- Windows: During Python installation, ensure you checked “Add Python to PATH.” If not, you might need to add it manually or reinstall Python.
- Universal: Always prefer
python -m pipover justpip. This explicitly tells Python to run thepipmodule associated with that specific Python interpreter, bypassing PATH issues.
Permission Denied Errors
- Cause: On some systems (especially Linux or macOS), trying to install packages globally (outside a virtual environment) might lead to permission errors if you don’t have administrator/root privileges for the Python installation directory.
- Solution:
- Use Virtual Environments: This is the best solution. Libraries installed in a virtual environment reside in your user space, eliminating permission issues.
- Install for User Only: If you must install globally and don’t have root access, use the
--userflag:pip install --user numpy. This installs NumPy into your user’s home directory. - Administrator/Root Access (with caution): On Linux/macOS, you could use
sudo pip install numpy(not recommended as it can corrupt system Python installations). On Windows, run your command prompt or PowerShell as an administrator.
Network/Proxy Issues
- Cause: If you’re in a corporate network or behind a proxy,
pipmight struggle to connect to PyPI to download packages. - Solution: Configure pip to use your proxy. You can set environment variables (
HTTP_PROXY,HTTPS_PROXY) or configure pip directly:
bash

pip install --proxy http://<username>:<password>@<proxy_host>:<proxy_port> numpy
Or, add proxy settings to yourpip.ini(Windows) orpip.conf(macOS/Linux) file.
Dependency Conflicts
- Cause: Installing different versions of libraries that depend on conflicting versions of NumPy (or other packages).
- Solution:
- Virtual Environments: The primary solution. Each project gets its isolated dependency set.
pipdeptree: A useful tool to visualize your dependency tree:pip install pipdeptree. Then runpipdeptreeto see potential conflicts.- Conda: Anaconda/Miniconda’s
condapackage manager is generally better at resolving complex dependency trees for scientific packages.
Outdated Pip/Setuptools
- Cause: An old version of
piporsetuptools(another package used by pip for installation) might have bugs or lack support for newer package formats. - Solution: Always keep your installation tools updated:
bash

python -m pip install --upgrade pip setuptools wheel
Mismatched Python Versions
- Cause: You might have multiple Python versions installed on your system (e.g., Python 2 and Python 3) and
pipis installing NumPy for the wrong one. - Solution: Always use
python -m pip install numpyorpython3 -m pip install numpyto explicitly linkpipto the desired Python interpreter. When working in a virtual environment,pip install numpywill automatically install to the Python version of that environment.
Conclusion: Unlocking the Power of Numerical Python
NumPy is not just another Python library; it is the fundamental building block for numerical computation, underpinning vast areas of data science, artificial intelligence, and scientific research. Its efficiency in handling large datasets and its rich array of mathematical functions make it an indispensable tool for anyone looking to analyze, manipulate, and understand numerical data in Python.
By following this guide, you should now have NumPy successfully installed in your Python environment, ready to be imported into your scripts and interactive sessions. Remember the importance of virtual environments for maintaining a clean and manageable development workflow, and leverage pip or conda as your package management tool of choice.
With NumPy at your fingertips, you’re empowered to embark on more advanced tasks: from basic array operations and linear algebra to sophisticated statistical analysis and the development of complex machine learning models. As the technology landscape continues to evolve, foundational tools like NumPy remain critical enablers, driving innovation, enhancing productivity, and pushing the boundaries of what’s possible in the digital realm. Now, go forth and compute!
aViewFromTheCave is a participant in the Amazon Services LLC Associates Program, an affiliate advertising program designed to provide a means for sites to earn advertising fees by advertising and linking to Amazon.com. Amazon, the Amazon logo, AmazonSupply, and the AmazonSupply logo are trademarks of Amazon.com, Inc. or its affiliates. As an Amazon Associate we earn affiliate commissions from qualifying purchases.