Upgrading your computer’s graphics processing unit (GPU) is one of the most impactful ways to boost its performance, whether you’re a hardcore gamer, a creative professional, or simply someone who wants a smoother, more responsive computing experience. A new GPU can unlock higher frame rates in games, accelerate video editing and 3D rendering, and even improve the efficiency of certain AI-powered applications. This comprehensive guide will walk you through the entire process of installing a new GPU, from initial preparation to final driver setup, ensuring a seamless and successful upgrade.
The world of technology is constantly evolving, with new hardware hitting the market at a rapid pace. Understanding how to integrate these components into your existing system is a fundamental skill for any tech enthusiast. This guide falls under our “Tech” umbrella, specifically within the “Tutorials” and “Gadgets” categories, aiming to empower you with the knowledge to enhance your digital setup.
Before You Begin: Preparation is Key
Embarking on a hardware upgrade can seem daunting, but a little preparation goes a long way in ensuring a smooth installation. Rushing into it without considering the prerequisites can lead to frustration and potential compatibility issues.
1. Choosing the Right GPU for Your Needs
The first and arguably most crucial step is selecting a GPU that aligns with your specific requirements and budget. This decision involves considering several factors:
- Performance Needs: Are you primarily gaming? If so, what resolution and refresh rate are you targeting? For professional work like video editing or 3D modeling, what kind of complex tasks will you be undertaking? AI development often demands significant VRAM and processing power. Research benchmarks for games and applications relevant to your use case.
- Compatibility with Your System: This is paramount. You need to ensure your new GPU will physically fit into your computer case and that your power supply unit (PSU) can handle its power demands.
- Budget: GPUs range widely in price. Set a realistic budget and research options within that range. Don’t forget to factor in the cost of any potential PSU upgrade if necessary.
Understanding GPU Specifications
When comparing GPUs, pay attention to key specifications:
- VRAM (Video RAM): This is the dedicated memory for your graphics card. More VRAM is generally better for higher resolutions, complex textures in games, and demanding creative workloads.
- Clock Speeds: These indicate how fast the GPU’s core and memory operate. Higher clock speeds generally translate to better performance.
- CUDA Cores (NVIDIA) / Stream Processors (AMD): These are the processing units within the GPU. More cores generally mean more processing power.
- Bus Interface: Modern GPUs use PCI Express (PCIe). Ensure your motherboard has a compatible PCIe slot (usually PCIe x16). The generation of PCIe (e.g., PCIe 3.0, 4.0, 5.0) can also impact performance, though the difference might be negligible for most users unless you’re using the absolute latest hardware.
2. Checking System Compatibility
Before purchasing a new GPU, a thorough compatibility check is essential. This prevents the disappointment of receiving a fantastic new component only to find it won’t work with your current setup.
Power Supply Unit (PSU) Requirements
Your new GPU will have a recommended PSU wattage. This is not a suggestion; it’s a requirement for stable operation. Your PSU needs to provide enough power not only for the GPU but also for your CPU, motherboard, and all other components.
- Find the GPU’s TDP (Thermal Design Power): Manufacturers usually list the recommended PSU wattage on their product pages. This wattage typically includes a buffer for other components.
- Check Your Current PSU: Locate the label on your PSU. It will list its total wattage and, importantly, its 12V rail amperage, which is crucial for powering high-demand components like GPUs and CPUs.
- Consider an Upgrade: If your current PSU is insufficient, you’ll need to purchase a new one. This adds to the overall cost but is a necessary investment for a stable and reliable system. Ensure the new PSU has enough wattage and the necessary PCIe power connectors (6-pin or 8-pin) for your new GPU.
Physical Dimensions and Case Clearance
Modern GPUs can be quite large, especially high-end models. You need to confirm that the new card will physically fit inside your computer case.
- Measure Your Case: Open your computer case and measure the available space for the GPU. Pay attention to length, height, and width (number of expansion slots it occupies).
- Check GPU Dimensions: GPU manufacturers list the dimensions of their cards. Compare these to your case’s clearance.
- Consider Airflow: Ensure that installing the new, potentially larger GPU won’t obstruct airflow within your case, which could lead to overheating.
Motherboard and CPU Compatibility
While less common with modern hardware, it’s worth a quick check.
- PCIe Slot: Ensure your motherboard has a PCIe x16 slot, which is standard for all GPUs. The PCIe generation (e.g., 3.0, 4.0) is backward and forward compatible, meaning a PCIe 4.0 GPU will work in a PCIe 3.0 slot, and vice-versa, though you might not achieve peak performance.
- CPU Bottlenecking: While not a strict compatibility issue, pairing a very powerful GPU with an old or significantly less powerful CPU can lead to “bottlenecking,” where the CPU can’t keep up with the GPU, limiting overall performance. Research CPU and GPU pairings if you’re concerned about this.
3. Gathering Your Tools and Software
Having the right tools and software ready before you start will make the installation process smoother and more efficient.
- Screwdriver Set: A Phillips head screwdriver is essential. Magnetic tips can be very helpful to avoid dropping screws into the case.
- Anti-Static Wrist Strap: This is highly recommended to prevent electrostatic discharge (ESD), which can damage sensitive computer components. Connect it to a grounded metal part of your computer case.
- Zip Ties or Velcro Straps: For cable management, keeping your build tidy and improving airflow.
- Flash Drive: For downloading and installing the latest GPU drivers.
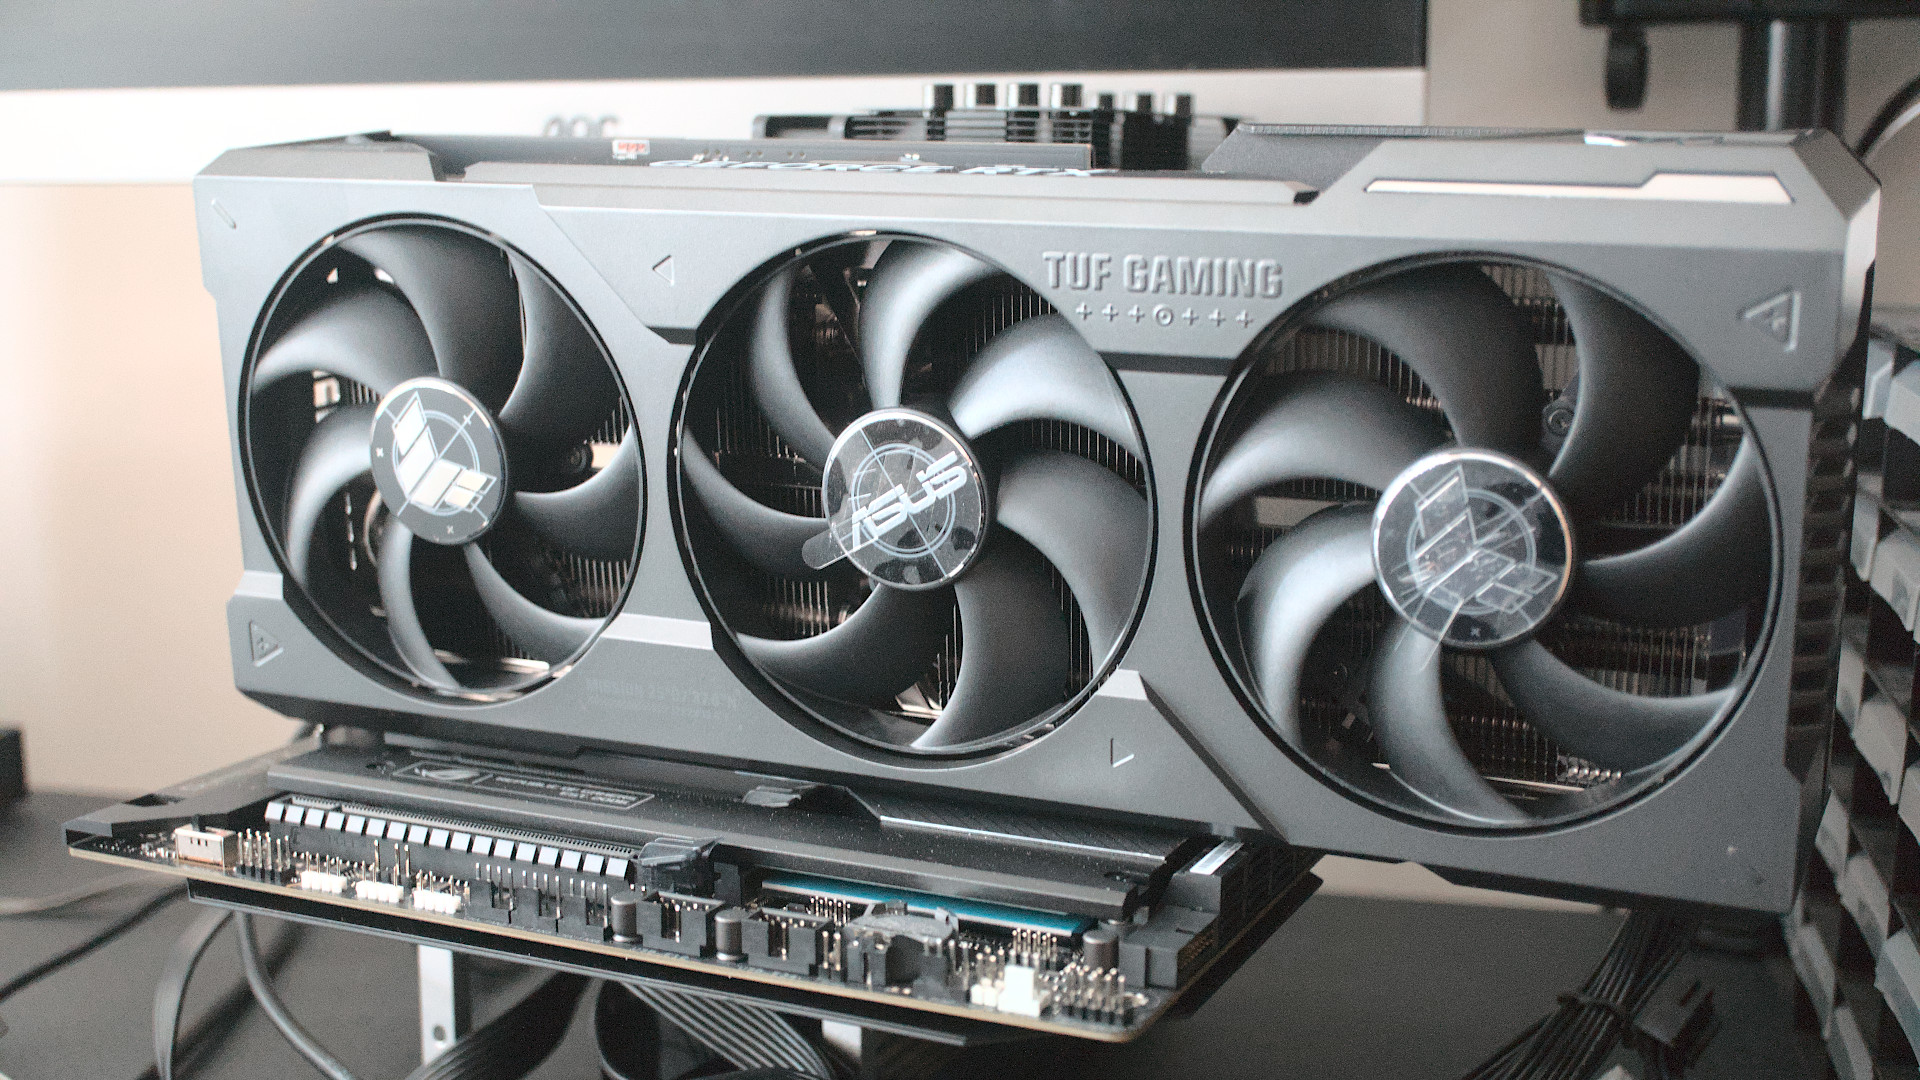
- Your New GPU: Of course! Keep it in its anti-static bag until you’re ready to install it.
- Your Old GPU (if applicable): You’ll need to remove this first.
The Installation Process: Step-by-Step
Once you’ve prepared and confirmed compatibility, it’s time to get your hands dirty. This process requires a careful and methodical approach.
1. Preparing Your Computer
Before you open your case, ensure you take the necessary precautions.

Powering Down and Disconnecting
- Shut Down Your PC: Perform a full shutdown of your operating system.
- Switch Off the PSU: Locate the power switch on the back of your PSU and flip it to the “Off” position (usually marked with “0”).
- Unplug the Power Cable: Disconnect the main power cord from the PSU.
- Disconnect Peripherals: Unplug all external devices, including your monitor, keyboard, mouse, and any other USB devices.
Discharging Static Electricity
- Ground Yourself: If you have an anti-static wrist strap, put it on and attach the clip to an unpainted metal part of your computer case. If you don’t have one, periodically touch a grounded metal object (like the metal case of your PC before you open it, or a metal radiator) to discharge any static electricity.
2. Removing the Old GPU (if applicable)
If you are replacing an existing GPU, this is the first hardware step.
- Open Your Computer Case: Most cases have side panels that are held in place by screws at the back. Unscrew these and carefully slide or lift off the side panel.
- Locate the Old GPU: It will be plugged into a long slot on your motherboard, usually towards the top of the expansion slot area, with display outputs facing the back of your case.
- Disconnect Power Cables: If your old GPU requires auxiliary power, disconnect the PCIe power cables coming from the PSU. These usually have clips that need to be pressed to release.
- Unscrew the GPU Bracket: The GPU is typically secured to the back of the case with screws. Remove these.
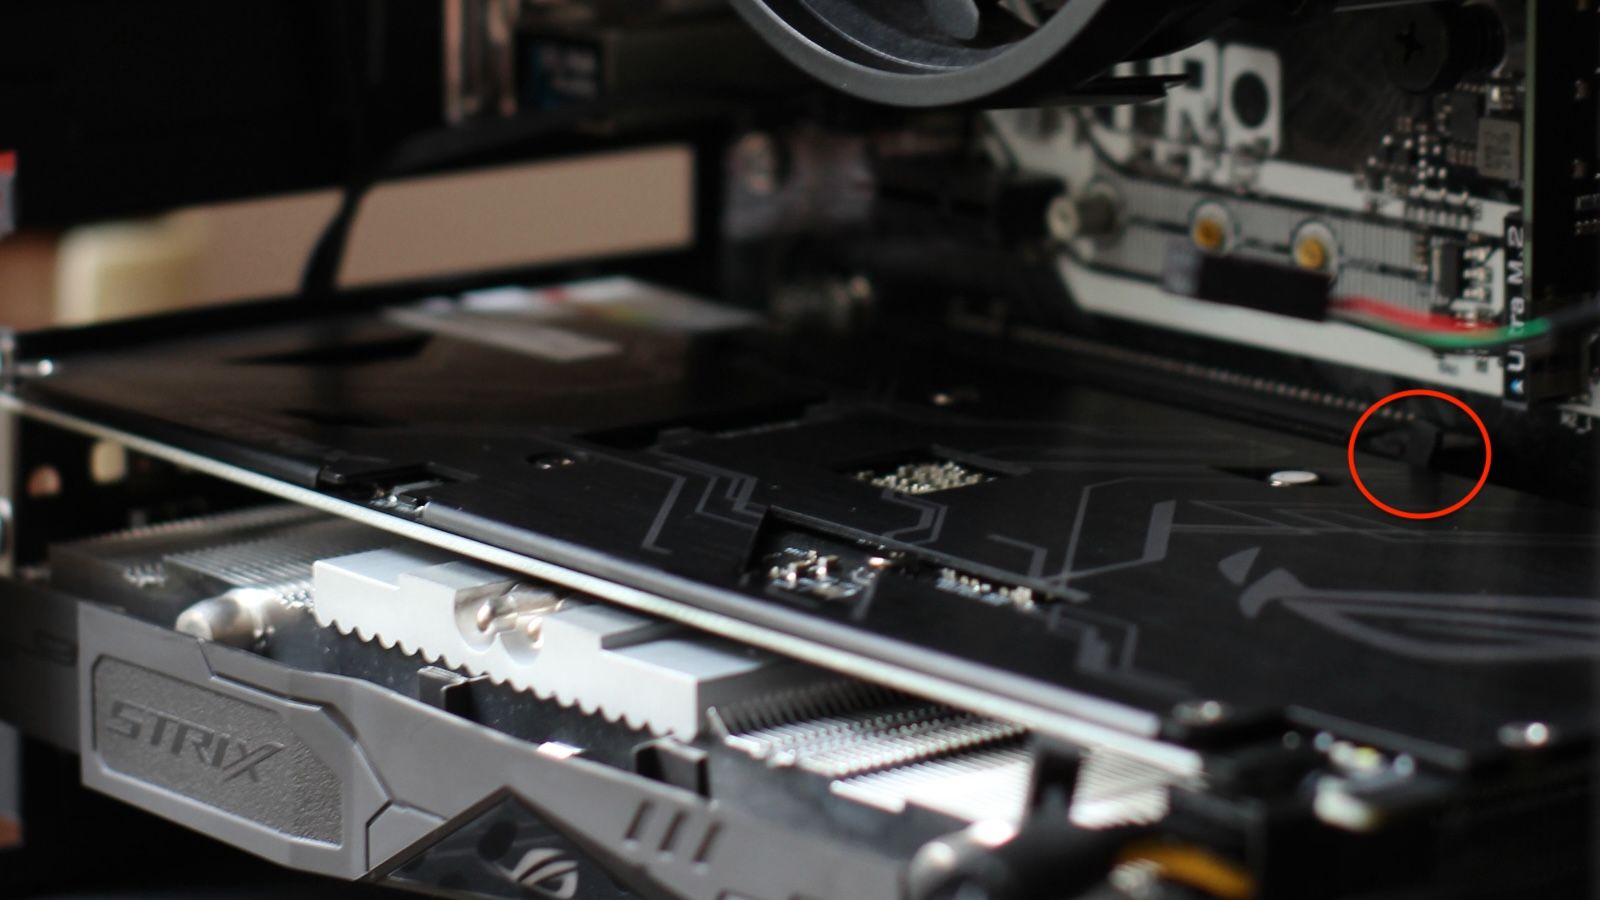
- Release the PCIe Slot Latch: At the end of the PCIe slot on the motherboard, there’s a small plastic latch or lever that locks the GPU in place. Gently press or slide this latch to release it.
- Gently Remove the GPU: With the screws removed and the latch released, carefully and evenly pull the GPU straight out of the PCIe slot. Avoid wiggling it excessively.
3. Installing the New GPU
This is the core of the upgrade process. Take your time and be gentle.
- Prepare the Expansion Slot: If your new GPU occupies more than one slot (which is common), you’ll need to remove the corresponding metal expansion slot covers from the back of your case. These are usually secured by screws or are designed to be snapped off.
- Remove the New GPU from its Packaging: Take the new GPU out of its anti-static bag. Handle it by the edges, avoiding touching the gold connectors.
- Align the GPU with the PCIe Slot: Carefully align the GPU’s connector with the PCIe x16 slot on your motherboard. Ensure it’s oriented correctly.
- Seat the GPU Firmly: Press down evenly on both ends of the GPU until it’s fully seated in the slot. You should hear a click as the PCIe slot latch engages, securing the card.
- Secure the GPU Bracket: Re-screw the GPU’s metal bracket to the back of your computer case, ensuring it’s firmly attached.
- Connect PCIe Power Cables: Connect the necessary PCIe power cables from your PSU to the GPU. Ensure they click into place securely. If your GPU requires 6-pin and 8-pin connectors, use the appropriate cables. Do not force cables; they are keyed to fit only one way.
- Double-Check Connections: Review all connections to ensure everything is seated properly and securely.
4. Cable Management and Closing Up
A tidy interior not only looks better but can also improve airflow and cooling.
- Organize Cables: Use zip ties or Velcro straps to bundle loose cables and route them neatly along the edges of your case. This prevents them from obstructing fans and airflow.
- Replace the Side Panel: Carefully slide or place the side panel back onto your case and secure it with its screws.
Post-Installation: Drivers and Testing
The physical installation is complete, but your new GPU won’t perform optimally without the correct software.
1. Installing GPU Drivers
Drivers are essential software that allows your operating system to communicate with your graphics card. Outdated or incorrect drivers can lead to performance issues, graphical glitches, or even system instability.
- Download the Latest Drivers:
- For NVIDIA GPUs: Visit the official NVIDIA driver download page (www.nvidia.com/drivers). Select your GPU model and operating system, then download the recommended driver.
- For AMD GPUs: Visit the official AMD driver download page (www.amd.com/en/support). Use their auto-detect tool or manually select your GPU model and operating system.
- Uninstall Old Drivers (Recommended): Before installing new drivers, it’s good practice to remove any remnants of your old GPU drivers.
- Using Display Driver Uninstaller (DDU): This is a highly recommended free utility. Download DDU and boot your computer into Safe Mode. Run DDU and select the option to clean and uninstall your previous GPU drivers.
- Using Windows Settings (less thorough): You can also go to “Apps” > “Apps & features” in Windows settings, find your old graphics driver software (e.g., NVIDIA Graphics Driver, AMD Software), and uninstall it.
- Install the New Drivers: Once old drivers are removed (or if this is a fresh install), run the driver installer you downloaded.
- Custom Installation: During the installation process, choose the “Custom” or “Advanced” installation option. This allows you to select only the components you need and often gives you the option to perform a “clean install,” which is recommended.
- Restart Your PC: After the driver installation is complete, restart your computer.
2. Testing Your New GPU
With drivers installed, it’s time to verify that everything is working correctly and to see your new GPU in action.
- Check Device Manager: In Windows, right-click the Start button and select “Device Manager.” Expand “Display adapters.” You should see your new GPU listed there, without any yellow exclamation marks, indicating it’s recognized and functioning.
- Run Benchmarks: Utilize benchmarking software to test the performance of your new GPU. Popular options include:
- 3DMark: A comprehensive suite for testing various aspects of graphics performance.
- Unigine Heaven/Superposition: Free, visually demanding benchmarks.
- In-Game Benchmarks: Many modern games have built-in benchmarking tools that provide detailed performance statistics.
- Play Your Favorite Games: The ultimate test is to load up your most demanding games and see the difference. Pay attention to frame rates, graphical settings, and overall smoothness.
- Monitor Temperatures: While benchmarking or gaming, keep an eye on your GPU temperatures. Software like MSI Afterburner or HWMonitor can help you track this. If temperatures are consistently high (above 80-85°C under load), it might indicate an airflow issue or a problem with the GPU’s cooler.
Troubleshooting Common Issues
Even with careful preparation, you might encounter minor hiccups. Here are solutions to some common problems.
1. No Display or Black Screen
- Reseat the GPU: Power off your PC, unplug it, and carefully remove and reinsert the GPU into the PCIe slot.
- Check Power Connections: Ensure all PCIe power cables are firmly plugged into both the GPU and the PSU.
- Verify Monitor Connection: Make sure your monitor is plugged into the new GPU’s ports, not the motherboard’s integrated graphics ports. Try a different display cable or port.
- Check PSU: If you recently upgraded your PSU, ensure it’s correctly installed and provides adequate power.
2. System Instability or Crashes
- Driver Issues: Re-uninstall and reinstall the GPU drivers, ensuring you perform a clean install.
- Overheating: Monitor temperatures. If they are too high, check case airflow, fan speeds, and ensure the GPU cooler is properly seated.
- Insufficient Power: If you’re pushing your system hard and experiencing crashes, your PSU might be struggling. Check its wattage and ensure it meets the GPU’s requirements.
- Faulty GPU: In rare cases, the GPU itself could be defective.
3. Poor Performance or Graphical Glitches
- Outdated Drivers: Ensure you have the latest drivers installed.
- Incorrect Settings: Double-check in-game or software settings.
- CPU Bottleneck: If your CPU is significantly older than your GPU, it might be limiting performance.
- VRAM Limit: If you’re trying to run games or applications at very high resolutions or with ultra-high settings, you might be hitting the VRAM limit of your card.
By following this comprehensive guide, you should be well-equipped to successfully install a new GPU, unlocking a significant boost in your computer’s graphical capabilities. Enjoy the enhanced performance and visual fidelity!
aViewFromTheCave is a participant in the Amazon Services LLC Associates Program, an affiliate advertising program designed to provide a means for sites to earn advertising fees by advertising and linking to Amazon.com. Amazon, the Amazon logo, AmazonSupply, and the AmazonSupply logo are trademarks of Amazon.com, Inc. or its affiliates. As an Amazon Associate we earn affiliate commissions from qualifying purchases.