In today’s interconnected world, a robust and reliable Wi-Fi network isn’t just a convenience; it’s a necessity. From streaming 4K content and engaging in video conferences to smart home automation and online gaming, every aspect of modern life relies on seamless internet access. Yet, many homes and offices still grapple with frustrating Wi-Fi dead zones, dropped connections, and sluggish speeds in certain areas. This is where a Netgear WiFi Extender steps in, acting as a powerful bridge to expand your existing network’s reach and eliminate those irritating signal gaps.

Netgear has long been a trusted name in networking hardware, known for its innovative technology and user-friendly devices. Their Wi-Fi extenders are designed to integrate effortlessly with your current router, amplifying its signal to blanket every corner of your space with fast, consistent Wi-Fi. Whether you’re struggling with a sprawling multi-story home, thick walls, or interference from other devices, a Netgear extender offers an effective and relatively simple solution.
This comprehensive guide will walk you through every step of installing your Netgear WiFi extender, ensuring you can enjoy uninterrupted connectivity throughout your entire property. We’ll cover the initial preparations, two primary installation methods (WPS and manual browser setup), optimal placement strategies, and essential troubleshooting tips to get you up and running smoothly. By the end of this article, you’ll be well-equipped to banish dead zones and unlock the full potential of your home network.
Preparing for Installation: What You’ll Need and Do First
Before you dive into the installation process, a little preparation can save you time and frustration. Gathering the necessary items and understanding a few basic concepts will ensure a smooth setup experience. Think of it as laying the groundwork for a perfectly extended network.
Gathering Your Essentials
The good news is that you won’t need a huge array of tools or technical expertise. Most of what you need is likely already at hand:
- Your Netgear WiFi Extender: Of course, this is the star of the show! Ensure you have the extender unit itself, its power adapter, and any accompanying documentation (though this guide aims to be comprehensive enough).
- Your Existing WiFi Router’s Details: You’ll need the name of your current Wi-Fi network (SSID) and its password (security key). If you’ve forgotten these, they’re often printed on a sticker on your router, or you can access your router’s administration page to retrieve them.
- A Computer or Mobile Device: You’ll use this device (a laptop, desktop, smartphone, or tablet) to configure the extender, especially if you opt for the manual web browser setup method. It should have Wi-Fi capabilities.
- An Available Power Outlet: The extender needs to be plugged in, ideally near your existing router for the initial setup.
Initial Power-Up and Understanding Indicator Lights
Once you have your essentials, the first step is to unbox your extender and get it powered up.
- Plug it in: For the initial setup, choose an electrical outlet in the same room as your existing Wi-Fi router. This proximity is crucial for the extender to establish a strong connection with your router during the configuration phase. You can move it later.
- Wait for Power: Plug the extender into the outlet. Most Netgear extenders will have a power LED indicator. Wait for this light to turn solid, which signifies the device is powered on and ready.
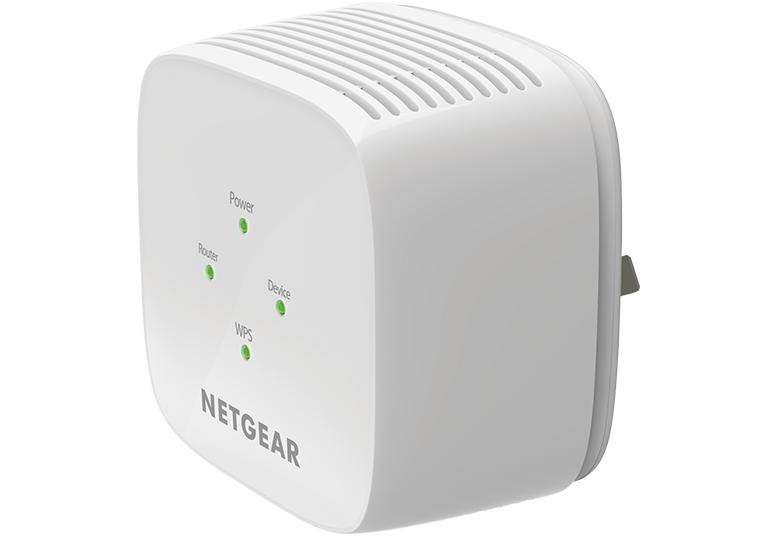
- Familiarize Yourself with LED Indicators: Netgear extenders typically have several LED lights that provide crucial feedback about the device’s status. While specific lights may vary slightly by model, common indicators include:
- Power LED: Indicates if the extender is on.
- Router Link LED: Shows the connection status between the extender and your main Wi-Fi router. Green usually means a good connection, amber/orange might indicate a weak connection, and red/off means no connection.
- Device Link LED: Indicates if devices are connected to the extender’s network.
- WPS LED (optional): Lights up during a WPS connection attempt.
- Activity/Ethernet LED (if applicable): Shows network activity through Ethernet ports.
Understanding these lights will be incredibly helpful for both successful installation and subsequent troubleshooting, allowing you to gauge the health and performance of your extended network at a glance.
Two Primary Ways to Install Your Netgear WiFi Extender
Netgear offers user-friendly options to set up your Wi-Fi extender, catering to different preferences and technical comfort levels. The two main methods are WPS (Wi-Fi Protected Setup) for quick, button-press installation, and the manual web browser setup for more control and troubleshooting flexibility.
Method 1: Easy Setup with WPS (Wi-Fi Protected Setup)
WPS is often the quickest and most straightforward way to connect your Netgear extender to your existing Wi-Fi network. It’s designed for simplicity, requiring little more than a few button presses.
What is WPS?
WPS is a network security standard that attempts to simplify the process of connecting new devices to a wireless network. Instead of manually entering passwords, you can often connect by pressing a button on both your router and the new device.
Step-by-Step WPS Installation:
- Power On the Extender: Plug your Netgear extender into a power outlet near your existing Wi-Fi router. Wait for the Power LED to turn solid.
- Activate WPS on the Extender: Locate the WPS button on your Netgear extender. Press and hold it for about 1-3 seconds, then release. The WPS LED on the extender should start blinking. You typically have about two minutes to complete the next step.
- Activate WPS on Your Router: Within those two minutes, go to your main Wi-Fi router and locate its WPS button. Press and hold it for 1-3 seconds, then release. The WPS LED on your router (if it has one) should also start blinking.
- Wait for Connection: The extender and router will now attempt to establish a connection. This process can take a minute or two. Observe the Router Link LED on your extender.
- A solid green light usually indicates a successful connection to your router.
- An amber/orange light might suggest a weak connection, but still functional.
- If it turns red or remains off, the connection failed, and you may need to retry or switch to the manual setup.
- Relocate Your Extender: Once the Router Link LED is solid green (or amber), you can unplug the extender and move it to its desired permanent location. Choose a spot roughly halfway between your router and the Wi-Fi dead zone. Plug it back in and wait for it to power up and reconnect. Ensure the Router Link LED remains stable.
Pros of WPS:
- Speed: It’s often the fastest way to get connected.
- Simplicity: No need to remember or type complex passwords.
Cons of WPS:
- Not All Routers Support It: Some older routers or custom firmware might not have a WPS button or functionality.
- Security Concerns (Minor for Extenders): While generally secure for setup, WPS has had historical vulnerabilities, though these are less relevant for an extender simply connecting to an already secured network.
- Limited Control: You have less control over the extended network’s name (SSID) or advanced settings.
- Troubleshooting: If it fails, there’s less diagnostic information, often necessitating a switch to manual setup.
Method 2: Manual Setup via Web Browser (mywifiext.net)
The web browser setup method provides more control and is a reliable alternative if WPS isn’t available, fails, or if you prefer a guided, step-by-step process with clear feedback. This method involves connecting directly to the extender’s temporary Wi-Fi network and using a web interface.
When to Use This Method:
- Your router doesn’t have a WPS button.
- The WPS setup failed.
- You want to customize your extended network’s name (SSID) and settings.
- You need to troubleshoot a connection issue more deeply.
Step-by-Step Web Browser Installation:
- Plug in the Extender: Place the Netgear extender in the same room as your router for the initial setup. Plug it into a power outlet and wait for the Power LED to turn solid.
- Connect Your Device to the Extender’s Default Network: On your computer or mobile device, go to your Wi-Fi settings. You should see a new Wi-Fi network broadcasting from the extender. It will typically be named something like
NETGEAR_EXT,NETGEAR_XXXXXX_EXT, orNetgear Extender. Connect to this network. There’s usually no password required for this initial connection, but if prompted, check the extender’s sticker or manual.- Important: Your device will temporarily lose internet access when connected to this extender network, as the extender itself isn’t yet connected to your main router. This is normal.
- Open a Web Browser: Launch a web browser (Chrome, Firefox, Edge, Safari, etc.) and type
mywifiext.netinto the address bar, then press Enter.- Troubleshooting
mywifiext.net: Ifmywifiext.netdoesn’t work, try typing192.168.1.250,192.168.0.250, or refer to your extender’s manual for its default IP address. Ensure your device is still connected to the extender’s default Wi-Fi network.
- Troubleshooting
- Netgear Genie Setup Wizard: You will be redirected to the Netgear Genie setup page.
- Create Account: If this is your first time setting up a Netgear extender, you’ll likely be prompted to create an account with a username and password. This is for accessing the extender’s settings later. Choose a strong, memorable password.
- Select Existing Network: The wizard will scan for available Wi-Fi networks. Select your main Wi-Fi network’s SSID from the list. If you have a dual-band router (2.4GHz and 5GHz), you may be prompted to select which bands you want to extend. It’s often best to extend both for comprehensive coverage.
- Enter Password: Input the password (security key) for your main Wi-Fi network when prompted. Be careful to enter it correctly, as typos are a common cause of setup failure.
- Configure Extended Network (Optional but Recommended): The wizard will then ask you to configure the name (SSID) of your extended network(s). You have a few options:
- Use the same SSID: The extender will broadcast the same name as your main router, allowing devices to roam seamlessly. This is convenient but can sometimes lead to devices “sticking” to a weaker signal.
- Create new SSIDs: The default is often
[YourRouterSSID]_EXT(e.g.,MyHomeWiFi_EXT). This makes it clear which network you’re connecting to, giving you more control over where devices connect. This is generally recommended for clarity.
- Review and Apply Settings: Review your chosen settings and click “Apply” or “Finish.” The extender will then save the configuration and attempt to connect to your main router.
- Verify Connection: Once the extender reboots (which it often does after applying settings), observe the Router Link LED. A solid green light indicates a successful connection to your main router.
- Relocate and Connect: Unplug the extender and move it to its optimal location (halfway between your router and the dead zone). Plug it back in. Wait for it to boot up and re-establish the connection. The Router Link LED should remain solid green. Now, you can connect your devices to the newly extended network(s).

Pros of Browser Setup:
- Reliability: Works with virtually any router.
- Control: Allows you to customize network names, passwords, and other advanced settings.
- Diagnostics: The web interface often provides more feedback if something goes wrong.
Cons of Browser Setup:
- Slightly More Steps: Requires navigating a web interface.
- Temporary Disconnection: Your device loses internet access briefly during the setup process.
Optimizing Your Extender’s Performance and Placement
Installing your Netgear extender is a significant step, but proper placement and verification are crucial to maximize its effectiveness. A perfectly configured extender in a suboptimal location will yield disappointing results.
Finding the Sweet Spot: Ideal Extender Placement
The location of your Wi-Fi extender is paramount to its performance. It’s not about simply being close to a power outlet; it’s about strategic positioning to effectively bridge the gap between your router and the areas needing better coverage.
- The “Halfway” Rule: A general rule of thumb is to place the extender roughly halfway between your existing Wi-Fi router and the area where you experience weak Wi-Fi signals or dead zones. If it’s too close to the router, it won’t extend the signal far enough. If it’s too far from the router, it will receive a weak signal itself, and thus, can only amplify a poor signal.
- Obstacle Avoidance: Just like your router, your extender’s signal can be hindered by physical obstacles. Try to avoid placing it behind large appliances (refrigerators, microwaves), thick concrete or brick walls, metal objects, or large aquariums. Line of sight, or as close to it as possible, is always best.
- Electrical Interference: Keep the extender away from devices that emit electromagnetic interference, such as cordless phones, baby monitors, microwave ovens, or other large electronics.
- Using the Extender’s LED Indicators for Optimal Signal: Many Netgear extenders have a dedicated LED that indicates the quality of the connection to your router (often the Router Link LED, sometimes explicitly labeled “Router Connection” or “Best Location”).
- Solid Green: Excellent connection. This is what you want.
- Solid Amber/Orange: Good connection, but perhaps not optimal. You might try moving it slightly.
- Solid Red/Off: Poor or no connection. You need to move the extender closer to your router.
Use this LED as your guide. Plug the extender into different outlets in the “halfway” zone and observe the LED until you find a spot that consistently shows a solid green light.
Post-Setup Verification and Connection
Once your extender is installed and optimally placed, it’s time to verify its operation and connect your devices.
- Connecting Devices to the Extended Network: On your smartphone, laptop, or other Wi-Fi enabled devices, open your Wi-Fi settings. You should now see your extended network(s) (e.g.,
MyHomeWiFi_EXTorMyHomeWiFiif you chose the same SSID). Connect to this network using the password you configured during setup (if it’s different from your main router, otherwise use your main router’s password). - Testing Speed and Signal Strength: Walk to the areas that previously had weak signals or dead zones. Test your internet speed using an online speed test (e.g., Speedtest.net) and observe your Wi-Fi signal strength icon. You should notice a significant improvement in both.
- Understanding Dual-Band Extension (2.4GHz vs. 5GHz): If your extender and router are dual-band (supporting both 2.4 GHz and 5 GHz Wi-Fi), you’ll have two extended networks.
- 2.4 GHz: Offers wider coverage and better penetration through walls but is generally slower and more prone to interference. Good for devices further away or smart home gadgets.
- 5 GHz: Provides faster speeds and lower latency but has a shorter range and is more easily obstructed. Ideal for bandwidth-intensive activities like streaming and gaming, particularly for devices closer to the extender.
You can connect different devices to the appropriate band based on their needs and proximity. Many extenders will intelligently use the best band for backhaul (connection to the router) and for devices, but some allow manual configuration.
Troubleshooting Common Netgear Extender Installation Issues
Even with the most detailed guides, technology can sometimes present unexpected challenges. If your Netgear extender isn’t working as expected, don’t despair. Most common issues have straightforward solutions.
“Cannot Connect to Extender Network”
If you can’t even connect your device to the extender’s temporary setup network (e.g., NETGEAR_EXT) or to your new extended network:
- Check Power: Ensure the extender is plugged in and its Power LED is solid.
- Ensure Correct Network Selected: Double-check that you’re selecting the correct network name from your device’s Wi-Fi list.
- Reset Extender: A factory reset can often resolve connectivity glitches by returning the extender to its default settings. Look for a small reset button (often recessed, requiring a paperclip) on the extender. Press and hold it for 7-10 seconds while the extender is powered on, then release. The lights will flash, and it will reboot. You’ll then need to repeat the setup process from scratch.
“mywifiext.net Not Working”
This is a very common issue during browser-based setup.
- Check URL Spelling: Ensure you’ve typed
mywifiext.netcorrectly in the address bar. It’s not a regular website, but a local address. - Verify Connection to Extender: Crucially, your computer or mobile device must be connected to the extender’s default Wi-Fi network (e.g.,
NETGEAR_EXT) formywifiext.netto resolve. If your device is connected to your main router’s Wi-Fi or using cellular data,mywifiext.netwill not work. - Try IP Address: If
mywifiext.netfails, try using the extender’s default IP address, often192.168.1.250or192.168.0.250. Consult your extender’s manual or sticker for the exact default IP. - Clear Browser Cache/Try Different Browser: Sometimes browser cache issues can interfere. Try clearing your browser’s cache or using a different web browser (e.g., if you’re using Chrome, try Firefox or Edge).
- Disable Ethernet (for Laptops/Desktops): If your computer is also connected via an Ethernet cable, disconnect it temporarily to ensure Wi-Fi is the sole connection method.
“Extender Not Connecting to Router”
This means the Router Link LED isn’t turning green after setup.
- WPS Timing: If using WPS, ensure you’re pressing the buttons on both the extender and router within the active window (usually 2 minutes). Try repeating the WPS process.
- Manual Setup Alternative: If WPS consistently fails, switch to the manual web browser setup (Method 2), as it offers more control and diagnostic messages.
- Router Compatibility/Firmware: Ensure your router’s firmware is up to date. Occasionally, very old routers might have compatibility issues, though this is rare with modern extenders.
- Interference/Distance: For initial setup, ensure the extender is in the same room as your router. Once connected, refer to the “Optimal Placement” section if the connection drops after relocation.
- Incorrect Password: During manual setup, a common mistake is entering the wrong password for your main Wi-Fi network. Double-check your router’s password.
“Slow Speeds After Installation”
You have Wi-Fi, but it’s not much faster or is even slower than before.
- Relocation Needed: The most common culprit. Your extender might be too far from the router (receiving a weak signal to amplify) or too close (not extending far enough). Refer to the Router Link LED and the “Halfway Rule” in the placement section.
- Band Selection: If you have a dual-band extender, ensure your devices are connecting to the appropriate band. For faster speeds, connect to the 5GHz extended network if your device supports it and is relatively close to the extender.
- Outdated Extender Firmware: Like any networking device, extenders benefit from firmware updates. Access your extender’s settings via
mywifiext.net(or its IP) and look for a firmware update option. Regularly checking for updates can improve performance and stability. - Channel Interference: If multiple neighboring Wi-Fi networks are on the same channel, it can cause slowdowns. While extenders often mirror the router’s channel, you can sometimes manually change the channel on your main router (via its admin page) to a less congested one (use a Wi-Fi analyzer app to find clear channels).
By systematically working through these troubleshooting steps, you can resolve most issues and get your Netgear WiFi extender operating at its full potential.
Conclusion
Installing a Netgear WiFi extender is an effective and relatively simple way to banish frustrating Wi-Fi dead zones and ensure seamless connectivity throughout your home or office. By carefully following the steps outlined in this guide – from initial preparation and choosing your preferred setup method (WPS or manual browser setup) to strategic placement and proactive troubleshooting – you can transform your network experience.
A well-placed Netgear extender means no more dropped video calls in the home office, uninterrupted streaming in the furthest bedroom, and reliable smart device connectivity in every corner. You’re not just extending a signal; you’re expanding your digital freedom and productivity. Take the plunge, set up your Netgear extender today, and enjoy the robust, wall-to-wall Wi-Fi coverage you deserve.
aViewFromTheCave is a participant in the Amazon Services LLC Associates Program, an affiliate advertising program designed to provide a means for sites to earn advertising fees by advertising and linking to Amazon.com. Amazon, the Amazon logo, AmazonSupply, and the AmazonSupply logo are trademarks of Amazon.com, Inc. or its affiliates. As an Amazon Associate we earn affiliate commissions from qualifying purchases.