In the intricate ecosystem of modern computing, every component plays a crucial role in delivering a seamless user experience. While often overlooked, your monitor – the window to your digital world – is no exception. Beyond merely plugging it into your computer, ensuring it has the correct and most up-to-date driver is fundamental for optimal performance, visual fidelity, and even your overall productivity. This comprehensive guide will walk you through everything you need to know about monitor drivers, from understanding their purpose to step-by-step installation methods and essential troubleshooting tips, ensuring your display always operates at its peak.
Understanding Monitor Drivers and Their Importance
Before diving into the “how-to,” it’s vital to grasp “what” a monitor driver is and “why” it holds such significance in the broader context of your technology setup. It’s a piece of software that acts as a translator, enabling your operating system to communicate effectively with your hardware.
What Exactly is a Monitor Driver?
At its core, a monitor driver is a software interface that allows your computer’s operating system (like Windows, macOS, or Linux) to recognize and control your monitor’s specific capabilities. Think of it as a specialized instruction manual that tells your PC: “This is an [X brand] monitor model [Y], it supports resolutions up to [Z], refresh rates of up to [W]Hz, and has specific color profiles.” Without this instruction manual, your operating system would only be able to interact with your monitor using a generic, basic set of commands, often limiting its functionality.
While operating systems typically come with generic drivers that allow basic display functionality (like showing an image), these generic drivers rarely unlock the full potential of your monitor. They might only support standard resolutions, lower refresh rates, or fail to utilize advanced features like HDR, Adaptive Sync (FreeSync/G-Sync), or specialized color calibration settings. This is where dedicated manufacturer-specific drivers become indispensable.
Why Proper Drivers Matter for Performance and Productivity
The impact of proper monitor drivers extends far beyond mere functionality; it directly influences your system’s performance, the quality of your visual experience, and by extension, your productivity and enjoyment.
- Optimal Resolution and Refresh Rate: Generic drivers often restrict your monitor to lower resolutions or refresh rates than it’s capable of. Installing the correct driver ensures you can utilize your monitor’s native resolution, leading to sharper images and more screen real estate. For gamers and content creators, achieving higher refresh rates (e.g., 144Hz, 240Hz) is crucial for smooth motion and responsiveness, something only proper drivers can enable.
- Enhanced Color Accuracy and Display Features: Many modern monitors boast advanced color technologies, wider gamuts, and specific display modes (e.g., sRGB, Adobe RGB, DCI-P3). The manufacturer’s driver often includes color profiles and settings that allow you to calibrate your display more accurately, critical for graphic designers, photographers, and video editors. Features like dynamic contrast, local dimming, and specific input lag reductions are also often contingent on the correct driver.
- Improved Stability and Compatibility: Using the correct driver reduces the likelihood of display-related issues such as screen flickering, sudden resolution changes, or even “no signal” problems. It ensures better compatibility with your graphics card and other hardware components, leading to a more stable and reliable system.
- Unlocking Advanced Functionality: Some monitors come with integrated USB hubs, specific input switching capabilities, or custom on-screen display (OSD) controls that might only be fully accessible when the proprietary driver is installed. For those utilizing multi-monitor setups, proper drivers facilitate smoother integration and configuration across all displays, enhancing multitasking and overall productivity.
- Digital Security and System Health: While less direct, downloading drivers from official sources is a critical aspect of digital security. Unofficial or bundled drivers from dubious third-party sites can introduce malware, bloatware, or create system vulnerabilities. Prioritizing official channels helps maintain the integrity and health of your operating system.
In essence, installing the correct monitor driver isn’t just a technical formality; it’s an investment in getting the most out of your hardware, optimizing your digital workspace, and safeguarding your system.
Preparing for Driver Installation: Essential Steps
Before you embark on the driver installation process, a few preparatory steps will ensure a smooth and successful experience. Taking a moment to gather information and assess your current setup can prevent common pitfalls and streamline the entire procedure.
Identifying Your Monitor Model and Operating System
The most critical pieces of information you’ll need are your monitor’s exact model number and your computer’s operating system version. Driver files are specific to both the hardware (your monitor) and the software environment (your OS).
-
Locate Your Monitor Model Number:
- Physical Label: Most monitors have a sticker on the back or bottom that includes the brand, model name, and model number. This is often the most reliable source. Look for labels like “Model No.” or “P/N” (Part Number).
- Original Packaging/Manual: If you still have the box or user manual, the model number will be prominently displayed there.
- Monitor’s On-Screen Display (OSD): Some monitors display their model number within their settings menu. Navigate through the OSD using the physical buttons on your monitor to find an “Information” or “System Info” section.
- System Information (Windows): While less reliable for specific monitor models, you can sometimes find basic display information. Press
Win + R, typemsinfo32, and press Enter. Look under “Components” -> “Display”. This will primarily show your graphics card, but sometimes basic monitor details are listed.
-
Identify Your Operating System:
- Windows 10/11: Click the Start button, then type
winverand press Enter. A small window will appear showing your Windows version and build number. Alternatively, go toSettings > System > Aboutfor more detailed information, including whether it’s 32-bit or 64-bit (most modern systems are 64-bit). - macOS: Click the Apple menu in the top-left corner of your screen, then select “About This Mac.”
- Windows 10/11: Click the Start button, then type
Knowing your exact monitor model (e.g., “Dell UltraSharp U2723QE”) and OS (e.g., “Windows 11 Home, 64-bit”) is paramount for downloading the correct driver package from the manufacturer’s website.
Checking Current Driver Status and Backup Considerations
Understanding your current driver situation can help you determine if an update is truly necessary or if you’re troubleshooting an existing issue.
-
Check Current Monitor Driver Status (Windows):
- Press
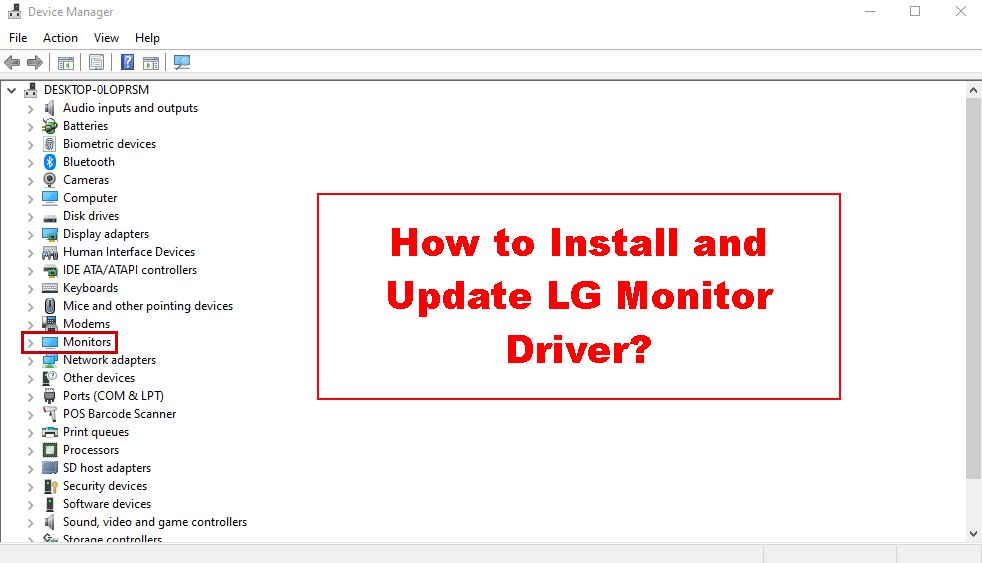
Win + Xand select “Device Manager” from the power user menu. - Expand the “Monitors” category. You’ll typically see “Generic PnP Monitor” if a specific driver isn’t installed, or the actual model name if it is.
- Right-click on your monitor and select “Properties.”
- Go to the “Driver” tab. Here you can see the driver provider, date, and version. This helps confirm if a manufacturer-specific driver is already in place or if it’s a generic Microsoft driver.
- Press
-
Backup Considerations:
- System Restore Point: Before making significant driver changes, especially if you’re troubleshooting or unsure, it’s always a good practice to create a system restore point. This allows you to revert your system to a previous working state if the new driver causes unexpected issues. Search for “Create a restore point” in the Windows search bar.
- Graphics Card Drivers: While this article focuses on monitor drivers, remember that your graphics card driver (GPU driver) is equally, if not more, critical for display performance. Ensure your GPU drivers are also up-to-date, especially if you’re experiencing display issues. GPU drivers are usually updated through NVIDIA GeForce Experience, AMD Radeon Software, or Intel Driver & Support Assistant.
- No specific monitor driver backup: Unlike GPU drivers, monitor drivers are typically small and don’t usually require dedicated backups. Downloading the latest version from the manufacturer is always the best approach.
By completing these preparatory steps, you’ll be well-equipped to proceed with the driver installation, minimizing potential setbacks and ensuring a smoother update process.
Step-by-Step Guide to Installing Your Monitor Driver
With your monitor model and OS identified, and your system ready, it’s time to tackle the installation itself. We’ll explore the most common and effective methods, guiding you through each one.
Method 1: Leveraging Windows Update for Generic Drivers
Windows Update is often the first line of defense for driver management, automatically providing generic or sometimes even specific drivers for your hardware. While convenient, it doesn’t always offer the optimal solution.

-
Check for Windows Updates:
- Go to
Settings > Update & Security > Windows Update(Windows 10) orSettings > Windows Update(Windows 11). - Click “Check for updates.”
- Windows will download and install any available updates, which may include display or monitor drivers.
- Optional Updates: Sometimes, manufacturer-specific drivers are categorized under “Optional updates” or “View optional updates.” Make sure to check this section and select any relevant monitor drivers.
- Go to
-
Limitations: While Windows Update provides a convenient baseline, it often installs a “Generic PnP Monitor” driver or an older version of a specific driver. This might be sufficient for basic functionality, but it won’t unlock all the advanced features or optimal performance settings of your monitor. For the best results, Method 2 is highly recommended.
Method 2: The Gold Standard – Downloading from the Manufacturer’s Website
This is the most reliable and recommended method for installing your monitor’s specific driver. Manufacturer websites host the latest, most compatible, and feature-rich drivers tailored for their products.
- Visit Your Monitor Manufacturer’s Official Website:
- Use a search engine to find the official support page for your monitor’s brand (e.g., Dell Support, HP Support, LG Support, Samsung Downloads, ASUS Support). Be cautious of third-party driver sites, as they can be sources of malware or outdated drivers.
- Navigate to the Support/Drivers Section:
- Look for sections like “Support,” “Drivers,” “Downloads,” or “Customer Service.”
- Search for Your Monitor Model:
- Enter the exact model number you identified earlier into the search bar.
- Once you find your monitor’s product page, look for a “Drivers,” “Downloads,” or “Software” tab.
- Select Your Operating System:
- On the driver download page, you’ll typically need to select your operating system (e.g., Windows 10 64-bit, Windows 11 64-bit) from a dropdown menu to ensure you download the correct driver version.
- Download the Driver:
- Locate the monitor driver file (it might be labeled as “Monitor Driver,” “Display Driver,” or “INF Driver”).
- Click the download button. The file is often a
.ziparchive or a self-extracting.exeinstaller.
- Install the Driver:
- For
.exeinstallers: Simply double-click the downloaded.exefile and follow the on-screen instructions. These are usually straightforward wizard-based installations. - For
.ziparchives:- Right-click the
.zipfile and select “Extract All…” to unzip its contents to a new folder. - Open the extracted folder. Look for an
.inffile (e.g.,monitor.inf,LG_driver.inf), an.catfile, and sometimes other related files. There might also be asetup.exewithin the extracted folder which you can run. If there is nosetup.exe, proceed to step 7.
- Right-click the
- For
- Manual Installation (for
.inffiles without an.exeinstaller):- Open Device Manager (right-click Start button -> Device Manager).
- Expand “Monitors,” right-click on your monitor (which might still be “Generic PnP Monitor”), and select “Update driver.”
- Choose “Browse my computer for drivers.”
- Click “Browse…” and navigate to the folder where you extracted the driver files (the folder containing the
.inffile). - Click “Next.” Windows will then attempt to install the driver from the specified location.
- You might receive a security warning about installing unsigned drivers; confirm to proceed if you’ve downloaded from the official manufacturer.
- Restart Your Computer:
- After installation, it’s always a good practice to restart your computer to ensure the new driver is fully loaded and recognized by the system.
Method 3: Manual Update via Device Manager
This method is particularly useful if you’ve already downloaded the driver files (e.g., an .inf file from a .zip archive) and need to point Windows to their location.
- Open Device Manager: Press
Win + Xand select “Device Manager.” - Locate Your Monitor: Expand the “Monitors” category.
- Initiate Driver Update: Right-click on your monitor entry (e.g., “Generic PnP Monitor” or your existing monitor model) and select “Update driver.”
- Choose Manual Search:
- Select “Browse my computer for drivers.”
- If you have a specific
.inffile, click “Let me pick from a list of available drivers on my computer,” then “Have Disk…” and navigate to your driver’s folder. - Alternatively, click “Browse…” and navigate directly to the folder where you saved the extracted driver files (the folder containing the
.inffile).
- Install Driver: Click “Next” and allow Windows to install the driver.
- Restart: Restart your PC to finalize the changes.
A Word of Caution on Third-Party Driver Utilities
You might encounter various third-party driver update tools (e.g., Driver Booster, Driver Easy, Snappy Driver Installer). While these tools promise convenience by scanning your system and automatically finding drivers, they come with significant risks:
- Digital Security Concerns: Many of these tools are ad-supported, bundle bloatware, or even worse, can install outdated, incorrect, or malicious drivers. This poses a serious digital security threat to your system.
- Driver Conflicts and Instability: Using non-official drivers can lead to system instability, crashes, and performance issues, as they may not be fully tested or compatible with your specific hardware and OS configuration.
- Unnecessary Software: These tools often install additional software that runs in the background, consuming system resources and potentially slowing down your PC.
Recommendation: For monitor drivers, and indeed for most critical system drivers, it is strongly advised to stick to the official methods described above. The minor convenience offered by third-party tools rarely outweighs the potential risks to your system’s stability and security. Prioritize direct downloads from manufacturers for peace of mind and optimal performance.
Troubleshooting Common Monitor Driver Issues
Even with the right steps, you might encounter bumps along the road. Here’s how to address some common monitor driver problems.
Resolving Installation Problems and “Best Driver Already Installed” Messages
- “Best Driver Already Installed”:
- This message often appears if Windows believes the generic PnP driver is sufficient or if an older version of the manufacturer’s driver is already present.
- Solution: Proceed with Method 2 (Manufacturer’s Website) or Method 3 (Manual Update via Device Manager) and explicitly point Windows to the downloaded driver files. Sometimes, you need to force the update by clicking “Let me pick from a list of available drivers on my computer” in Device Manager, then “Have Disk…” and locating the
.inffile.
- Driver Not Installing/Error Message:
- Corrupted Download: Re-download the driver file from the manufacturer’s website.
- Incorrect Version: Double-check that you downloaded the correct driver for your exact monitor model and OS (32-bit vs. 64-bit).
- Antivirus Interference: Temporarily disable your antivirus software during installation (remember to re-enable it immediately after).
- Administrator Rights: Ensure you are logged in as an administrator or run the installer “as administrator” (right-click the
.exeand select “Run as administrator”).
- Previously Installed Driver Causing Conflict:
- Uninstall Existing Driver: In Device Manager, right-click your monitor, select “Uninstall device.” Check the box “Attempt to remove the driver software for this device” if available. Then restart your computer and try installing the new driver.
- Roll Back Driver: If a newly installed driver causes issues, you can revert to a previous one. In Device Manager, right-click your monitor, go to “Properties,” then the “Driver” tab, and click “Roll Back Driver” (if the option is available).
Addressing Display Anomalies After Driver Updates
After updating your monitor driver, you might notice some visual irregularities.
- Incorrect Resolution or Refresh Rate:
- Check Display Settings: Right-click on your desktop, select “Display settings.” Scroll down to “Advanced display settings” or “Display adapter properties.” Here, you can manually set the native resolution and the highest available refresh rate your monitor supports.
- Graphics Card Control Panel: Sometimes, specific display settings are managed by your graphics card’s control panel (NVIDIA Control Panel, AMD Radeon Software, Intel Graphics Command Center). Check these utilities for monitor-specific settings.
- Flickering or Distorted Image:
- Cable Check: Ensure your display cable (HDMI, DisplayPort, DVI, VGA) is securely connected at both the monitor and graphics card ends. Try a different cable if possible.
- GPU Driver Conflict: Your monitor driver might be clashing with your graphics card driver. Try updating your graphics card driver to the latest version. If the issue persists, try rolling back your GPU driver.
- Monitor Settings: Access your monitor’s OSD (On-Screen Display) menu to check for any internal settings that might be causing the issue (e.g., overdrive settings, input mode).
- No Signal/Black Screen:
- Reboot: A simple reboot often resolves temporary display glitches.
- Safe Mode: If your screen remains black, try booting into Windows Safe Mode. If you get a display in Safe Mode, it indicates a driver issue. You can then uninstall the problematic driver from Safe Mode.
- Alternative Input: If your monitor has multiple inputs (HDMI, DisplayPort), try switching to a different input to see if the issue is with the specific input you’re using.
- Physical Connection: Double-check all physical connections to ensure they are firm.
By systematically going through these troubleshooting steps, you can often diagnose and resolve most common monitor driver-related issues, bringing your display back to optimal performance.
Maintaining Optimal Display Performance and Digital Security
Installing your monitor driver is often a “set it and forget it” task, but a few best practices can ensure long-term stability and protect your system.
Best Practices for Driver Management
- Don’t Over-Update (Unless Necessary): Unlike graphics card drivers, which often receive performance-boosting updates, monitor drivers are generally very stable. Once you have the correct, manufacturer-specific driver installed and your display is working perfectly, there’s usually no urgent need to update it with every new version. Update only if you’re experiencing issues, upgrading your OS, or if the manufacturer releases a significant update with new features.
- Prioritize Manufacturer’s Website: Always source your drivers directly from the monitor manufacturer’s official support website. This ensures you get the legitimate, tested, and most compatible software for your specific device. Avoid relying on generic driver download sites or third-party utilities.
- Keep Records: It can be helpful to keep a small text file or note of your monitor model and the driver version you installed, especially if you have multiple monitors or frequently reinstall your OS. This can save time during future setups or troubleshooting.
- Regular System Maintenance: While not directly related to monitor drivers, regularly updating your operating system, graphics card drivers, and running disk cleanup tools contributes to a healthy computing environment where all components, including your monitor, can function optimally.

Securing Your System Through Official Downloads
In an era where digital security is paramount, the source of your software downloads significantly impacts your system’s vulnerability.
- Malware Prevention: Unofficial driver download sites are notorious vectors for distributing malware, adware, and spyware. These malicious programs can compromise your personal data, degrade system performance, or even render your computer unusable. Sticking to official manufacturer websites dramatically reduces this risk.
- System Integrity: Incorrect or corrupted drivers can lead to system crashes (Blue Screen of Death), data loss, or create security loopholes that attackers could exploit. Official drivers are rigorously tested by manufacturers to ensure compatibility and stability with their hardware and common operating systems.
- Firmware Updates (If Applicable): Some advanced monitors also receive firmware updates, which are low-level software updates for the monitor itself. These are always provided exclusively through the manufacturer’s support site and can address hardware-specific bugs or introduce new features. Downloading these from anywhere else is extremely risky.
By adhering to these simple yet crucial practices, you not only maintain optimal display performance but also contribute significantly to the overall digital security and longevity of your technology setup. A well-maintained system, equipped with proper drivers from trusted sources, is a productive and secure system.
aViewFromTheCave is a participant in the Amazon Services LLC Associates Program, an affiliate advertising program designed to provide a means for sites to earn advertising fees by advertising and linking to Amazon.com. Amazon, the Amazon logo, AmazonSupply, and the AmazonSupply logo are trademarks of Amazon.com, Inc. or its affiliates. As an Amazon Associate we earn affiliate commissions from qualifying purchases.