In the rapidly evolving landscape of technology, businesses and developers alike are constantly seeking robust, scalable, and flexible database solutions to power their applications. From high-traffic e-commerce platforms to dynamic content management systems and cutting-edge AI tools, the demand for databases that can handle vast amounts of diverse data with agility has never been higher. Among the various contenders in the database world, MongoDB has emerged as a powerhouse, distinguishing itself as a leading NoSQL document database. Its popularity stems from its ability to store data in flexible, JSON-like documents, making it incredibly intuitive for developers and highly scalable for modern, data-intensive applications.

This comprehensive guide is designed to walk you through the process of installing MongoDB across various operating systems, ensuring you have a solid foundation to leverage this powerful tool. Whether you’re a seasoned developer, a budding tech enthusiast exploring new software, or a business owner looking to optimize your data infrastructure, understanding how to properly set up MongoDB is a crucial step in your digital journey. We’ll delve into its core benefits, prepare your system, and provide detailed, step-by-step instructions for a seamless installation experience.
Understanding MongoDB: A Modern Database for Dynamic Applications
Before we dive into the nitty-gritty of installation, it’s beneficial to grasp what MongoDB is and why it has garnered such widespread acclaim, particularly within the ‘Tech’ sphere of software development and digital infrastructure. Unlike traditional relational databases (SQL) that store data in rigid tables with predefined schemas, MongoDB operates on a NoSQL paradigm, specifically as a document database. This fundamental difference is key to its flexibility and performance.
The NoSQL Advantage: Why MongoDB Stands Out
The advent of the internet and the explosion of big data brought forth challenges that traditional relational databases often struggled to meet. The rigid schema of SQL databases, while excellent for structured data, can become a bottleneck when dealing with rapidly changing data types, unstructured information, or the need for horizontal scalability. This is where NoSQL databases like MongoDB shine.
MongoDB stores data in BSON (Binary JSON) documents, which are essentially JSON-like structures. Each document can have its own unique structure, allowing for highly flexible and agile data modeling. This “schemaless” approach significantly boosts developer productivity, as changes to application data models don’t necessitate complex database schema migrations. For startups building innovative apps, or established enterprises iterating quickly on new features, this agility is invaluable. It aligns perfectly with modern software development methodologies like Agile and DevOps, where rapid iteration and deployment are paramount. The ability to evolve your data structure with your application ensures that your technology stack remains aligned with your business strategy and the ever-changing demands of the market.
Key Features and Use Cases
MongoDB isn’t just flexible; it’s also packed with features designed for performance, scalability, and reliability, making it a cornerstone for many ‘Tech’ applications today:
- High Performance: It supports rich queries, secondary indexes, and provides high performance for data persistence.
- High Availability: Replica sets provide automatic failover and data redundancy, ensuring your applications remain online even if a server fails. This is crucial for maintaining brand reputation and avoiding costly downtime.
- Horizontal Scalability (Sharding): MongoDB can distribute data across multiple servers in a process called sharding. This allows it to handle massive data volumes and high throughput by distributing the load, making it suitable for even the most demanding applications.
- Rich Query Language: Although NoSQL, MongoDB offers a powerful query language that supports various querying capabilities, including aggregation, geospatial queries, and text search.
- Cost-Effectiveness: Being an open-source project, MongoDB Community Edition offers a powerful, free-to-use solution, reducing initial investment costs for businesses and side hustles, aligning with ‘Money’ topics regarding savvy financial tools.
Common use cases for MongoDB include content management systems, mobile applications, real-time analytics, IoT data, product catalogs, and highly personalized user experiences. Its versatility makes it a go-to choice for a wide array of digital products and services that define modern technology trends.
Prerequisites for a Seamless MongoDB Installation
A smooth installation process begins with proper preparation. Before you embark on installing MongoDB, it’s essential to ensure your system meets the necessary requirements and that you have all the prerequisite tools in place. This foundational step minimizes potential roadblocks and ensures that MongoDB operates optimally once installed.
System Requirements and Compatibility
MongoDB is designed to run on various operating systems, but each has specific requirements. Generally, you’ll need:
- Operating System: MongoDB supports recent versions of Windows (Server 2012 R2, Windows 8 and later), macOS (10.13 High Sierra and later), and various Linux distributions (Ubuntu, Debian, Red Hat, CentOS, Amazon Linux). Always refer to the official MongoDB documentation for the most up-to-date compatibility matrix for your specific version.
- Hardware: While MongoDB can run on modest hardware for development purposes, production environments typically require robust resources.
- RAM: A minimum of 4GB of RAM is recommended, though more is always better, especially for data-intensive operations.
- Disk Space: Ensure you have ample free disk space. MongoDB stores data on disk, and the space required will grow with your database. Solid-state drives (SSDs) are highly recommended for performance.
- CPU: A multi-core processor is beneficial for handling concurrent requests.
- Network: An open port for MongoDB (default is 27017) is necessary for client applications to connect. For ‘Digital Security,’ consider firewall rules to restrict access to trusted IPs only.
Essential Tools and Preparations
Depending on your operating system, you might need specific tools or take preliminary steps:
- For Linux:
- Package Manager: You’ll rely heavily on your distribution’s package manager (e.g.,
aptfor Debian/Ubuntu,yumordnffor Red Hat/CentOS). Ensure it’s up-to-date. - GPG Key: MongoDB packages are signed with a GPG key for security. You’ll need to import this key to verify the authenticity of the packages.
- Storage Engine: MongoDB uses WiredTiger as its default storage engine, which is integrated.
- Package Manager: You’ll rely heavily on your distribution’s package manager (e.g.,
- For macOS:
- Homebrew: The most popular and recommended way to install MongoDB on macOS is using Homebrew, a fantastic package manager. If you don’t have it, install it first:
/bin/bash -c "$(curl -fsSL https://raw.githubusercontent.com/Homebrew/install/HEAD/install.sh)". - Xcode Command Line Tools: Homebrew often requires these. Install them via
xcode-select --install.
- Homebrew: The most popular and recommended way to install MongoDB on macOS is using Homebrew, a fantastic package manager. If you don’t have it, install it first:
- For Windows:
- C++ Redistributable: MongoDB might require the Microsoft Visual C++ Redistributable for Visual Studio. Ensure you have the latest version installed, typically available from Microsoft’s website.
- Administrator Privileges: You’ll need administrator rights to install software and manage services.
By taking these preparatory steps, you’re setting the stage for a smooth and efficient MongoDB installation, minimizing potential errors and ensuring that your system is ready to host this powerful database.
Step-by-Step Installation Guides Across Platforms
Now that your system is prepared, let’s dive into the core of this tutorial: the actual installation process. We’ll cover the most common methods for installing MongoDB on Windows, macOS, and various Linux distributions. Follow the instructions carefully for your specific operating system.
Installing MongoDB on Windows
Windows users have two primary methods for installing MongoDB: using the MSI installer (recommended) or performing a manual installation from a ZIP archive.
Using the MSI Installer (Recommended)
This method is straightforward and sets up MongoDB as a Windows service, making it easy to manage.
- Download the MSI: Go to the official MongoDB Download Center (mongodb.com/try/download/community) and select the “Windows” platform, “MSI” package, and the latest stable “Community Server” version.
- Run the MSI Installer: Locate the downloaded
.msifile and double-click it. - Follow the Wizard:
- Click “Next” on the welcome screen.
- Accept the end-user license agreement and click “Next.”
- Choose “Complete” for a full installation, or “Custom” if you want to select specific components or change the installation directory. For most users, “Complete” is sufficient.
- Service Configuration: Crucially, on the “Service Configuration” screen:
- Run service as Network Service user (Recommended): This is the default and generally sufficient.
- Run service as a local or domain user: If you need specific user privileges, choose this option and provide credentials.
- Install MongoDB Compass: This is a GUI tool for interacting with MongoDB. It’s highly recommended for visual management. Check the box to install it.
- Click “Next,” then “Install.”
- Completion: Once the installation finishes, click “Finish.” MongoDB is now installed as a Windows service and should start automatically.
Manual Installation (ZIP Archive)
This method provides more control but requires manual configuration to run MongoDB as a service.

- Download the ZIP: From the MongoDB Download Center, select “Windows,” “ZIP,” and the latest stable “Community Server” version.
- Extract the Archive: Extract the contents of the downloaded ZIP file to your chosen directory (e.g.,
C:mongodb). It’s recommended to rename the extracted folder tomongodbfor simplicity. - Create Data and Log Directories: Inside your
C:mongodbdirectory, create two subdirectories:datadb(for database files) andlog(for log files).mkdir C:mongodbdatadbmkdir C:mongodblog
- Create a Configuration File: In
C:mongodb, create a file namedmongod.cfgwith the following basic content:
systemLog:

    destination: file

    path: C:mongodblogmongod.log

storage:

    dbPath: C:mongodbdatadb
- Add MongoDB to System PATH (Optional but Recommended): This allows you to run MongoDB commands from any directory.
- Search for “Environment Variables” and open “Edit the system environment variables.”
- Click “Environment Variables…”
- Under “System variables,” find the
Pathvariable and click “Edit.” - Click “New” and add the path to your MongoDB
bindirectory (e.g.,C:mongodbbin). - Click “OK” on all windows.
- Install as a Windows Service: Open Command Prompt as an administrator and run:
bash

"C:mongodbbinmongod.exe" --config "C:mongodbmongod.cfg" --install
- Start the Service:
bash

net start MongoDB
Installing MongoDB on macOS (via Homebrew)
Homebrew makes installing MongoDB on macOS incredibly simple and is the recommended method.
- Install Homebrew (if not already installed):
bash

/bin/bash -c "$(curl -fsSL https://raw.githubusercontent.com/Homebrew/install/HEAD/install.sh)"
- Tap the MongoDB Homebrew Tap: This makes the official MongoDB formulas available.
bash

brew tap mongodb/brew
- Install MongoDB Community Server:
bash

brew install mongodb-community@6.0 # Replace 6.0 with the desired version, e.g., 7.0
Homebrew will install MongoDB, create the default data directory (/data/db), and set upmongodandmongosh. - Start MongoDB:
bash

brew services start mongodb-community@6.0
This starts MongoDB as a background service and ensures it launches automatically on system startup. - Verify Installation:
bash

brew services list
You should seemongodb-communitylisted asstarted.
Installing MongoDB on Linux
Installation on Linux typically involves using your distribution’s package manager. We’ll cover Debian/Ubuntu and Red Hat/CentOS.
Debian/Ubuntu (APT)
- Import the MongoDB GPG Key: This key verifies the integrity of the downloaded packages.
bash

sudo apt-get install gnupg curl

curl -fsSL https://www.mongodb.org/static/pgp/server-6.0.asc | sudo gpg --dearmor | sudo tee /etc/apt/trusted.gpg.d/mongodb-org-6.0.gpg > /dev/null
(Replace6.0with your desired MongoDB version if different.) - Create a List File for MongoDB: This tells APT where to find the MongoDB packages.
- For Ubuntu 22.04 (Jammy):
bash

echo "deb [ arch=amd64,arm64 ] https://repo.mongodb.org/apt/ubuntu jammy/mongodb-org/6.0 multiverse" | sudo tee /etc/apt/sources.list.d/mongodb-org-6.0.list
- For Ubuntu 20.04 (Focal):
bash

echo "deb [ arch=amd64,arm64 ] https://repo.mongodb.org/apt/ubuntu focal/mongodb-org/6.0 multiverse" | sudo tee /etc/apt/sources.list.d/mongodb-org-6.0.list
- For Debian 11 (Bullseye):
bash

echo "deb [ arch=amd64,arm64 ] https://repo.mongodb.org/apt/debian bullseye/mongodb-org/6.0 multiverse" | sudo tee /etc/apt/sources.list.d/mongodb-org-6.0.list
(Adjustjammy,focal, orbullseyeand6.0according to your OS version and desired MongoDB version.)
- For Ubuntu 22.04 (Jammy):
- Update APT and Install MongoDB:
bash

sudo apt-get update

sudo apt-get install -y mongodb-org
- Start MongoDB:
bash

sudo systemctl start mongod
- Enable MongoDB to Start on Boot:
bash

sudo systemctl enable mongod
- Verify Status:
bash

sudo systemctl status mongod
You should see “active (running)”.
Red Hat/CentOS (YUM/DNF)
- Create a Repository File: Create
/etc/yum.repos.d/mongodb-org-6.0.repo(replace6.0with your desired version) and add the following content:
ini

[mongodb-org-6.0]

name=MongoDB Repository

baseurl=https://repo.mongodb.org/yum/redhat/$releasever/mongodb-org/6.0/x86_64/

gpgcheck=1

enabled=1

gpgkey=https://www.mongodb.org/static/pgp/server-6.0.asc
(Adjust6.0for your MongoDB version.$releaseverwill automatically detect your CentOS/RHEL version.) - Install MongoDB:
bash

sudo yum install -y mongodb-org # For CentOS/RHEL 7

# OR

sudo dnf install -y mongodb-org # For CentOS/RHEL 8+
- Start MongoDB:
bash

sudo systemctl start mongod
- Enable MongoDB to Start on Boot:
bash

sudo systemctl enable mongod
- Verify Status:
bash

sudo systemctl status mongod
You should see “active (running)”.
Post-Installation: Configuration, Verification, and Initial Steps
After successfully installing MongoDB, there are a few crucial steps to take. These involve verifying that the database is running correctly, understanding how to manage its service, and taking initial steps towards securing your data. These post-installation practices are vital for smooth operation and ‘digital security’.
Starting, Stopping, and Checking MongoDB Status
- Linux (Systemd):
- Start:
sudo systemctl start mongod - Stop:
sudo systemctl stop mongod - Restart:
sudo systemctl restart mongod - Status:
sudo systemctl status mongod
- Start:
- macOS (Homebrew Services):
- Start:
brew services start mongodb-community@6.0 - Stop:
brew services stop mongodb-community@6.0 - Restart:
brew services restart mongodb-community@6.0 - Status:
brew services list
- Start:
- Windows (Services Manager or Command Prompt):
- Open “Services” application (search for “services”). Find “MongoDB Server (MongoDB)” and use the start/stop/restart options.
- From an Administrator Command Prompt:
- Start:
net start MongoDB - Stop:
net stop MongoDB
- Start:
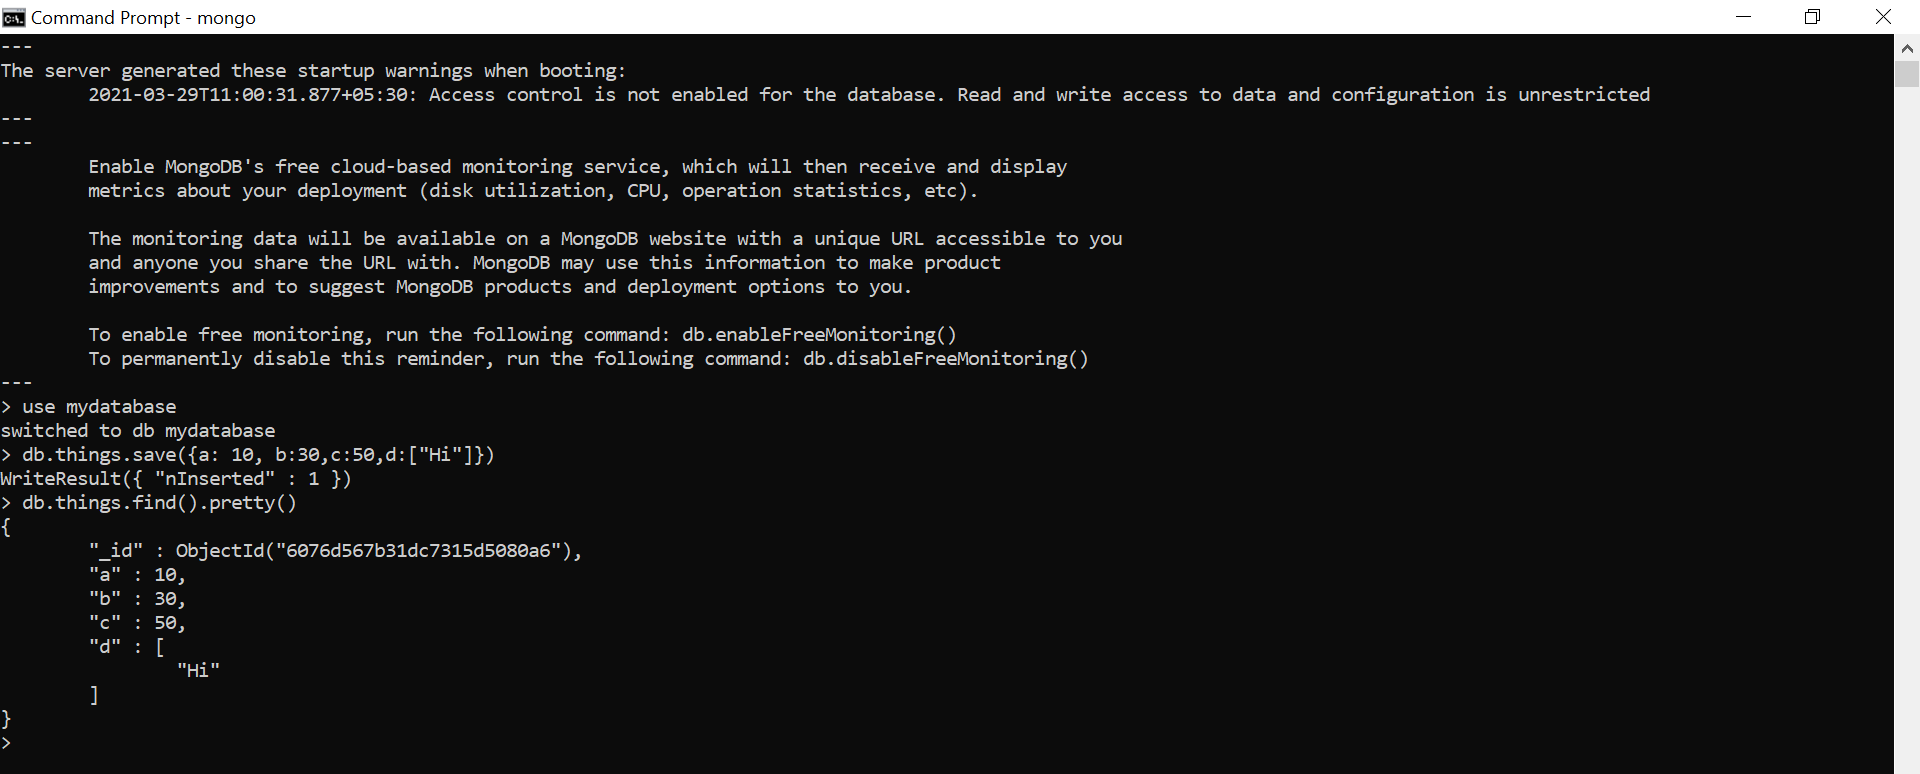
Connecting to MongoDB with mongosh
mongosh is the new MongoDB Shell, a powerful command-line interface for interacting with your MongoDB instance. It’s usually installed alongside the MongoDB server.
- Open a terminal or command prompt.
- Type
mongoshand press Enter.
bash

mongosh
If MongoDB is running locally on the default port (27017),mongoshwill connect automatically. You’ll see a prompt liketest>(indicating you’re connected to thetestdatabase).
You can now start issuing commands, such as show dbs to list existing databases, or db.version() to check the MongoDB server version. This is your gateway to database management, data manipulation, and testing your application’s connection.
Basic Security Considerations (Firewall, Authentication)
For ‘Digital Security’ and ‘Productivity,’ securing your database is paramount, especially in production environments.
- Firewall Rules: By default, MongoDB listens on port 27017. It’s crucial to configure your system’s firewall to allow incoming connections only from trusted IP addresses or application servers.
- Linux (ufw example):
bash

sudo ufw allow from [your_app_server_ip] to any port 27017

sudo ufw enable
- Windows: Configure Windows Defender Firewall to block port 27017 for public networks and allow specific IPs for private networks.
- macOS: Use
pfctlor third-party firewall applications to manage network access.
- Linux (ufw example):
- Enable Authentication: Never run a production MongoDB instance without authentication. This requires users to provide a username and password to connect.
- Edit your
mongod.cfg(or/etc/mongod.confon Linux) and add:
yaml

security:

    authorization: enabled
- Restart the MongoDB service.
- Connect with
mongosh, create an administrator user, and then create application-specific users with appropriate roles. - From now on, you’ll need to connect with credentials:
mongosh --username [username] --password [password] --authenticationDatabase admin.
- Edit your
Implementing these basic security measures is critical to protect your data from unauthorized access, a fundamental aspect of digital security and maintaining trust in your brand.
Troubleshooting Common Installation Issues
Despite careful preparation, issues can arise during installation or post-setup. Here are some common problems and their solutions:
- MongoDB Fails to Start:
- Check Logs: The most important step. Examine the MongoDB log file (e.g.,
/var/log/mongodb/mongod.logon Linux,C:mongodblogmongod.logon Windows). Error messages here often pinpoint the problem. - Permissions: Ensure the user running
mongodhas read/write permissions to thedbPathandlogPathdirectories. - Port Conflict: Another application might be using port 27017. You can change MongoDB’s port in the configuration file (
port: 27018). - Configuration File Errors: Even a minor syntax error in
mongod.cfgormongod.confcan prevent startup. YAML is sensitive to indentation.
- Check Logs: The most important step. Examine the MongoDB log file (e.g.,
mongoshCannot Connect:- Is MongoDB Running? Verify the MongoDB service is active.
- Firewall: Check if your firewall is blocking connections to port 27017.
- Binding IP: If MongoDB is configured to listen only on
localhost(127.0.0.1) but you’re trying to connect from a different IP, it won’t work. Check thebindIpsetting in your configuration file. For remote access, you might need to bind to0.0.0.0(all interfaces) or specific network interfaces, but this significantly impacts security and must be coupled with firewall rules and authentication.
- Package Manager Issues (Linux):
- GPG Key Errors: Re-import the GPG key carefully.
- Repository Not Found: Double-check the repository list file (
.listor.repo) for correct distribution name, MongoDB version, and URL. Runsudo apt updateorsudo yum updateafter changes. - Dependency Conflicts: Occasionally, other installed packages might conflict.
aptoryum/dnfusually provide helpful messages in such cases.
When troubleshooting, patience and methodical problem-solving are key. Consult the official MongoDB documentation, which is extensive and well-maintained, for detailed error messages and solutions. Online forums and communities are also excellent resources.
By successfully navigating these steps, you’ve not only installed a powerful database but also gained valuable experience in system administration, which is crucial for anyone venturing into ‘Tech’ development or managing ‘Digital Security’ for their ‘Brand’.
Conclusion
Installing MongoDB is a foundational step toward harnessing the power of a modern, flexible, and scalable database for your applications. Whether you’re building a groundbreaking AI tool, optimizing an existing software product, or embarking on a new side hustle, MongoDB offers the agility and performance required for today’s dynamic digital landscape. We’ve walked through the “how-to” of installation across Windows, macOS, and Linux, emphasized the critical “why” behind its popularity, and touched upon essential post-installation steps like configuration and security.
The decision to adopt MongoDB often comes down to its intrinsic benefits: its document model accelerates development cycles, its horizontal scalability handles massive growth, and its rich feature set supports complex data needs. For developers, this translates to increased productivity and a faster path from concept to deployment. For businesses, it means greater resilience, better performance for user-facing applications, and the capacity to innovate without being constrained by outdated data architectures.
As you integrate MongoDB into your projects, remember that ongoing learning is vital. Explore its comprehensive query language, delve into advanced features like replication and sharding, and always prioritize security best practices. The world of technology is constantly evolving, and by mastering tools like MongoDB, you position yourself and your projects at the forefront of innovation, ready to tackle future challenges and capitalize on new opportunities.
aViewFromTheCave is a participant in the Amazon Services LLC Associates Program, an affiliate advertising program designed to provide a means for sites to earn advertising fees by advertising and linking to Amazon.com. Amazon, the Amazon logo, AmazonSupply, and the AmazonSupply logo are trademarks of Amazon.com, Inc. or its affiliates. As an Amazon Associate we earn affiliate commissions from qualifying purchases.