In today’s hyper-connected world, a reliable internet connection isn’t a luxury; it’s a necessity. Whether you’re working from home, streaming your favorite shows, gaming online, or simply staying in touch with loved ones, your modem and router are the unsung heroes that make it all possible. Understanding how to properly install these crucial devices can save you time, frustration, and even potential technical headaches down the line. This guide will walk you through the entire process, from unpacking your new hardware to enjoying a stable, high-speed internet experience, all while keeping in mind the broader themes of technology, brand considerations, and even financial implications.
Understanding Your Network’s Foundation: Modem vs. Router
Before we dive into the installation process, it’s essential to understand the distinct roles your modem and router play. While they often work in tandem, and sometimes are combined into a single unit, they are fundamentally different pieces of equipment.
The Modem: Your Gateway to the Internet
Think of your modem as the translator for your home network. It’s the device that connects your home’s internal network to your Internet Service Provider (ISP). The modem takes the signal coming from your ISP (whether it’s via coaxial cable, DSL phone line, or fiber optic cable) and converts it into a format that your router and other devices can understand. It’s the bridge between the vast internet and your personal digital space.
Key Functions of a Modem:
- Signal Conversion: Translates the ISP’s signal into a usable digital format.
- ISP Connection: Establishes a direct link to your internet provider.
- Single Device Connection: Traditionally, a modem was designed to connect only one device directly to the internet. This is why a router is crucial for multi-device connectivity.
Types of Modems:
The type of modem you have will depend on your ISP’s technology:
- Cable Modems: Used with coaxial cable internet. They are the most common type for many households.
- DSL Modems: Used with telephone lines. These are typically found in areas where cable internet is not available.
- Fiber Optic Modems (ONTs): Used with fiber optic internet. Fiber offers the fastest speeds but requires specialized equipment.
When you sign up for internet service, your ISP will either provide you with a modem or require you to purchase a compatible one. Often, ISPs offer modem rental services, which can be convenient but may lead to higher long-term costs. Considering your budget and long-term financial strategy, purchasing your own compatible modem can sometimes be more cost-effective. Always check with your ISP about their approved modem list to ensure compatibility.
The Router: The Director of Your Home Network
If the modem is the gateway, the router is the traffic director. Its primary job is to create your local area network (LAN) within your home and manage the flow of data between your devices and the internet. It takes the internet signal from the modem and shares it among all your connected devices, whether wired or wireless.
Key Functions of a Router:
- Network Creation: Establishes your private home network.
- IP Address Assignment: Assigns unique IP addresses to each device on your network, allowing them to communicate with each other and the internet.
- Wi-Fi Broadcasting: Creates your wireless network (Wi-Fi) signal, enabling devices to connect without cables.
- Firewall Protection: Provides a basic level of security by acting as a firewall, protecting your network from unauthorized access.
- Data Routing: Directs internet traffic efficiently to the correct devices.
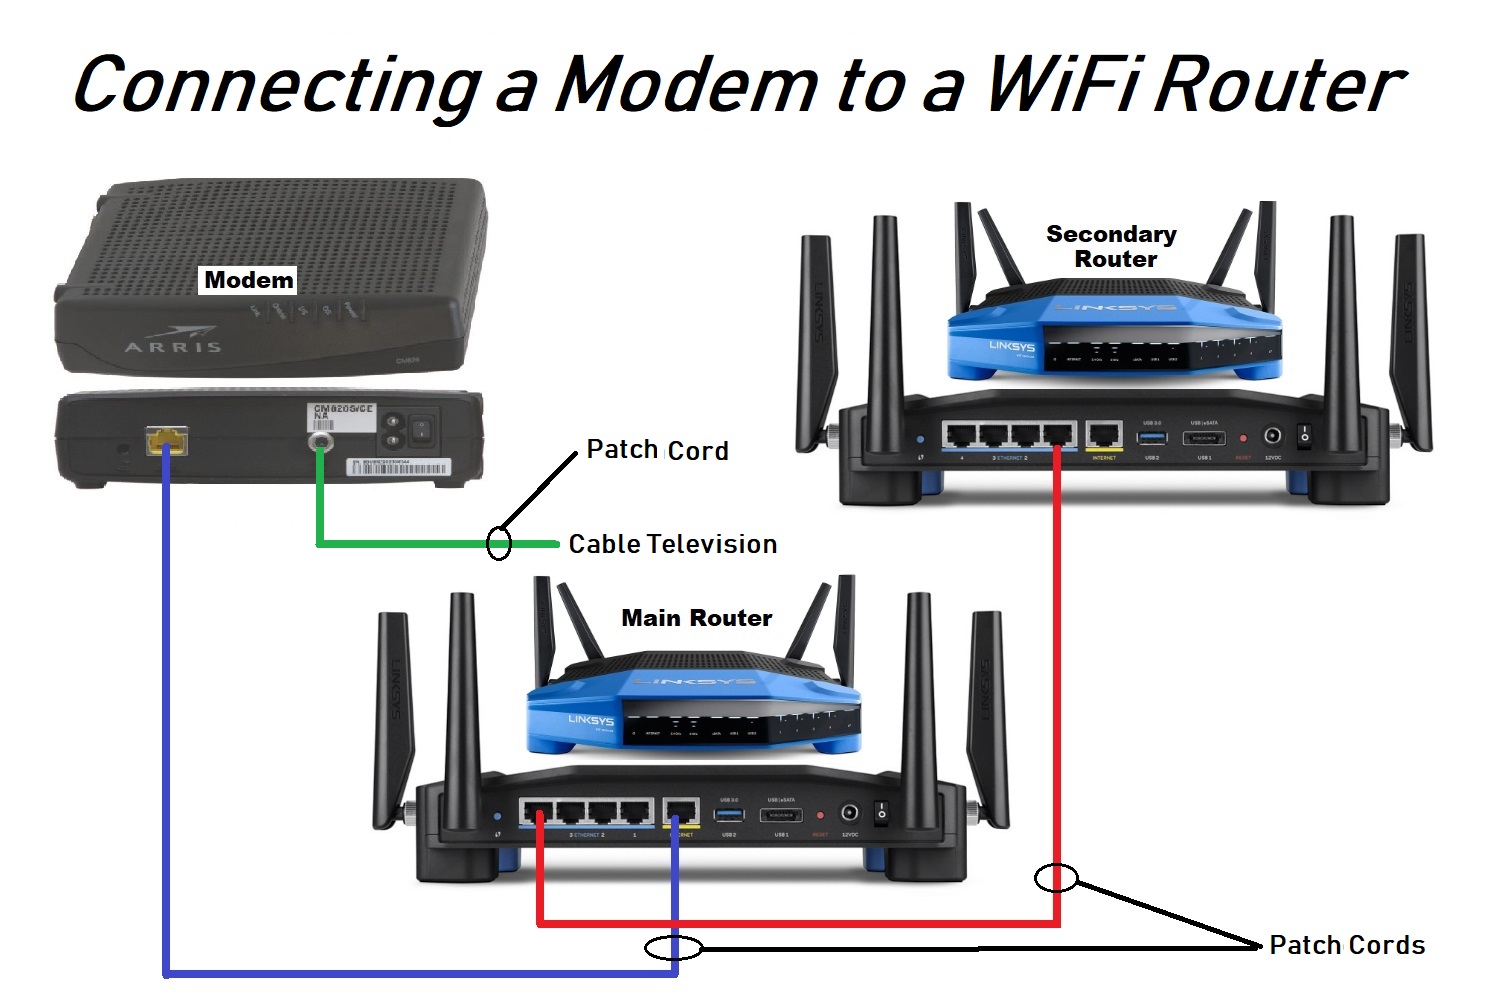
Modem/Router Combos (Gateways):
Many ISPs provide a single device that combines the functionality of both a modem and a router. These are often called “gateways” or “modem/router combos.” While convenient, they sometimes offer less flexibility and advanced customization compared to separate units. If you’re looking for maximum control over your network or aiming for the best possible performance, using separate modem and router units is often recommended.
Step-by-Step Installation Guide
Now that we understand the roles of our key players, let’s get down to the practical steps of installing your modem and router. This process is generally straightforward, but following these steps carefully will ensure a smooth setup.
2.1. Unboxing and Initial Connections
2.1.1. Gather Your Equipment
Before you begin, ensure you have all the necessary components:
- Modem: The device that connects to your ISP.
- Router: The device that creates your Wi-Fi network. (If you have a combo unit, you’ll only have one device to connect initially.)
- Power Adapters: For both the modem and router.
- Ethernet Cables: At least two are usually included – one to connect the modem to the router, and another to connect your computer for initial setup if needed.
- Coaxial Cable (for cable modems) or Phone Cable (for DSL modems): To connect the modem to your wall outlet.
- User Manuals: Keep these handy for specific instructions for your models.
2.1.2. Positioning Your Equipment
The placement of your modem and router can significantly impact your internet speed and Wi-Fi coverage.
- Modem: Ideally, place your modem near the wall outlet where your internet service enters your home. It doesn’t need to be centrally located, as its primary function is the ISP connection.
- Router: This is where placement is critical for Wi-Fi. For optimal coverage, place your router in a central location in your home, away from obstructions like thick walls, metal objects, and large appliances (especially microwaves). Elevating the router (on a shelf or table) can also improve signal distribution.
2.1.3. Connecting the Modem
- Power Down: Ensure your modem is not plugged into a power source yet.
- Connect to Wall Outlet:
- Cable Modem: Screw the coaxial cable (the one that looks like a thick TV cable) securely into the designated port on the back of the modem and the corresponding wall outlet.
- DSL Modem: Connect one end of the phone cable to the DSL port on the back of the modem and the other end to the active phone jack in your wall.
- Fiber Optic Modem (ONT): This connection will depend on your ISP and the type of fiber installation. Typically, a fiber optic cable will be connected directly to the ONT.
- Connect to Power: Plug the modem’s power adapter into the modem and then into a power outlet.
- Power On: Turn on the modem. You should see various lights illuminate and blink. Allow the modem a few minutes to boot up and establish a connection with your ISP. Consult your modem’s manual or ISP’s guide to understand what the status lights indicate.
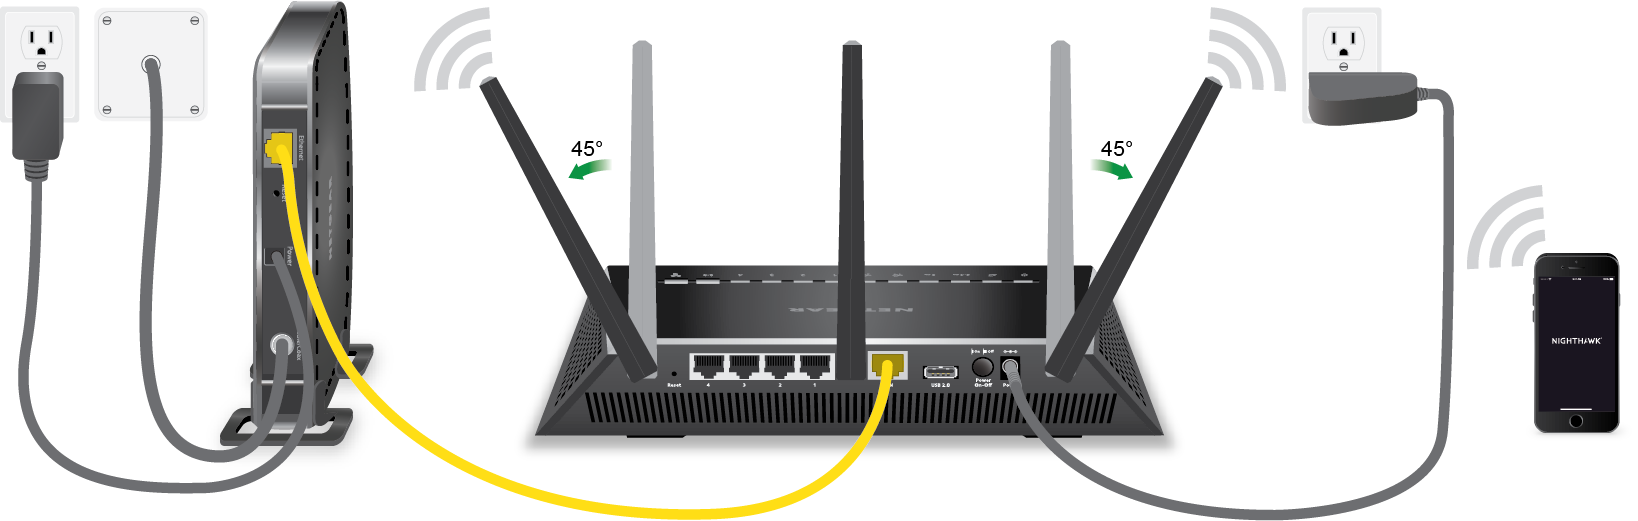
2.1.4. Connecting the Router to the Modem
This step is crucial for enabling Wi-Fi and connecting multiple devices.
- Power Down (if connected): If your router is already plugged in, unplug its power.
- Connect Ethernet Cable: Take an Ethernet cable. Connect one end to the LAN or Ethernet port on your modem. Connect the other end to the WAN or Internet port on your router. This is usually a different color or set apart from the other ports on the router.
- Connect Router Power: Plug the router’s power adapter into the router and then into a power outlet.
- Power On Router: Turn on the router. Like the modem, it will go through a boot-up sequence.
Configuration and Setup: Bringing Your Network to Life
Once your hardware is physically connected, it’s time to configure your network settings. This is where you’ll set up your Wi-Fi name and password.
3.1. Initial Router Configuration
Most modern routers are designed for easy setup through a web browser or a dedicated mobile app.
3.1.1. Wired Connection (Recommended for Initial Setup)
- Connect a Computer: Use another Ethernet cable to connect your computer directly to one of the LAN ports on your router.
- Access Router Interface: Open a web browser on your connected computer. In the address bar, type the router’s default IP address. This is commonly
192.168.1.1or192.168.0.1, but it can vary. You can find the default IP address, username, and password in your router’s manual or on a sticker on the router itself. - Login: Enter the default username and password.
- Setup Wizard: Most routers will launch an easy-to-use setup wizard. Follow the on-screen prompts. This wizard will guide you through essential settings.
3.1.2. Wireless Connection (If Wired is Not an Option)
If you can’t connect via Ethernet, you might be able to connect wirelessly using the router’s default Wi-Fi network.
- Find Default Wi-Fi: Look for a sticker on your router that lists the default Wi-Fi network name (SSID) and password.
- Connect to Default Wi-Fi: On your computer or smartphone, search for available Wi-Fi networks and connect to the default network using the provided password.
- Access Router Interface: Once connected, open a web browser and proceed to step 3.1.1.2.
3.2. Setting Up Your Wi-Fi Network
During the setup process, you’ll be prompted to:
- Set Your Wi-Fi Network Name (SSID): Choose a name that is unique and easy to remember. Avoid using personal information.
- Create a Strong Password: This is crucial for your digital security. Use a combination of uppercase and lowercase letters, numbers, and symbols. A strong password prevents unauthorized access to your network, protecting your data and preventing others from using your internet bandwidth. Think of this as brand protection for your digital space – a strong password is a key element of your network’s identity and security.
- Choose Security Protocol: Opt for WPA2 or WPA3 security, which are the most secure options available.
3.3. Firmware Updates and Advanced Settings
Once you’ve completed the basic setup, it’s good practice to:
- Check for Firmware Updates: Router manufacturers regularly release firmware updates to improve performance, fix bugs, and patch security vulnerabilities. Within the router’s web interface, look for an option to check for and install firmware updates. This is a critical step for maintaining both the performance and security of your network.
- Change Default Login Credentials: For enhanced security, change the default administrator username and password for accessing your router’s settings. This prevents anyone with the default credentials from easily accessing and reconfiguring your router.
- Guest Network: Consider setting up a guest network for visitors. This allows them to access your internet without giving them access to your primary network and connected devices.
Troubleshooting Common Issues
Even with the most careful installation, you might encounter a few hiccups. Here are solutions to some common problems:
4.1. No Internet Connection
- Check Lights: Examine the status lights on your modem and router. Refer to their manuals to understand what the lights indicate. If the modem lights suggest no connection to the ISP, contact your provider.
- Restart Devices: A simple power cycle often resolves issues. Unplug both the modem and router, wait 30 seconds, and then plug them back in, modem first, followed by the router.
- Check Cables: Ensure all Ethernet cables are securely plugged into the correct ports.
- ISP Outage: Check with your ISP to see if there are any reported outages in your area.
4.2. Slow Internet Speeds
- Router Placement: Re-evaluate your router’s position. Obstructions and distance can weaken the signal.
- Too Many Devices: If many devices are actively using the internet simultaneously, speeds can decrease. Consider upgrading your internet plan or router if this is a persistent issue.
- Interference: Other electronic devices (microwaves, cordless phones) can interfere with Wi-Fi signals. Try to move your router away from such devices.
- Bandwidth Usage: Check if any devices are consuming excessive bandwidth (e.g., large downloads, continuous streaming on multiple devices).
- Router Age: Older routers may not support the latest Wi-Fi standards or the speeds offered by your ISP. Consider an upgrade if your router is several years old.
4.3. Wi-Fi Not Reaching All Areas
- Router Upgrade: If your home is large or has many walls, you might need a more powerful router or a Wi-Fi mesh system. Mesh systems use multiple nodes to create a seamless Wi-Fi network throughout your entire home.
- Wi-Fi Extenders/Boosters: These devices can help extend the range of your existing Wi-Fi signal, though they can sometimes halve the speed.

Conclusion: Securing Your Digital Lifestyle
Installing your modem and router is a fundamental step in establishing your digital presence. By understanding the roles of each device, following the installation steps diligently, and performing basic configuration, you can ensure a stable and secure internet connection. Remember that your network is the foundation of your online activities, impacting everything from productivity to entertainment. Regularly checking for firmware updates and maintaining strong security practices are vital for protecting your data and your digital lifestyle. Just as a well-defined brand strategy builds trust and recognition, a well-configured and secure network builds a reliable and safe online environment for you and your household. With this guide, you’re well on your way to enjoying a seamless and robust internet experience.
aViewFromTheCave is a participant in the Amazon Services LLC Associates Program, an affiliate advertising program designed to provide a means for sites to earn advertising fees by advertising and linking to Amazon.com. Amazon, the Amazon logo, AmazonSupply, and the AmazonSupply logo are trademarks of Amazon.com, Inc. or its affiliates. As an Amazon Associate we earn affiliate commissions from qualifying purchases.