In the fast-paced world of data science, machine learning, and general Python development, managing your project dependencies and environments can quickly become a labyrinthine challenge. From conflicting package versions to system-wide installations that disrupt other projects, developers often find themselves grappling with setup complexities rather than focusing on innovation. This is where Miniconda emerges as a powerful, yet elegantly simple, solution.
Miniconda is not just another installer; it’s a streamlined, minimalist bootstrap for Conda, the open-source package and environment management system. Unlike its larger sibling, Anaconda, which bundles hundreds of scientific packages by default, Miniconda provides just Conda, Python, and a handful of essential dependencies. This lean approach offers unparalleled flexibility, allowing you to build precisely the environments you need, tailored to each project’s specifications. For tech professionals, this translates into boosted productivity, enhanced digital security through isolated environments, and a significant improvement in workflow efficiency – aspects that contribute directly to your professional brand and, ultimately, your financial bottom line by saving time and reducing costly errors.
This comprehensive guide will walk you through everything you need to know about installing Miniconda. We’ll delve into why it’s often the preferred choice for experienced developers, data scientists, and anyone keen on optimizing their Python development workflow. We’ll cover the step-by-step installation process across Windows, macOS, and Linux, and provide crucial insights into leveraging its power for maximum productivity. By the end of this article, you’ll not only have Miniconda installed but also a deeper understanding of how to use it to create reproducible, secure, and efficient development environments that stand as a testament to your technical acumen.
Understanding Miniconda: Why It’s Your Go-To Python Environment Manager
The modern development landscape demands agility and precision. Developers need tools that empower them to quickly set up, manage, and tear down project environments without affecting other work. Miniconda is designed precisely for this purpose, offering a robust foundation for building tailored Python ecosystems. Its core strength lies in its ability to manage both packages and environments independently, providing a level of control that traditional methods like pip and virtualenv often struggle to match, especially when dealing with non-Python dependencies or complex scientific computing stacks. This meticulous control over your development environment is a hallmark of a proficient tech professional, enhancing your personal brand in the competitive digital space and directly impacting project efficiency and cost-effectiveness.
Miniconda vs. Anaconda: Choosing the Right Tool for the Job
Often, the first question new users ask is about the difference between Miniconda and Anaconda. While both are distributions of Conda, they cater to different user needs and scenarios.
-
Anaconda: This is the full-featured distribution, a colossal toolbox for data science and machine learning. It comes pre-packaged with Python, R, and over 7,500 scientific packages, including popular libraries like NumPy, pandas, SciPy, Matplotlib, and scikit-learn. Anaconda is ideal for beginners who want to dive straight into data science without the hassle of individual package installations. It’s a “batteries included” approach that prioritizes immediate usability over minimalism. For organizations, it can provide a standardized, robust environment, which in turn reinforces their brand as tech-forward and efficient.
-
Miniconda: In contrast, Miniconda is the minimalist alternative. It includes only Conda, Python, and a few basic dependencies. This barebones setup is precisely its strength. It gives you a clean slate, allowing you to install only the packages you explicitly need for each project. This is particularly beneficial for:
- Resource Constraints: Users with limited disk space or memory will appreciate its smaller footprint.
- Custom Environments: Developers who need very specific versions of libraries or combinations that aren’t typically bundled together.
- Experienced Users: Those who prefer precise control over their package installations and environment configurations.
- Production Deployments: Where minimizing dependencies can lead to more stable and secure deployments.
Choosing Miniconda demonstrates a nuanced understanding of efficient resource management (a ‘money-smart’ approach to computing) and a commitment to clean, reproducible development practices, which are vital components of a strong professional tech brand. By only installing what’s necessary, you reduce potential conflicts, speed up environment creation, and maintain a lighter, more agile system.
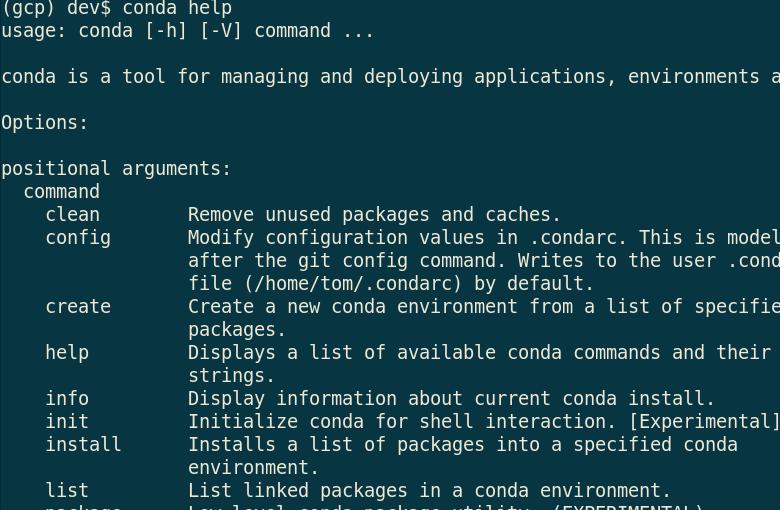
The Power of Conda: More Than Just a Package Manager
At the heart of Miniconda is Conda, a system that goes far beyond what traditional Python package managers like pip can do. Conda is both a package manager and an environment manager, offering a holistic approach to dependency resolution and environment isolation.
-
Environment Management: Conda allows you to create isolated environments, each with its own Python interpreter and set of installed packages. Imagine working on Project A that requires Python 3.8 and a specific version of TensorFlow, while Project B needs Python 3.10 and a completely different set of libraries. Conda enables you to switch seamlessly between these environments without conflicts. This isolation is a critical feature for productivity and digital security, preventing “dependency hell” and ensuring that changes in one project don’t inadvertently break another. For companies, this translates into more reliable project delivery and less downtime, safeguarding their brand reputation and financial investments in development.
-
Package Management: Conda is designed to manage packages for any language, not just Python. It handles libraries written in R, Scala, Java, and C/C++, making it a versatile tool for multi-language projects. Crucially, Conda resolves dependencies comprehensively, ensuring that all necessary libraries and their correct versions are installed together, even system-level dependencies. This robust dependency resolution minimizes installation errors and ensures that your environments are stable and reproducible across different machines or collaborators. This capability is paramount for team collaboration (enhancing the “brand” of a coherent, efficient team) and for ensuring project reliability (saving “money” by preventing costly rework). Conda’s ability to manage non-Python dependencies is a significant advantage over
pipwhich is limited to Python packages, making Conda a superior choice for complex scientific and data-intensive applications.
Preparing for Installation: System Requirements and Best Practices
Before you embark on the installation process, taking a few moments to prepare can save you significant time and frustration. A well-prepared system ensures a smooth setup, minimizes potential issues, and sets the stage for an optimized development environment. This preparatory step is akin to any smart financial or branding strategy – laying solid groundwork prevents future headaches and expenses.
Pre-Installation Checklist: Ensuring a Smooth Setup
To guarantee a seamless Miniconda installation, consider the following:
- Operating System Compatibility: Miniconda supports Windows (7 and newer), macOS (10.13+), and Linux (x86, x86_64). Ensure your operating system meets the minimum requirements.
- Disk Space Considerations: While the Miniconda installer itself is relatively small (typically under 100 MB), the environments you create and the packages you install within them can consume significant disk space. A single data science environment with common libraries can easily take up several gigabytes. Allocate sufficient space, ideally at least 10-20 GB, especially if you plan to work on multiple projects. This foresight in resource allocation is a core tenet of efficient tech management and a financially sound approach to digital infrastructure.
- Internet Connection: A stable internet connection is essential for downloading the installer and subsequently for installing packages and creating environments.
- Administrator/Sudo Privileges: Depending on your chosen installation path (e.g., system-wide vs. user-specific), you may need administrator rights on Windows or
sudoprivileges on macOS/Linux. For most users, installing into their home directory is recommended and often avoids the need for elevated permissions, contributing to better digital security and fewer permission-related issues. - Existing Python Installations: If you have existing Python installations (e.g., from
python.org, system Python, or another Anaconda distribution), Miniconda will create its own isolated environments. While it generally coexists peacefully, it’s good practice to be aware of your system’sPATHvariable and how Miniconda might interact with it.
Deciding on Your Python Version and Installation Path
These two decisions are crucial for the long-term maintainability and flexibility of your development environment.
-
Python Version: When you download the Miniconda installer, you’ll typically have options for Python 3.x. Python 3 is the industry standard and should be your default choice for new projects. Avoid Python 2 unless you have a specific legacy project requirement. The latest stable Python 3.x version (e.g., 3.9, 3.10, or 3.11 depending on availability) is generally recommended, as it offers the most up-to-date features and security patches. Miniconda allows you to install multiple Python versions later within different environments, so your initial choice isn’t permanent, but selecting a current version simplifies initial setup.
-
Installation Path:
- Default Path (User Home Directory): For most users, especially individual developers, installing Miniconda into your user home directory (e.g.,
C:Users<your_username>Miniconda3on Windows,/Users/<your_username>/miniconda3on macOS, or/home/<your_username>/miniconda3on Linux) is the recommended approach. This prevents permission issues, keeps your system Python pristine, and allows you to manage your environments without needing administrator privileges. This is a best practice for digital security and personal productivity, reflecting a professional approach to managing your digital workspace. - System-Wide Path: Installing Miniconda in a shared system location (e.g.,
C:ProgramDataMiniconda3on Windows or/opt/miniconda3on Linux/macOS) is typically reserved for server deployments or multi-user machines where all users need access to the same Conda installation. This requires administrator/sudo privileges and can sometimes lead to permission complexities.
- Default Path (User Home Directory): For most users, especially individual developers, installing Miniconda into your user home directory (e.g.,
By carefully considering these factors, you ensure a robust and adaptable foundation for all your Python development endeavors, aligning with principles of good tech management and laying the groundwork for financially efficient project execution.
Step-by-Step Installation Guide: Getting Miniconda Up and Running
Now that you’re prepared, let’s dive into the core of the matter: installing Miniconda on your specific operating system. While the general steps are similar, there are nuances for Windows, macOS, and Linux that are important to follow. Throughout this process, remember that a clean, verified installation is an investment in your productivity and the reliability of your future projects.
Installing on Windows
Windows users typically use a graphical installer, making the process straightforward.
- Download the Installer: Open your web browser and navigate to the official Miniconda download page:
docs.conda.io/en/latest/miniconda.html. Locate the “Miniconda installer for Windows” section and download the 64-bit installer for the latest Python 3.x version (e.g.,Miniconda3-latest-Windows-x86_64.exe). - Run the Installer: Once the download is complete, double-click the
.exefile to start the installation wizard. - Follow Installer Prompts:
- Welcome Screen: Click “Next”.
- License Agreement: Read the license and click “I Agree”.
- Installation Type: Choose “Just Me” (recommended for individual users to install in your user directory, avoiding permission issues) and click “Next”. “All Users” requires administrator privileges and installs system-wide.
- Destination Folder: The installer will suggest a default path (e.g.,
C:Users<your_username>miniconda3). This is generally the best choice. If you wish to change it, ensure the path does not contain spaces. Click “Next”. - Advanced Installation Options:
- “Add Miniconda3 to my PATH environment variable” (Recommended): This option makes
condacommands accessible from any terminal window. While some guides advise against adding to PATH to avoid conflicts with other Python installations, for most users starting with Conda, this simplifies usage. Conda’s environment activation system inherently handles conflicts well. - “Register Miniconda3 as my default Python 3.x”: Check this box if you want applications that look for Python to use the Miniconda Python by default. This is usually safe to do.
- Click “Install”.
- “Add Miniconda3 to my PATH environment variable” (Recommended): This option makes
- Completion: Once the installation finishes, click “Next” and then “Finish”. You might be prompted to install VS Code; you can skip this if you already have an editor.
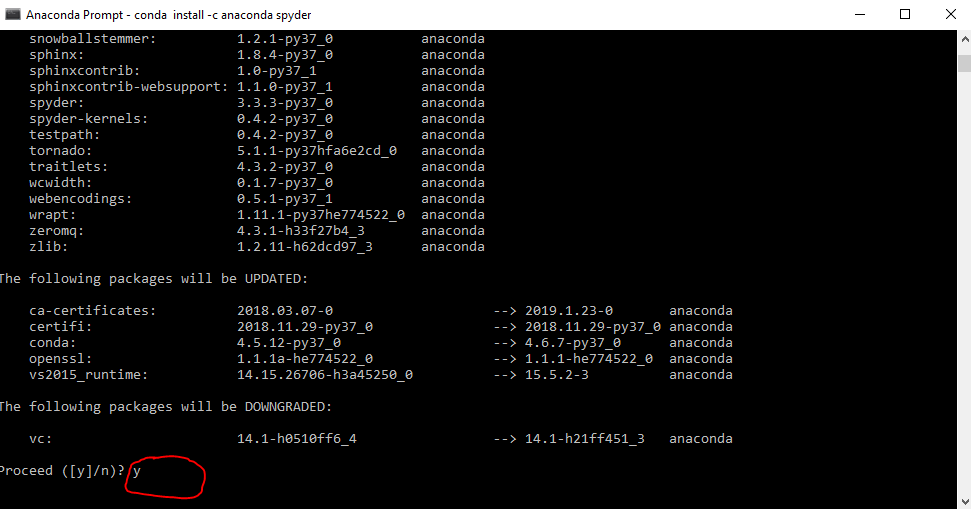
- Verify Installation: Open the “Anaconda Prompt (Miniconda3)” from your Start Menu. This special prompt automatically activates the base Conda environment.
- Type
conda --versionand press Enter. You should see the Conda version number. - Type
python --versionand press Enter. You should see the Python version included with Miniconda. - Type
conda update condaand press Enter to ensure your Conda installation is up-to-date. Confirm withywhen prompted.
- Type
Installing on macOS
For macOS, you have the choice between a graphical installer (.pkg) or a command-line installer (.sh). The command-line option is often preferred by developers for its transparency and control.
- Download the Installer: Go to the official Miniconda download page. Download the 64-bit graphical installer (
.pkg) or the command-line installer (.sh) for the latest Python 3.x version (e.g.,Miniconda3-latest-MacOSX-x86_64.pkgorMiniconda3-latest-MacOSX-x86_64.sh). - For
.pkgGraphical Installer (Easier):- Double-click the
.pkgfile. - Follow the prompts: “Continue”, “Agree” to the license, select “Install for me only” (recommended), choose the destination folder (default to your user home directory is best), and click “Install”.
- Enter your administrator password if prompted.
- Click “Close” when finished.
- Double-click the
- For
.shCommand-Line Installer (Recommended for more control):- Open your Terminal application.
- Navigate to your Downloads folder:
cd Downloads - Run the installer script:
bash Miniconda3-latest-MacOSX-x86_64.sh(replace with your downloaded filename). - Review License: Press Enter to review the license agreement. Scroll through by pressing Spacebar and type
yesto accept. - Installation Location: Press Enter to accept the default installation location (your home directory, e.g.,
/Users/<your_username>/miniconda3). You can specify a different path if desired. - Initialize Conda: When asked “Do you wish the installer to initialize Miniconda3 by running conda init?”, type
yesand press Enter. This adds Conda to your shell’s configuration (.bash_profile,.zshrc, etc.) so you can usecondacommands.
- Verify Installation (for both .pkg and .sh):
- Close and reopen your Terminal, or run
source ~/.bash_profile(orsource ~/.zshrcif using Zsh, which is default on newer macOS versions) to apply changes. - Type
conda --versionand press Enter. - Type
python --versionand press Enter. - Type
conda update condaand press Enter.
- Close and reopen your Terminal, or run
Installing on Linux
Linux installation is similar to the command-line approach on macOS.
- Download the Installer: Go to the official Miniconda download page. Download the 64-bit command-line installer for the latest Python 3.x version (e.g.,
Miniconda3-latest-Linux-x86_64.sh). - Open Terminal: Open your preferred terminal application.
- Navigate to Downloads:
cd Downloads(or wherever you saved the installer). - Run the Installer:
bash Miniconda3-latest-Linux-x86_64.sh(replace with your downloaded filename). - Follow Prompts:
- Review License: Press Enter to review, then type
yesto accept. - Installation Location: Press Enter to accept the default (your home directory, e.g.,
/home/<your_username>/miniconda3). - Initialize Conda: Type
yeswhen prompted to runconda init.
- Review License: Press Enter to review, then type
- Verify Installation:
- Close and reopen your Terminal, or run
source ~/.bashrc(orsource ~/.zshrcif you’re using Zsh). - Type
conda --versionand press Enter. - Type
python --versionand press Enter. - Type
conda update condaand press Enter.
- Close and reopen your Terminal, or run
Post-Installation: Initializing Conda and Basic Commands
After successful installation, it’s crucial to understand basic Conda commands to start managing your environments effectively.
- Initialize Conda (if not done during install): If you didn’t choose to initialize Conda during installation, or if you’re experiencing issues, run:
conda init
Then close and reopen your terminal. - Update Conda: Always keep Conda itself updated:
conda update conda - Create a New Environment: This is the cornerstone of Conda’s power. Create an isolated environment for your project, specifying the Python version:
conda create -n my_project_env python=3.9
Replacemy_project_envwith a descriptive name for your project. You can also specify other packages to install immediately:conda create -n my_project_env python=3.9 pandas numpy - Activate an Environment: Before working on a project, activate its environment:
conda activate my_project_env
Your terminal prompt will usually change to indicate the active environment (e.g.,(my_project_env) your_username@your_machine:~). - Install Packages: With the environment activated, install any necessary packages:
conda install scipy matplotlib
Conda will resolve dependencies automatically. For packages not available via Conda, you can still usepip:pip install flask - List Installed Packages: See what’s in your current environment:
conda list - Deactivate an Environment: When you’re done working on a project, deactivate its environment to return to the base (or previous) environment:
conda deactivate - Remove an Environment: To clean up a project environment:
conda remove -n my_project_env --all
Be careful with this command, as it permanently deletes the environment and all its packages.
Mastering these fundamental commands is an investment in your technical productivity (Tech), showcasing a systematic approach to development (Brand), and ultimately saving you countless hours in debugging dependency issues (Money).
Optimizing Your Workflow with Miniconda: Tips and Best Practices
Installing Miniconda is just the first step. To truly unlock its potential and elevate your development process, you need to integrate it intelligently into your daily workflow. These best practices will not only enhance your productivity and project reliability but also reinforce your professional brand as a meticulous and efficient technologist, potentially leading to more valuable contributions and better financial returns on your skills.
Environment Management for Productivity and Security
The disciplined use of Conda environments is paramount for maintaining a clean, secure, and reproducible development setup.
- One Environment Per Project: This is the golden rule. Avoid installing all your packages into the
baseenvironment. Each project, no matter how small, should have its own dedicated Conda environment. This prevents package version conflicts, makes projects self-contained, and simplifies collaboration. It’s like having separate, organized workspaces for different tasks, which significantly boosts productivity and reduces digital security risks associated with shared dependencies. - Pinning Package Versions: When creating or installing packages in an environment, it’s good practice to specify exact (or at least major) versions (e.g.,
python=3.9.12 pandas=1.3.5). This ensures reproducibility, meaning your environment will behave the same way even if new versions of packages are released. This level of precision is critical for stable software delivery and is a hallmark of robust engineering practices, adding value to your work and your professional brand. - Sharing Environments with
environment.yml: For collaborative projects or deploying applications, you can export your environment’s definition to a YAML file:
conda env export > environment.yml
Thisenvironment.ymlfile can then be shared with others, allowing them to recreate an identical environment on their machines with a single command:
conda env create -f environment.yml
This feature is invaluable for team collaboration, ensuring everyone is working with the same dependencies, and critical for CI/CD pipelines, directly contributing to efficient project delivery and reducing “money” spent on compatibility issues.
Integrating Miniconda with Your Development Tools
Modern Integrated Development Environments (IDEs) and code editors offer seamless integration with Conda environments, further enhancing your development experience.
- VS Code: Visual Studio Code has excellent Python extension support. Once Miniconda is installed, VS Code can automatically detect your Conda environments. You can easily switch between environments using the Python interpreter selector in the status bar (usually bottom-left). This allows VS Code to use the correct Python interpreter and packages for your active project. This integration streamlines your coding workflow, making you more productive (Tech) and capable of delivering higher-quality code (Brand).
- PyCharm: JetBrains PyCharm, a popular Python IDE, also integrates well with Conda. When creating a new project or configuring an existing one, you can select “Conda Environment” as the interpreter type. PyCharm will then detect your available Conda environments or allow you to create new ones directly from the IDE. This deep integration simplifies debugging, testing, and running your Python code within its correct environment.
- Jupyter Notebooks: For data scientists, Jupyter Notebooks are indispensable. You can install Jupyter within a specific Conda environment (
conda install jupyter). When you launch Jupyter (jupyter notebook), it will use the Python kernel from the environment it was installed in. You can also register multiple Conda environments as kernels within a single Jupyter installation, allowing you to switch between them directly from your notebook interface, which is a massive boost for productivity in data analysis and machine learning workflows.
Staying Updated and Troubleshooting Common Issues
Maintaining your Conda installation and environments is crucial for long-term stability and efficiency, impacting both your productivity and the financial costs of system maintenance.
- Regular Updates: Periodically update Conda itself (
conda update conda) and your base environment. For individual project environments, update packages cautiously, especially in production, to avoid breaking changes.conda update --allwithin an active environment will update all packages. - Common Errors and Solutions:
conda: command not found: This typically means Conda isn’t in your system’s PATH. Ensure you ranconda initand reopened your terminal.PackagesNotFoundErrororUnsatisfiableError: These usually indicate that Conda can’t find the requested package or can’t resolve dependencies. Check your spelling, try different channels (conda install -c conda-forge package_name), or consider slightly different package versions.- Network Issues: If downloads fail, check your internet connection and proxy settings.
- Seeking Help: The Conda documentation (
docs.conda.io) is an excellent resource. For specific problems, the broader Python and data science communities on platforms like Stack Overflow or dedicated forums are incredibly supportive. Being able to self-diagnose and resolve issues efficiently is a key skill for any tech professional, showcasing independence and problem-solving abilities (Brand).
Conclusion
The decision to install Miniconda is a strategic one, empowering you with a lightweight, flexible, and robust system for managing your Python development environments. We’ve explored how Miniconda, with Conda at its core, offers a superior approach to package and environment management compared to traditional methods, providing granular control and preventing the dreaded “dependency hell.” From its minimal footprint to its cross-platform compatibility and powerful environment isolation capabilities, Miniconda is an indispensable tool for anyone serious about Python development, data science, or machine learning.
By following this guide, you’ve not only successfully installed Miniconda across various operating systems but also gained an understanding of best practices for optimizing your workflow. Creating distinct environments for each project, carefully managing package versions, and seamlessly integrating with your preferred development tools are not merely technical steps; they are fundamental principles that contribute directly to your success as a tech professional.
Consider the broader impact:
- Tech: Miniconda sharpens your technical edge, boosting productivity, ensuring reproducible results, and providing a stable foundation for exploring cutting-edge AI tools and software development. It embodies efficient software management, a cornerstone of modern technology trends.
- Brand: A well-managed development environment reflects positively on your personal and professional brand. It demonstrates attention to detail, a commitment to best practices, and a proactive approach to preventing problems – qualities highly valued in any tech role or organization.
- Money: Ultimately, efficiency translates to savings. By minimizing setup time, preventing costly errors due to dependency conflicts, and streamlining project handovers, Miniconda helps you deliver projects faster and more reliably. For individuals, this means more time for side hustles or career growth; for businesses, it signifies reduced operational costs and increased profitability.
Embrace Miniconda. It’s more than just an installer; it’s a gateway to a more organized, productive, and professional development future. Start creating your custom environments today and experience the difference a truly lean and powerful Python environment manager can make.
aViewFromTheCave is a participant in the Amazon Services LLC Associates Program, an affiliate advertising program designed to provide a means for sites to earn advertising fees by advertising and linking to Amazon.com. Amazon, the Amazon logo, AmazonSupply, and the AmazonSupply logo are trademarks of Amazon.com, Inc. or its affiliates. As an Amazon Associate we earn affiliate commissions from qualifying purchases.