The digital landscape is constantly evolving, offering users unparalleled flexibility and power over their computing environments. For many years, the choice between operating systems often meant a strict either/or proposition: Windows for its widespread compatibility and user-friendliness, or Linux for its open-source freedom, robustness, and powerful command-line tools. However, modern technology has blurred these lines, making it easier than ever to integrate the best of both worlds. Installing or running a Linux operating system on a Windows machine is no longer a niche activity for tech enthusiasts; it’s a practical strategy embraced by developers, IT professionals, students, and anyone looking to expand their digital toolkit.
This comprehensive guide will delve into the various methods of bringing Linux to your Windows PC, exploring the benefits, prerequisites, and step-by-step instructions for each approach. Whether you’re interested in a full dual-boot setup, a seamless integration with the Windows Subsystem for Linux (WSL), or a sandboxed environment through virtualization, we’ve got you covered. By the end of this article, you’ll have a clear understanding of how to unlock the power of Linux without having to abandon your familiar Windows environment.
Why Install Linux on Windows? Exploring the Benefits and Use Cases
The allure of Linux extends beyond its free and open-source nature. Integrating Linux into a Windows workflow brings a multitude of advantages, enhancing productivity, security, and the overall computing experience. For anyone operating in the tech sphere, understanding these benefits is crucial for making an informed decision.
Enhanced Development and Programming Environment
Linux is widely regarded as the operating system of choice for developers. Its powerful command-line interface (CLI) and native support for a vast array of programming languages, tools, and frameworks (like Python, Ruby, Node.js, Git, Docker, Kubernetes) make it an ideal environment for software development. Many server environments run on Linux, so developing within a similar ecosystem on your local machine can minimize compatibility issues and streamline deployment processes. Furthermore, package managers like apt, dnf, or pacman simplify the installation and management of software dependencies, a critical aspect for any serious coder. Running a Linux environment on Windows allows developers to leverage their existing Windows hardware while gaining access to these powerful, development-centric tools, avoiding the need for a separate machine.
Access to a Rich Ecosystem of Open-Source Software
Beyond development tools, Linux boasts an incredible library of high-quality, free, and open-source software (FOSS). From robust graphics editing tools like GIMP and Inkscape, to video editors like Kdenlive, and office suites like LibreOffice, the Linux ecosystem offers powerful alternatives to proprietary software, often at no cost. This provides users with more control over their software, greater transparency in how applications function, and a vibrant community of users and developers. For those interested in digital security, privacy, or simply exploring alternatives, the open-source world Linux champions is a treasure trove of innovation and collaborative effort.
Robust Security, Privacy, and Performance Advantages
Linux distributions are renowned for their robust security architecture. Their open-source nature means that code is constantly reviewed by a global community, leading to quicker identification and patching of vulnerabilities compared to closed-source systems. Historically, Linux has also been less targeted by mainstream malware and viruses due to its smaller market share on desktops, though this is not an excuse to neglect security practices. Furthermore, Linux offers greater control over system processes and data, which can lead to enhanced privacy for users concerned about data collection by operating system vendors. From a performance perspective, Linux can often run more efficiently on older or less powerful hardware, consuming fewer resources and offering a snappier user experience, effectively giving old machines a new lease on life.
Learning and Customization Opportunities
For tech enthusiasts, students, or anyone looking to deepen their understanding of how computers work, Linux offers an unparalleled learning experience. Its transparent nature allows users to peek under the hood, modify system settings, compile kernels, and truly understand the intricacies of an operating system. The desktop environments are highly customizable, offering everything from minimalist interfaces to feature-rich graphical shells, allowing users to tailor their computing experience precisely to their preferences. This level of control and transparency makes Linux an excellent platform for learning about operating systems, networking, and system administration, skills that are highly valued in the modern tech landscape.
Understanding Your Installation Options: Choosing the Right Path
Integrating Linux with Windows isn’t a one-size-fits-all solution. There are distinct approaches, each with its own advantages, disadvantages, and specific use cases. Understanding these options is key to selecting the method that best suits your needs, technical proficiency, and hardware configuration.
1. Windows Subsystem for Linux (WSL): Integrated Simplicity
What it is: WSL is a compatibility layer for running Linux binary executables (ELF format) natively on Windows. It allows developers to run a GNU/Linux environment — including most command-line tools, utilities, and applications — directly on Windows, without the overhead of a traditional virtual machine or a dual-boot setup. WSL has evolved from WSL 1 (which used a translation layer) to WSL 2 (which uses a lightweight virtual machine with a real Linux kernel).
Pros:
- Seamless Integration: Access Linux files directly from Windows Explorer, and run Windows executables from the Linux terminal.
- Low Overhead: Much less resource-intensive than a full virtual machine for command-line tasks.
- Easy Setup: Installation is typically straightforward via the Microsoft Store or command line.
- No Partitioning Required: Doesn’t require repartitioning your hard drive.
- Fast I/O (WSL 2): WSL 2 offers significantly improved file system performance compared to WSL 1, especially for tasks involving large codebases.
Cons:
- No Native GUI: While GUI apps are now supported (WSLg), the primary focus remains on command-line tools. Running full-fledged Linux desktop environments is not its main purpose.
- Limited Hardware Access: Direct hardware access (e.g., specific USB devices, graphics card beyond basic display) can be more challenging than with a native or virtual machine setup.
- Not a True Dual-Boot: You are still running Linux within Windows, not as a standalone operating system.
Ideal for: Developers, system administrators, and users who primarily need Linux command-line tools, scripts, and server applications without leaving their Windows desktop.
2. Virtualization: Running Linux in a Sandbox
What it is: Virtualization involves using a software application (a hypervisor) to create a virtual machine (VM) on your Windows host operating system. This VM acts like a separate computer, on which you can install and run a full Linux operating system alongside Windows. Popular hypervisors include Oracle VirtualBox, VMware Workstation Player (free for personal use), and Microsoft Hyper-V (built into Windows Pro/Enterprise).
Pros:
- Isolation and Safety: The VM is isolated from the host OS, meaning any issues within the Linux VM won’t affect your Windows installation. Ideal for testing new software or configurations.
- Full Linux Experience: You can install and run any Linux distribution with its full graphical desktop environment, just as if it were installed on a physical machine.
- Portability: VMs can often be moved between different host machines.
- Snapshotting: Hypervisors allow you to take snapshots of your VM’s state, enabling you to revert to a previous point if something goes wrong.
Cons:
- Resource Intensive: VMs consume RAM, CPU, and disk space from your host machine, potentially slowing down Windows if resources are limited.
- Performance Overhead: While modern virtualization is highly optimized, there’s always some performance overhead compared to running an OS natively.
- Requires Dedicated Software: You need to install and configure a hypervisor.
Ideal for: Users who want a full Linux desktop experience without modifying their disk partitions, testing new distributions, or running applications that require a full GUI Linux environment in an isolated manner.
3. Dual-Booting: A Separate Partition Approach
What it is: Dual-booting involves installing Linux on a separate partition of your hard drive, alongside Windows. When you start your computer, you’re presented with a boot menu (usually GRUB for Linux) that allows you to choose which operating system you want to load. This means you’re running either Windows or Linux natively, never at the same time.
Pros:
- Native Performance: Both operating systems run directly on the hardware, offering the best possible performance.
- Full Hardware Access: Linux has direct access to all your computer’s hardware resources.
- No Resource Sharing Overhead: When you’re in Linux, all resources are dedicated to Linux.
Cons:
- Complex Setup: Requires repartitioning your hard drive, which carries a small risk of data loss if not done carefully.
- No Simultaneous Use: You cannot run Windows and Linux concurrently. Switching between them requires a full reboot.
- Partition Management: Requires careful management of disk space between the two operating systems.
- Bootloader Management: Issues with bootloaders (especially UEFI-based systems) can be tricky for beginners.
Ideal for: Users who need maximum performance from both operating systems, desire a completely native Linux experience, and are comfortable with more involved setup processes.
Prerequisites and Preparations Before You Begin
Regardless of which installation method you choose, a little preparation goes a long way in ensuring a smooth and successful process. Skipping these crucial steps can lead to headaches, lost data, or an incomplete setup.
1. Back Up Your Data
This is arguably the most critical step, especially if you’re considering dual-booting or making significant changes to your disk partitions. Always create a full backup of all important files, documents, photos, and any other critical data from your Windows installation to an external hard drive or cloud storage. While the installation processes described are generally safe, unforeseen issues like power outages, incorrect partition selections, or hardware failures can occur. A backup is your ultimate safety net.
2. Free Up Disk Space
- For WSL: You’ll need a reasonable amount of free space (e.g., 10-20GB) on your Windows drive, especially for WSL 2, which uses a virtual hard disk to store the Linux distribution.
- For Virtual Machines: Allocate enough disk space for the virtual hard drive that your Linux VM will use (e.g., 20-50GB, depending on your intended use).
- For Dual-Booting: This requires the most planning. You’ll need a dedicated partition for Linux. A minimum of 30-50GB is recommended for a comfortable Linux desktop experience, but more is better, especially if you plan to store large files or install many applications. Use Windows’ Disk Management tool to shrink an existing partition and create unallocated space before starting the Linux installation.
3. Download Your Chosen Linux Distribution (ISO File)
There are hundreds of Linux distributions available, each with its own philosophy, default desktop environment, and target audience. Some popular and beginner-friendly choices include:
- Ubuntu: Very popular, user-friendly, vast community support.
- Linux Mint: Based on Ubuntu, aims for a traditional desktop experience.
- Fedora: Cutting-edge, sponsored by Red Hat.
- Debian: The foundational distribution for many others, very stable.
- Pop!_OS: Based on Ubuntu, geared towards developers and creative professionals.
Visit the official website of your chosen distribution and download the latest stable ISO file. Ensure you download the correct architecture (usually 64-bit for modern PCs).
4. Create a Bootable USB Drive (for Dual-Booting and VMs)

If you plan to dual-boot or install Linux into a virtual machine from an ISO, you’ll need to create a bootable USB drive (or burn a DVD, though USB is more common now).
- Software: Tools like Rufus (for Windows), Etcher (cross-platform), or UNetbootin can turn your downloaded ISO file into a bootable USB drive.
- USB Drive: You’ll need a USB flash drive with at least 8GB capacity. Make sure it’s empty, as the process will format it.
5. Understand UEFI/Legacy BIOS (for Dual-Booting)
Modern computers use UEFI (Unified Extensible Firmware Interface) instead of the older BIOS. UEFI offers features like Secure Boot and Fast Startup.
- Check Boot Mode: Before dual-booting, determine if your Windows installation is in UEFI or Legacy BIOS mode. You can usually find this in System Information (search for “System Information” in Windows, then look for “BIOS Mode”). Linux should ideally be installed in the same mode as Windows to avoid boot issues.
- Disable Fast Startup (Windows): Fast Startup can cause issues with dual-booting as it doesn’t fully shut down the system. Go to Control Panel > Power Options > Choose what the power buttons do > Change settings that are currently unavailable, then uncheck “Turn on fast startup.”
- Disable Secure Boot (UEFI only): Secure Boot is a UEFI feature designed to prevent unauthorized operating systems from loading. While some Linux distributions are compatible with Secure Boot, it’s often easier for beginners to disable it in your computer’s UEFI settings before installing Linux.
Step-by-Step Installation Guides
Now that you’re prepared, let’s walk through the installation process for each method.
Method 1: Installing Linux via Windows Subsystem for Linux (WSL)
This is the easiest and least intrusive way to get a Linux environment on Windows.
-
Enable WSL Feature:
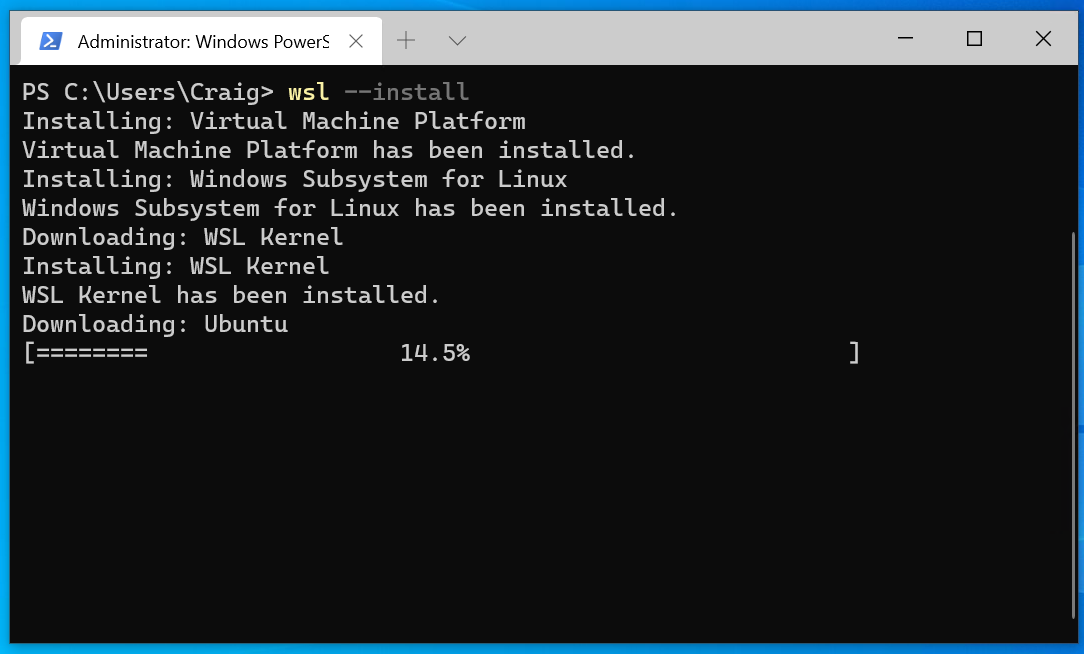
- Open PowerShell or Command Prompt as an administrator.
- Type
wsl --installand press Enter. This command will enable the necessary Windows features (WSL and Virtual Machine Platform) and download the Ubuntu distribution by default. - Alternatively, for a specific distribution or if the above command fails:
- Enable “Windows Subsystem for Linux” and “Virtual Machine Platform” via “Turn Windows features on or off” (search in Windows).
- Restart your computer if prompted.
-
Install a Linux Distribution from the Microsoft Store:
- Open the Microsoft Store and search for your desired Linux distribution (e.g., “Ubuntu”, “Debian”, “Kali Linux”).
- Select the distribution and click “Get” or “Install.”
-
Initial Setup:
- Once installed, open the distribution (e.g., “Ubuntu”) from your Start Menu.
- The first time you run it, it will take a few minutes to complete the installation.
- You’ll be prompted to create a new UNIX username and password. Remember these credentials, as they are separate from your Windows login.
-
Update and Use:
- After setup, it’s good practice to update your package lists and installed packages:
bash

sudo apt update

sudo apt upgrade
- You can now use your Linux command line, install tools, and even run GUI applications using WSLg (available on Windows 11 or Windows 10 with specific updates).
- After setup, it’s good practice to update your package lists and installed packages:
Method 2: Dual-Booting Linux with Windows
This method gives you native performance but requires careful partitioning. We’ll use Ubuntu as an example.
-
Shrink Your Windows Partition:
- In Windows, right-click the Start button and select “Disk Management.”
- Locate your main Windows partition (usually C:).
- Right-click it and select “Shrink Volume.”
- Enter the amount of space you want to free up for Linux (e.g., 50000 MB for 50GB) and click “Shrink.” This will create “Unallocated” space. Do not create a new partition here; leave it unallocated.
-
Create a Bootable USB Drive:
- Use Rufus or Etcher to write your downloaded Ubuntu ISO to a USB drive.
-
Boot from the USB Drive:
- Restart your computer. As it boots, repeatedly press the key to enter your BIOS/UEFI settings or the boot menu (commonly F2, F10, F12, DEL, or ESC, varies by manufacturer).
- In the BIOS/UEFI settings, disable Secure Boot and Fast Startup (if not already done).
- Set the boot order to prioritize your USB drive, or select it directly from the one-time boot menu.
- Save changes and exit. Your computer should now boot from the USB drive.
-
Start the Ubuntu Installer:
- When the Ubuntu installer loads, you’ll usually see an option to “Try Ubuntu” or “Install Ubuntu.” Choose “Install Ubuntu.”
- Follow the on-screen prompts for language, keyboard layout, etc.
- When prompted for “Installation type,” this is critical:
- DO NOT select “Erase disk and install Ubuntu.” This will wipe your Windows installation.
- Select “Install Ubuntu alongside Windows Boot Manager” (if available and you have unallocated space). This is the easiest option.
- If that option isn’t available, choose “Something else.” This allows you to manually create partitions.
-
Manual Partitioning (if “Something else” was chosen):
- Locate the “free space” you created earlier.
- Select it and click the “+” button to create new partitions:
- Root Partition (
/): Primary, Ext4 journaling file system, mount point/. Allocate most of your space here (e.g., 30-40GB). - Swap Area: Logical, swap area. Allocate 2GB or equal to your RAM, whichever is smaller (not strictly necessary with modern RAM amounts, but good practice).
- Home Partition (
/home– Optional but Recommended): Logical, Ext4 journaling file system, mount point/home. Allocate the remaining space here. This keeps your personal files separate from the operating system, making future re-installations easier.
- Root Partition (
- Bootloader Installation: Ensure the bootloader is installed on the same drive as your Windows Boot Manager (usually
/dev/sdaor/dev/nvme0n1, not a specific partition number like/dev/sda1).
-
Complete Installation:
- Continue with user setup (name, password, computer name).
- The installer will copy files and configure your system.
- Once complete, you’ll be prompted to restart. Remove the USB drive when instructed.
-
Boot into Linux or Windows:
- Upon reboot, you should see the GRUB bootloader menu, allowing you to choose between Ubuntu and Windows.
Method 3: Running Linux in a Virtual Machine (VirtualBox Example)
This method provides a full Linux experience in a safe, isolated environment.
-
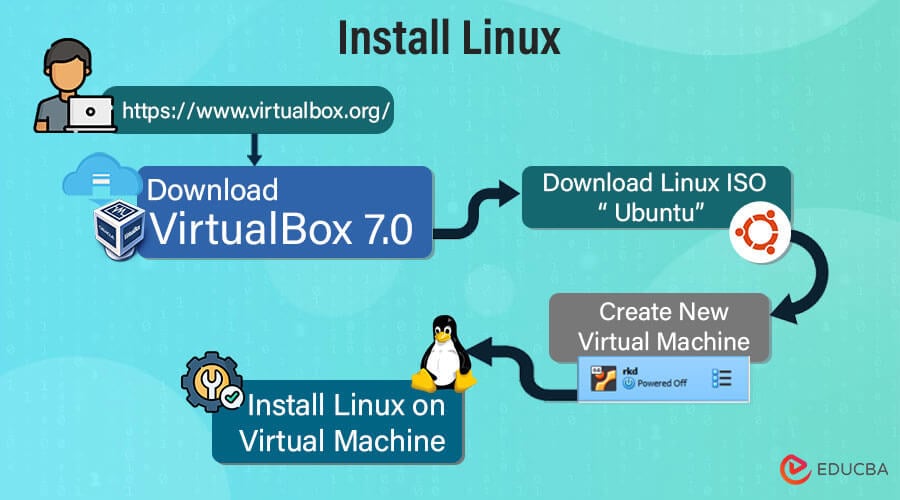
Install VirtualBox (or VMware Workstation Player):
- Download and install VirtualBox from its official website (
virtualbox.org). Follow the default installation steps.
- Download and install VirtualBox from its official website (
-
Create a New Virtual Machine:
- Open VirtualBox. Click “New” to create a new VM.
- Name: Give your VM a descriptive name (e.g., “Ubuntu Linux VM”).
- Machine Folder: Choose where the VM files will be stored.
- ISO Image: Point to your downloaded Linux ISO file. Check “Skip Unattended Installation.”
- Type: Select “Linux.”
- Version: Select the specific distribution and architecture (e.g., “Ubuntu (64-bit)”).
- Memory Size: Allocate RAM. Start with at least 4GB (4096MB) for a desktop environment if your host has enough.
- Processors: Allocate at least 2 CPU cores if your host has them.
- Hard Disk: Select “Create a virtual hard disk now.”
- Disk Size: Allocate at least 25-30GB for the virtual hard disk.
- Hard Disk File Type: VDI (VirtualBox Disk Image) is usually fine.
- Storage on physical hard disk: “Dynamically allocated” is generally preferred as it only uses space as needed, up to the maximum size.
-
Start the Virtual Machine and Install Linux:
- Select your newly created VM in VirtualBox and click “Start.”
- The VM will boot from the ISO image, launching the Linux installer.
- Follow the on-screen prompts, just like a native installation (refer to Step 4 and 5 of the dual-boot guide for the Linux installer steps).
- When asked about “Installation type,” select “Erase disk and install Ubuntu” (or your chosen distro). This only affects the virtual disk within the VM, not your physical hard drive.
-
Install Guest Additions (Highly Recommended):
- Once Linux is installed and running in the VM, click on “Devices” in the VirtualBox menu bar (at the top of the VM window) and select “Insert Guest Additions CD Image…”
- This will mount a virtual CD containing drivers and utilities that enhance VM performance, enable seamless mouse integration, shared clipboards, drag-and-drop functionality, and full-screen resolution.
- Open the mounted CD in the Linux file manager and run the appropriate installer script (usually
VBoxLinuxAdditions.runvia terminal:sudo sh VBoxLinuxAdditions.run). - Restart the VM after installation.
Post-Installation Tips and Next Steps
Congratulations on successfully integrating Linux into your Windows environment! Your journey has just begun. Here are some essential steps and recommendations to get the most out of your new Linux system:
1. Update Your System Immediately
This is crucial for security and stability. Open a terminal in your Linux environment and run the following commands:
- For Debian/Ubuntu-based systems (like Ubuntu, Linux Mint, Pop!_OS):
bash

sudo apt update

sudo apt upgrade
- For Fedora:
bash

sudo dnf update
These commands will download and install the latest security patches and software updates.
2. Install Essential Software
Depending on your needs, you’ll want to install various applications.
- Web Browser: Firefox is usually pre-installed, but you might want Chrome/Chromium.
- Office Suite: LibreOffice is the default, a powerful alternative to Microsoft Office.
- Media Player: VLC is a versatile choice.
- Development Tools: If you’re a developer, install your preferred IDEs (VS Code, Sublime Text), version control systems (Git), and programming language runtimes.
- Productivity Tools: Explore task managers, note-taking apps, and cloud sync clients.
Most software can be installed via the distribution’s software center (e.g., Ubuntu Software Center) or through the command line using package managers (sudo apt install [package-name]).
3. Customize Your Desktop Environment
Linux offers unparalleled customization.
- Themes and Icons: Change the look and feel of your desktop.
- Widgets and Panels: Add useful information to your desktop.
- Dock/Taskbar: Modify its position, size, and contents.
- Wallpaper: Personalize your background.
Explore your desktop environment’s settings (GNOME, KDE Plasma, XFCE, etc.) to tailor it to your preferences.
4. Explore the Linux Ecosystem and Community
Dive deeper into what Linux has to offer:
- Command Line: Learn more advanced terminal commands; they are incredibly powerful.
- Shell Scripting: Automate tasks with Bash scripts.
- Virtual Desktops: Enhance your workflow with multiple workspaces.
- Linux Forums and Communities: Engage with other users to ask questions, share knowledge, and discover new tools. Ubuntu Forums, Stack Overflow, and Reddit’s Linux subreddits are great starting points.
Conclusion
The decision to install Linux on Windows opens up a world of possibilities, from supercharging your development workflow and leveraging powerful open-source tools to enhancing your system’s security and performance. Whether you opt for the seamless integration of WSL, the isolated safety of a virtual machine, or the raw performance of a dual-boot setup, each method empowers you with greater control and flexibility over your computing experience.
By carefully considering your needs, preparing your system, and following the detailed steps outlined in this guide, you can successfully bridge the gap between Windows and Linux. Embrace the journey of exploration and learning that Linux offers. The skills gained and the insights discovered will not only enrich your personal computing but also significantly boost your proficiency in the ever-evolving landscape of technology. Welcome to the powerful, open world of Linux!
aViewFromTheCave is a participant in the Amazon Services LLC Associates Program, an affiliate advertising program designed to provide a means for sites to earn advertising fees by advertising and linking to Amazon.com. Amazon, the Amazon logo, AmazonSupply, and the AmazonSupply logo are trademarks of Amazon.com, Inc. or its affiliates. As an Amazon Associate we earn affiliate commissions from qualifying purchases.