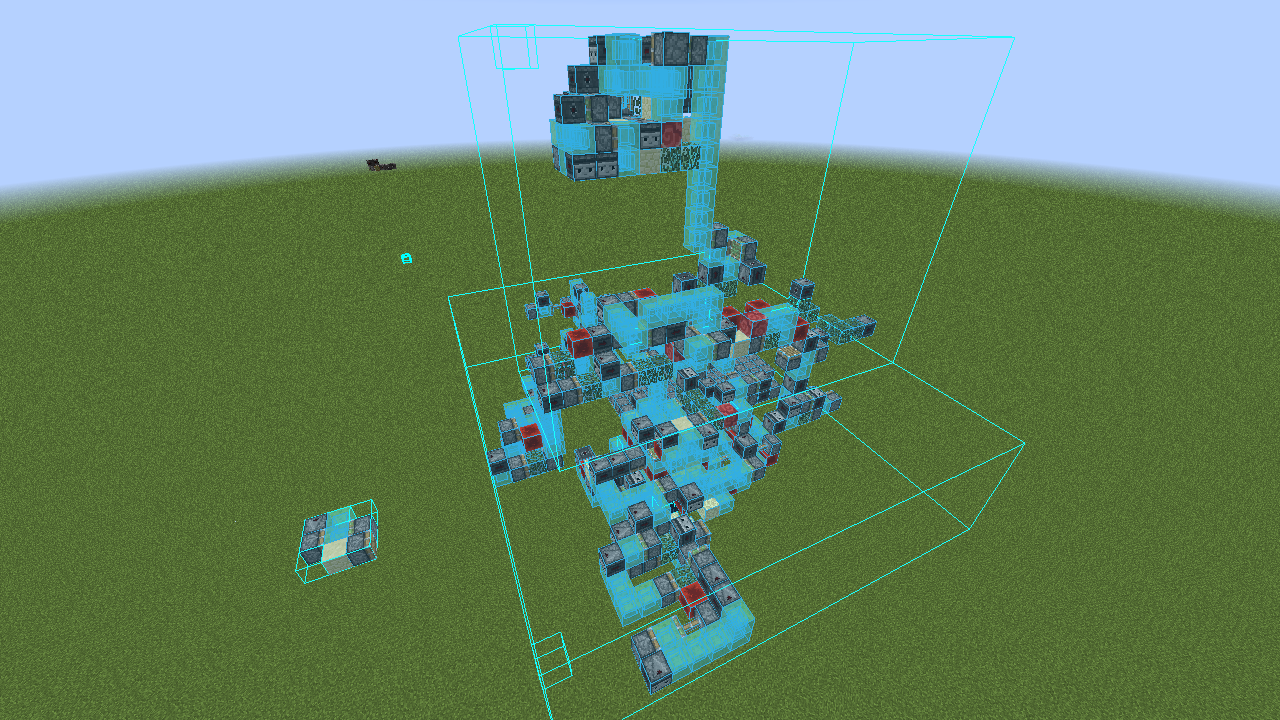
The Minecraft modding ecosystem has evolved significantly over the last decade, transitioning from complex manual injections to sophisticated modular loaders. For technical builders and architects within the Minecraft community, “Lightmatica” (a popular derivative or common misspelling of Litematica) has become an indispensable tool. It provides a holographic blueprint system that allows players to visualize complex structures before placing a single block.
However, installing mods on macOS often presents unique challenges compared to Windows, primarily due to Apple’s restrictive file permissions, the transition to Apple Silicon (M1/M2/M3 chips), and the specific directory structures of macOS. This guide provides a comprehensive, professional walkthrough on how to install Lightmatica for Minecraft 1.20.4 Java Edition on macOS, ensuring a stable and high-performance environment.
Prerequisites and System Configuration for macOS
Before diving into the installation process, it is crucial to ensure your macOS environment is prepared to handle Minecraft mods. Modern Minecraft (1.20.4) runs on Java 17 or higher, and the way macOS handles these binaries can affect game stability.
Installing the Correct Java Runtime
While the Minecraft Launcher comes with a bundled version of Java, it is often beneficial for modded players to install a standalone version of the Java Development Kit (JDK). For version 1.20.4, Java 17 is the standard.
- Architecture Awareness: If you are using an Intel-based Mac, download the x64 version. If you are using a Mac with Apple Silicon (M1, M2, or M3), ensure you download the AArch64 (ARM64) version. Using the ARM64 version of Java allows Minecraft to run natively on Apple’s hardware, providing a massive boost in FPS and thermal efficiency.
- Recommended Providers: Adoptium (Eclipse Temurin) or Amazon Corretto are highly recommended for their stability on macOS.
Minecraft Launcher Preparation
Before attempting to install mods, you must have a clean installation of Minecraft 1.20.4. Open your Minecraft Launcher, navigate to the “Installations” tab, and create a new profile for version 1.20.4. Run the game at least once to the main menu. This step is critical because it triggers the launcher to download the necessary .jar files and assets that the mod loader will need to patch.
Deploying the Fabric Loader Environment
Lightmatica is built specifically for the Fabric Mod Loader, a lightweight and modular alternative to the older Forge system. Fabric is preferred for version 1.20.4 due to its fast update cycle and minimal impact on system resources—a key advantage for Mac users who may be balancing workflows.
Downloading the Fabric Installer
Navigate to the official Fabric website and download the .jar (Universal) installer. While there is a .exe for Windows, the .jar version is the native way to handle the installation on macOS.
Overcoming macOS Gatekeeper Security
When you attempt to open the Fabric Installer, macOS may block it with a message stating the developer cannot be verified. This is part of Apple’s “Gatekeeper” security.
- To bypass this, do not double-click the file. Instead, Right-click (or Control-click) the installer and select Open.
- A dialog box will appear with an “Open” button; click it to proceed.
Executing the Installation
Once the installer window opens:
- Select the “Client” tab.
- Ensure the Minecraft Version is set to 1.20.4.
- Select the latest Loader Version.
- Ensure the “Create Profile” checkbox is ticked.
- Click Install.
Upon completion, a new “Fabric Loader 1.20.4” profile will appear in your Minecraft Launcher.
Integrating Lightmatica and Required Library Dependencies
Unlike some standalone software, Lightmatica operates as a module within the Fabric ecosystem. It requires a specific library mod called MaLiLib to function. MaLiLib contains the configuration interfaces and mathematical code that Lightmatica relies on.
Sourcing the Files
You will need to download two specific files for Minecraft 1.20.4:
- Lightmatica (Litematica): Ensure the file name indicates compatibility with 1.20.4.
- MaLiLib: This must also be the version designated for 1.20.4.
- Fabric API: Almost all Fabric mods require the “Fabric API” (a separate mod from the Loader) to bridge the gap between the game and the mod’s code.
Accessing the macOS Application Support Directory
The most common hurdle for Mac users is finding the Minecraft “mods” folder, as the Library folder is hidden by default.
- Open Finder.
- In the top menu bar, click Go, then select Go to Folder…
- Type the following path:
~/Library/Application Support/minecraft - Look for a folder named
mods. If it does not exist, you can manually create a new folder and name itmods(all lowercase).
File Placement
Drag and drop the Lightmatica .jar, the MaLiLib .jar, and the Fabric API .jar into this folder. It is vital to ensure no older versions of these mods are present in the folder, as version conflicts will cause the JVM (Java Virtual Machine) to crash upon startup.
Technical Optimization and Troubleshooting on macOS
Running modded Minecraft on a Mac requires a few final technical adjustments to ensure the software utilizes the hardware effectively, especially regarding memory management and display scaling.
Adjusting RAM Allocation
By default, the Minecraft Launcher allocates only 2GB of RAM to the game. For a mod like Lightmatica, which processes complex schematic data, increasing this to 4GB or 6GB is recommended.
- Open the Minecraft Launcher and go to Installations.
- Click the three dots (…) next to your Fabric 1.20.4 profile and select Edit.
- Click More Options.
- In the JVM Arguments text box, locate the string
-Xmx2G. - Change it to
-Xmx4G(for 8GB Macs) or-Xmx6G(for 16GB+ Macs). - Click Save.
Resolving “Unidentified Developer” Errors for Mod Jars
In some instances, particularly on macOS Sonoma or Ventura, the OS may prevent the Java binary from loading the mod files. If the game fails to launch, you may need to strip the “quarantine” attribute from the downloaded files. This is done via the Terminal:
- Open Terminal and type:
xattr -d com.apple.quarantine(ensure there is a space at the end). - Drag the mods from your
modsfolder into the Terminal window to auto-fill their paths. - Press Enter.
High-DPI Scaling (Retina Displays)
If your Minecraft interface looks blurry on a Retina display, consider installing the “Retina Check” or “Sodium” mod alongside Lightmatica. Sodium not only improves frame rates significantly but also fixes several rendering bugs inherent to the macOS OpenGL implementation.
Leveraging Lightmatica: Initial Launch and Keybindings
Once the installation is successful and the game is running, you can verify the mod is active by looking at the bottom left of the Minecraft title screen; it should mention “Fabric (Modded)”.
Accessing the Configuration Menu
The default key to open the Lightmatica menu is ‘M’. On macOS, ensure your “Function” keys aren’t conflicting with system shortcuts (like Mission Control or Brightness). You can change these bindings in the “Hotkeys” section of the Lightmatica menu.
Essential Functionality
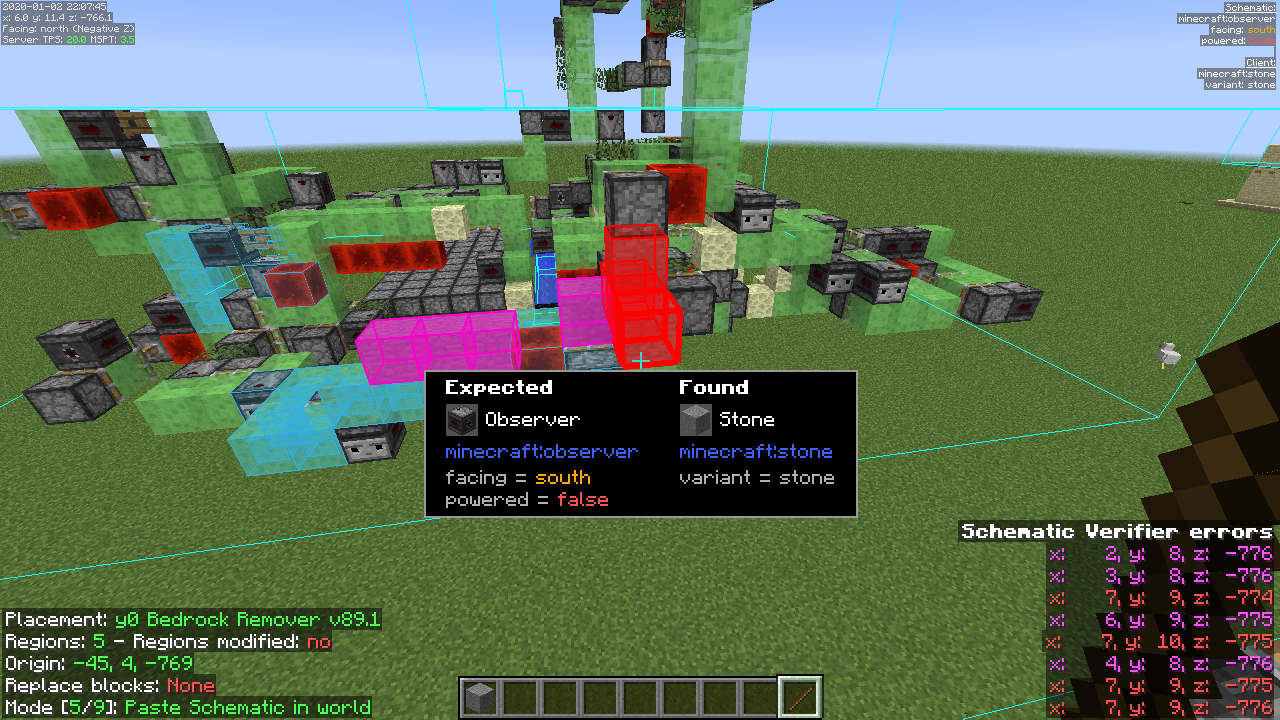
- Schematic Placement: Use the ‘M’ menu to load a
.litematicor.schemfile. - The “Stick” Tool: Lightmatica uses an item (default is a wooden stick) as a “tool” to manipulate placements. You can change the mode of the tool by holding Left Control and scrolling the mouse wheel.
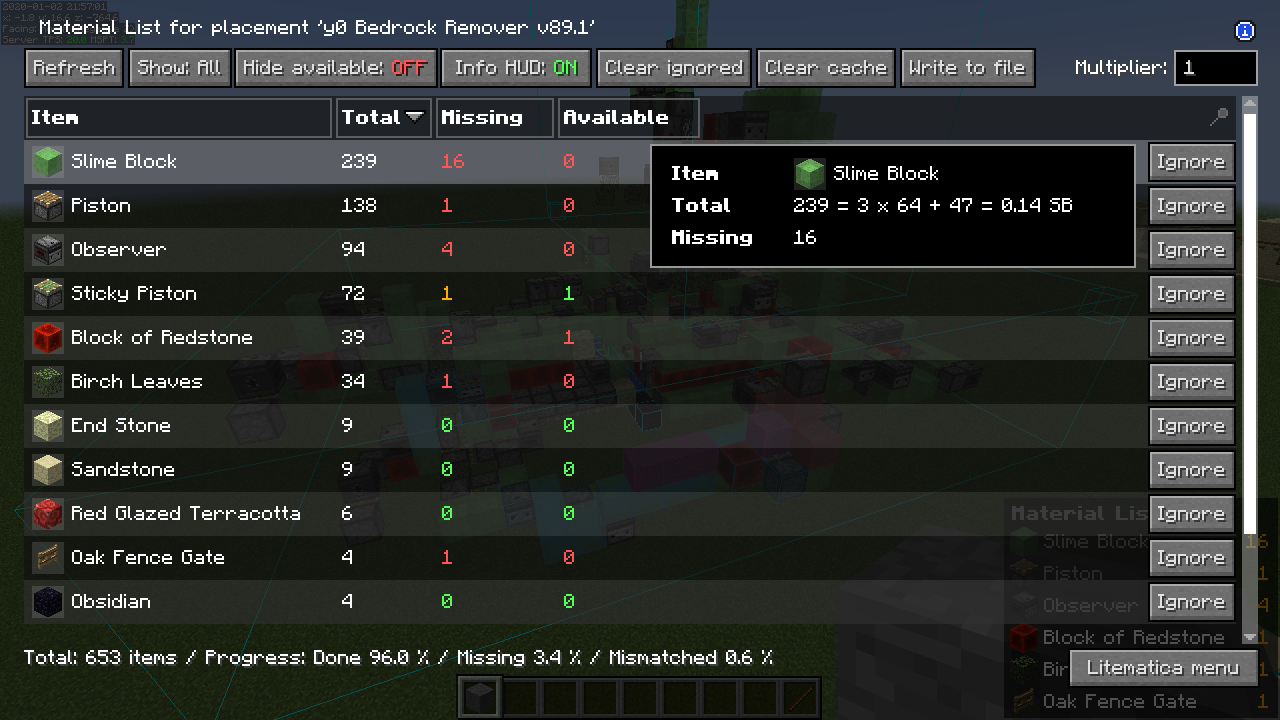
- Verifying Materials: The “Material List” feature (found within the menu) is a powerful tool for survival players, providing a full breakdown of every block required to complete a project.
Conclusion
Installing Lightmatica for Mac 1.20.4 Java is a multi-step technical process that requires attention to detail, specifically regarding version parity and macOS-specific directory structures. By utilizing the Fabric Loader, ensuring Java 17 compatibility, and properly managing the ~/Library path, users can transform their Mac into a powerful workstation for Minecraft architecture.
While the macOS environment presents more security hurdles than Windows, the result—especially on Apple Silicon—is a highly stable and efficient building experience. With Lightmatica successfully installed, you now have the technical infrastructure to execute complex designs with mathematical precision.
aViewFromTheCave is a participant in the Amazon Services LLC Associates Program, an affiliate advertising program designed to provide a means for sites to earn advertising fees by advertising and linking to Amazon.com. Amazon, the Amazon logo, AmazonSupply, and the AmazonSupply logo are trademarks of Amazon.com, Inc. or its affiliates. As an Amazon Associate we earn affiliate commissions from qualifying purchases.