The evolution of home entertainment has transitioned from simple television sets to complex, integrated ecosystems where audio quality is just as critical as visual resolution. LG has established itself as a leader in this space, offering sound bars that integrate cutting-edge Digital Signal Processing (DSP), Dolby Atmos support, and seamless wireless connectivity. However, the performance of these sophisticated gadgets is heavily dependent on proper installation and configuration.
Installing an LG sound bar is more than just plugging in a power cord; it requires an understanding of digital interfaces, acoustic placement, and software integration. This guide provides a deep dive into the technical procedures required to set up your LG sound bar for an optimal auditory experience, ensuring you leverage every bit of technology packed into the hardware.

1. Selecting and Establishing the Optimal Physical Interface
Before diving into software settings, the physical connection between your TV and the sound bar dictates the maximum audio quality you can achieve. LG sound bars typically offer three primary hardware connection methods: HDMI ARC/eARC, Optical (Toslink), and Wireless (Bluetooth/Wi-Fi).
HDMI ARC and eARC: The Professional’s Choice
For users seeking the highest fidelity, HDMI eARC (Enhanced Audio Return Channel) is the industry standard. Unlike standard HDMI connections, eARC supports higher bandwidth and speeds, allowing for the transmission of uncompressed data. This is essential if your LG sound bar supports advanced codecs like Dolby Atmos or DTS:X.
To install using this method, locate the HDMI port on your TV labeled “ARC” or “eARC.” Connect a High-Speed HDMI cable (Version 2.1 is recommended for eARC) from this port to the “HDMI OUT (TV ARC)” port on the sound bar. The technical advantage here is “CEC” (Consumer Electronics Control), which LG brands as “SIMPLINK.” This protocol allows your TV remote to control the sound bar’s volume and power state automatically, creating a unified tech ecosystem.
Optical Digital Audio (Toslink)
If you are working with legacy hardware or a TV that lacks HDMI ARC support, the Optical Digital connection is the secondary choice. This interface uses fiber optics to transmit audio signals as pulses of light, which eliminates electromagnetic interference (EMI).
While reliable, the technical limitation of Optical cables is bandwidth; they generally cannot support lossless formats like Dolby TrueHD or the spatial metadata required for full Dolby Atmos. When installing, ensure the plastic protective caps are removed from the cable tips, and click the cable firmly into the “Optical In” port on the sound bar and the “Optical Out” on the TV.
Wireless Integration via Bluetooth and LG Sound Sync
For a minimalist aesthetic without cable clutter, LG gadgets offer “Sound Sync.” This proprietary technology uses Bluetooth or Wi-Fi to bridge the audio gap. While convenient, wireless connections can occasionally introduce latency (audio-sync issues). To minimize this, ensure the sound bar is within a clear line of sight of the TV and away from other 2.4GHz interference sources like microwave ovens or high-traffic Wi-Fi routers.
2. Hardware Synchronization and Subwoofer Calibration
Most modern LG sound bars are 2.1, 3.1, or 5.1 channel systems that include a wireless subwoofer. The subwoofer is responsible for the low-frequency effects (LFE) that provide cinematic depth. Achieving a stable wireless handshake between the main bar and the subwoofer is a critical step in the installation process.
Establishing the Wireless Link
Upon initial power-up, the sound bar and subwoofer should pair automatically. This is indicated by a solid green LED on the rear of the subwoofer. If the LED blinks green or shows red, a manual reset is required. Using a small pin, press the “Pairing” button on the back of the subwoofer. Once the LED flashes rapidly, press the “Volume Mute” or “Stop” button on the sound bar remote for several seconds until the display reads “REMOTE PAIR” or “WL RESET.” This re-establishes the encrypted 5.8GHz wireless link between the components.
Strategic Acoustic Positioning
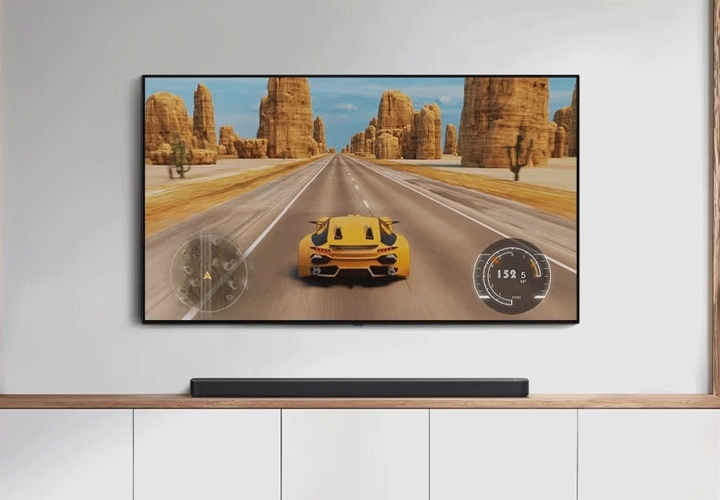
The placement of your hardware significantly impacts the soundstage. The sound bar should be centered directly below or above the TV at ear level. For LG models featuring up-firing drivers (designed for Atmos), it is imperative not to place the bar inside a cabinet shelf, as the sound waves need to bounce off the ceiling to create the “overhead” effect.

The subwoofer, being omnidirectional, offers more flexibility. However, placing it near a corner can “load” the room, artificially boosting the bass (known as room gain). For the most accurate tech-spec performance, place the subwoofer about six inches away from the wall to allow the rear port to breathe, preventing “muddy” audio reproduction.
3. Software Configuration and the LG Sound Bar App
In the modern tech landscape, hardware is only half the story. The software layer defines how the hardware interacts with your environment. LG provides a dedicated “LG Sound Bar” app (available on iOS and Android) that acts as a sophisticated control center for your device.
Utilizing the LG Sound Bar App
Once the physical installation is complete, download the app and connect your sound bar to your local Wi-Fi network. This allows for “Over-the-Air” (OTA) firmware updates. Keeping the firmware updated is vital; LG frequently releases patches that improve Bluetooth stability, fix HDMI handshake bugs, and refine the DSP algorithms.
The app also provides access to a 10-band graphic equalizer, allowing you to manually tune the frequency response. For users who find dialogue muffled, the app offers a “Night Mode” or “Voice Recovery” setting, which compresses the dynamic range and boosts frequencies in the 2kHz–5kHz range where human speech resides.
AI Room Calibration Pro
One of the most impressive AI tools in LG’s high-end sound bars is “AI Room Calibration.” Every room has different acoustic properties—curtains absorb sound, while glass reflects it. Through the app, you can trigger a calibration sequence. The sound bar will emit a series of tones, using its internal microphones to measure how the sound bounces off your walls. It then uses AI algorithms to automatically adjust its output to compensate for your room’s specific acoustic flaws, ensuring the audio remains balanced regardless of your furniture layout.
4. Advanced System Integration and Troubleshooting
To complete the installation, you must ensure the TV’s internal software is communicating correctly with the sound bar. This often involves navigating the TV’s hidden audio menus to enable “Passthrough” mode.
Optimizing TV Output Settings
By default, many TVs downmix audio to PCM Stereo. To get the full benefit of your LG sound bar, go into your TV’s Audio/Expert settings. Change the Digital Output Audio Format from “PCM” to “Auto” or “Passthrough.” This ensures the TV doesn’t process the audio signal, instead sending the raw bitstream (like Dolby Atmos) directly to the sound bar’s high-quality DAC (Digital-to-Analog Converter).
Furthermore, enable “HDMI-CEC” or “SIMPLINK” in the TV’s general settings. This is the “glue” that makes the tech feel integrated, allowing for a single-remote experience.
Troubleshooting Common Installation Hurdles
Despite the sophisticated tech, issues like “Audio Lag” can occur. This is often caused by the TV taking too long to process the video frame compared to the audio. Most LG sound bars have an “AV Sync” setting on the remote or in the app. You can adjust this in milliseconds (ms) to perfectly align the lip-sync.
If the sound bar produces no sound via HDMI, check the “Input” source. It is a common mistake to remain on “Optical” when the cable is “HDMI.” Additionally, ensure that the HDMI cable is plugged into the “HDMI IN” on the sound bar only if you are daisy-chaining a gaming console; for TV audio, it must be the “HDMI OUT (TV ARC/eARC)” port.
Conclusion: The Result of Technical Precision
Installing an LG sound bar is an exercise in integrating various technological disciplines: digital communication, wireless networking, and acoustic engineering. By choosing the right interface (eARC), ensuring stable wireless pairing for the subwoofer, and utilizing AI-driven software tools for room calibration, you transform a simple gadget into a high-performance home cinema system.
The professional setup of these devices ensures that you aren’t just hearing loud noises, but experiencing the nuanced soundscapes intended by sound engineers. Whether it is the subtle rustle of leaves in a drama or the thunderous roar of an engine in an action sequence, a correctly installed LG sound bar delivers the fidelity and immersion that modern tech enthusiasts demand. Once the LEDs are solid, the firmware is updated, and the AI has mapped your room, your installation is complete—leaving you with nothing but pure, unadulterated audio performance.
aViewFromTheCave is a participant in the Amazon Services LLC Associates Program, an affiliate advertising program designed to provide a means for sites to earn advertising fees by advertising and linking to Amazon.com. Amazon, the Amazon logo, AmazonSupply, and the AmazonSupply logo are trademarks of Amazon.com, Inc. or its affiliates. As an Amazon Associate we earn affiliate commissions from qualifying purchases.