In the rapidly evolving landscape of digital entertainment, the quest for a personalized, powerful, and cost-effective media hub has led many tech enthusiasts to a potent combination: Kodi and the Amazon Firestick. While the Firestick itself offers a world of streaming options through its native app store, installing Kodi transforms this compact device into an unparalleled, highly customizable media center. This guide will walk you through every step of the process, ensuring you can unlock a universe of content, from your personal media library to a vast array of online streams, all from the comfort of your couch.
As a staple on a tech-focused website, we understand the allure of open-source innovation and the desire to maximize the utility of your gadgets. This tutorial isn’t just about following instructions; it’s about understanding the synergy between an open-source powerhouse like Kodi and a popular streaming device like the Firestick, empowering you to take full control of your digital entertainment experience.
Why Kodi and Firestick Are a Perfect Match for Entertainment Enthusiasts
Before we dive into the nitty-gritty of installation, let’s understand why this pairing has become so popular among those looking to transcend traditional streaming limitations. It’s a marriage of convenience, customization, and cost-effectiveness that appeals to a wide range of users, from casual viewers to hardcore media collectors.
Understanding Kodi: Your Ultimate Media Center
Kodi, formerly known as XBMC (Xbox Media Center), is a free, open-source media player software application developed by the XBMC Foundation. It’s designed to be a digital hub for all your entertainment needs. Unlike proprietary streaming apps that dictate what you can watch, Kodi gives you the reins.
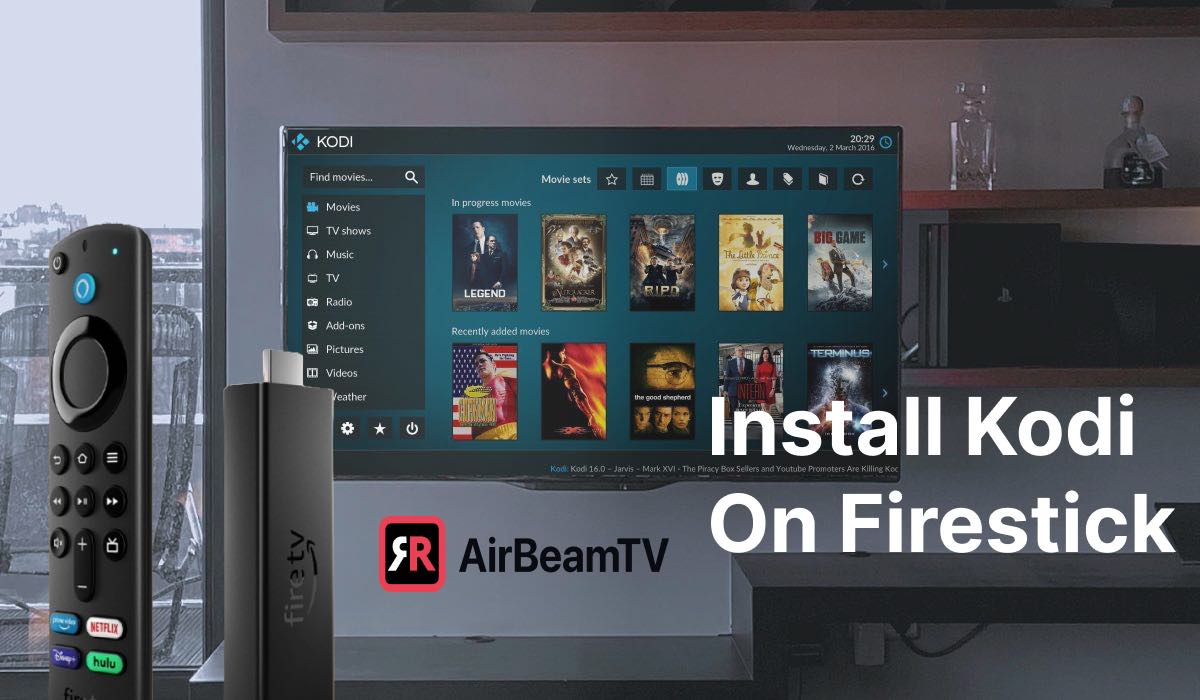
At its core, Kodi allows users to play and view most streaming media, such as videos, music, podcasts, and videos from the internet, as well as all common digital media files from local and network storage media. Its true power, however, lies in its extensibility through a vast ecosystem of add-ons. These add-ons, developed by its community, can unlock access to diverse content – from news and weather to international channels, sports, and niche interests – often going beyond what’s available through conventional means. Think of it as a blank canvas upon which you can paint your ideal entertainment portal. Its robust interface is designed for large-screen TVs, making navigation with a remote a seamless experience.
The Amazon Firestick: A Gateway to Smart TV
The Amazon Firestick is one of the most popular and affordable streaming devices on the market. This compact HDMI dongle plugs directly into your TV, instantly transforming it into a smart TV capable of streaming content from Netflix, Prime Video, Hulu, Disney+, and countless other services. Running on a customized version of Android, the Firestick offers a user-friendly interface, integration with Amazon’s Alexa voice assistant, and access to a wide array of apps through the Amazon Appstore.
Its low cost, ease of setup, and portability make it an ideal device for consumers who want smart TV capabilities without investing in a new television. While its native app store provides plenty of content, the underlying Android operating system means it’s also highly amenable to sideloading applications not officially available, which is precisely where Kodi comes into play.
The Synergy: Unlocking Full Potential
The combination of Kodi and Firestick is a game-changer. By installing Kodi on your Firestick, you essentially bypass the limitations of Amazon’s ecosystem, opening up your device to a world of media beyond what’s officially sanctioned. Here’s why this synergy is so powerful:
- Customization: Kodi offers unparalleled customization options, from skins that change its entire look and feel to highly specific add-ons that cater to every imaginable interest. The Firestick provides the hardware to run this powerful software.
- Centralized Media Hub: Consolidate all your digital media – movies, TV shows, music, photos – from local network drives, cloud storage, or the internet into one intuitive interface. No more switching between multiple apps for different types of content.
- Cost-Effectiveness: You get the power of a dedicated media center without the need for expensive hardware. The affordable Firestick becomes a powerhouse with Kodi.
- Portability: Take your entire customized media setup with you. Just plug your Firestick into any TV with an HDMI port, connect to Wi-Fi, and your Kodi experience is ready to go.
For those who crave control and variety in their entertainment, the Kodi-Firestick pairing is not just a hack; it’s an upgrade, turning a simple streaming stick into a versatile and dynamic media command center.
Essential Preparations Before You Begin
Installing Kodi on a Firestick isn’t as straightforward as downloading an app from the Amazon Appstore. Since Kodi isn’t officially available there, we’ll need to “sideload” it. This process involves a few preparatory steps to ensure your Firestick is ready to accept applications from outside Amazon’s curated list. These steps are crucial and must be completed accurately.
Enabling “Apps from Unknown Sources”
The first and most important step is to tell your Firestick that it’s okay to install applications that aren’t from the official Amazon Appstore. This is a security feature, and while we’re going to temporarily bypass it, it’s generally good practice to be aware of the source of any app you install.
- Navigate to Settings: From your Firestick’s home screen, scroll to the right until you reach the “Settings” gear icon. Select it.
- Go to “My Fire TV”: Within the Settings menu, scroll down and select “My Fire TV” (or “Device & Software” on older Fire OS versions).
- Access “Developer Options”: Select “Developer Options.”
- Troubleshooting Note: If you don’t see “Developer Options,” it means it’s hidden. To reveal it, go to “About” in the “My Fire TV” menu and click on your “Fire TV Stick” (or “Fire TV Cube,” etc.) seven times. A message will appear saying “You are now a developer!” Then, go back to “My Fire TV,” and “Developer Options” should now be visible.
- Enable “Apps from Unknown Sources”: Inside “Developer Options,” you’ll see “Apps from Unknown Sources.” Toggle this setting to “ON.” A warning message will appear; read it and then select “Turn On” to confirm.
- Disable “ADB Debugging” (Optional but Recommended): For Kodi installation, “ADB Debugging” does not need to be enabled, and keeping it off can enhance security unless you specifically need it for other development purposes. Ensure it is “OFF” unless instructed otherwise for advanced tasks.
This step is critical because it grants your Firestick permission to install Kodi once we download it.
Installing the Downloader App
Since you can’t download files directly from a web browser on a Firestick, we need a specialized app to facilitate the download of Kodi’s installation file. The “Downloader” app, developed by AFTVnews, is the go-to solution for sideloading on Firestick devices. It acts as a browser and file manager, making the process incredibly simple.
- Return to the Home Screen: Press the Home button on your Firestick remote.
- Use the Search Function: Navigate to the “Find” tab on the Firestick home screen, then select “Search.”
- Search for “Downloader”: Begin typing “Downloader” into the search bar. As you type, suggestions will appear. Select “Downloader” when it pops up.
- Install Downloader: The Downloader app icon (often a bright orange square with a download arrow) will appear in the search results under “Apps & Games.” Select it, then click “Download” or “Get” to install it.
- Open Downloader: Once installed, you can either click “Open” immediately or return to your Apps & Channels to launch it later.
Upon opening Downloader for the first time, you may be prompted to grant storage permissions. Make sure to allow these permissions for the app to function correctly. You might also see a quick start guide or tips; you can dismiss these to get to the main interface, which typically features a URL input field.
Clearing Storage (Optional but Recommended)
While not strictly necessary for every installation, ensuring you have adequate free storage space on your Firestick can prevent potential issues during the download and installation of Kodi. Firesticks, especially older models, can have limited internal storage, and a cluttered device can lead to slow performance or failed installations.
- Navigate to Settings > My Fire TV > About > Storage. Here you can see your available space.
- Clear Cache/Uninstall Unused Apps: Go to Settings > Applications > Manage Installed Applications. Review the list of apps.
- For apps you don’t use, select them and choose “Uninstall.”
- For frequently used apps, selecting “Clear Cache” can free up temporary space without deleting user data. Avoid “Clear Data” unless you want to reset an app entirely.
Having at least 500MB to 1GB of free space is a good practice for a smooth Kodi installation and operation.
With these preparations complete, your Firestick is now ready to welcome Kodi into its digital ecosystem. The next step will focus on the actual download and installation process.
Step-by-Step Guide: Installing Kodi on Your Firestick
With your Firestick prepared and the Downloader app at the ready, the core task of installing Kodi is surprisingly straightforward. This section will guide you through downloading the correct version of Kodi and performing the installation.
Downloading Kodi via Downloader
Kodi’s official website provides different versions for various operating systems and architectures. For the Amazon Firestick, which runs on an Android-based OS with an ARM 32-bit processor, you need the specific Android ARM (32-bit) version. It’s crucial to download from the official source to ensure you get a legitimate and secure version of Kodi.
- Launch the Downloader App: From your Firestick’s home screen, navigate to “Apps & Channels” (the three squares and a plus sign icon) and launch the “Downloader” app.
- Enter the Kodi Download URL: In the URL field on the Downloader home screen, you’ll need to type the exact URL for Kodi’s Android ARM 32-bit APK file.
- A reliable shortcut URL often maintained by tech sites is
https://www.kodi.tv/download/android. When you go to the Kodi download page, scroll down to the Android section, and find the “ARMV7A (32BIT)” architecture. Click on this to initiate the download. - Alternatively, many guides provide direct shortened URLs for the APK file itself. A common pattern for the direct download is something like
https://kodi.tv/wp-content/uploads/android/kodi-20.4-Nexus-armeabi-v7a.apk(replace20.4-Nexuswith the latest stable version number, e.g.,21.0-Omega). - Tip: Using the Firestick remote to type URLs can be cumbersome. If you have a companion app for your Firestick on your phone, you can often use its keyboard to type faster.
- A reliable shortcut URL often maintained by tech sites is
- Initiate Download: After entering the URL, click “Go” or press the play/pause button on your remote. Downloader will connect to the server and begin downloading the Kodi APK file.
- Wait for Download Completion: The download time will vary depending on your internet speed. A progress bar will indicate the status. Once the download is complete, Downloader will automatically prompt you to install the application.
Installing the Kodi Application
Once the APK file is fully downloaded, the installation process begins. This is similar to installing any app on an Android device from a downloaded file.
- Installation Prompt: After the download finishes, a new window will appear with the installation prompt. It will show the Kodi icon and ask if you want to install this application.
- Select “Install”: Scroll down and select the “Install” button.
- Wait for Installation: The installation process will take a few moments. A progress bar or spinner will indicate that Kodi is being installed.
- Installation Complete: Once finished, you’ll see a notification stating “App installed.” You’ll then be given two options: “Done” or “Open.”
- “Done”: If you select “Done,” you’ll return to the Downloader app. This is often recommended so you can delete the APK file immediately, freeing up space.
- “Open”: If you select “Open,” Kodi will launch immediately.
If you chose “Done,” Downloader will usually ask if you want to delete the APK file. It’s highly recommended to “Delete” the file as it’s no longer needed and simply takes up valuable storage space on your Firestick. Confirm the deletion when prompted.
Congratulations! You have successfully installed Kodi on your Amazon Firestick. You can now find Kodi by navigating to your “Apps & Channels” on the Firestick home screen. It might appear at the very end of your app list. To move it to a more prominent position, highlight the Kodi icon, press the menu button (three horizontal lines) on your remote, and select “Move.”
Post-Installation: Setting Up Kodi for Optimal Use
Installing Kodi is just the first step. To truly transform your Firestick into a personalized entertainment powerhouse, you’ll need to configure Kodi, add your media sources, and explore its vast add-on ecosystem. This post-installation setup is where Kodi’s true customization potential shines.
Navigating Kodi for the First Time
When you launch Kodi for the first time, you’ll be greeted by its default Estuary skin. The interface is designed for ease of use on a TV screen, navigated with your Firestick remote.
- Initial Launch: Kodi might take a moment to load on its first launch as it initializes its components.
- Grant Permissions: Kodi will likely request access to your files and media. It’s crucial to “Allow” these permissions, as Kodi needs them to function correctly and access local or network media.
- Explore the Interface: The main menu typically runs vertically along the left side (or horizontally across the top/bottom, depending on the skin). Common categories include Movies, TV Shows, Music, Music Videos, TV, Radio, Games, Add-ons, Pictures, Videos, and System/Settings. Take a moment to familiarize yourself with the layout.
Enhancing Kodi with Add-ons
Add-ons are the heart of Kodi’s versatility, extending its functionality beyond playing local files. They allow Kodi to stream content from the internet, access live TV, weather forecasts, and much more.
There are generally two types of add-ons:
- Official Add-ons: Available through the official Kodi Add-on Repository, these are generally well-supported, stable, and legal. They include services like YouTube, Twitch, SoundCloud, and various news channels.
- Unofficial Add-ons: Developed by third parties and not hosted in the official repository. While some offer fantastic content, users should exercise caution. Always research the legality and security of unofficial add-ons before installing them. This guide will focus on the general process, which applies to both.
General Steps to Install Add-ons:
- Access the Add-ons Section: From the Kodi home screen, navigate to “Add-ons.”
- Browse Repositories: You’ll typically click on the “package installer” icon (an open box icon) in the top-left corner.
- Install from Repository: Select “Install from repository.” Here you’ll find the “Kodi Add-on Repository” which contains all official add-ons. You might also see other repositories if you’ve added them (which is a step required for many unofficial add-ons: System > File manager > Add source, then Install from zip file to add the repository).
- Choose Category and Install: Browse through categories like Video add-ons, Music add-ons, Program add-ons, etc. Select an add-on you wish to install (e.g., YouTube), and then click the “Install” button. Kodi will download and enable the add-on.
- Launch Add-on: Once installed, you can launch the add-on from the “Add-ons” section on your home screen or within its specific category (e.g., YouTube will be under “Video add-ons”).
Important Note on Legality and Safety: While Kodi itself is legal, the legality of content streamed through certain add-ons can vary by region and source. Always ensure you are accessing content legally and responsibly. Using a Virtual Private Network (VPN) is highly recommended with Kodi to protect your privacy and security, especially when exploring content outside official sources.
Basic Configuration and Customization
Kodi allows for extensive personalization. Here are a few common settings you might want to adjust:
- Skins: Change the entire look and feel of Kodi. Go to Settings (gear icon) > Interface > Skin. You can download new skins from the official repository for a fresh aesthetic.
- Language and Regional Settings: Adjust these to your preference. Go to Settings > Interface > Regional. Here you can set the language, keyboard layout, time zone, and temperature units.
- Media Library Setup: If you have personal media (movies, TV shows, music) stored on a network drive (NAS) or an external USB drive connected to your Firestick (if supported via an OTG cable), you’ll want to add these sources to Kodi.
- Navigate to Settings > Media > Library > Videos/Music.
- Select “Add Videos…” or “Add Music…”
- Browse to your network location (e.g., SMB share) or external drive, select the folder containing your media, and confirm. Kodi will then scan your media and scrape metadata (cover art, plot summaries, etc.) to create a rich, organized library.
- Power Saving Settings: For Firesticks, ensuring Kodi doesn’t keep your device awake unnecessarily is good for energy consumption and device longevity. Explore power-saving options under Settings > System > Power saving.
By taking the time to set up and customize Kodi, you’ll create a truly personalized and powerful entertainment hub that far exceeds the capabilities of your Firestick out of the box.
Troubleshooting Common Issues and Optimizing Performance
Even with a smooth installation, users might encounter a few common hiccups or wish to optimize Kodi’s performance on their Firestick. Addressing these proactively can significantly enhance your user experience.
Resolving Buffering Problems
Buffering is arguably the most frustrating issue for any streamer. On a Firestick running Kodi, buffering can be caused by several factors:
- Internet Speed and Stability:
- Solution: Test your internet speed. For HD streaming, a consistent 20-25 Mbps is recommended. For 4K, aim for 50 Mbps or higher. If your Wi-Fi signal is weak, consider moving your Firestick closer to your router, using a Wi-Fi extender, or even an Ethernet adapter for Firestick (which connects via the micro-USB port) for a more stable wired connection.
- Add-on Source Overload:
- Solution: Some add-on sources are simply overloaded or have limited bandwidth. Try a different source for the content you’re watching, or explore more reliable add-ons.
- Kodi Cache Settings:
- Solution: Kodi uses a small cache, which can fill up and cause buffering. Advanced users can configure Kodi’s
advancedsettings.xmlfile to increase the cache size, but this requires more technical steps and is generally only recommended if you have sufficient free RAM. Be cautious, as improperly configured cache settings can worsen performance.
- Solution: Kodi uses a small cache, which can fill up and cause buffering. Advanced users can configure Kodi’s
- Firestick Storage & RAM:
- Solution: Ensure your Firestick has enough free storage and RAM. Close other background apps, clear the cache for Kodi and other apps (Settings > Applications > Manage Installed Applications > Kodi > Clear Cache), and consider uninstalling unused apps. A Firestick with insufficient resources will struggle to run Kodi smoothly.
- VPN Overhead:
- Solution: While a VPN is highly recommended (see below), some VPNs can slow down your connection. Try connecting to a different VPN server, or temporarily disable your VPN to see if it resolves the buffering (then re-enable and investigate your VPN provider).
Kodi Not Opening or Crashing
If Kodi fails to launch or frequently crashes, try these steps:
- Force Stop and Clear Cache: Go to Settings > Applications > Manage Installed Applications > Kodi. Select “Force Stop,” then “Clear Cache.” Do NOT select “Clear Data” unless you want to factory reset Kodi and lose all your settings and add-ons.
- Check for Updates: An outdated version of Kodi might have bugs. See the “Keeping Kodi Updated” section below.
- Reboot Firestick: A simple restart can resolve many temporary software glitches. Unplug the Firestick from its power source for 30 seconds, then plug it back in.
- Insufficient Storage: If your Firestick is critically low on storage, apps can struggle to launch or function. Clear space as described in the “Clearing Storage” section.
- Reinstall Kodi: As a last resort, if all else fails, uninstall Kodi (Settings > Applications > Manage Installed Applications > Kodi > Uninstall) and then follow the installation guide from the beginning.
Keeping Kodi Updated
Like any software, Kodi regularly releases updates to fix bugs, improve performance, and introduce new features. Keeping your Kodi installation updated ensures you have the most stable and secure experience. Since Kodi isn’t in the Amazon Appstore, updates are manual:
- Check for New Versions: Periodically visit the official Kodi download page (
kodi.tv/download) to see if a newer stable version is available for Android ARM 32-bit. - Use Downloader for Update: When a new version is available, repeat the download process using the Downloader app. You’ll download the new APK file just as you did for the initial installation.
- Install Over Existing Version: When you install the new APK, Kodi will typically recognize that an older version is already present and will simply update it, preserving your existing settings and add-ons. You do not usually need to uninstall the old version first.

The Importance of a VPN with Kodi
A Virtual Private Network (VPN) is not just a recommendation; it’s a vital tool for anyone using Kodi, especially when streaming content from unofficial add-ons.
- Privacy Protection: A VPN encrypts your internet traffic, preventing your Internet Service Provider (ISP) and other third parties from monitoring your online activities. This is crucial for privacy, as some ISPs throttle connections or issue warnings based on perceived streaming activities.
- Security: VPNs add a layer of security, protecting you from potential threats when connecting to various sources online.
- Bypassing Geo-restrictions: A VPN can allow you to virtually change your location, granting access to geo-restricted content and services that might not be available in your physical region.
- Preventing Throttling: Some ISPs might throttle internet speeds when detecting heavy streaming. A VPN can mask your activity, potentially preventing your ISP from slowing down your connection.
How to Use a VPN with Firestick:
- Choose a Reputable VPN: Select a VPN provider known for its speed, no-logs policy, and Firestick compatibility (e.g., ExpressVPN, NordVPN, Surfshark).
- Install VPN App: Download and install your chosen VPN app directly from the Amazon Appstore on your Firestick.
- Connect to Server: Launch the VPN app, log in, and connect to a server of your choice before launching Kodi.
Investing in a good VPN is an investment in your digital privacy, security, and an uninterrupted Kodi streaming experience.
By understanding these common issues and implementing the recommended solutions and optimizations, you can ensure your Kodi-powered Firestick provides a stable, enjoyable, and secure entertainment experience for years to come.
The journey of transforming your Amazon Firestick into a fully customized Kodi media center is one that empowers you to control your entertainment like never before. From the initial steps of enabling unknown sources to the nuances of add-on installation and performance optimization, you’ve gained the knowledge to unlock a universe of content. This synergy between Kodi’s open-source flexibility and the Firestick’s accessibility creates a media hub that is not only powerful but also incredibly personal. Embrace the freedom, explore the possibilities, and enjoy the limitless entertainment that awaits at your fingertips.
aViewFromTheCave is a participant in the Amazon Services LLC Associates Program, an affiliate advertising program designed to provide a means for sites to earn advertising fees by advertising and linking to Amazon.com. Amazon, the Amazon logo, AmazonSupply, and the AmazonSupply logo are trademarks of Amazon.com, Inc. or its affiliates. As an Amazon Associate we earn affiliate commissions from qualifying purchases.