The Java Development Kit (JDK) is an indispensable tool for anyone venturing into the world of Java programming. Whether you’re a seasoned software engineer, a budding developer, or a student embarking on your first coding journey, the JDK provides the essential components required to write, compile, and run Java applications. This comprehensive guide will walk you through the entire process of installing JDK Java, covering various operating systems, configuring environment variables, and verifying your setup, ensuring you have a robust foundation for your Java development endeavors.
The significance of a correctly installed JDK cannot be overstated. It acts as the backbone for countless applications, from enterprise-level systems and mobile apps to web services and embedded devices. Without it, you simply cannot develop in Java. This tutorial is designed to be accessible and thorough, helping you navigate potential pitfalls and set up your development environment efficiently. By the end of this guide, you’ll not only have JDK installed but also a clear understanding of its components and why each step is crucial.

Understanding JDK and Why It Matters
Before diving into the installation process, it’s vital to grasp what the Java Development Kit is and why it holds such a pivotal role in the Java ecosystem. This foundational understanding will empower you to troubleshoot issues more effectively and make informed decisions regarding your development setup.
What is the Java Development Kit (JDK)?
The Java Development Kit (JDK) is a software development environment used for developing Java applications and applets. It includes the Java Runtime Environment (JRE), an interpreter/loader (java), a compiler (javac), an archiver (jar), a documentation generator (javadoc), and other tools. Essentially, the JDK is a superset of the JRE. While the JRE provides the necessary components to run Java applications, the JDK provides everything required to develop them.
Key components within the JDK include:
- Java Virtual Machine (JVM): The abstract machine that enables your computer to run Java programs.
- Java Runtime Environment (JRE): The execution environment that contains the JVM, class libraries, and other supporting files. It’s what allows users to run Java applications.
- Compiler (javac): Translates your human-readable Java source code (.java files) into bytecode (.class files) that the JVM can understand.
- Debugger (jdb): A tool for finding and fixing errors in your Java programs.
- Archiver (jar): Used to package Java class files, associated metadata, and resources (text, images, etc.) into a single archive file.
- Documentation Generator (javadoc): Creates API documentation in HTML format from comments in your source code.
This suite of tools makes the JDK a powerful, all-encompassing environment for any Java developer. It’s the starting point for virtually all Java-based software development.
Why JDK is Essential for Java Development
The JDK is not just another piece of software; it’s the very foundation upon which all Java development stands. Its essentiality stems from several factors:
Firstly, compilation. Without the javac compiler included in the JDK, your plain text Java code would be meaningless to a computer. The compiler is the translator that converts your high-level instructions into executable bytecode.
Secondly, execution environment. While users only need the JRE to run Java applications, developers need the full JDK during the development phase. The JDK contains a JRE, allowing you to test your applications as you build them, ensuring they function as expected in a runtime environment.
Thirdly, tooling. The various utilities bundled within the JDK, such as jar for packaging, javadoc for documentation, and jdb for debugging, streamline the development workflow significantly. These tools are designed to work together seamlessly, enhancing developer productivity and ensuring adherence to best practices in software engineering. For instance, javadoc alone saves countless hours in manually documenting APIs, a critical aspect of collaborative and maintainable software projects.
Finally, platform independence. Java’s famous “write once, run anywhere” (WORA) principle is heavily reliant on the JDK and JVM. When you compile Java code with the JDK, it produces bytecode that can run on any platform with a compatible JVM. This portability is a huge advantage, reducing development costs and increasing market reach. For businesses leveraging Java, this means their applications can be deployed across diverse operating systems and hardware with minimal modifications, a significant factor in technological flexibility and economic efficiency.
Preparing for Your JDK Installation
Before you begin the actual installation, a few preparatory steps will ensure a smooth and successful setup. These steps involve checking your system, understanding your options, and acquiring the necessary files.
Checking System Requirements
While Java is highly platform-independent, installing the JDK still requires your system to meet certain basic criteria. Fortunately, Java is relatively lightweight and can run on most modern computers.
- Operating System: Ensure your operating system is supported. Modern JDK versions support Windows (64-bit), macOS, and various Linux distributions (e.g., Ubuntu, Fedora, CentOS, Red Hat). Older JDK versions might support 32-bit Windows, but it’s generally recommended to use 64-bit systems for modern development.
- Processor: Any modern multi-core processor (Intel, AMD, ARM) will suffice.
- RAM: A minimum of 2GB RAM is recommended, though 4GB or more will provide a much smoother development experience, especially when running IDEs like IntelliJ IDEA or Eclipse.
- Disk Space: You’ll need approximately 200-500 MB of free disk space for the JDK installation itself, plus additional space for your projects, IDEs, and other development tools.
- Internet Connection: Required for downloading the JDK installer and any potential updates or additional libraries.
It’s always a good practice to ensure your operating system is up-to-date with the latest security patches and system updates before installing new software. This minimizes compatibility issues and enhances overall system stability.
Choosing the Right JDK Version (Oracle vs. OpenJDK)
One of the crucial decisions you’ll face is choosing which JDK distribution to install. Historically, Oracle JDK was the dominant choice, but with changes in licensing, OpenJDK distributions have become increasingly popular and are often the preferred option for many developers and enterprises.
- Oracle JDK: This is the commercial distribution of Java from Oracle. It includes additional proprietary features, but since Java 11, Oracle JDK is no longer free for commercial use in production environments without a subscription. It remains free for personal use and development. If you choose Oracle JDK, you will need to create an Oracle account to download it.
- OpenJDK: This is the open-source reference implementation of Java. Various vendors provide their own builds of OpenJDK, all based on the same open-source codebase. Popular OpenJDK distributions include:
- Adoptium (formerly AdoptOpenJDK): A widely used, free, and open-source distribution maintained by the Eclipse Foundation. It’s highly recommended for both personal and commercial use due to its community support and regular updates.
- Amazon Corretto: Amazon’s free, multiplatform, production-ready distribution of OpenJDK. It comes with long-term support.
- Microsoft Build of OpenJDK: Microsoft’s free distribution of OpenJDK.
- Red Hat OpenJDK: Red Hat also provides its own OpenJDK builds.
For most developers, especially those starting out or working in enterprise settings that prefer open-source solutions, Adoptium (Eclipse Temurin) is an excellent choice due to its strong community backing and ease of access. It provides regular updates and is completely free for all uses. For this guide, we will primarily focus on the installation process that is common across most JDK distributions, with specific notes where differences arise.
Downloading the JDK Installer
Once you’ve decided on your preferred JDK distribution and version (e.g., JDK 17 LTS or JDK 21), the next step is to download the installer.
-
For Adoptium (Eclipse Temurin – Recommended):
- Go to the official Adoptium website:
https://adoptium.net/ - On the homepage, you’ll typically see the latest LTS (Long Term Support) version prominently displayed (e.g., Temurin 17 or Temurin 21).
- Select your operating system (Windows, macOS, Linux) and architecture (x64 is most common).
- Download the appropriate installer. For Windows, this will usually be an
.msifile. For macOS, a.pkgfile. For Linux, often a.tar.gzarchive or a.deb/.rpmpackage.
- Go to the official Adoptium website:
-
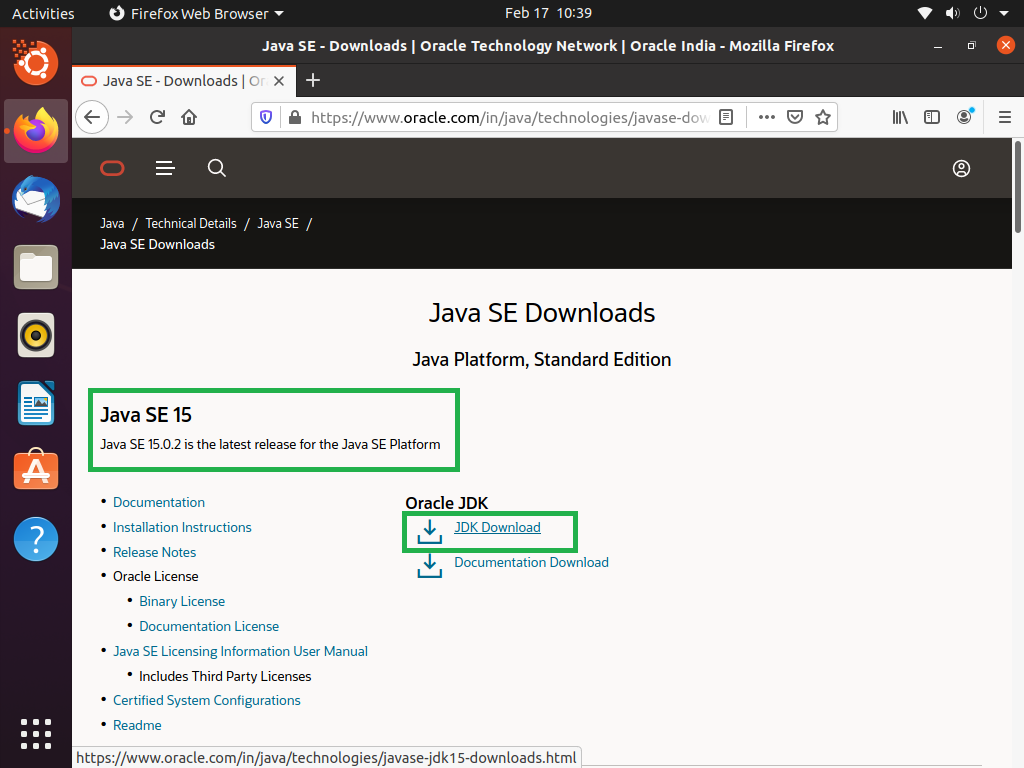
For Oracle JDK:
- Go to the Oracle Java Downloads page:
https://www.oracle.com/java/technologies/downloads/ - Navigate to the desired JDK version.
- Select your operating system and architecture.
- Download the appropriate installer. You will likely be prompted to sign in with an Oracle account or create one if you don’t have one.
- Go to the Oracle Java Downloads page:
Always download JDKs from their official sources to ensure authenticity and avoid security risks. Once the download is complete, you’re ready to proceed with the installation.
Step-by-Step JDK Installation Guides
The installation process varies slightly depending on your operating system. Below are detailed instructions for Windows, macOS, and Linux environments.
Installing JDK on Windows
Windows users typically have the easiest installation experience thanks to executable installers.
- Run the Installer: Locate the downloaded
.msifile (e.g.,jdk-*-windows-x64_bin.msi) and double-click it to start the installation wizard. - Follow the Wizard:
- The wizard will guide you through the process. Click “Next” on the welcome screen.
- Choose Installation Path: The installer usually defaults to
C:Program FilesJavajdk-<version>. While you can change this, it’s generally recommended to stick with the default path unless you have specific reasons not to. Click “Next”. - Installation: The installer will copy the necessary files to your system. You might see a progress bar.
- Completion: Once finished, you’ll see a “Successfully Installed” message. Click “Close”.
The JDK is now installed on your Windows system. The next critical step is to configure environment variables.
Installing JDK on macOS

On macOS, you’ll typically download a .pkg installer, which functions similarly to Windows.
- Run the Installer: Locate the downloaded
.pkgfile (e.g.,jdk-*-macos-x64_bin.pkg) and double-click it. - Follow the Wizard:
- The installer will open. Click “Continue” through the introduction and license agreement.
- Installation Type: Click “Install” to proceed with the standard installation. You might be prompted for your administrator password.
- Installation: The files will be copied to
/Library/Java/JavaVirtualMachines/jdk-<version>.jdk/Contents/Home. - Completion: After successful installation, you’ll see a confirmation. Click “Close”.
Unlike Windows, macOS typically handles the PATH variable for Java automatically for system-wide installations. However, setting JAVA_HOME is still a good practice for development tools.
Installing JDK on Linux
Linux offers more flexibility, often allowing installation via package managers or manual archive extraction. We’ll cover the manual method, which is universally applicable.
- Download the Archive: Download the
.tar.gzarchive (e.g.,jdk-*-linux-x64_bin.tar.gz). - Create Installation Directory: It’s good practice to install JDK in a central location. Open a terminal and create a directory (e.g.,
/usr/local/java):
bash

sudo mkdir -p /usr/local/java
- Extract the Archive: Navigate to your download directory and extract the contents of the archive into the newly created directory:
bash

sudo tar -xvf jdk-*-linux-x64_bin.tar.gz -C /usr/local/java/
This will create a directory like/usr/local/java/jdk-<version>(e.g.,/usr/local/java/jdk-17). - Remove Archive (Optional): You can remove the downloaded
.tar.gzfile to save space:
bash

rm jdk-*-linux-x64_bin.tar.gz
After extraction, you’ll need to set up environment variables for the system to recognize the JDK installation.
Configuring Environment Variables
Configuring environment variables is a crucial step that allows your operating system and development tools to locate the JDK installation. Without this, your system won’t know where to find the javac compiler or the java runtime.
Understanding PATH and JAVA_HOME
Two primary environment variables are critical for Java development:
PATH: This system variable tells your operating system where to find executable programs (likejava,javac,jar, etc.) when you type their names in the command prompt or terminal. You need to add thebindirectory of your JDK installation to thePATHvariable.JAVA_HOME: This user-defined environment variable points to the root directory of your JDK installation. Many Java-based applications, build tools (like Maven or Gradle), and Integrated Development Environments (IDEs) rely onJAVA_HOMEto correctly locate the JDK. It’s a best practice to set this variable.
Setting Environment Variables on Windows
-
Open System Properties:
- Right-click on “This PC” (or “My Computer”) and select “Properties”.
- Click on “Advanced system settings” on the left pane.
- In the “System Properties” window, click the “Environment Variables…” button.
-
Set
JAVA_HOME:- Under “System variables”, click “New…”.
- For “Variable name”, enter
JAVA_HOME. - For “Variable value”, enter the path to your JDK installation directory (e.g.,
C:Program FilesJavajdk-17). Click “OK”.
-
Update
PATH:- Under “System variables”, scroll down and find the
Pathvariable, then select it and click “Edit…”. - In the “Edit environment variable” window, click “New” and add
%JAVA_HOME%bin. (Alternatively, you can add the full path to your JDK’sbindirectory, e.g.,C:Program FilesJavajdk-17bin). - Ensure this entry is at the top of the list or near the top to prioritize your JDK installation over any other potential Java installations. Click “OK” on all open windows to save changes.
- Under “System variables”, scroll down and find the
You may need to restart your command prompt or terminal for the changes to take effect.
Setting Environment Variables on macOS
While the .pkg installer often configures PATH partially, manually setting JAVA_HOME and ensuring PATH is correct is advisable.
- Open Terminal: Launch your Terminal application.
- Determine Shell: Check which shell you are using:
- For
bash:echo $SHELLwill show/bin/bash. - For
zsh(default for macOS Catalina and later):echo $SHELLwill show/bin/zsh.
- For
- Edit Shell Configuration File:
- For
bash, edit~/.bash_profileor~/.bashrc. - For
zsh, edit~/.zshrc. - Use a text editor:
nano ~/.zshrc(or~/.bash_profile).
- For
- Add/Modify Variables: Add the following lines to the end of the file. Replace
jdk-17.jdkwith your actual JDK version and folder name.
bash

export JAVA_HOME=/Library/Java/JavaVirtualMachines/jdk-17.jdk/Contents/Home

export PATH="$JAVA_HOME/bin:$PATH"
- Save and Exit: Save the file (Ctrl+O, then Enter for Nano) and exit the editor (Ctrl+X for Nano).
- Apply Changes: Load the new configuration:
- For
bash:source ~/.bash_profile(orsource ~/.bashrc) - For
zsh:source ~/.zshrc
- For
Setting Environment Variables on Linux
Similar to macOS, you’ll edit your shell configuration file.
- Open Terminal: Launch your terminal.
- Determine Shell: Check your shell (bash, zsh, etc.).
- Edit Shell Configuration File:
- For
bash, edit~/.bashrc(or~/.bash_profileor/etc/profilefor system-wide). - For
zsh, edit~/.zshrc. - Using
nano:nano ~/.bashrc(ornano ~/.zshrc).
- For
- Add/Modify Variables: Add the following lines to the end of the file. Replace
jdk-17with your actual JDK folder name (e.g.,jdk-17.0.8).
bash

export JAVA_HOME=/usr/local/java/jdk-17 # Adjust to your actual JDK folder

export PATH="$JAVA_HOME/bin:$PATH"
- Save and Exit: Save the file and exit the editor.
- Apply Changes: Load the new configuration:
source ~/.bashrc(orsource ~/.zshrc)
For a system-wide installation on Linux, you could also create a .conf file in /etc/profile.d/ (e.g., java.sh) with the export commands, which would apply to all users upon login. Remember to run sudo update-alternatives --config java and sudo update-alternatives --config javac to ensure the correct Java version is linked if you have multiple JDKs installed.
Verifying Your JDK Installation and Next Steps
After successfully installing the JDK and configuring environment variables, it’s crucial to verify that everything is set up correctly. This confirmation step ensures that your system recognizes Java and that you can begin developing applications.
Confirming Installation with Command Prompt/Terminal
- Open a New Command Prompt/Terminal: Close any existing terminals or command prompts and open a new one to ensure the updated environment variables are loaded.
- Check Java Version: Type the following command and press Enter:
bash

java -version
You should see output similar to this (the exact version number will vary):
openjdk version "17.0.8" 2023-07-18

OpenJDK Runtime Environment Temurin-17.0.8+7 (build 17.0.8+7)

OpenJDK 64-Bit Server VM Temurin-17.0.8+7 (build 17.0.8+7, mixed mode, sharing)
If you see an error like “command not found” or an incorrect version, revisit thePATHconfiguration. - Check Java Compiler Version: Type the following command and press Enter:
bash

javac -version
You should see output like:
javac 17.0.8
This confirms that the Java compiler is correctly accessible. If you see an error, recheck yourPATHvariable. - Check JAVA_HOME (Optional but Recommended):
- Windows:
echo %JAVA_HOME% - macOS/Linux:
echo $JAVA_HOME
You should see the path to your JDK installation directory.
- Windows:
If all these commands return the expected output, congratulations! Your JDK installation is successful.
Writing Your First Java Program
To truly confirm your setup and get a feel for Java development, let’s write and run a simple “Hello, World!” program.
- Create a Directory: Create a new folder for your Java projects, for example,
JavaProjects. - Create
HelloWorld.javaFile: Inside this folder, create a file namedHelloWorld.javausing a text editor (Notepad, VS Code, Sublime Text, etc.). Paste the following code into it:
java

public class HelloWorld {

    public static void main(String[] args) {

        System.out.println("Hello, World from JDK!");

    }

}
Ensure the filename (HelloWorld.java) exactly matches the class name (HelloWorld). - Compile the Program: Open your command prompt/terminal, navigate to your
JavaProjectsdirectory, and compile the code:
bash

cd <path_to_JavaProjects_directory>

javac HelloWorld.java
If successful, this command will create aHelloWorld.classfile in the same directory. If you get errors, double-check your code for typos and confirmjavacis working. - Run the Program: Now, run the compiled program:
bash

java HelloWorld
You should see the output:
Hello, World from JDK!
This successfully confirms your JDK is fully operational and ready for development.
Troubleshooting Common Installation Issues
Despite careful steps, you might encounter issues. Here are common problems and their solutions:
'java' is not recognized as an internal or external command(orcommand not found): This almost always indicates an incorrect or missingPATHenvironment variable setup. Revisit the “Configuring Environment Variables” section, especially step 3 for Windows and step 4 for macOS/Linux. EnsureJAVA_HOME/binis correctly added to yourPATH. Remember to open a new terminal or command prompt after making changes.Error: Could not find or load main class HelloWorld: This typically means thejavacommand cannot find yourHelloWorld.classfile.- Ensure you are in the correct directory when running
java HelloWorld. - Make sure you compiled the
.javafile successfully (i.e.,HelloWorld.classexists). - The class name in your
.javafile must exactly match the filename.
- Ensure you are in the correct directory when running
- Multiple Java Versions: If you have multiple JDKs installed, your system might be using an older or incorrect version.
- On Windows, ensure the correct
JAVA_HOMEis set and that%JAVA_HOME%binappears before any other Java paths in yourPATHvariable. - On Linux/macOS, check your shell configuration file (
.bashrc,.zshrc) to ensureJAVA_HOMEandPATHpoint to your desired JDK. You can also usewhich javaandwhich javacto see which executables are being picked up. On Linux,update-alternativescan help manage default Java versions.
- On Windows, ensure the correct
- Installer Issues: If the installer fails, try downloading it again in case of corruption. For Linux, ensure you have execute permissions on the
.shor.tar.gzfiles if installing manually. - Security Warnings: Your OS or antivirus might flag the installer. Always download JDK from official sources to minimize risks.
For persistent issues, search online forums (Stack Overflow is excellent), provide detailed error messages, and specify your operating system and JDK version. The Java community is vast and helpful.
The successful installation of JDK Java marks your official entry into the world of Java development. With your environment ready, you can now explore the vast possibilities Java offers, from building sophisticated enterprise applications to developing interactive Android apps. The journey has just begun, and a properly configured JDK is your first, most essential step towards mastering this powerful and versatile programming language.
aViewFromTheCave is a participant in the Amazon Services LLC Associates Program, an affiliate advertising program designed to provide a means for sites to earn advertising fees by advertising and linking to Amazon.com. Amazon, the Amazon logo, AmazonSupply, and the AmazonSupply logo are trademarks of Amazon.com, Inc. or its affiliates. As an Amazon Associate we earn affiliate commissions from qualifying purchases.