In the ever-evolving landscape of digital security, having the right tools at your disposal is paramount. For professionals and enthusiasts alike, Kali Linux stands as an undisputed champion – a robust, Debian-derived operating system packed with an arsenal of penetration testing, ethical hacking, and digital forensics tools. Whether you’re a cybersecurity student looking to hone your skills, a seasoned penetration tester, or simply curious about the intricacies of network security, installing Kali Linux is the foundational step towards unlocking a world of capabilities.
This comprehensive guide will walk you through the entire process, from understanding what Kali Linux is and why it’s so vital, to preparing your system, choosing the right installation method, and finally, getting your new cybersecurity powerhouse up and running. We’ll delve into the various approaches, ensuring you can select the one that best fits your needs, and provide clear, step-by-step instructions to make the installation as smooth as possible. Prepare to transform your machine into a formidable cybersecurity workstation, ready to tackle any digital challenge.
Understanding Kali Linux: Why It’s Indispensable
Before we dive into the technicalities of installation, it’s crucial to grasp what Kali Linux represents and why it has become the de facto standard in the cybersecurity community. Its reputation isn’t just hype; it’s built on a foundation of meticulously curated tools and a philosophy geared towards security professionals.
What is Kali Linux?
At its core, Kali Linux is an open-source, Debian-based Linux distribution specifically designed for advanced penetration testing and security auditing. Developed and maintained by Offensive Security, it’s a specialized operating system pre-loaded with hundreds of tools tailored for various information security tasks, including penetration testing, forensics, reverse engineering, security research, and vulnerability assessment. Unlike general-purpose operating systems, Kali Linux is built with a single, clear objective: to provide a powerful and versatile platform for cybersecurity operations. Its minimalist design, combined with its comprehensive toolkit, ensures that system resources are dedicated to the tasks at hand, making it incredibly efficient for demanding security work.
Key Features and Use Cases
The power of Kali Linux lies in its extensive collection of pre-installed software. From network analysis tools like Wireshark and Nmap to web application vulnerability scanners such as Burp Suite and OWASP ZAP, and password cracking utilities like John the Ripper and Aircrack-ng, Kali covers virtually every aspect of penetration testing. It also includes tools for exploitation (Metasploit Framework), wireless attacks, digital forensics, and social engineering.
Key Features include:
- Hundreds of Tools: A vast and ever-growing repository of security tools, regularly updated and categorized for easy access.
- Custom Kernel: Patched for injection, essential for wireless penetration testing.
- Fully Customizable: Despite its specialized nature, Kali Linux is highly customizable, allowing users to tailor it to their specific workflows and preferences.
- FHS Compliant: Adheres to the Filesystem Hierarchy Standard, making it easy to navigate and understand.
- Multi-language Support: Ensures accessibility for a global user base.
- ARM Support: Capable of running on a wide range of hardware, including Raspberry Pi and other ARM-based devices, making it incredibly versatile for mobile and embedded system security.
Use Cases span across multiple domains of cybersecurity:
- Penetration Testing: Simulating cyberattacks to identify vulnerabilities in systems, networks, and applications.
- Vulnerability Assessment: Identifying, quantifying, and prioritizing vulnerabilities in IT systems.
- Digital Forensics: Recovering and investigating material found in digital devices, often in relation to computer crime.
- Security Research: Developing new exploits, tools, and methodologies to improve digital security.
- Education: Serving as a crucial learning platform for aspiring cybersecurity professionals.
Understanding these aspects highlights why Kali Linux is not just another operating system, but a critical asset in the modern digital security toolkit, indispensable for anyone serious about protecting and testing digital assets.
Preparing for Installation: Essential Prerequisites
Before you can embark on your Kali Linux journey, a little preparation goes a long way. Ensuring you have the necessary hardware, software, and information beforehand will prevent common hiccups and make the installation process much smoother.
Hardware Requirements
While Kali Linux is relatively light on resources, optimal performance, especially when running resource-intensive security tools or multiple virtual machines, requires a decent setup. Here’s a general guideline:
- Minimum:
- RAM: 2GB (for a smooth experience, 4GB is recommended)
- Disk Space: 20GB (for basic installation)
- CPU: Single core, 2GHz processor
- Recommended:
- RAM: 8GB or more
- Disk Space: 50GB or more (especially if you plan to save large amounts of data or use many tools)
- CPU: Dual-core or quad-core processor
For installation on a virtual machine, these requirements apply to the resources you allocate to the virtual machine itself. Also, ensure your system BIOS/UEFI settings allow for booting from USB drives and, if using a virtual machine, that virtualization technology (like Intel VT-x or AMD-V) is enabled.
Obtaining the Kali Linux ISO
The first crucial step is downloading the official Kali Linux ISO image. It’s imperative to always download from the official source to ensure authenticity and avoid compromised images.
- Visit the Official Website: Go to
www.kali.org/downloads. - Choose Your Image: You’ll find several images available.
- Kali Linux 64-Bit Installer: This is the most common choice for modern PCs and virtual machines.
- Kali Linux 32-Bit Installer: For older systems.
- Kali Linux ARM Images: For devices like Raspberry Pi.
- Virtual Machine Images: Pre-built images for VMware or VirtualBox are also available and can simplify the setup if you exclusively plan to run Kali in a VM.
- Download: Click on the appropriate download link. You can choose a direct download or a torrent download. Torrent is often faster and more reliable, especially for large files.
- Verify Integrity (Crucial): After downloading, always verify the SHA256 checksum of the ISO image against the one provided on the Kali Linux download page. This step ensures that your downloaded file is not corrupted and has not been tampered with. Tools like
certutilon Windows,shasumon macOS/Linux, or dedicated checksum verifiers can be used.
Creating a Bootable USB Drive
Once you have the Kali Linux ISO, you’ll need to create a bootable USB drive (or DVD, though USB is far more common) to install the operating system. You’ll need a USB drive with at least 8GB of space.
Several tools can help you create a bootable USB:
- Rufus (Windows): A popular and highly reliable tool.
- Download Rufus from its official website.
- Insert your USB drive.
- Open Rufus, select your USB drive under “Device.”
- Click “SELECT” and browse to your downloaded Kali Linux ISO image.
- Leave other settings as default (Partition scheme, Target system, File system).
- Click “START” and confirm any warnings.
- Etcher (Windows, macOS, Linux): A user-friendly, cross-platform tool.
- Download Etcher from its official website (
www.balena.io/etcher). - Open Etcher.
- Click “Flash from file” and select your Kali Linux ISO.
- Click “Select target” and choose your USB drive.
- Click “Flash!” and wait for the process to complete.
- Download Etcher from its official website (
- dd (Linux/macOS): For command-line enthusiasts.
- Identify your USB drive’s device name (e.g.,
/dev/sdb,/dev/disk2) usinglsblkordiskutil list. Be extremely careful, as using the wrong device name can erase your primary drive. - Unmount the USB drive:
sudo umount /dev/sdX(replacesdXwith your device). - Execute the
ddcommand:sudo dd if=/path/to/kali.iso of=/dev/sdX bs=4M status=progress(replace/path/to/kali.isoand/dev/sdX). This command can take a while.
- Identify your USB drive’s device name (e.g.,
Once your bootable USB is ready, you’re set for the next big step: choosing and executing your installation method.
Choosing Your Installation Method
Kali Linux offers several installation avenues, each with its own advantages and disadvantages. Your choice will depend on your specific needs, comfort level with Linux, and the hardware you plan to use.
Bare Metal Installation: The Dedicated Approach
Installing Kali Linux “bare metal” means it’s the sole operating system on your computer, directly interacting with the hardware. This method provides the highest performance and full access to all hardware features without the overhead of virtualization.
- Pros: Maximum performance, direct hardware access (e.g., for specialized wireless adapters), no virtualization overhead.
- Cons: Replaces your existing OS (unless dual-booting), can be more complex for beginners, requires a dedicated machine or a partition.
- Best For: Experienced users, dedicated cybersecurity workstations, scenarios where raw performance and full hardware control are critical.
Virtual Machine Installation: Flexibility and Safety
Installing Kali Linux as a virtual machine (VM) within a hypervisor like VirtualBox or VMware Workstation/Player is arguably the most popular and recommended method for beginners. The VM runs as a guest operating system on top of your existing host OS (Windows, macOS, Linux).
- Pros: Safe (doesn’t modify your host OS), easy to snapshot and revert, allows running multiple OSs simultaneously, portable.
- Cons: Performance overhead, limited direct hardware access (e.g., some Wi-Fi adapters), requires adequate host resources.
- Best For: Beginners, those who need to switch between OSs frequently, experimentation, maintaining a clean host system.
Dual Boot Installation: Windows/macOS Alongside Kali
Dual booting allows you to have two operating systems (e.g., Windows and Kali Linux) installed on the same machine, giving you the option to choose which one to boot into at startup.
- Pros: Near bare-metal performance for Kali, retains your primary OS, efficient use of hardware.
- Cons: Risk of data loss if not done carefully (especially partitioning), can be complex to set up, requires dedicated disk space.
- Best For: Users who need both their primary OS and full Kali performance, comfortable with disk partitioning.
WSL (Windows Subsystem for Linux) Installation: A Lighter Alternative
For Windows users, WSL allows you to run a Linux environment directly within Windows without the need for a virtual machine or dual boot. Kali Linux is available as a distribution for WSL.
- Pros: Highly integrated with Windows, no separate boot, easy to install, lightweight.
- Cons: Not a full Kali Linux installation (no GUI by default, limited hardware access, not ideal for all pen-testing tools), performance limitations compared to bare metal or VMs.
- Best For: Developers, those who need command-line Linux tools, quick scripting, light security tasks, users who primarily work in Windows but need occasional Linux functionality.
For the purpose of this guide, we will focus on the Virtual Machine Installation using VirtualBox, as it offers the best balance of safety, flexibility, and ease of use for most users.
Step-by-Step Guide: Installing Kali Linux on a Virtual Machine (VirtualBox)
This section will walk you through the process of installing Kali Linux inside Oracle VirtualBox. Ensure you have VirtualBox installed on your host operating system and that you’ve downloaded the Kali Linux ISO.
Setting Up Your Virtual Machine
- Open VirtualBox: Launch Oracle VM VirtualBox Manager.
- Create a New VM: Click the “New” button (or Ctrl+N).
- Name: Give your VM a descriptive name, e.g., “Kali Linux 2023.”
- Machine Folder: Choose a location on your hard drive to store the VM files.
- Type: Select “Linux.”
- Version: Select “Debian (64-bit)” (Kali is Debian-based).
- Memory Size: Allocate at least 2048 MB (2 GB) RAM. 4096 MB (4 GB) or more is recommended for better performance.
- Hard Disk: Select “Create a virtual hard disk now” and click “Create.”
- Hard disk file type: Choose “VDI (VirtualBox Disk Image).”
- Storage on physical hard disk: Select “Dynamically allocated.” This means the virtual disk will only grow as you fill it, rather than taking up all allocated space immediately.
- File location and size: Specify a location (usually defaults to the machine folder) and allocate at least 20 GB. 50 GB is recommended. Click “Create.”
- Configure VM Settings: Select your newly created VM and click “Settings” (or Ctrl+S).
- System > Motherboard: Ensure “Enable I/O APIC” is checked.
- System > Processor: Allocate at least 2 CPU cores for better performance. Enable “PAE/NX” if available.
- Display > Screen: Increase “Video Memory” to at least 64 MB, preferably 128 MB or more. Enable “3D Acceleration” if your host system supports it.
- Storage > Controller: IDE > Empty: Click on the “Empty” CD icon. On the right-hand side, click the smaller CD icon and choose “Choose a disk file…” Navigate to your downloaded Kali Linux ISO and select it. This mounts the ISO as a virtual CD/DVD drive for the VM to boot from.
- Network > Adapter 1: Set “Attached to” to “NAT” (default, allows internet access from within the VM). If you want your Kali VM to be accessible from your host machine or other VMs, consider “Bridged Adapter.”
- Click “OK” to save the settings.
Booting from the Kali ISO
- Start the VM: Select your Kali Linux VM in VirtualBox Manager and click the “Start” button (the green arrow).
- Boot Menu: The VM will boot up. You should see the Kali Linux boot menu.
- Choose “Graphical install” for a user-friendly, mouse-driven installation.
- Alternatively, “Install” for a text-based installation (useful if graphical install fails).
Navigating the Installation Wizard
Follow the on-screen prompts carefully:
- Language: Select your preferred language.
- Location: Choose your geographical location.
- Keyboard Layout: Select your keyboard layout.
- Network Configuration:
- Hostname: Enter a hostname for your Kali machine (e.g.,
kali-box). - Domain Name: You can leave this blank for a home setup.
- Hostname: Enter a hostname for your Kali machine (e.g.,
- User Setup:
- Full name for the new user: Enter your full name.
- Username for your account: Choose a username (e.g.,
kaliuser). - Choose a password for the new user: Set a strong password and confirm it. Remember this password! Kali Linux no longer uses the default ‘root/toor’ login directly by default for the primary user, promoting better security practices.
- Clock Configuration: Select your time zone.
Partitioning Disks and User Setup
This is a critical step, but straightforward for a VM installation.
- Partitioning Method:
- Choose “Guided – Use the entire disk.” This is the easiest and recommended option for virtual machines, as the virtual disk is dedicated to Kali.
- Select the virtual disk presented (it will likely be something like
SCSI1 (0,0,0) (sdb) - 21.5 GB VBOX HARDDISK).
- Partitioning Scheme:
- Select “All files in one partition (recommended for new users).” This simplifies management.
- Review the changes and select “Finish partitioning and write changes to disk.”
- Confirm by selecting “Yes” when asked “Write the changes to disks?”
Completing the Installation
- Install the GRUB Boot Loader: Select “Yes” when prompted to install the GRUB boot loader to the master boot record.
- Choose your virtual hard disk (e.g.,
/dev/sda). This ensures your VM can boot Kali.
- Choose your virtual hard disk (e.g.,
- Installation Completion: The installation will continue, copying files and configuring the system. This can take some time.
- Reboot: Once the installation is complete, you’ll be prompted to reboot. Click “Continue.”
- The VM will restart. Crucially, ensure you unmount the Kali Linux ISO from the virtual CD drive. In VirtualBox, go to “Devices” -> “Optical Drives” and uncheck the Kali ISO. If you don’t, the VM might try to boot from the ISO again.
- Login: After reboot, you should be presented with the Kali Linux login screen. Enter the username and password you created during the installation.
Congratulations! You have successfully installed Kali Linux on a Virtual Machine.
Post-Installation Essentials: Securing and Customizing Your New System
Installing Kali Linux is just the beginning. To ensure your system is secure, up-to-date, and optimized for your specific needs, there are several crucial post-installation steps you should always perform.
Initial Updates and Upgrades
Keeping your system and its tools current is paramount in cybersecurity. Vulnerabilities are discovered daily, and outdated software can quickly become a liability.
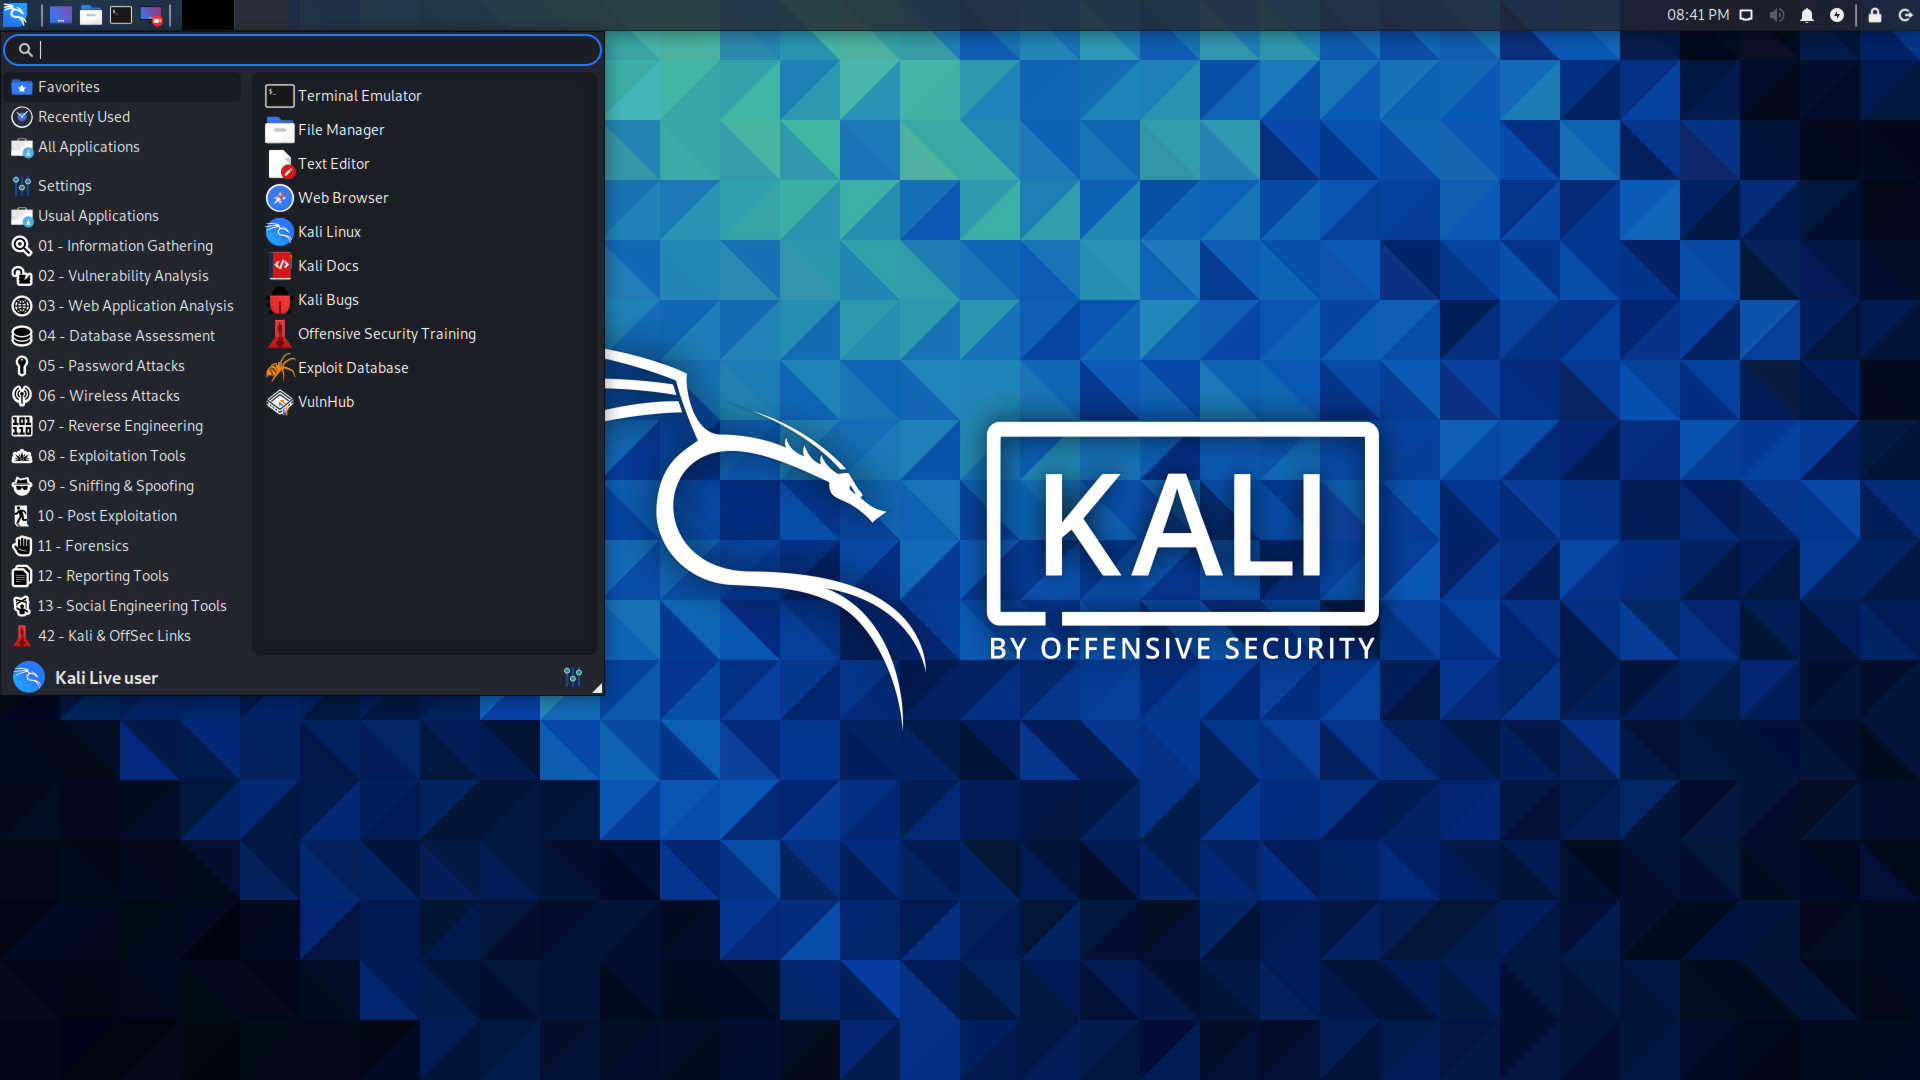
- Open a Terminal: Once logged into Kali, open a terminal window (usually an icon in the taskbar or via the applications menu).
- Update Package Lists: This fetches the latest information about available packages from the Kali repositories.
bash

sudo apt update
You’ll be prompted for your user password.sudostands for “superuser do,” temporarily granting administrative privileges. - Upgrade Installed Packages: This upgrades all installed packages to their latest versions.
bash

sudo apt full-upgrade -y
The-yflag automatically confirms prompts, making the process unattended. This command can take a significant amount of time, depending on how many updates are available. It’s recommended to run this frequently. - Clean Up: Remove unnecessary packages and clear the local repository cache.
bash

sudo apt autoremove -y

sudo apt clean
- Reboot (if necessary): If the kernel or core system components were updated, it’s wise to reboot your system for the changes to take full effect.
bash

sudo reboot
Installing Guest Additions (for VMs)
If you installed Kali Linux in a VirtualBox VM, installing VirtualBox Guest Additions is highly recommended. These provide better integration between your host and guest OS, enabling features like:
- Shared Clipboard: Copy and paste between host and guest.
- Drag and Drop: Drag files between host and guest.
- Full Screen Mode: Kali automatically adjusts to your monitor’s resolution.
- Better Mouse Pointer Integration: Seamless mouse movement.
- From VirtualBox Menu: With your Kali VM running, go to the VirtualBox menu bar at the top of your host machine’s screen. Select
Devices->Insert Guest Additions CD image.... - Mount the Virtual CD: Open a file manager in Kali. You should see a new CD drive icon (often labeled
VBox_GAs_XXXX). Click on it to mount it. - Open Terminal and Install: Navigate to the mounted directory in your terminal.
bash

cd /media/cdrom0

# or wherever your system mounts the CD. You can check with 'ls /media'
Then, run the installer:
bash

sudo ./VBoxLinuxAdditions.run
If you encounter errors about missing dependencies, install them first:
bash

sudo apt install build-essential dkms linux-headers-$(uname -r)

sudo reboot # Reboot after installing dependencies, then try running VBoxLinuxAdditions.run again.
- Reboot: After successful installation, reboot your Kali VM for the changes to take effect.
Essential Tools and Customization
Kali Linux comes with a plethora of tools, but you might want to add more, remove some, or customize your desktop environment for better productivity.
- Install More Tools: Kali provides “metapackages” that bundle related tools. You can install an entire category of tools (e.g., web application assessment tools) with a single command:
bash

sudo apt install kali-tools-web
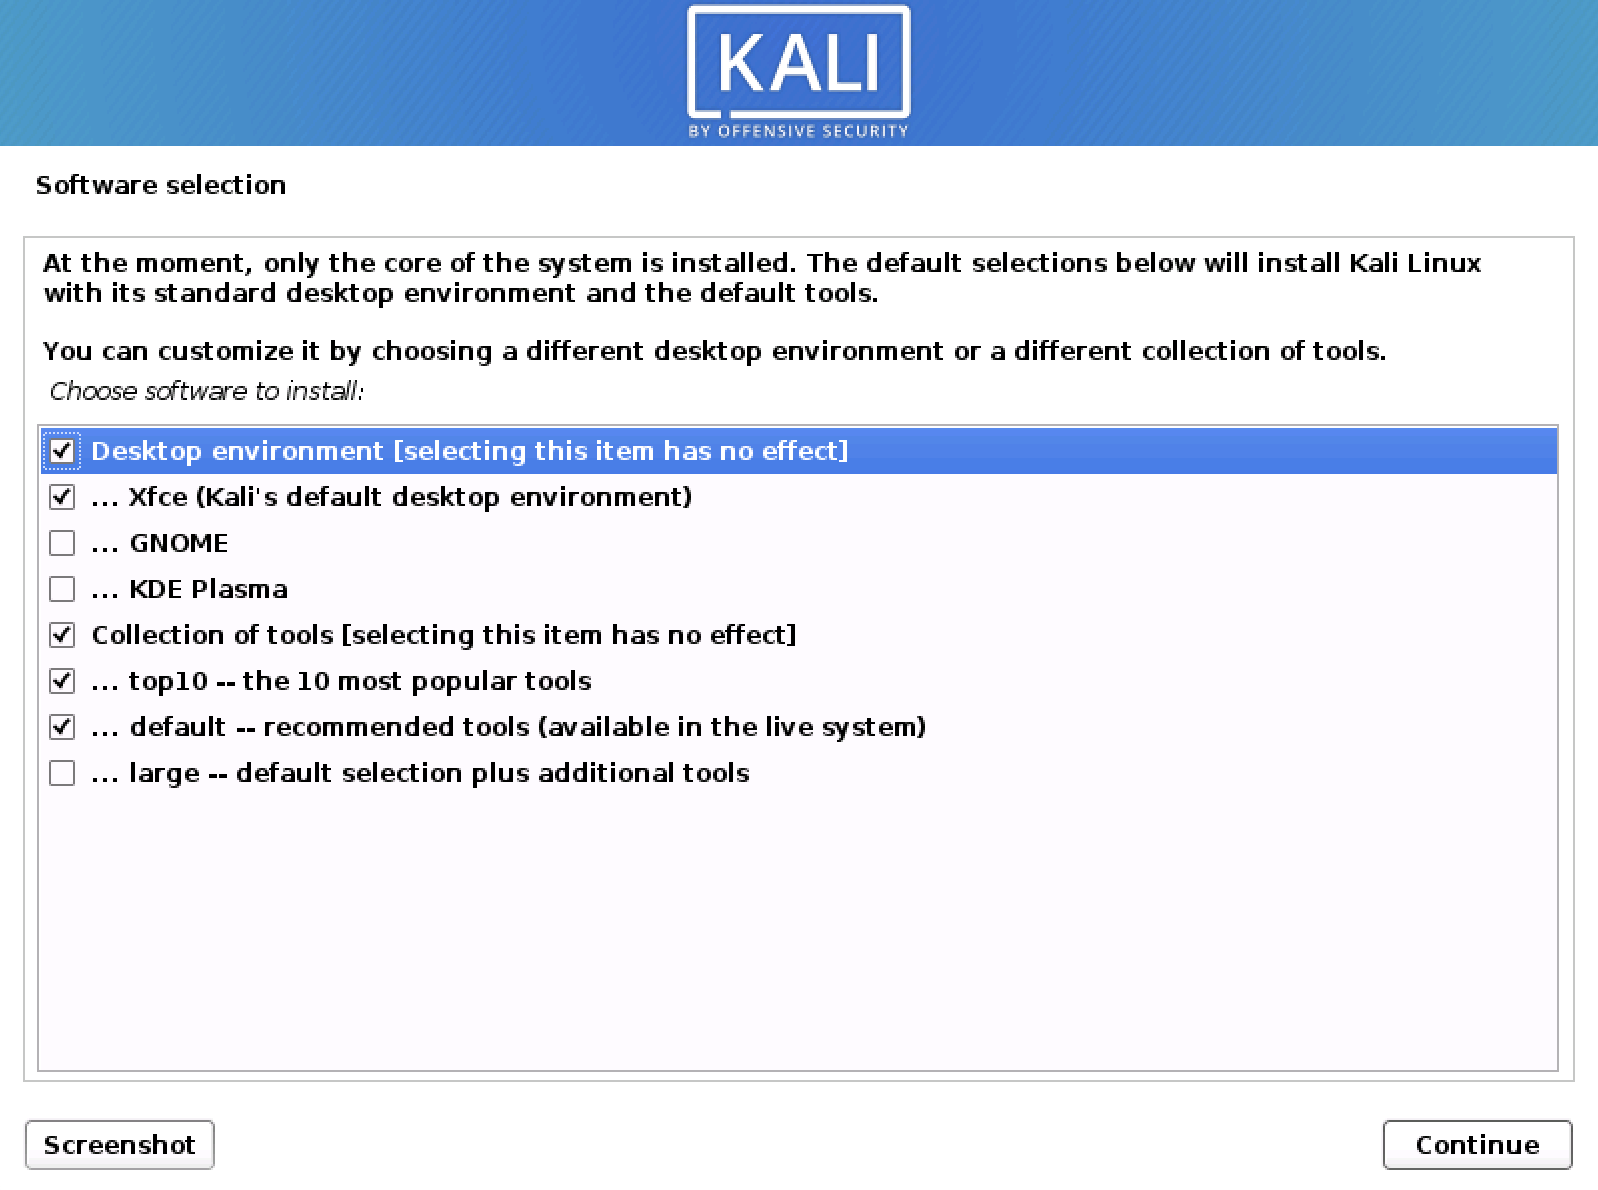
Explore available metapackages usingapt search kali-tools. - Change Desktop Environment: By default, Kali uses XFCE. If you prefer GNOME, KDE Plasma, or other DEs, you can install them:
bash

sudo apt install kali-desktop-gnome # For GNOME

sudo apt install kali-desktop-kde   # For KDE Plasma
You can then choose your preferred desktop environment from the login screen. - Customize Appearance: Kali’s desktop environment (XFCE by default) is highly customizable. You can change themes, icons, fonts, and panel layouts through the
Settings Manager. - Install Additional Software: If you need non-security-related software (e.g., a specific browser, text editor, or development tools), use
sudo apt install [package-name]. - VPN Configuration: For anonymity and secure communication, configuring a VPN client is often a primary concern for cybersecurity professionals.
- Dotfiles Management: For advanced users, managing “dotfiles” (configuration files) with a version control system like Git can streamline setup across multiple Kali installations.
By following these post-installation steps, you ensure your Kali Linux environment is robust, secure, and tailored to maximize your productivity in the demanding world of cybersecurity.
Conclusion and Best Practices
Installing Kali Linux is a pivotal step for anyone venturing into or deepening their expertise in cybersecurity. This guide has provided a thorough walkthrough, from understanding Kali’s significance and preparing your system, to selecting the right installation method, and finally, getting your dedicated cybersecurity environment up and running. Whether you chose a virtual machine for its flexibility or are considering a bare-metal setup for raw power, you now possess the foundational knowledge to deploy this indispensable operating system.
Remember, the installation process is just the beginning. The true power of Kali Linux lies in its extensive suite of tools and your ability to master them. Continual learning, ethical practice, and staying updated with the latest security trends are crucial. Always ensure your Kali installation is patched, and your tools are current, as the threat landscape is constantly evolving.
As you embark on your journey with Kali Linux, always adhere to ethical hacking principles. Use these powerful tools responsibly and legally, respecting privacy and property. Kali Linux is a tool for defense, research, and education, empowering you to identify weaknesses and build stronger digital defenses. Welcome to the world of advanced cybersecurity – your Kali Linux workstation is now ready to assist you in securing the digital frontier.
aViewFromTheCave is a participant in the Amazon Services LLC Associates Program, an affiliate advertising program designed to provide a means for sites to earn advertising fees by advertising and linking to Amazon.com. Amazon, the Amazon logo, AmazonSupply, and the AmazonSupply logo are trademarks of Amazon.com, Inc. or its affiliates. As an Amazon Associate we earn affiliate commissions from qualifying purchases.