In the dynamic world of technology, where every pixel and frame per second counts, the humble graphics driver plays a pivotal, often underestimated, role. Whether you’re a hardcore gamer seeking the ultimate immersive experience, a professional video editor rendering complex projects, an architect visualizing intricate designs, or simply a casual user who expects a smooth, responsive computing experience, your graphics driver is the unsung hero powering it all. This guide will demystify the process of installing graphics drivers, ensuring your system operates at its peak, minimizing frustrating glitches, and even unlocking new features and performance enhancements. Understanding this fundamental aspect of tech maintenance is crucial not just for technical proficiency, but also for safeguarding your digital productivity and, in some cases, your online income streams.
Why Your Graphics Driver Matters: Unlocking Peak Performance and Stability
At its core, a graphics driver is a piece of software that allows your operating system (Windows, macOS, Linux) to communicate effectively with your graphics processing unit (GPU). Without the correct driver, your GPU is essentially a powerful but unintelligent piece of hardware, unable to fully leverage its capabilities. The right driver acts as the interpreter, translating commands from your applications into instructions your graphics card can understand and execute.
The Role of Graphics Drivers in Modern Computing
Think of your graphics driver as the engine’s firmware in a high-performance vehicle. While the hardware (the GPU itself) provides the raw power, the driver ensures that power is delivered efficiently, intelligently, and in sync with the demands of the operating system and applications. Modern drivers aren’t just about basic functionality; they often include optimizations for specific games, AI-driven rendering enhancements, improved video playback capabilities, and crucial security patches. For content creators, designers, or anyone involved in visually intensive tasks, an updated driver can dramatically cut down rendering times, prevent software crashes, and provide access to features that enhance productivity and creative output. This directly translates to better brand presentation for your work and potentially higher earnings if your income depends on high-quality visual content or smooth live streams.
Signs You Need a Driver Update
Your computer often provides subtle (and sometimes not-so-subtle) cues when its graphics drivers are outdated or corrupt. Recognizing these symptoms early can save you from potential system instability and lost work.
- Performance Degradation: Games running slower than usual, stuttering, or experiencing significantly lower frame rates, even on previously well-performing titles. Video editing software might lag or crash during playback or export.
- Visual Artifacts: Screen flickering, distorted images, strange lines, or corrupted textures appearing in games or applications.
- System Instability: Frequent crashes to the desktop, blue screen of death (BSOD) errors specifically mentioning graphics-related files (e.g.,
nvlddmkm.sysfor NVIDIA,atikmdag.sysfor AMD), or the entire system freezing. - Resolution and Display Issues: Inability to select native display resolutions, incorrect aspect ratios, or external monitors not being detected.
- Software Incompatibility: Certain games or applications refusing to launch, displaying error messages about missing or outdated graphics capabilities, or failing to utilize advanced features like Ray Tracing or DLSS/FSR.
- Missing Features: If new features advertised for your graphics card (e.g., a new control panel option, a specific video encoding preset) are not appearing.
Ignoring these signs can not only lead to a frustrating user experience but also put undue stress on your hardware, potentially leading to premature component failure. For businesses or individuals relying on stable systems for online income or critical projects, timely driver management is a vital component of digital security and financial prudence.
Essential Preparations Before You Begin
Before diving into the installation process, a few preparatory steps are crucial. These steps ensure you download the correct driver, minimize potential conflicts, and provide a safety net should anything go awry. Taking the time for proper preparation reflects a professional approach to tech maintenance, a core tenet of effective brand management for your digital presence.
Identifying Your Graphics Hardware and Operating System
The first and most critical step is to know what graphics card you have and which operating system you’re running. This information will dictate which driver package you need to download.
- For Windows:
- Graphics Card: Press
Win + R, typedxdiag, and press Enter. In the DirectX Diagnostic Tool, go to the “Display” tab (or “Display 1” and “Display 2” if you have multiple GPUs). You’ll see the “Name” of your graphics card (e.g., NVIDIA GeForce RTX 3080, AMD Radeon RX 6700 XT, Intel Iris Xe Graphics). - Operating System: Press
Win + Ito open Settings, then go to “System” > “About.” You’ll find your “Windows specification,” including “Edition” (e.g., Windows 10 Pro, Windows 11 Home) and “System type” (64-bit operating system).
- Graphics Card: Press
- For macOS:
- Click the Apple menu () in the top-left corner, then select “About This Mac.” You’ll see details about your integrated graphics (e.g., Intel Iris Plus Graphics) or dedicated GPU (e.g., AMD Radeon Pro). macOS drivers are typically updated directly through system updates, simplifying the process.
- For Linux:
- The method varies by distribution, but commands like
lspci -k | grep -EA3 'VGA|3D|Display'in the terminal can often reveal your graphics card. OS version can be found withlsb_release -a.
- The method varies by distribution, but commands like
Sourcing the Right Driver: The Importance of Official Channels
Once you know your hardware, the next step is to acquire the driver. This is where relying on official sources becomes paramount. Downloading drivers from unofficial websites or third-party repositories can expose your system to malware, unstable software, or incorrect drivers that could cause more harm than good. A savvy user understands the value of official channels, much like a strong brand values authenticity and direct communication.
- NVIDIA: Visit the official NVIDIA website (www.nvidia.com/drivers). Use their driver detection tool or manually select your product type, series, product, and operating system.
- AMD: Visit the official AMD website (www.amd.com/en/support). Utilize their auto-detect tool or manually select your product category, family, and model.
- Intel: Visit the official Intel website (www.www.intel.com/content/www/us/en/support/detect.html). Use their Driver & Support Assistant or search for your specific processor/graphics model.
- Laptop/OEM Manufacturers: If you have a laptop (e.g., Dell, HP, Lenovo, Asus), sometimes the OEM (Original Equipment Manufacturer) provides customized drivers specifically optimized for your laptop’s unique hardware configuration. While general drivers from NVIDIA/AMD/Intel often work, OEM drivers can sometimes offer better stability or specific features. Check your laptop manufacturer’s support website first, entering your specific model number.
- Windows Update: While Windows Update does provide graphics drivers, they are often generic, older versions, or basic drivers that enable functionality but don’t offer the latest performance optimizations or features. It’s generally not the preferred method for getting the best driver for a dedicated GPU.
Always download the latest stable version available. Beta drivers might offer cutting-edge features but can introduce instability.
Backing Up and Pre-Uninstallation Steps
While rare, a driver installation can sometimes go wrong, leading to system issues. Performing a system restore point or backing up critical data is a smart preventative measure, especially for those whose work directly impacts their online income or brand reputation.
- Create a System Restore Point (Windows): Search for “Create a restore point” in the Windows search bar. In the System Properties window, click “Create,” give it a descriptive name (e.g., “Before Graphics Driver Update”), and click “Create.” This allows you to revert your system to a previous working state if problems arise.
- Backup Critical Data: While less directly impacted by driver issues, it’s always good practice to ensure important files (documents, projects, photos) are backed up to a cloud service or external drive.
- Download Display Driver Uninstaller (DDU): For a truly clean installation, especially when switching between GPU brands (e.g., NVIDIA to AMD) or experiencing persistent driver issues, DDU is an invaluable free utility. Download it from its official source (often Guru3D). This tool removes all traces of previous graphics drivers, preventing conflicts.
Step-by-Step Installation Methods for Graphics Drivers
With preparations complete, you’re ready to install. There are several methods, each with its own level of cleanliness and effectiveness. Understanding these methods empowers you to choose the right approach for your situation.

The Recommended Method: Clean Installation Using DDU
This method is highly recommended for troubleshooting, major driver upgrades, or when switching graphics cards, as it ensures all remnants of old drivers are purged, preventing conflicts and maximizing stability.
- Download New Driver: Obtain the latest graphics driver package from your GPU manufacturer’s official website and save it to a location you can easily find (e.g., your Downloads folder).
- Download DDU: Download the latest version of Display Driver Uninstaller (DDU) from its official source.
- Disconnect from Internet: This prevents Windows Update from automatically installing a generic driver after uninstallation, which can interfere with the clean install.
- Boot into Safe Mode:
- Windows 10/11: Press
Win + Ito open Settings > System > Recovery > Advanced startup > Restart now. After restart, go to Troubleshoot > Advanced options > Startup Settings > Restart. Then, press4orF4to enter Safe Mode.
- Windows 10/11: Press
- Run DDU:
- Extract the DDU archive to a folder.
- Run
Display Driver Uninstaller.exe. - Select “GPU” as the device type and then choose your GPU manufacturer (NVIDIA, AMD, or Intel).
- Click “Clean and restart (highly recommended).” DDU will then meticulously remove all driver components and restart your computer.
- Install New Driver:
- Once your system restarts (in normal mode), run the driver installer you downloaded in Step 1.
- Follow the on-screen prompts. When given the option, always choose “Custom” or “Advanced” installation and tick the box for “Perform a clean installation” (if the driver installer offers it, which NVIDIA and AMD typically do). This performs another layer of cleaning within the installer itself.
- Select only the components you need (e.g., graphics driver, PhysX, HDMI Audio Driver). You might not need GeForce Experience or Adrenalin Software if you prefer not to use them, though they offer useful features.
- Reboot: After the installation is complete, restart your computer again to ensure all changes take effect.
- Reconnect to Internet: You can now safely reconnect to the internet.
Standard Installation via Manufacturer’s Installer
This method is simpler and often sufficient if you’re merely updating an existing driver and haven’t encountered major issues.
- Download New Driver: Obtain the latest graphics driver package from your GPU manufacturer’s official website.
- Run Installer: Double-click the downloaded executable file to launch the installer.
- Follow Prompts:
- Accept the license agreement.
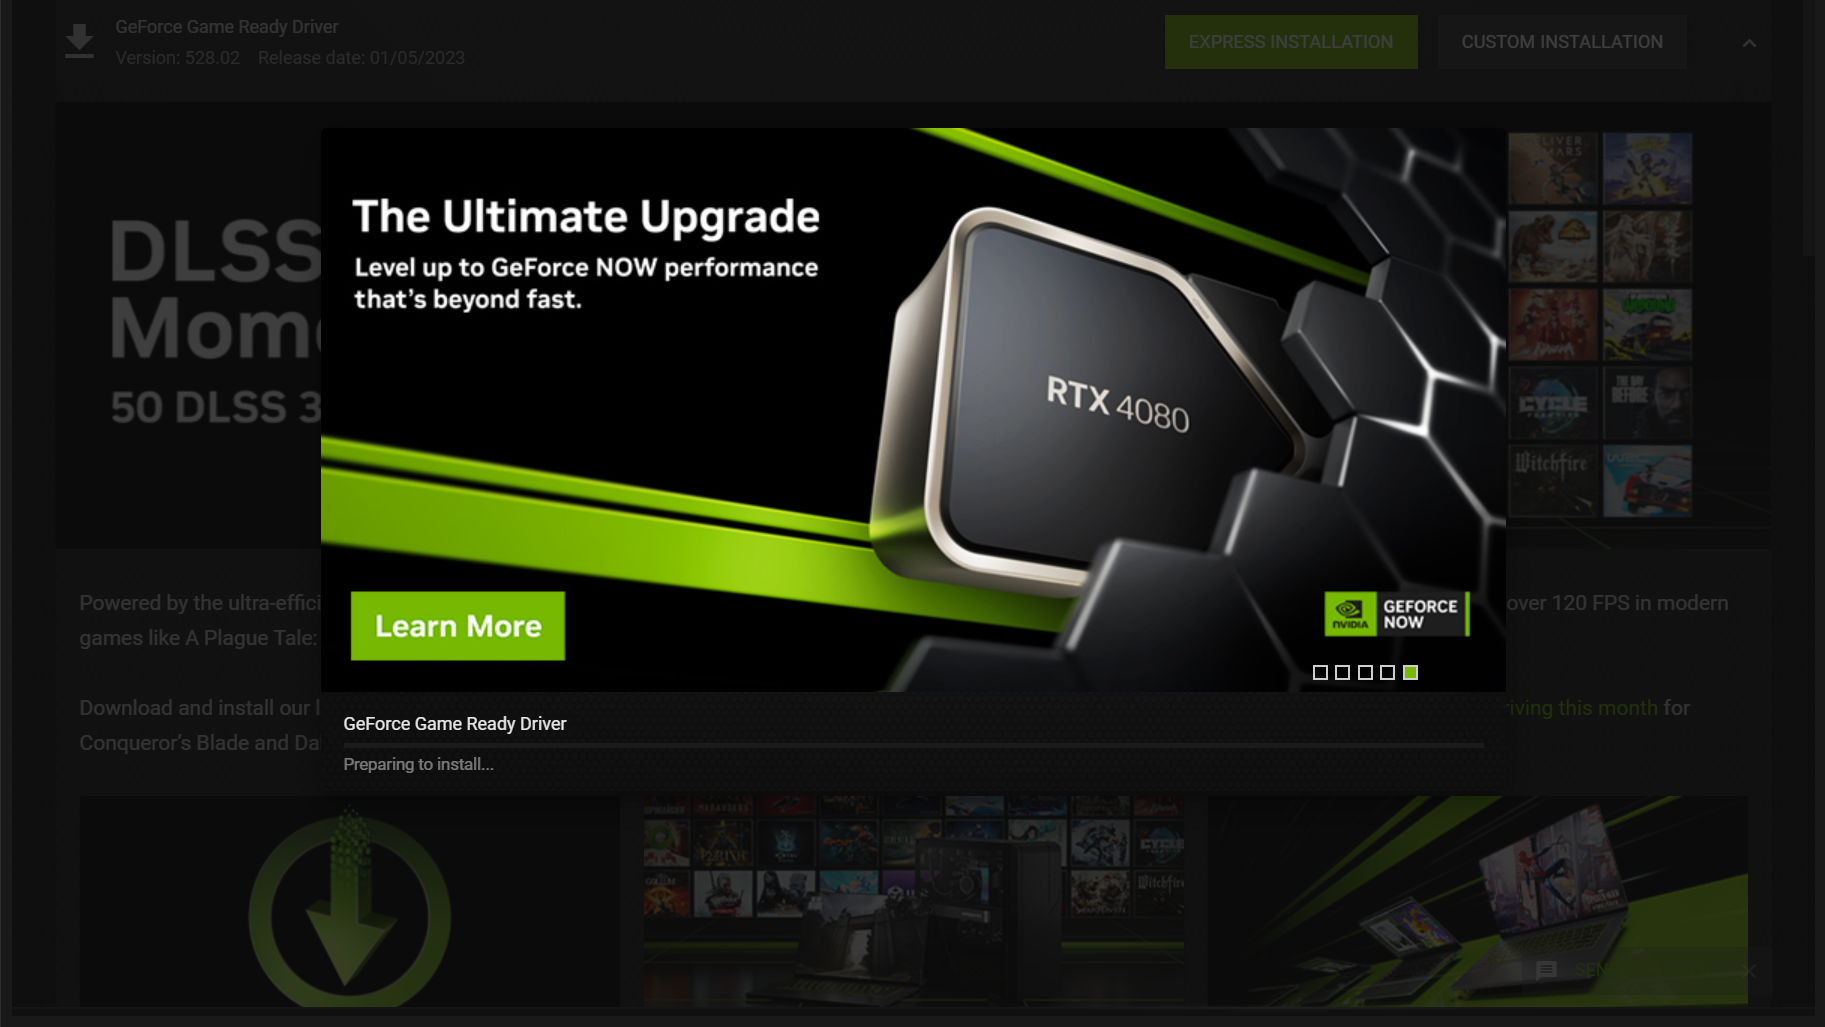
- When given the choice between “Express” (or “Recommended”) and “Custom” (or “Advanced”), it’s generally better to choose “Custom.”
- If you choose “Custom,” ensure the “Perform a clean installation” box is checked. This option will uninstall the old driver before installing the new one, offering a cleaner update than “Express.”
- Select the components you wish to install.
- Proceed with the installation.
- Reboot: Once the installation is finished, restart your computer.
Updating Drivers Through Device Manager (and its Limitations)
The Device Manager is a built-in Windows utility that allows for basic driver management. While it can update drivers, it’s generally not the preferred method for graphics drivers as it may not install the full, optimized package provided by the manufacturer.
- Open Device Manager: Press
Win + Xand select “Device Manager.” - Locate Graphics Card: Expand “Display adapters.” Right-click on your graphics card (e.g., NVIDIA GeForce RTX 3080).
- Update Driver: Select “Update driver.”
- Choose Search Method:
- “Search automatically for updated driver software”: Windows will try to find a driver online or locally. This often finds only generic drivers or outdated versions.
- “Browse my computer for driver software”: This is more effective. Choose “Let me pick from a list of available drivers on my computer,” then click “Have Disk…” and navigate to the folder where you extracted the driver package you downloaded (you might need to extract the manufacturer’s installer first if it’s a single executable).
- Follow Prompts: Complete the installation and restart your computer if prompted.
The Windows Update Approach
Windows Update will occasionally push graphics driver updates. These are usually vetted for stability but are rarely the absolute latest or most performance-oriented drivers.
- Open Settings: Press
Win + I. - Navigate to Windows Update: Go to “Windows Update” (Windows 11) or “Update & Security” > “Windows Update” (Windows 10).
- Check for Updates: Click “Check for updates.”
- Optional Updates: If a graphics driver is available, it might appear under “Optional updates” or “View optional updates.” You can choose to install it from there.
This method is generally suitable for integrated graphics or basic systems where cutting-edge performance isn’t a priority. For dedicated gaming or professional GPUs, manual installation from the manufacturer’s website is always superior.
Post-Installation Verification and Driver Maintenance
Installing the driver is just one part of the journey. Verifying its success and establishing a routine for ongoing maintenance ensures your system remains optimized, productive, and reliable.
Confirming a Successful Installation
After restarting your computer, it’s wise to confirm that the new drivers have been installed correctly.
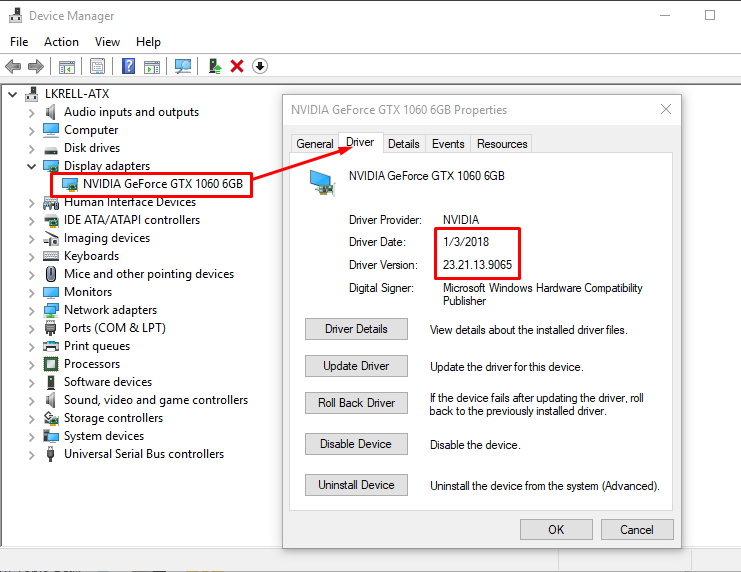
- Device Manager: Open Device Manager (
Win + X> Device Manager). Expand “Display adapters.” Your graphics card should be listed without any yellow exclamation marks or red X icons. Double-click on it, go to the “Driver” tab, and verify that the “Driver Version” and “Driver Date” correspond to the newly installed package. - GPU Manufacturer Control Panel:
- NVIDIA: Right-click on the desktop and select “NVIDIA Control Panel.” The version number should be displayed within the control panel.
- AMD: Right-click on the desktop and select “AMD Software Adrenalin Edition.” The version details are usually found in the “Settings” or “System” tab.
- Intel: Search for “Intel Graphics Command Center” or similar.
- These control panels not only confirm the driver version but also allow you to configure various display and performance settings, crucial for fine-tuning your system for specific tasks, be it gaming or professional productivity.
- Test Applications/Games: Launch a few graphically intensive applications or games that previously showed issues. Observe if performance has improved, artifacts are gone, and stability is restored.
Ongoing Driver Management and Best Practices
Maintaining your graphics drivers is not a one-time task but an ongoing process. Establishing good habits can prevent future headaches and ensure long-term system health.
- Regular Checks: Periodically check your GPU manufacturer’s website for new driver releases. For most users, checking every 1-3 months or when a new major game/application is released is sufficient. Gamers and professionals might check more frequently.
- Read Release Notes: Before updating, always skim the release notes for the new driver. They often highlight new features, performance improvements for specific titles, and bug fixes. Crucially, they might also mention known issues, which could prompt you to wait for a subsequent, more stable release if your current setup is perfectly functional.
- “If it ain’t broke, don’t fix it” (with a caveat): If your system is perfectly stable, and you’re not experiencing any issues or needing new features, there’s no urgent need to update drivers immediately upon release. Sometimes, a new driver can introduce unforeseen bugs. However, don’t let drivers become too outdated, as you’ll miss out on critical security patches and performance improvements that eventually benefit everyone. Balance stability with staying reasonably current.
- Automatic Update Tools: NVIDIA’s GeForce Experience and AMD’s Adrenalin Software offer options to notify you of new drivers or even automatically download and install them. While convenient, always retain the option to perform a “Custom” or “Clean” install rather than a simple “Express” update.
- Backup (Again): Before major driver updates, consider creating another system restore point. It’s a small step that can save significant time and stress.
By diligently managing your graphics drivers, you are not only ensuring the longevity and optimal performance of your hardware but also protecting your digital assets and potential income streams. A smoothly running machine means fewer interruptions, more efficient work, and a more enjoyable overall computing experience—a testament to thoughtful tech management.
Conclusion
Installing and maintaining graphics drivers is a fundamental aspect of owning a modern computer. It’s not just about pushing the boundaries of gaming or accelerating professional workloads; it’s about ensuring the basic stability, security, and efficiency of your system. From understanding why these drivers are so critical to navigating the step-by-step installation process with tools like DDU, this guide has equipped you with the knowledge to take control of your graphics performance.
Remember, consistent attention to driver updates, coupled with smart preparatory steps, can prevent countless hours of troubleshooting, save you from costly repairs, and unlock the full potential of your hardware. Whether you’re enhancing your productivity with AI tools, securing your digital footprint, or building your online brand, a well-maintained graphics driver is an indispensable component of your tech arsenal, ensuring a seamless, high-performance digital journey. Embrace these best practices, and enjoy a computing experience that is not only robust and responsive but also future-ready.
aViewFromTheCave is a participant in the Amazon Services LLC Associates Program, an affiliate advertising program designed to provide a means for sites to earn advertising fees by advertising and linking to Amazon.com. Amazon, the Amazon logo, AmazonSupply, and the AmazonSupply logo are trademarks of Amazon.com, Inc. or its affiliates. As an Amazon Associate we earn affiliate commissions from qualifying purchases.