In the ever-evolving landscape of technology, few components offer as significant a performance boost as a Graphics Processing Unit (GPU). Whether you’re a gamer seeking smoother frame rates, a creative professional demanding faster rendering times, or an AI enthusiast looking to accelerate complex computations, a GPU is often the key to unlocking your system’s full potential. However, for many, the idea of installing a new piece of hardware can seem daunting. This comprehensive guide will demystify the process, breaking down each step to ensure a successful and confident GPU installation, ultimately enhancing your computing experience across a range of tech-centric applications.
Understanding Your GPU and Its Role
Before diving into the physical installation, it’s crucial to understand what a GPU is and why it’s so vital. The GPU, often referred to as a graphics card or video card, is a specialized electronic circuit designed to rapidly manipulate and alter memory to accelerate the creation of images in a frame buffer intended for output to a display device. In simpler terms, it handles all the visual processing for your computer. While your CPU (Central Processing Unit) is the brain of your computer, managing general tasks, the GPU is the dedicated artist, responsible for drawing everything you see on your screen.
This specialization makes GPUs incredibly powerful for tasks that involve parallel processing, where many calculations can be performed simultaneously. This is why they are indispensable for:
- Gaming: Delivering higher resolutions, smoother frame rates, and more detailed graphics.
- Video Editing and 3D Rendering: Significantly reducing rendering times for complex projects.
- AI and Machine Learning: Accelerating the training of machine learning models and complex data analysis.
- Scientific Simulations: Performing complex calculations for research and development.
Types of GPUs
There are two primary types of GPUs you’ll encounter:
- Integrated Graphics: These are built directly into your CPU or motherboard. They are suitable for basic computing tasks like web browsing, word processing, and light media consumption. However, they lack the power for demanding applications.
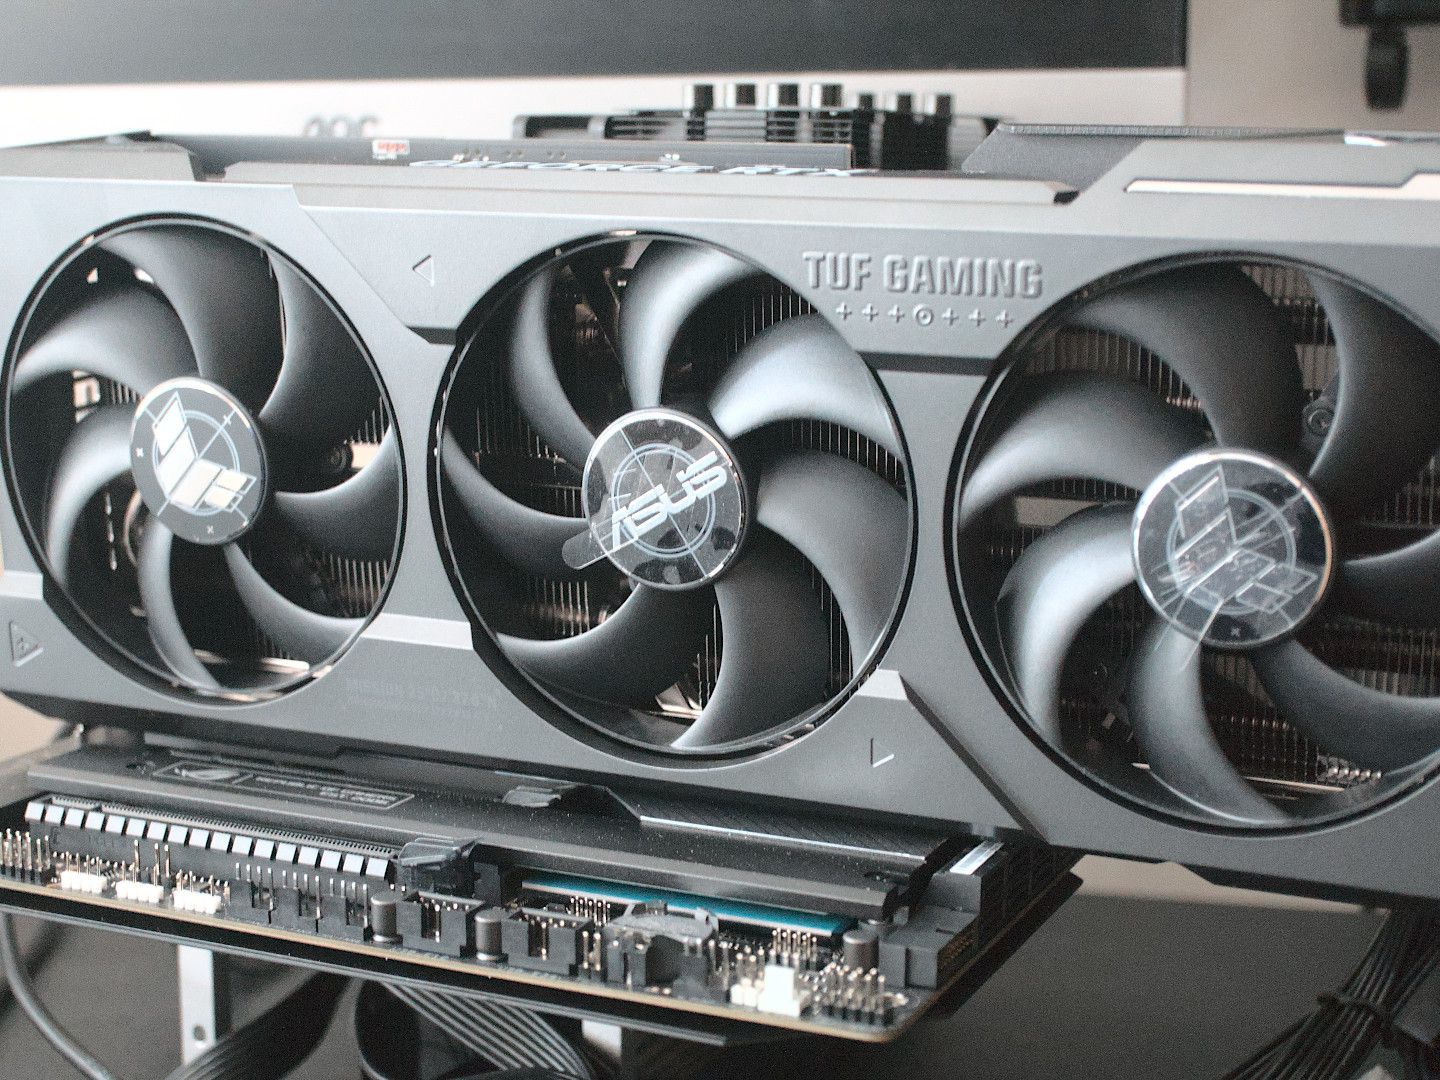
- Discrete (or Dedicated) Graphics: These are separate components that plug into your motherboard via a PCIe slot. They offer significantly more processing power and are what we’ll be focusing on for installation.
When considering a discrete GPU, you’ll typically encounter two major manufacturers: NVIDIA (GeForce series) and AMD (Radeon series). Both offer a wide range of options to suit different budgets and performance needs.
Pre-Installation: Preparation is Key
A smooth installation begins with meticulous preparation. Rushing this phase can lead to compatibility issues, damage to components, or an incomplete setup.
1. Compatibility Checks: Ensuring a Perfect Fit
This is arguably the most critical step. Before purchasing a new GPU, you must ensure it will work with your existing system.
System Requirements
- Motherboard Slot: Most modern GPUs utilize a PCI Express (PCIe) x16 slot. Nearly all motherboards manufactured in the last decade will have at least one of these. Check your motherboard’s specifications to confirm its PCIe version (e.g., PCIe 3.0, 4.0, 5.0). While newer PCIe versions are backward compatible, a newer GPU might not reach its full potential if plugged into an older, slower slot.
- Power Supply Unit (PSU): This is a common bottleneck. High-performance GPUs are power-hungry. Your PSU needs to have sufficient wattage to power the GPU in addition to all your other components (CPU, RAM, storage, etc.). GPU manufacturers usually provide a recommended PSU wattage for their cards. It’s always wise to have a little headroom.
- PSU Connectors: Modern GPUs require specific power connectors, typically 6-pin or 8-pin PCIe power connectors, directly from the PSU. Ensure your PSU has the necessary connectors. If not, you may need to upgrade your PSU.
- Case Size: GPUs can be physically large, especially high-end models. Measure the available space in your computer case, both in length and width, and compare it to the dimensions of the GPU you are considering. Pay attention to the “slot” count (e.g., 2-slot, 3-slot) as well, as this indicates how much physical space it will occupy on your motherboard and case.
- Operating System: Ensure your operating system (Windows, Linux, macOS) is compatible with the GPU and its drivers. Most modern GPUs support recent versions of popular operating systems.
Software and Driver Considerations
- Current Drivers: It’s good practice to uninstall your current graphics drivers before installing a new GPU. This prevents potential conflicts. For NVIDIA, use Display Driver Uninstaller (DDU) in Safe Mode. For AMD, use their recommended uninstall utility.
- Latest Drivers: Once the new GPU is installed, you’ll need to download and install the latest drivers from the manufacturer’s website (NVIDIA or AMD) for optimal performance and stability.
2. Gathering Your Tools
You won’t need a vast array of specialized tools, but a few essentials will make the job easier and safer.
- Phillips Head Screwdriver: This is the most crucial tool for removing and installing components. A magnetic tip can be very helpful for handling small screws.
- Anti-Static Wrist Strap: Essential for preventing electrostatic discharge (ESD), which can permanently damage your computer components.
- Zip Ties or Velcro Straps: For managing cables and keeping your build tidy, improving airflow.
- Flashlight or Headlamp: To illuminate dark corners inside your case.
- A Clean, Well-Lit Workspace: Free from clutter and potential static sources (like carpet).
The Installation Process: Step-by-Step
With your system prepared and tools at the ready, it’s time to get your hands dirty.
1. Power Down and Disconnect

Safety first!
- Shut Down Your Computer: Perform a full shutdown through your operating system.
- Turn Off the PSU Switch: Locate the power switch on the back of your power supply unit and flip it to the “off” position.
- Unplug the Power Cable: Disconnect the main power cord from the back of your computer.
- Ground Yourself: If you have an anti-static wrist strap, attach it to your wrist and then to an unpainted metal part of your computer case. If you don’t have one, periodically touch an unpainted metal part of the case to discharge any static electricity.
2. Open Your Computer Case
Each case is different, but most involve:
- Removing Side Panel(s): Typically, you’ll need to unscrew a few screws on the back of the case to slide or swing open one or both side panels. Consult your case manual if you’re unsure.
3. Locate the PCIe Slot and Remove the Old GPU (If Applicable)
If you’re upgrading, you’ll need to remove your old GPU first.
- Identify the PCIe x16 Slot: This is usually the longest slot on your motherboard, often colored differently, and located near the CPU. It will be aligned with the expansion slots at the back of your case.
- Disconnect Power Cables: If your current GPU is powered by PCIe power cables from the PSU, carefully unlatch the clips and pull them out.
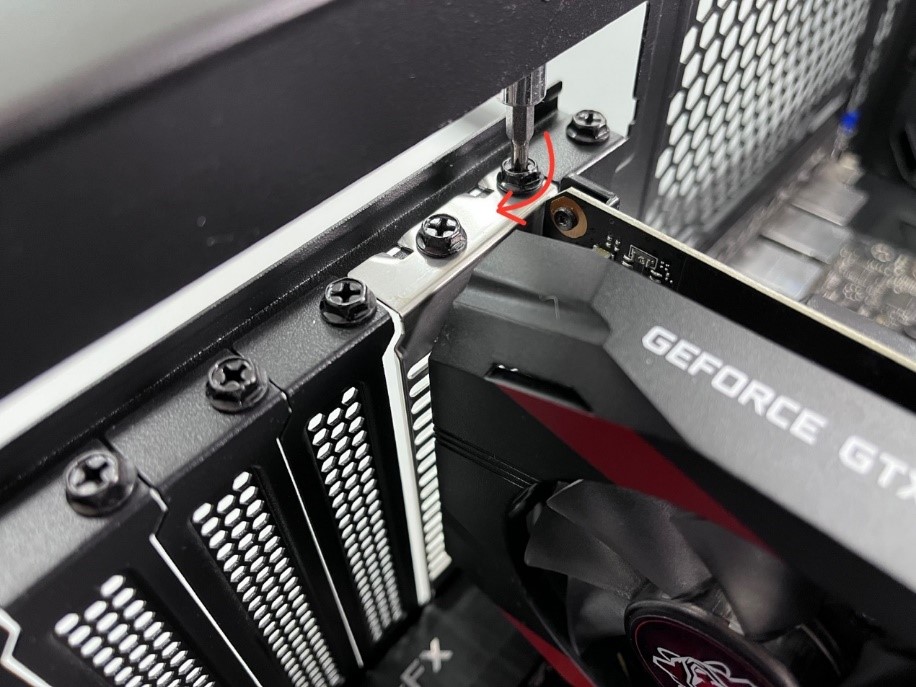
- Unscrew the GPU: The GPU is typically secured to the case by one or two screws at the back, corresponding to the expansion slot covers. Remove these screws.
- Release the PCIe Slot Latch: At the end of the PCIe slot on the motherboard, there’s usually a small plastic latch that locks the GPU in place. Gently press or slide this latch to release it. Be careful not to force it.
- Remove the Old GPU: Gently pull the old GPU straight up and out of the PCIe slot. Avoid wiggling it excessively.
4. Install the New GPU
Now for the main event!
- Remove Expansion Slot Covers: If your new GPU occupies more slots than your old one (or if you’re installing for the first time), you’ll need to remove the corresponding expansion slot covers from the back of your case. These are usually held in by screws or clips.
- Align the GPU: Carefully align the gold contacts on the bottom of your new GPU with the PCIe x16 slot. Ensure it’s oriented correctly.
- Insert the GPU: Gently but firmly press the GPU straight down into the slot. You should feel it seat properly, and the PCIe slot latch should click into place, securing it. If it doesn’t feel like it’s fully seated, don’t force it. Remove it and try again.
- Secure the GPU: Reinstall the screws you removed earlier to secure the GPU’s bracket to the back of the computer case.
- Connect Power Cables: Connect the necessary PCIe power cables from your PSU to the power connectors on your new GPU. Ensure they click into place securely.
- Cable Management: Tidy up the cables using zip ties or Velcro straps. This improves airflow, which is crucial for keeping your GPU cool. Route cables away from fans and ensure they aren’t obstructing anything.
5. Close Up and Power On
The final steps before booting up.
- Replace the Side Panel: Reattach the side panel(s) to your computer case and secure them with their screws.
- Reconnect Peripherals and Power: Plug your power cable back in and reconnect your monitor, keyboard, mouse, and any other peripherals.
- Turn on the PSU Switch: Flip the power switch on the back of your PSU to the “on” position.
- Power On Your Computer: Press the power button on your computer.
Post-Installation: Drivers and Testing
Your GPU is physically installed, but the process isn’t complete until you install the necessary software and verify its functionality.
1. Installing Drivers
This is crucial for your GPU to function correctly and at its full potential.
- Download Latest Drivers: Go to the website of your GPU manufacturer (NVIDIA or AMD) and navigate to their driver download section. Enter your GPU model and operating system to find the correct driver package.
- Run the Installer: Execute the downloaded driver installer. Follow the on-screen prompts. It’s generally recommended to perform a “clean installation” if the option is available, as this removes any residual driver files.
- Restart Your Computer: The installer will likely prompt you to restart your computer. Do so to finalize the driver installation.
2. Verifying Installation and Testing
Once your system has rebooted with the new drivers, it’s time to check if everything is working as expected.
- Check Device Manager (Windows):
- Right-click on the Start button and select “Device Manager.”
- Expand the “Display adapters” section.
- Your newly installed GPU should be listed here without any error symbols (like a yellow exclamation mark).
- Display Resolution:
- Right-click on your desktop and select “Display settings.”
- Ensure that your display resolution is set to your monitor’s native resolution. If not, select it from the dropdown menu.
- Run Benchmarking Software: To truly test the performance of your new GPU, run benchmarking software like FurMark, 3DMark, or Unigine Heaven. These programs push your GPU to its limits, allowing you to check for stability, monitor temperatures, and compare your scores to others.
- Test Your Applications: Launch your favorite games, video editing software, or any other demanding applications you plan to use. Observe performance, check for any visual artifacts or crashes, and monitor your GPU’s temperature using monitoring software like MSI Afterburner or HWMonitor.
Troubleshooting Common Issues
- No Display: Double-check all power connections to the GPU and motherboard. Ensure the GPU is fully seated in the PCIe slot. Verify your monitor is plugged into the new GPU’s ports, not the motherboard’s integrated graphics ports.
- Computer Won’t Boot: This often indicates a power issue. Ensure your PSU is sufficient and all power cables are connected correctly. Reseat the GPU.
- Crashing or Artifacts: This could be due to driver issues, overheating, or a faulty GPU. Reinstall drivers cleanly. Monitor temperatures during demanding tasks. If issues persist, consider testing the GPU in another system if possible.
By following these steps, you can confidently install a new GPU into your system, unlocking a new level of performance for your gaming, creative, or computational endeavors. A powerful GPU is an investment in your digital experience, and with a little preparation and care, you can enjoy its benefits for years to come.
aViewFromTheCave is a participant in the Amazon Services LLC Associates Program, an affiliate advertising program designed to provide a means for sites to earn advertising fees by advertising and linking to Amazon.com. Amazon, the Amazon logo, AmazonSupply, and the AmazonSupply logo are trademarks of Amazon.com, Inc. or its affiliates. As an Amazon Associate we earn affiliate commissions from qualifying purchases.