In the ever-evolving digital landscape, having a reliable and efficient web browser is paramount. For many, Google Chrome stands out as a top choice, lauded for its speed, extensive features, and seamless integration with Google’s ecosystem. If you’ve recently upgraded to Windows 11 or are looking to install Chrome for the first time on this operating system, you’re in the right place. This comprehensive guide will walk you through the entire process, ensuring a smooth and straightforward installation experience.
Getting Started: Your Chrome Installation Journey
Before we dive into the step-by-step instructions, it’s important to understand that installing software on Windows 11 is generally a user-friendly process. Microsoft has continued to refine the user interface and installation pathways, making it accessible even for those who aren’t deeply familiar with technology. The task of installing Chrome is no exception. We’ll cover everything from accessing the installer to confirming a successful setup.
Downloading the Google Chrome Installer
The first and most crucial step in installing Google Chrome is to obtain the official installer file. It’s vital to download software directly from the developer’s website to ensure you’re getting a legitimate and malware-free version.
Step 1: Open Your Current Web Browser
Even if Chrome isn’t installed, you’ll likely have a web browser already available on your Windows 11 system. This is typically Microsoft Edge. Launch Edge by clicking on its icon on your taskbar or by searching for it in the Start menu.
Step 2: Navigate to the Official Google Chrome Download Page
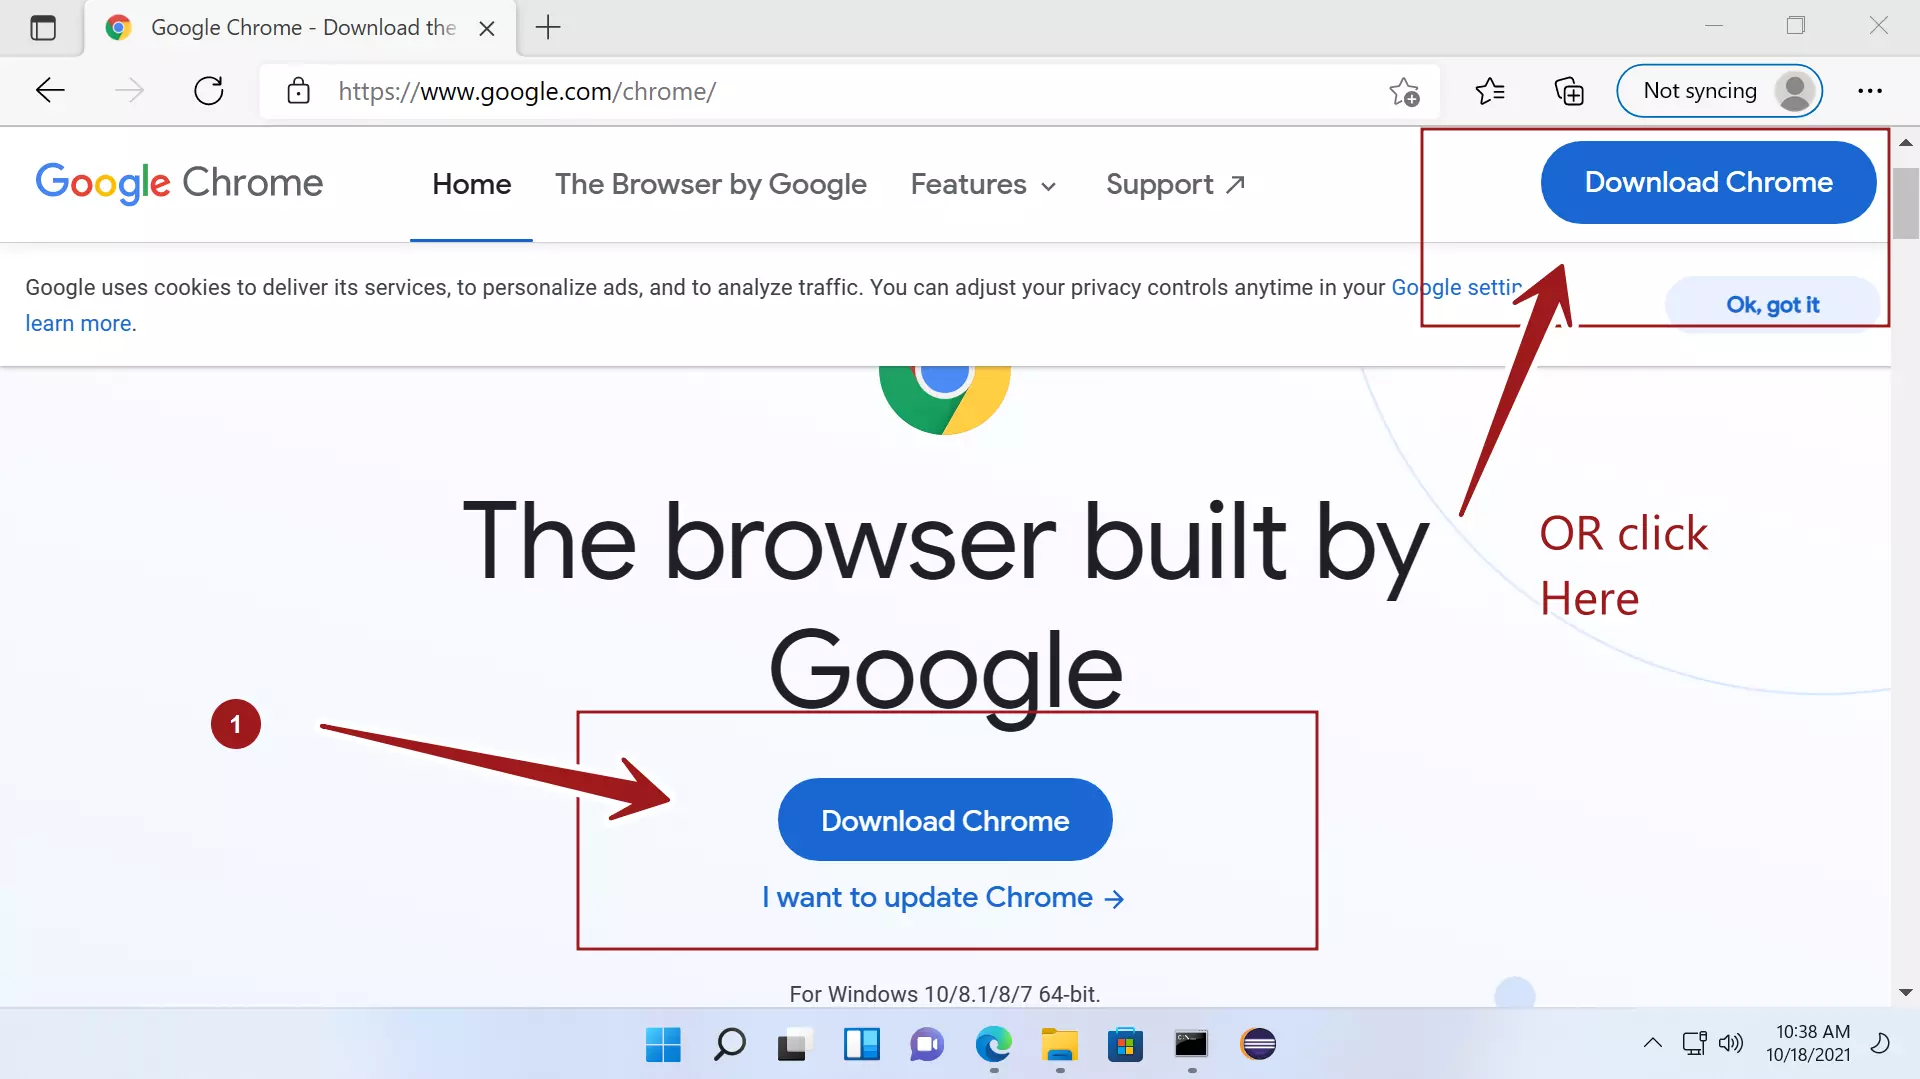
Once your browser is open, use the address bar to navigate to the official Google Chrome download page. You can simply type google.com/chrome into the address bar and press Enter. This will take you directly to the page where you can initiate the download.
Step 3: Initiate the Download
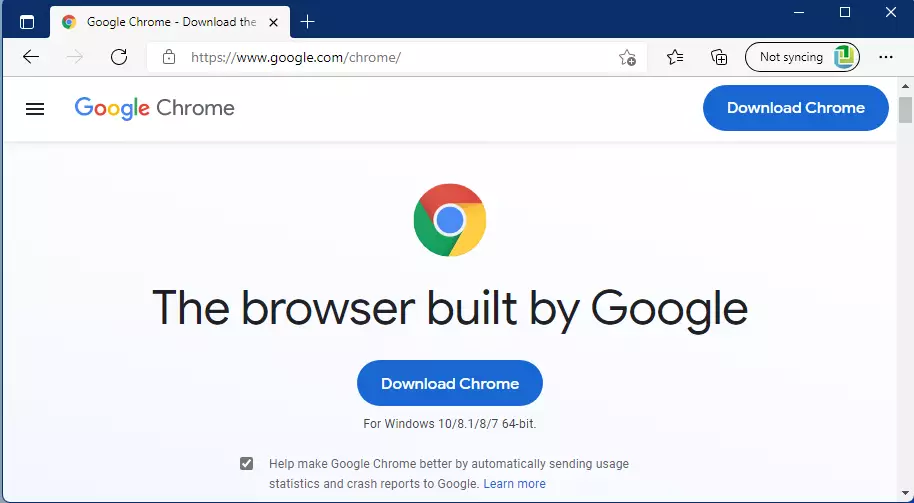
On the Chrome download page, you’ll typically see a prominent “Download Chrome” button. Click on this button. The website should automatically detect that you’re using Windows 11 and offer the correct version of the installer.
Step 4: Accept Terms and Conditions and Download
A pop-up window might appear, asking you to review and accept the Google Chrome Terms of Service. Read through them, and if you agree, click the “Accept and Install” or a similar button. This action will begin the download of the Chrome installer file, usually named something like ChromeSetup.exe.
Step 5: Locate the Downloaded File
Depending on your browser’s settings, the installer file will be saved in your default Downloads folder. You can usually access this folder by pressing Ctrl + J in most browsers or by navigating to it through File Explorer.
Installing Google Chrome: The Step-by-Step Process
With the installer file in hand, the actual installation of Google Chrome on your Windows 11 machine is a swift and automated process. You’ll mostly be watching as the installer does the heavy lifting.
Step 1: Run the Chrome Installer
Locate the ChromeSetup.exe file you downloaded. Double-click on this file to run the installer. You might see a User Account Control (UAC) prompt asking for permission to make changes to your device. Click “Yes” to proceed.
Step 2: The Installation Begins
The Chrome installer will now launch. In most cases, you won’t need to make any specific choices during this phase. The installer will connect to the internet, download the necessary Chrome files, and install them automatically. You’ll see a progress bar indicating the installation status.
Step 3: Chrome Opens Automatically
Once the installation is complete, Google Chrome will typically launch automatically. You’ll be greeted by the Chrome welcome screen, which might offer you the option to sign in with your Google account or start browsing immediately.
Post-Installation: Setting Up and Personalizing Chrome
Congratulations! You’ve successfully installed Google Chrome on your Windows 11 computer. Now, let’s explore some of the initial setup steps and personalization options to make your browsing experience even better.
Initial Chrome Setup and Customization
When Chrome opens for the first time, it often guides you through a brief setup process. This is your opportunity to tailor Chrome to your preferences.
1. Signing In with Your Google Account (Optional but Recommended)
If you have a Google account (e.g., a Gmail address), signing in is highly recommended. This allows you to:
- Sync your data: This includes bookmarks, browsing history, passwords, extensions, and settings across all your devices where you use Chrome. If you switch computers or use Chrome on your phone, your settings will be consistent.
- Access Google services: Seamlessly integrate with other Google services like Google Drive, Google Calendar, and Google Docs.
- Personalize your experience: Receive tailored search results and recommendations.
To sign in, click the profile icon in the top-right corner of the Chrome window and select “Sign in to Chrome.” Enter your Google account credentials.
2. Setting Chrome as Your Default Browser
While you can now use Chrome, you might still be prompted to use Microsoft Edge for certain links. To make Chrome your primary browser, follow these steps:
- Open Settings on Windows 11 (click the Start button and select the gear icon).
- Navigate to Apps > Default apps.
- In the search bar for “Set defaults for applications,” type “Chrome” and select Google Chrome.
- Under the “Set default for this app” section, click on the current default browser (likely Microsoft Edge) next to “.htm” and “.html” files, and choose Google Chrome from the dropdown list.
- You might also want to change the default for other web-related file types and protocols to Chrome.
3. Exploring Chrome’s Features and Customization Options
Once set up, take some time to explore Chrome’s interface and settings:
- New Tab Page: Customize what you see when you open a new tab. You can change the background, add shortcuts to your favorite websites, and see your Google activity.
- Settings Menu: Access the full range of Chrome settings by clicking the three vertical dots in the top-right corner and selecting “Settings.” Here you can manage privacy, security, appearance, extensions, and more.
- Extensions: The Chrome Web Store offers thousands of extensions that can add new functionalities and customize your browsing experience. From ad blockers to productivity tools, there’s an extension for almost everything. You can access it through the Settings menu or by searching for “Chrome Web Store.”
Troubleshooting Common Installation Issues
While the installation process is usually smooth, sometimes issues can arise. Here are a few common problems and their solutions:
Addressing Potential Installation Hiccups
- “Download failed” or “Download interrupted”: This often indicates a problem with your internet connection. Ensure you have a stable internet connection and try downloading the installer again. If the issue persists, try disabling any VPN or proxy server you might be using temporarily.
- “Installer is not responding” or “Installer is stuck”: This could be due to a temporary system glitch. Try restarting your computer and then running the installer again. Ensure your Windows 11 operating system is up-to-date, as outdated system files can sometimes cause compatibility issues.
- Antivirus blocking the installation: Some antivirus software might mistakenly flag the installer as a threat. If you suspect this is the case, you can temporarily disable your antivirus software before running the installer. Remember to re-enable it immediately after the installation is complete.
- Insufficient disk space: While Chrome itself doesn’t take up a massive amount of space, ensure you have enough free space on your hard drive for the installation and for future updates and cached data.
If you encounter a more specific error message, searching for that exact message online will often yield targeted solutions from Microsoft forums, Google’s support pages, or tech communities.
By following these steps, you should have Google Chrome up and running on your Windows 11 machine without any hassle. Enjoy the speed, features, and vast capabilities of one of the world’s most popular web browsers!
aViewFromTheCave is a participant in the Amazon Services LLC Associates Program, an affiliate advertising program designed to provide a means for sites to earn advertising fees by advertising and linking to Amazon.com. Amazon, the Amazon logo, AmazonSupply, and the AmazonSupply logo are trademarks of Amazon.com, Inc. or its affiliates. As an Amazon Associate we earn affiliate commissions from qualifying purchases.