In the dynamic world of digital creation and professional presentation, typography plays a pivotal role. Fonts are not merely characters on a screen; they are the silent storytellers that imbue your content with personality, convey your brand’s essence, and ensure readability and aesthetic appeal. Whether you’re a graphic designer crafting a compelling visual identity, a writer meticulously polishing a manuscript, a marketer developing engaging campaign materials, or simply an individual looking to personalize your digital workspace, the ability to install and manage fonts on your macOS system is an indispensable skill.
This guide will walk you through the process of installing fonts on macOS, covering everything from the simplest drag-and-drop methods to more advanced techniques using Font Book. We’ll delve into why custom fonts are crucial for branding, explore where to find high-quality font resources, and offer tips for effective font management, all within the context of macOS’s intuitive interface. By the end of this article, you’ll be equipped to elevate your projects with the perfect typeface, transforming your documents and designs from ordinary to extraordinary.
Understanding the Importance of Typography in Design and Branding
Before we dive into the technicalities of installation, it’s essential to appreciate why fonts matter so much. In the realm of Brand building, typography is a cornerstone of visual identity. A well-chosen font can instantly communicate a brand’s personality – whether it’s modern and sleek, traditional and elegant, playful and quirky, or authoritative and professional. This consistent visual language, often referred to as Corporate Identity, reinforces brand recognition and helps a company stand out in a crowded marketplace.
Think about iconic brands: Coca-Cola’s distinctive script, Google’s friendly sans-serif, or Tiffany & Co.’s sophisticated serif. These choices are not accidental; they are deliberate decisions that contribute significantly to the overall perception of the brand. For personal branding as well, selecting appropriate fonts for your website, social media, or business cards can project an image of professionalism and attention to detail.
Beyond branding, in the Tech space, fonts impact user experience. Readability is paramount in applications, websites, and digital interfaces. The right typeface can make content accessible and engaging, while a poor choice can lead to frustration and disengagement. Developers and designers often consider font legibility across various screen sizes and resolutions. Furthermore, the use of specialized fonts, like monospace fonts for code editors, is critical for programmers to enhance clarity and reduce errors.
In the world of Money, while not as immediately obvious, typography also plays a role. Financial reports, investment prospectuses, and marketing materials for financial services need to convey trust, seriousness, and clarity. The chosen fonts can influence how credible and reliable an organization appears to potential investors or clients. A clean, professional font instills confidence, whereas a cluttered or unprofessional typeface might inadvertently suggest a lack of attention to detail.
Where to Find and Download Fonts for macOS
The journey to installing new fonts begins with finding the right ones. Fortunately, the internet offers a vast array of resources, catering to every aesthetic and functional need. These can be broadly categorized into free and paid options, each with its own advantages.
Free Font Resources
For those working on a budget or exploring various options, numerous websites offer high-quality fonts completely free of charge.
- Google Fonts: This is arguably the most popular and comprehensive resource for free, open-source fonts. It boasts a massive library of web fonts and desktop fonts that can be easily downloaded. Google Fonts is renowned for its diverse selection, covering a wide range of styles, weights, and languages. The fonts are licensed under the Open Font License (OFL), making them free for personal and commercial use.
- Font Squirrel: Font Squirrel curates a collection of free fonts that are hand-selected and high-quality, often suitable for commercial use. They provide excellent previews and details about each font’s license, making it easy to ensure compliance.
- DaFont & 1001 Free Fonts: These platforms offer a colossal number of free fonts, often categorized by style (script, serif, sans-serif, decorative, etc.). While a treasure trove, it’s crucial to pay close attention to the licensing terms for each font, as many are intended for personal use only. Always double-check before using them for commercial projects.
When downloading from these sites, you’ll typically find fonts packaged in ZIP archives. You’ll need to extract these files before proceeding with the installation.
Paid Font Marketplaces
For designers and businesses seeking unique, professional, and often more refined typefaces, investing in paid fonts is a common practice.
- MyFonts: This is one of the largest and most respected marketplaces for commercial fonts. You can find a vast selection of fonts from renowned foundries and independent designers. MyFonts offers detailed licensing information and often provides extensive font families with various weights and styles.
- Adobe Fonts (formerly Typekit): If you are an Adobe Creative Cloud subscriber, you have access to a curated library of thousands of high-quality fonts. These fonts can be easily activated and synced to your macOS system directly through the Creative Cloud desktop app, making the process seamless.
- Fontspring: Similar to MyFonts, Fontspring offers a wide selection of commercial fonts with flexible licensing options. They are known for their user-friendly interface and good customer support.
- Creative Market: This platform offers a broader range of creative assets, including fonts, graphic templates, and illustrations. You can find unique and handcrafted fonts here, often bundled with other design resources.
When purchasing fonts, ensure you understand the licensing terms – desktop licenses, web licenses, app licenses, etc. – to ensure you are using them legally and appropriately for your intended purpose.
Installing Fonts on macOS: Step-by-Step Tutorials
macOS provides a built-in application called Font Book that makes managing and installing fonts incredibly straightforward. There are several methods to achieve this, from the most intuitive drag-and-drop to using Font Book’s dedicated installation features.
Method 1: The Drag-and-Drop Method (Easiest)
This is the quickest and most common way to install fonts.
-
Locate Your Font Files: After downloading and extracting your font files (usually in
.ttf,.otf, or.ttcformats), place them in an easily accessible folder. -
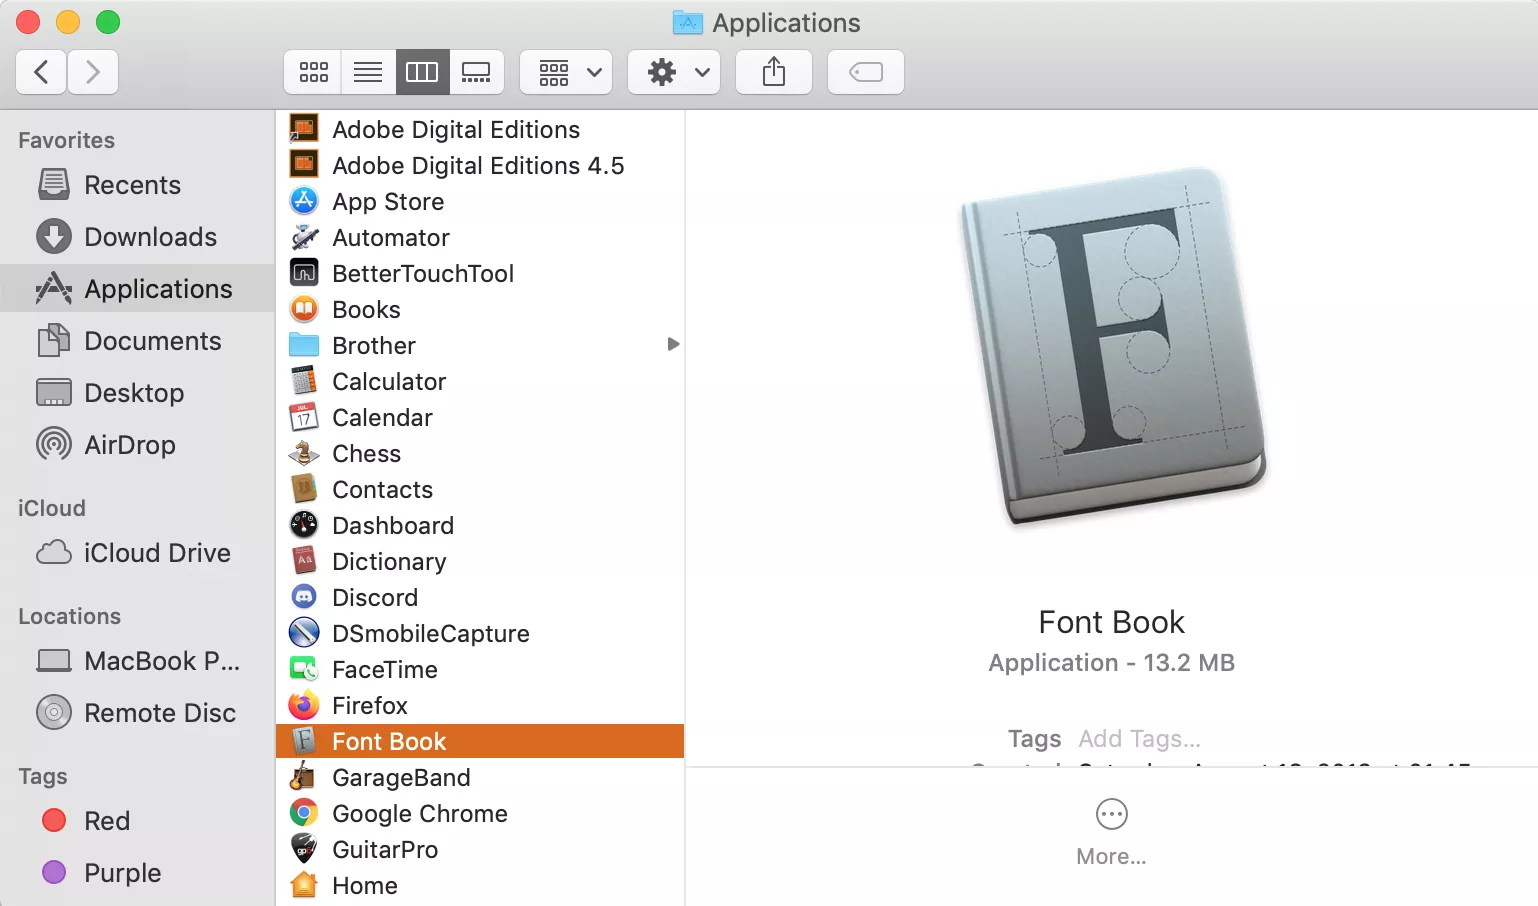
Open Font Book: You can find Font Book by:
- Going to your Applications folder and double-clicking the Font Book icon.
- Using Spotlight Search (Command + Spacebar) and typing “Font Book.”
-
Drag and Drop: With Font Book open, simply drag the font files from your Finder window directly into the Font Book window.
- Tip: You can select multiple font files at once and drag them in.
-
Validation: Font Book will automatically validate the fonts to ensure they are not corrupted or problematic. If a font has issues, you might see a warning.
-
Installation: Once dropped, the fonts will be installed and appear in your Font Book library. You can then access them in your applications.
Method 2: Using Font Book’s “Add Fonts” Feature
This method offers a slightly more structured approach within Font Book itself.
-
Open Font Book: As described above, launch Font Book from your Applications folder or via Spotlight.
-
Click the “+” Button or Go to File > Add Fonts: In the Font Book window, look for a plus (+) button, usually located in the top-left corner of the toolbar. Alternatively, you can go to the menu bar and select
File > Add Fonts to Current User.... -
Navigate to Your Font Files: A Finder window will appear. Navigate to the folder where you saved your downloaded font files.
-
Select and Open: Select the font files you wish to install and click the “Open” button.
- Note: You can also select a folder containing fonts, and Font Book will display the fonts within that folder for you to choose from.
-
Validation and Installation: Font Book will then validate and install the selected fonts.
Method 3: Double-Clicking Font Files
This is another very quick method, especially for individual fonts.
-
Locate a Font File: Navigate to the font file (
.ttf,.otf, or.ttc) in Finder. -
Double-Click: Double-click the font file.
-
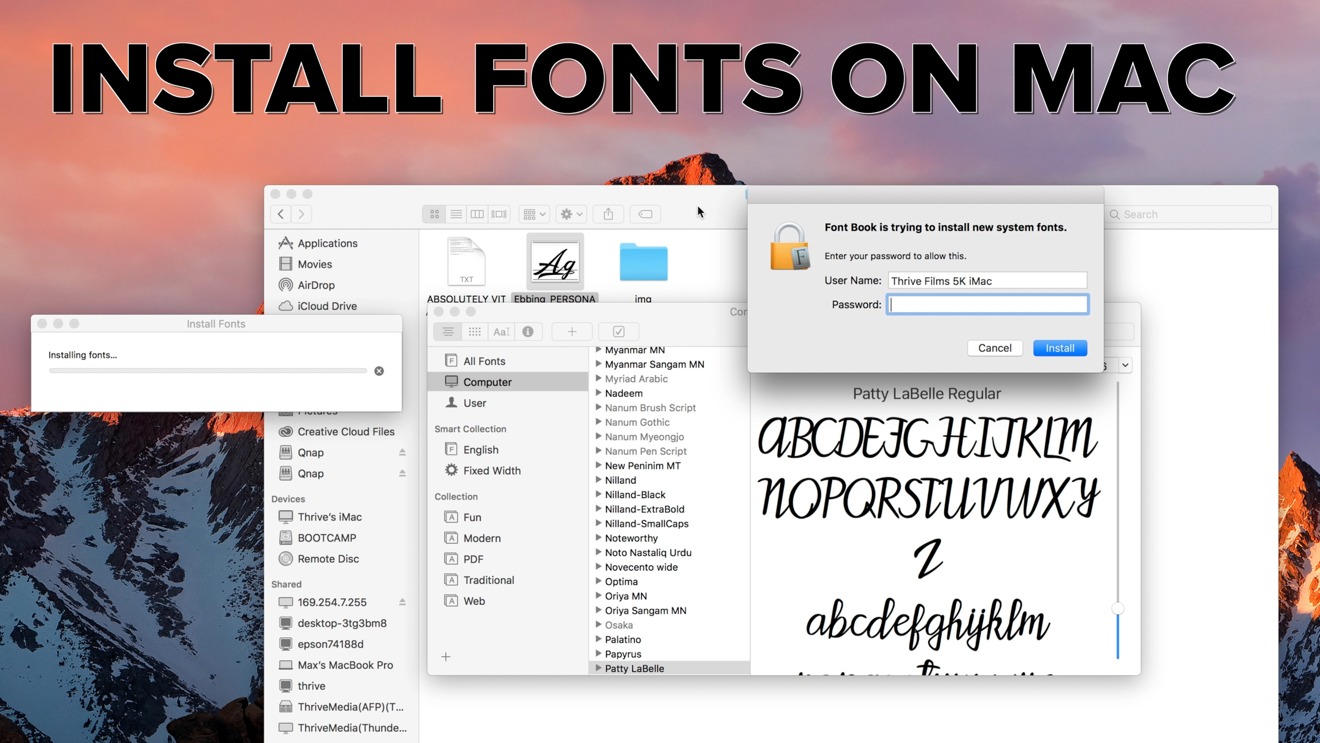
Preview and Install: A Font Book preview window will open, showing you what the font looks like. At the bottom of this window, you’ll see an “Install Font” button. Click it.
- Note: If the font is already installed, you might see an option to “Resolve Duplicates” or “Update.”
-
Validation: Font Book will validate and install the font.
Understanding Font Validation and Management in Font Book
Font Book is more than just an installer; it’s a powerful font management utility.
Font Validation
When you add fonts, Font Book performs a validation process. This checks for common issues such as:
- Corrupted files: The font data might be damaged.
- Duplicate fonts: You may have multiple versions of the same font installed.
- Font conflicts: Two fonts might have the same PostScript name, which can cause issues.
If validation errors occur, Font Book will prompt you on how to proceed. It’s generally advisable to resolve any validation warnings to prevent unexpected behavior in your applications.
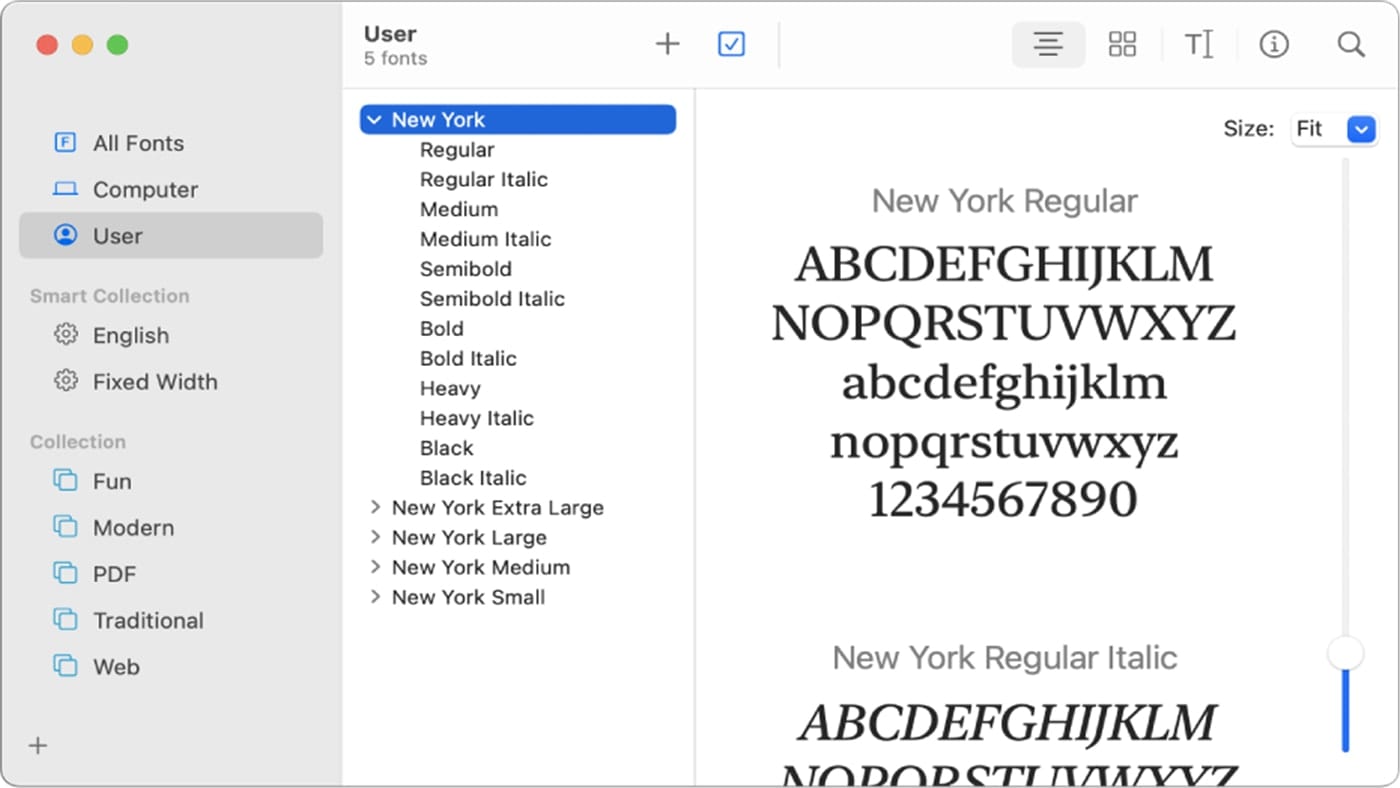
Organizing Fonts with Collections
As your font library grows, keeping it organized becomes crucial. Font Book allows you to create Collections, which are essentially custom groups for your fonts. This is incredibly useful for project-specific font sets, or for grouping fonts by style or purpose.
- Create a New Collection: In Font Book, click the “+” button at the bottom of the sidebar, or go to
File > New Collection. - Name Your Collection: Give your collection a descriptive name (e.g., “Project Alpha Fonts,” “Serif Classics,” “Brand X Typefaces”).
- Add Fonts to the Collection: You can drag fonts from your main library into your newly created collection. You can also select fonts in the main library, right-click (or Control-click), and choose “Add to Collection.”
Disabling and Removing Fonts
If you have too many fonts installed, it can slow down your system and make finding the right font in applications cumbersome. Font Book allows you to disable fonts you don’t use frequently. Disabled fonts won’t appear in application font menus but remain on your system, ready to be re-enabled.
- To Disable: Select the font(s) in Font Book and click the “Disable” button in the toolbar (or right-click and select “Disable”).
- To Remove: Select the font(s) you want to remove, then click the “Remove” button (the minus sign [-] in the toolbar) or go to
File > Remove. You will be asked to confirm the removal.
Important Note: Be cautious when removing or disabling system fonts. macOS relies on certain fonts for its interface and core functionalities. It’s generally best to leave system fonts untouched unless you have a very specific reason and understand the potential consequences.
Best Practices for Font Management and Usage
Effective font management goes beyond just installation; it involves thoughtful selection, organization, and consistent application.
Consistency in Branding
For Brand building and Corporate Identity, consistency is key. Use the same fonts across all your communication channels – website, social media, marketing collateral, presentations, and internal documents. This reinforces your brand’s visual identity and makes it instantly recognizable. If your brand guidelines specify certain fonts, ensure they are installed and readily available on all team members’ computers.
Application-Specific Font Sets
When working on different projects, especially in Tech development or design, you might need specific font sets. Using Font Book’s collections allows you to load only the necessary fonts for a particular project, reducing clutter and potential font conflicts within applications.
Font Licensing and Legality
This is a critical aspect, especially when dealing with Money and commercial ventures. Always adhere to the licensing terms of the fonts you use. Using fonts without proper licensing can lead to legal issues and significant financial penalties. Paid font marketplaces are transparent about licensing, while free font sites require careful review of individual font licenses.
Font Pairing
Choosing complementary fonts can significantly enhance the visual appeal and readability of your content. A common technique is to pair a serif font for headings with a sans-serif font for body text, or vice-versa. Experiment with different pairings to find combinations that best reflect your project’s tone and message. Resources like Google Fonts often suggest font pairings.
Font Legibility and Accessibility
In all contexts, but particularly in Tech (user interfaces) and Money (financial documents), legibility is paramount. Ensure your chosen fonts are easy to read at various sizes and on different screens. Avoid overly decorative or complex fonts for large blocks of text. Consider accessibility for users with visual impairments by choosing fonts with clear character distinction and good x-height.
Conclusion
Mastering the installation and management of fonts on macOS is a valuable skill for anyone who creates, communicates, or presents digitally. From establishing a strong Brand presence to ensuring clear and effective communication in Tech and Money sectors, the right typography makes a profound difference.
With macOS’s user-friendly Font Book, the process of adding new typefaces is intuitive and efficient. Whether you prefer the simple drag-and-drop method, the guided “Add Fonts” feature, or the quick double-click approach, you can easily expand your creative palette. Beyond installation, learning to organize fonts into collections, validate their integrity, and understand licensing is crucial for a streamlined and professional workflow.
By leveraging the vast resources available and applying best practices in font management, you can consistently elevate your projects, ensuring your message is not only heard but also seen with clarity, impact, and undeniable style. So go ahead, explore new fonts, install them with confidence, and let your creativity flow.
aViewFromTheCave is a participant in the Amazon Services LLC Associates Program, an affiliate advertising program designed to provide a means for sites to earn advertising fees by advertising and linking to Amazon.com. Amazon, the Amazon logo, AmazonSupply, and the AmazonSupply logo are trademarks of Amazon.com, Inc. or its affiliates. As an Amazon Associate we earn affiliate commissions from qualifying purchases.