The visual appeal of any document, design, or digital project hinges significantly on typography. For Mac users, a well-curated collection of fonts can elevate their work from ordinary to extraordinary. Whether you’re a graphic designer crafting a brand identity, a writer looking to personalize your documents, or a business professional aiming for impactful presentations, understanding how to install and manage fonts on your Mac is an essential skill. This guide will walk you through the process, from acquiring new fonts to organizing your library, ensuring your typographic toolkit is always at its best.
Understanding Font Management on macOS
Before diving into the installation process, it’s beneficial to understand how macOS handles fonts. Unlike some operating systems where fonts are scattered across various folders, macOS centralizes font management through a dedicated application: Font Book. This powerful, albeit sometimes overlooked, utility is the gateway to installing, previewing, organizing, and even troubleshooting your font collection.
Font Book allows you to:
- Install Fonts: Easily add new fonts to your system.
- Preview Fonts: See how different fonts look before you use them.
- Organize Fonts: Create collections to group fonts by project, style, or client.
- Validate Fonts: Check for errors or corruption that might prevent a font from working correctly.
- Disable Fonts: Temporarily remove fonts from your system without deleting them, which can be useful for troubleshooting or decluttering your font menus.
Knowing that Font Book is your primary tool will demystify the process and make font installation feel less like a technical hurdle and more like a simple organizational task.
Acquiring and Preparing Your Fonts
The journey of installing fonts begins with obtaining them. Fonts can be acquired from various sources, each with its own licensing considerations. Understanding these nuances is crucial, especially for commercial use.
Where to Find Fonts
- Free Font Repositories: Websites like Google Fonts, DaFont, and Font Squirrel offer a vast selection of free fonts for personal and sometimes commercial use. Always check the license for each font to ensure compliance.
- Paid Font Foundries and Marketplaces: Companies like Adobe Fonts (included with Creative Cloud subscriptions), MyFonts, Fontspring, and individual foundries offer high-quality, professionally designed fonts. These often come with more robust licensing options for commercial projects.
- Bundles and Subscriptions: Services like Envato Elements or Adobe Creative Cloud provide access to extensive font libraries through a subscription model, offering great value for those who use a wide variety of fonts regularly.
- Custom-Designed Fonts: For unique branding needs, many businesses commission custom fonts from type designers.
Understanding Font File Types
Fonts come in several file formats, and macOS supports the most common ones:
- TrueType (.ttf): An older but still widely used format, known for its compatibility.
- OpenType (.otf): A more modern and robust format that can contain more typographic features, such as ligatures, stylistic alternates, and swashes. OpenType fonts are generally preferred for their advanced capabilities and scalability.
- TrueType Collections (.ttc): A container format that can hold multiple TrueType fonts in a single file.
- Datafork TrueType (.dfont): A Mac-specific TrueType format that is less common now.
For most users, .otf and .ttf files are what you’ll encounter. Font Book handles all of these seamlessly.
Preparing Fonts for Installation
Once you’ve downloaded your fonts, they are often compressed in a ZIP archive.
- Locate the Downloaded File: Find the .zip file in your Downloads folder or wherever you saved it.
- Extract the Files: Double-click the .zip file. macOS has a built-in utility that will automatically extract the contents. If it’s a different compression format, you might need a third-party utility like The Unarchiver.
- Identify the Font Files: After extraction, you’ll see a folder containing the font files. Look for the files with the .ttf, .otf, or .dfont extensions. Sometimes, you might find multiple versions of the same font (e.g., Regular, Bold, Italic, Light).
It’s a good practice to create a dedicated folder on your Mac to store your font files. This can be within your Documents folder or a separate drive, making it easier to manage your font library and back it up.
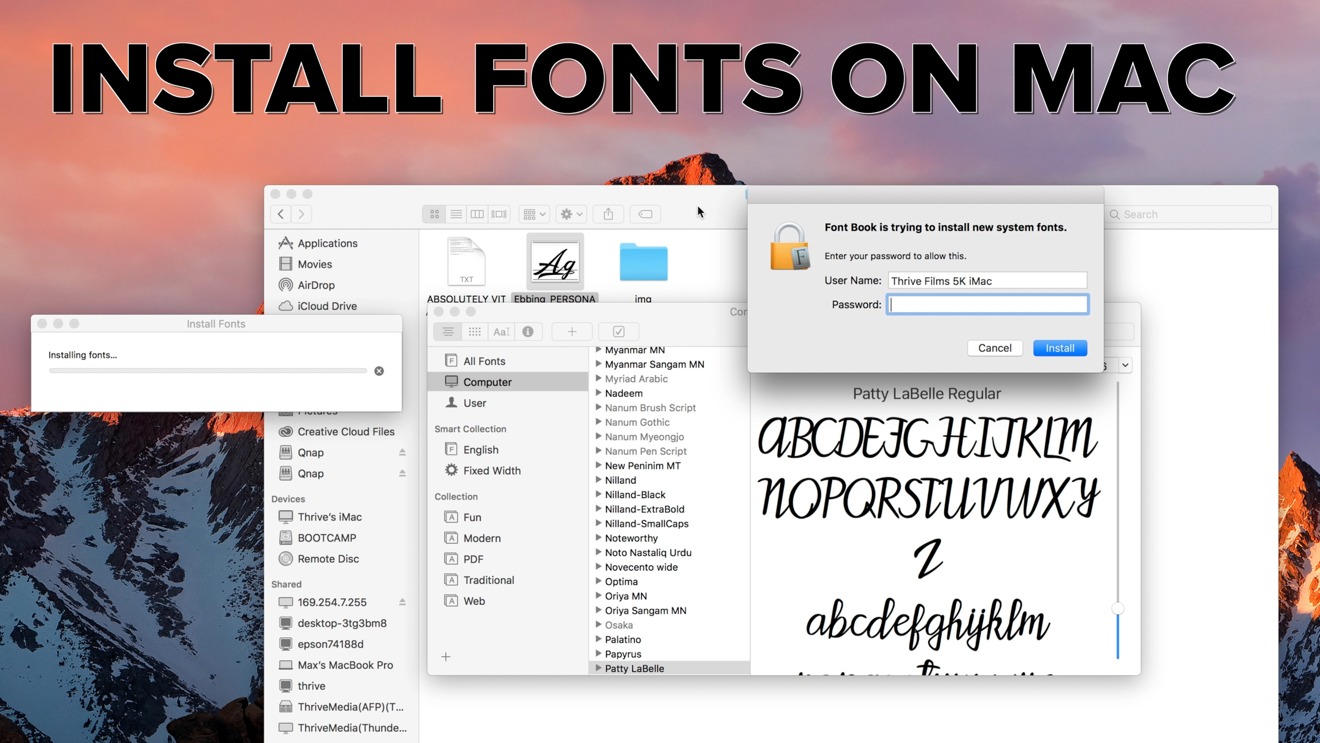
Installing Fonts on Your Mac Using Font Book
Font Book is the central hub for managing fonts on macOS, and installing new fonts is a straightforward process. There are a few methods to achieve this, catering to different user preferences.
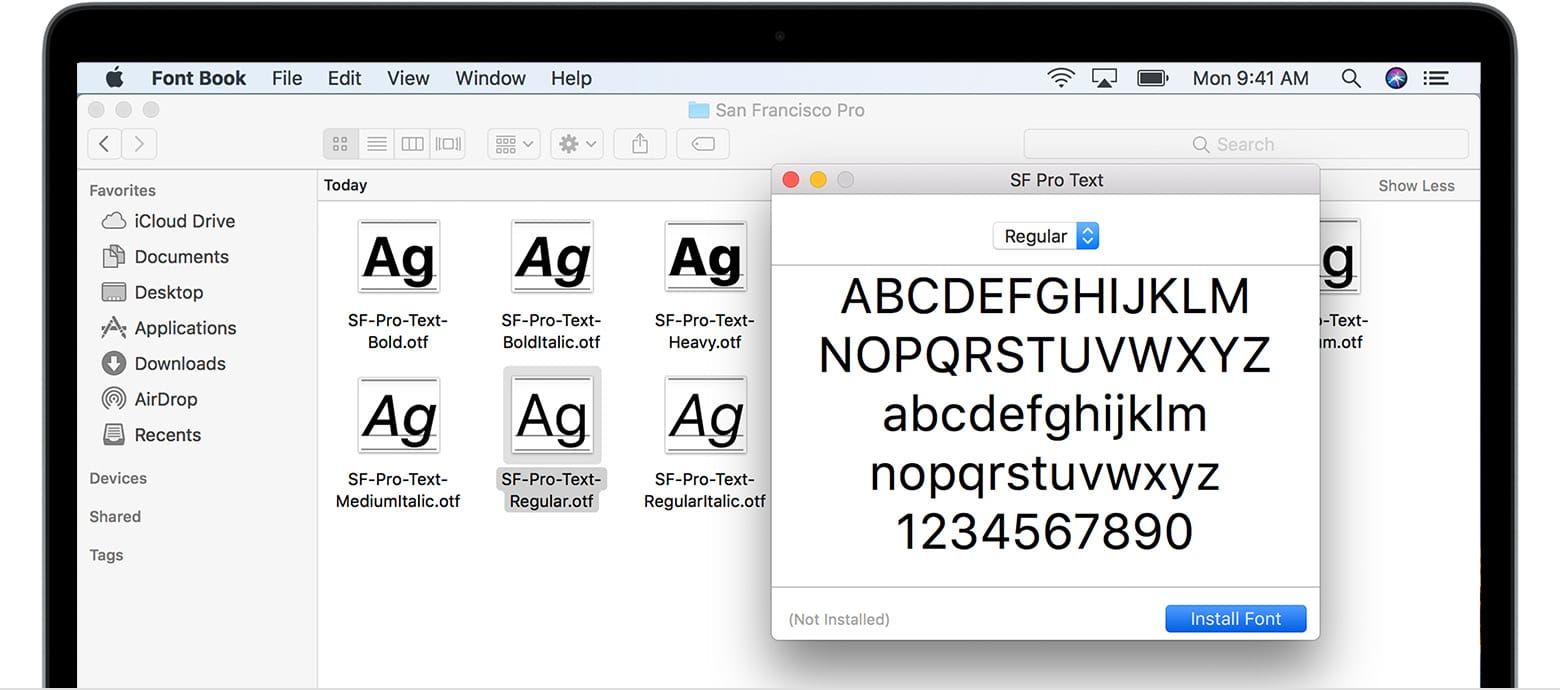
Method 1: Double-Click Installation (The Easiest Way)
This is the quickest and most common method for installing individual fonts or small sets of fonts.
- Locate Your Font File: Navigate to the folder where you extracted your font files (.ttf or .otf).
- Double-Click the Font File: Select the font file you wish to install and double-click it.
- Font Book Preview Window: A Font Book preview window will appear, displaying the font.
- Click “Install Font”: At the bottom of the preview window, you’ll see an “Install Font” button. Click it.
Font Book will then validate the font and install it for you. You’ll typically see a notification confirming the installation, or the font will simply appear in your Font Book list.
Method 2: Drag and Drop into Font Book
This method is efficient when you have multiple fonts to install from a single folder.
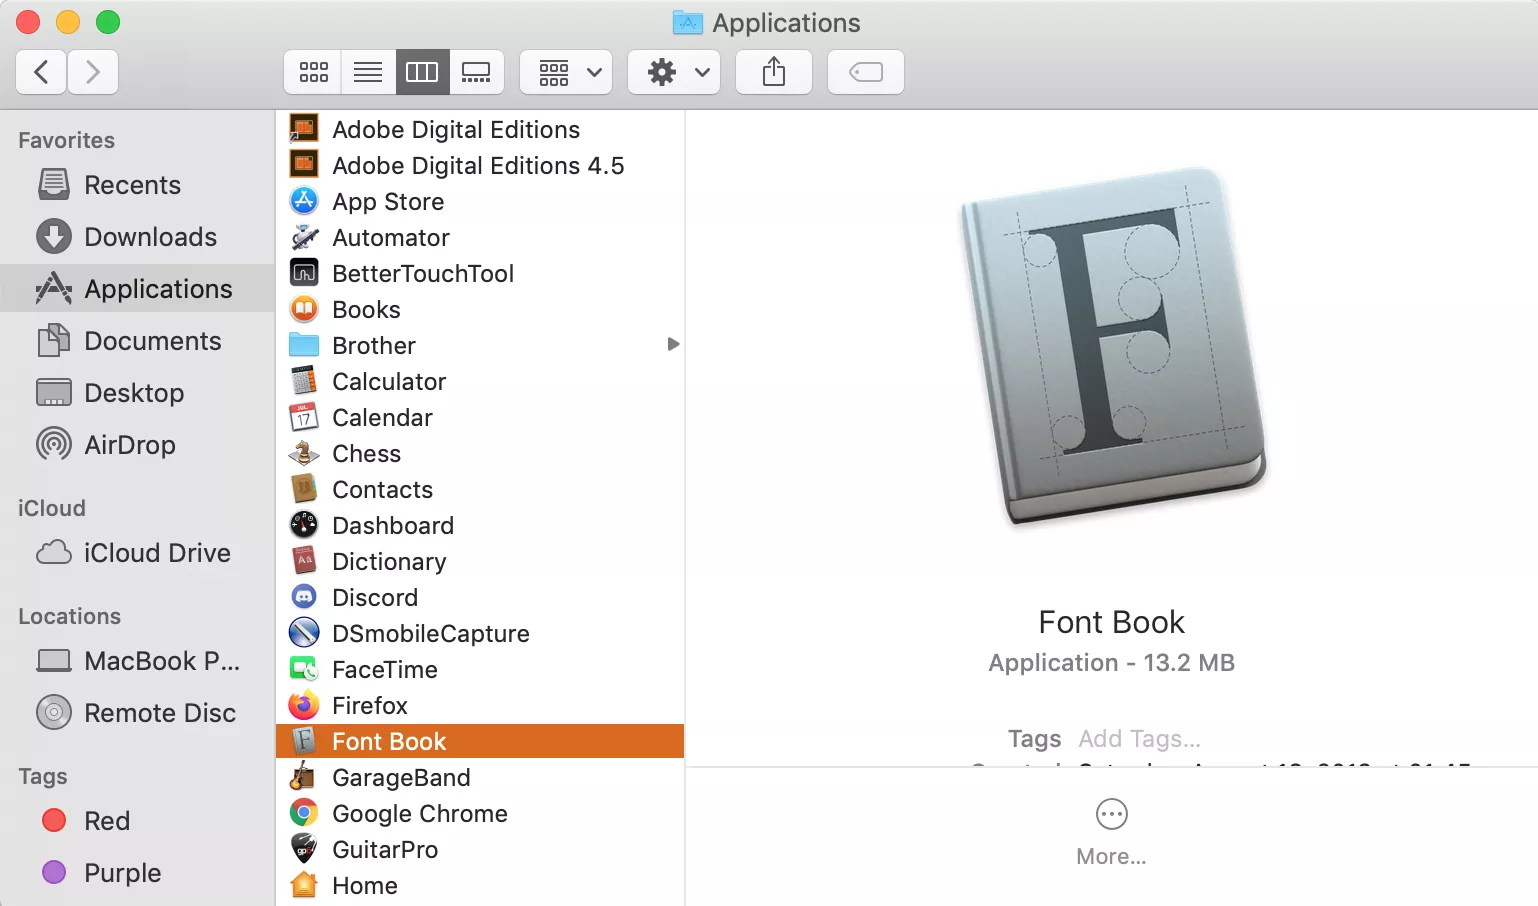
- Open Font Book: You can find Font Book in your Applications folder, or search for it using Spotlight (Command + Spacebar and type “Font Book”).
- Open Your Font Folder: Have the folder containing your extracted font files open in Finder.
- Drag and Drop: Click and drag the desired font files directly from your Finder window into the Font Book window. You can drag them onto the “All Fonts” collection or a specific collection you’ve created.
Font Book will automatically process the dragged fonts and add them to your system.
Method 3: Using the Font Book Menu
This method is less commonly used but is an alternative way to initiate the installation process.
- Open Font Book: Launch the Font Book application.
- Go to File > Add Fonts: From the menu bar, select “File” and then “Add Fonts…”.
- Browse and Select: A Finder window will open. Navigate to the location of your font files, select the ones you want to install, and click “Open.”
Font Book will then install the selected fonts.
Understanding Font Locations and User vs. System Fonts
When you install fonts, macOS places them in specific locations, and Font Book manages these locations.
- User Fonts: Fonts installed using the methods above are typically placed in your user library (
~/Library/Fonts). This means the fonts are only available to your user account. This is the default and recommended location for most users. - System Fonts: Fonts located in
/Library/Fontsare available to all user accounts on the Mac. Installing fonts here requires administrator privileges and is generally reserved for fonts that are essential for the operating system or system-wide applications. It’s advisable to stick to User Fonts unless you have a specific reason to install system-wide.
Font Book allows you to see where fonts are installed. Select a font in Font Book, and in the preview pane, you’ll see information including its location.
Organizing and Managing Your Font Library
Once you start accumulating fonts, keeping them organized becomes crucial for efficiency and creativity. A cluttered font menu can slow down your workflow and make it difficult to find the perfect typeface for your project. Font Book provides tools to help you manage your growing collection.
Creating Font Collections
Collections in Font Book are like playlists for your fonts. They allow you to group fonts by project, client, style, or any other criteria you choose.
- Open Font Book: Launch the Font Book application.
- Create a New Collection: Click the “+” button in the bottom-left corner of the Font Book window and select “New Collection.”
- Name Your Collection: Give your collection a descriptive name (e.g., “Client X Branding,” “Web Design Fonts,” “Serif Styles”).
- Add Fonts to the Collection:
- Drag and Drop: Drag fonts from your “All Fonts” list into your newly created collection.
- Using the Edit Menu: Select the fonts you want to add, then go to “Edit” > “Add to Collection” and choose your collection.
This hierarchical organization means you don’t have to clutter your main font menus. When you need a specific font, you can go directly to the relevant collection within Font Book and even activate it from there.
Activating and Deactivating Fonts
Font Book allows you to temporarily disable fonts you aren’t currently using. This is incredibly useful for:
- Performance: Reducing the number of active fonts can speed up application launch times and improve overall system responsiveness, especially if you have a very large font library.
- Troubleshooting: If an application is crashing or displaying text incorrectly, deactivating recently installed fonts can help identify if a problematic font is the cause.
- Decluttering Font Menus: By deactivating fonts not relevant to your current project, your application font menus (in apps like Pages, Word, Photoshop, etc.) become much cleaner and easier to navigate.
To activate or deactivate a font:
- Select the Font(s): In Font Book, select the font or fonts you wish to manage.
- Use the Toolbar or Menu:
- Toolbar: Click the “Enable” or “Disable” button in the Font Book toolbar.
- Right-Click: Right-click on the selected font(s) and choose “Enable” or “Disable.”
- Menu: Go to “Edit” > “Enable” or “Edit” > “Disable.”
When a font is disabled, it’s still present in your library but is not active in the system. You can easily re-enable it at any time.
Validating Fonts for Errors
Sometimes, fonts can become corrupted during download or transfer, leading to installation issues or rendering problems. Font Book’s “Validate Font” feature can help detect and sometimes resolve these issues.
- Select the Font: In Font Book, select the font you suspect might have an issue.
- Validate Font:
- Toolbar: Click the “Validate” button in the toolbar.
- Menu: Go to “File” > “Validate Font.”
Font Book will perform a check. If it finds errors, it will provide a report and may offer to resolve them or recommend deleting the problematic font.
Advanced Font Management and Tips
Beyond basic installation and organization, several advanced techniques and tips can enhance your font management workflow, particularly for professionals working with design software and branding.
Using Fonts Across Applications
Once a font is installed and activated on your Mac, it becomes available in the font menus of virtually all applications, including:
- Microsoft Office Suite: Word, PowerPoint, Excel.
- Adobe Creative Suite: Photoshop, Illustrator, InDesign, Premiere Pro.
- Apple Applications: Pages, Keynote, Numbers, Final Cut Pro.
- Web Browsers: For displaying web fonts or sometimes for in-browser text editing.
You don’t need to install a font separately for each application. A system-wide installation through Font Book is all that’s required.
Font Licensing Considerations
This is a critical aspect for anyone using fonts professionally, especially for branding and commercial projects.
- Personal Use vs. Commercial Use: Many free fonts are licensed only for personal use. Using them in a product you sell, a marketing campaign, or on a business website requires a commercial license.
- Types of Licenses: Licenses vary. Some grant unlimited use, while others might restrict the number of users, devices, or the scope of distribution (e.g., web embedding, app embedding, broadcast use).
- Read the License: Always read the font license agreement carefully before using a font commercially. If in doubt, contact the font designer or foundry.
- Adobe Fonts: Adobe Fonts offers a convenient solution as its license generally covers use in projects for clients and personal projects, including commercial work, as long as you have an active Creative Cloud subscription.
Understanding and respecting font licensing protects you from legal issues and supports the designers who create these valuable typographic tools.
Font Management Software
For users with extremely large font libraries (hundreds or thousands of fonts), dedicated font management software can offer more advanced features than Font Book. Popular options include:
- Suitcase Fusion: A professional-grade font manager used by many design agencies.
- FontBase: A free font manager with paid professional features, offering a modern interface and robust organization.
- RightFont: Another popular choice known for its speed and integration with design workflows.
These tools often provide features like cloud syncing, advanced previewing, font auto-activation based on opened documents, and more sophisticated organization than Font Book.
Backing Up Your Fonts
Your font library is a valuable asset. Ensure you have a backup strategy in place.
- Organize Your Font Files: Keep all your original font files (.ttf, .otf) in a designated folder on your Mac or an external drive.
- External Drive Backup: Regularly copy this font folder to an external hard drive.
- Cloud Storage: Use cloud storage services like iCloud Drive, Dropbox, or Google Drive to sync your font folder, ensuring accessibility and a remote backup.
By following these steps, you can ensure your carefully curated font collection is safe and readily available whenever inspiration strikes or a project demands it.
Conclusion: Mastering Your Mac’s Typography
Installing and managing fonts on your Mac is more than just a technical step; it’s an integral part of the creative and professional process. By leveraging Font Book, understanding font file types and licensing, and adopting good organizational practices, you can transform your Mac into a powerful typographic workstation.
Whether you’re aiming for a sleek personal brand, a visually striking marketing campaign, or simply want to enhance the readability of your documents, the fonts you choose and how you manage them play a pivotal role. This guide has provided the foundational knowledge and practical steps to confidently install, organize, and utilize fonts, empowering you to bring your digital visions to life with exceptional typography. Remember to always experiment, explore new typefaces, and keep your font library organized to ensure a smooth and inspiring workflow.
aViewFromTheCave is a participant in the Amazon Services LLC Associates Program, an affiliate advertising program designed to provide a means for sites to earn advertising fees by advertising and linking to Amazon.com. Amazon, the Amazon logo, AmazonSupply, and the AmazonSupply logo are trademarks of Amazon.com, Inc. or its affiliates. As an Amazon Associate we earn affiliate commissions from qualifying purchases.