In the digital realm, fonts are more than just text; they are powerful tools for expression, branding, and readability. Whether you’re a professional designer, a budding content creator, a student working on a presentation, or simply someone who appreciates aesthetic appeal, having the right fonts at your fingertips can significantly elevate your Mac experience. macOS comes equipped with a fantastic array of pre-installed fonts, but the true magic happens when you venture beyond the defaults and personalize your system with typefaces that resonate with your vision.
This guide will walk you through everything you need to know about installing, managing, and troubleshooting fonts on your Mac. We’ll cover the primary methods for integrating new typefaces, delve into best practices for organization, and even touch upon the broader implications of font choice for personal branding and digital creativity, aligning with the core interests of tech enthusiasts and brand builders alike. By the end, you’ll be empowered to curate a font library that truly reflects your unique style and enhances your digital projects.
Understanding Fonts and Their Impact on Your Digital World
Before diving into the “how-to,” it’s beneficial to grasp what fonts are, why they matter, and the different formats you’re likely to encounter. This foundational knowledge will make your font management journey smoother and more effective.
Why Fonts Matter for Your Mac Experience
Fonts are the silent communicators of your digital work. They influence readability, convey tone, and establish an aesthetic identity. Think about it: a playful comic sans font evokes a vastly different feeling than a sophisticated serif or a clean, modern sans-serif. For individuals, selecting the right font can make your documents more engaging, your presentations more impactful, and your personal projects more expressive. For businesses and personal brands, fonts are a cornerstone of visual identity, helping to create instant recognition and communicate core values. A consistent and well-chosen typeface across all your digital assets—from your website to your social media posts—builds trust and professionalism. In a world saturated with digital content, distinctive typography can be a key differentiator.
Beyond aesthetics, fonts also play a crucial role in user experience and accessibility. Some fonts are inherently easier to read on screens, while others are better suited for print. Understanding these nuances allows you to make informed decisions that enhance both the beauty and functionality of your Mac-based creations.
Common Font File Types You’ll Encounter
When you download fonts from the internet, you’ll primarily come across a few standard file formats. Knowing these formats will help you understand what you’re installing and how they behave.
- TrueType Fonts (.ttf): Developed by Apple and Microsoft in the late 1980s, TrueType fonts are one of the most common and widely supported font formats. They are known for their ease of use and good display quality on both screens and printouts. Most free fonts you’ll find online are in TTF format.
- OpenType Fonts (.otf): A more advanced and versatile font format, OpenType was developed jointly by Microsoft and Adobe. OTF fonts can contain up to 65,536 glyphs, allowing for extended character sets, ligatures, small caps, old-style figures, and other typographic features that provide greater design flexibility. They are an evolution of TrueType and are also widely supported across platforms. Professional designers often prefer OpenType due to its advanced capabilities.
- Web Open Font Format (.woff, .woff2): While not typically installed directly on your Mac for system-wide use, WOFF and WOFF2 formats are crucial for web design. They are compressed versions of OpenType or TrueType fonts, optimized for fast loading on websites. You might download these if you’re developing web projects, but for desktop applications, you’ll generally use TTF or OTF.
- PostScript Type 1 Fonts: Older and less common now, Type 1 fonts were once a standard for professional printing. They consist of two files: a screen font and a printer font. While still supported by macOS, they are gradually being phased out in favor of OpenType.
For most users, TTF and OTF will be the primary formats you’ll interact with. macOS handles both seamlessly, making installation straightforward regardless of the type.
Step-by-Step Installation Methods for Fonts on macOS
Installing fonts on your Mac is a remarkably simple process, largely thanks to the intuitive Font Book application that comes pre-installed with your operating system. There are a few methods you can employ, each suitable for different scenarios.
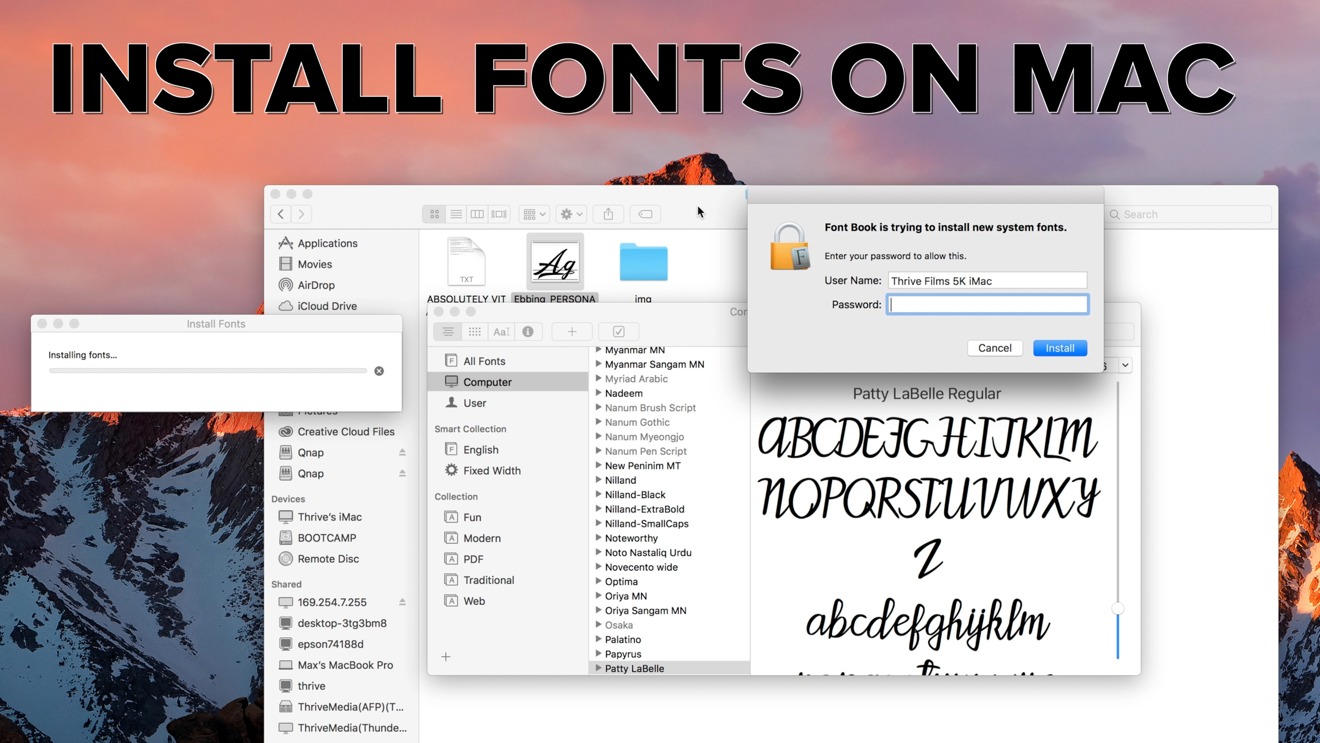
1. Using Font Book: The Native and Recommended Way
Font Book is Apple’s built-in font management utility. It allows you not only to install new fonts but also to preview, organize, validate, and remove them. This is the most robust and recommended method for installing fonts.
Steps:
- Locate Your Font Files: After downloading new fonts, they will usually be in a
.zipfile. Double-click the.zipfile to decompress it. You’ll then see the individual font files (e.g.,.ttf,.otf) inside a folder. - Open Font Book:
- Method A (Direct from Font File): The easiest way is to simply double-click on any
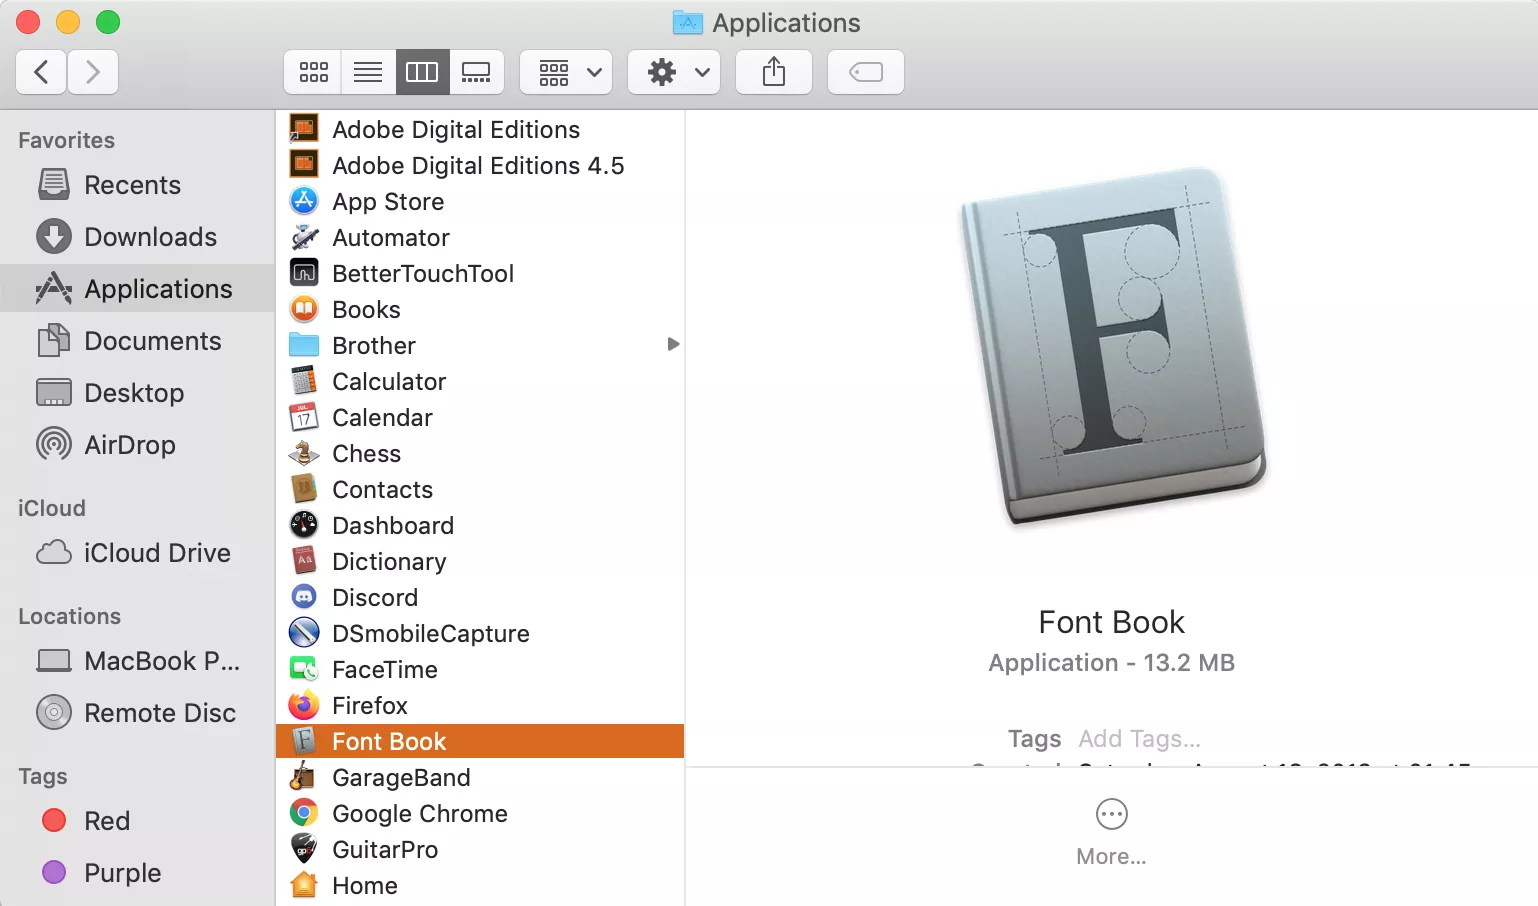
.ttfor.otffont file. This will automatically open Font Book and display a preview of the font. - Method B (Manual Launch): Alternatively, you can open Font Book by navigating to
Applications > Font Bookor by using Spotlight Search (Cmd + Space, then type “Font Book”).
- Method A (Direct from Font File): The easiest way is to simply double-click on any
- Preview and Install:
- When you double-click a font file, a Font Book window will appear, showing a preview of the typeface.
- At the bottom right of this window, you’ll see an “Install Font” button. Click this button.
- Font Validation: Font Book will perform a quick validation check to ensure the font file isn’t corrupted or problematic. If any issues are found, a warning will appear. For minor issues (e.g., duplicated font names), you might still be able to proceed, but it’s often best to find an alternative font if severe errors are reported.
- Confirm Installation: Once validated, the font will be added to your Font Book library and become available in all applications that support custom fonts (e.g., Pages, Microsoft Word, Adobe Creative Suite, Mail, etc.).
2. Drag-and-Drop Installation: A Quick Alternative
For users who prefer a more direct approach, Font Book also supports drag-and-drop functionality, making font installation even quicker.
Steps:
- Extract Font Files: Ensure your font files (
.ttf,.otf) are extracted from any.ziparchives. - Open Font Book: Launch the Font Book application.
- Drag and Drop: Drag your desired font files (or a folder containing multiple font files) directly into the Font Book window. You can drop them onto the “All Fonts” section or a specific collection you’ve created.
- Install and Validate: Font Book will automatically initiate the installation and validation process, similar to the double-click method. Confirm any prompts, and your fonts will be ready to use.
3. Manual Installation for Specific Access (Advanced)
While Font Book handles most installations perfectly, there are scenarios where you might want to manually place font files in specific directories. This method is generally for advanced users or for specific organizational needs.
On macOS, fonts can be stored in a few key locations:
/Library/Fonts(System-Wide Access): Fonts placed here are available to all user accounts on your Mac. This is ideal for shared computers or for fonts that everyone needs access to.~/Library/Fonts(User-Specific Access): The~symbol represents your user’s home directory. Fonts placed in this folder are only available to your specific user account. This is useful if you want to keep your font library separate from other users or manage fonts for personal projects without cluttering the system-wide collection./System/Library/Fonts(macOS System Fonts): This directory contains the fonts essential for macOS itself. NEVER modify or delete fonts from this location, as it can lead to system instability and display issues.
Steps for Manual Installation:
- Extract Font Files: Make sure your font files are extracted.
- Open Finder: Go to your Finder.
- Navigate to Library Folder:
- For
~/Library/Fonts(User-Specific): From the Finder menu bar, clickGo > Go to Folder...(or Cmd + Shift + G), then type~/Library/Fontsand press Enter. - For
/Library/Fonts(System-Wide): From the Finder menu bar, clickGo > Go to Folder...(or Cmd + Shift + G), then type/Library/Fontsand press Enter.
- For
- Drag and Drop: Drag your font files into the opened
Fontsfolder. - Restart Applications: For the newly added fonts to appear, you might need to quit and restart any applications you intend to use them in.
While this method bypasses Font Book’s direct management, the fonts will still appear in Font Book after a restart, allowing you to validate and manage them from there.
Managing Your Font Library: Deactivating, Removing, and Organizing
A well-curated font library is efficient and prevents application slowdowns caused by an excessive number of active fonts. Font Book isn’t just for installation; it’s your central hub for managing your entire collection.
Deactivating and Removing Fonts
Over time, your font collection might grow unwieldy, or you might find that you no longer need certain fonts. Font Book offers easy ways to manage your active fonts.
- Deactivating a Font: If you want to temporarily disable a font without deleting it, perhaps to reduce clutter or test performance, you can deactivate it.
- Open Font Book.
- Select the font you wish to deactivate.
- Go to
Edit > Deactivate [Font Name]or right-click the font and chooseDeactivate [Font Name]. A small gray icon next to the font name indicates it’s deactivated. Deactivated fonts will not appear in application font menus.
- Removing a Font: To permanently delete a font from your system:
- Open Font Book.
- Select the font(s) you want to remove.
- Go to
Edit > Remove [Font Name]or right-click the font and chooseRemove [Font Name]. - Confirm the action. The font file will be moved to the Trash.
Organizing with Collections
Font Book allows you to create custom collections, which are incredibly useful for organizing fonts by project, client, style, or any other criteria.
- Create a New Collection: In Font Book, click the
+button at the bottom of the “Collections” sidebar or go toFile > New Collection. Name your collection (e.g., “Client X Project,” “Handwritten Fonts,” “Holiday Designs”). - Add Fonts to a Collection: Drag and drop fonts from your “All Fonts” list into your new collection. Fonts can belong to multiple collections without duplicating the actual font files.
This organizational feature is a huge productivity booster, especially for designers and content creators who work with a diverse range of projects, ensuring the right fonts are always easily accessible.
Troubleshooting and Best Practices for Font Usage
Even with straightforward installation, you might occasionally encounter issues with fonts. Knowing how to troubleshoot and following some best practices can save you time and frustration.
Resolving Common Font Installation Issues
- Font Not Appearing in Applications:
- Restart Applications: After installing new fonts, you must quit and restart any applications (Word, Photoshop, etc.) that were open during the installation. They need to reload their font caches.
- Check Font Book: Ensure the font is listed and active (not grayed out) in Font Book. If it has a warning symbol, it might be corrupted.
- Corrupted or Damaged Fonts:
- Font Book’s validation process should catch most issues during installation. If a font causes application crashes or displays incorrectly, it might be damaged.
- Validate Manually: Select the font in Font Book and go to
File > Validate Font. If it reports serious errors, consider finding an alternative source for the font or trying a different typeface.
- Duplicate Fonts:
- If you install the same font multiple times from different sources, Font Book will flag it as a duplicate.
- Resolve Duplicates: Go to
Edit > Resolve Duplicatesin Font Book. It will prompt you to choose which version to keep or automatically resolve them. Keeping the newest or highest quality version is usually best.
- Font Cache Issues:
- Sometimes, macOS or individual applications can have corrupted font caches, preventing newly installed fonts from appearing or causing display problems.
- Clear System Font Caches: This is a more advanced step and should be done cautiously. You can use third-party tools or terminal commands to clear font caches. A simpler approach is to restart your Mac in Safe Mode, then restart normally. Safe Mode clears some system caches automatically.
Best Practices for Font Management
- Don’t Overload: While it’s tempting to install every beautiful font you find, having thousands of active fonts can slow down your Mac and applications. Install only what you genuinely need. Deactivate unused fonts.
- Organize with Collections: As mentioned, use Font Book collections to keep your fonts tidy and easy to find.
- Keep Originals: Always keep a backup of your original font files (the
.ttfor.otffiles) in a safe place, like a cloud storage service or an external drive. This way, if a font becomes corrupted or is accidentally deleted, you can easily reinstall it. - Understand Licensing: Be aware of font licensing. Many free fonts are only for personal use. If you’re using fonts for commercial projects (e.g., client work, products for sale, branding for a business), ensure you have the appropriate commercial license. This is critical for legal compliance, especially for businesses concerned with “Brand” reputation.
Sourcing Fonts and Their Branding Power
Now that you’re a pro at installing and managing fonts, let’s explore where to find new typefaces and emphasize their strategic role in branding and design.
Where to Discover New Fonts
The internet is a treasure trove of fonts, both free and paid, catering to every style imaginable.
- Google Fonts: A fantastic resource for high-quality, free, open-source fonts. All fonts on Google Fonts are licensed for both personal and commercial use, making it a go-to for many. They are easy to browse and download.
- Adobe Fonts: If you have an Adobe Creative Cloud subscription, Adobe Fonts (formerly Typekit) offers a vast library of professional fonts that can be synced directly to your desktop applications. This is invaluable for designers already invested in the Adobe ecosystem.
- DaFont, Font Squirrel, 1001 Free Fonts: These websites offer extensive collections of free fonts. Always check the licensing information for each font, as many are “free for personal use” but require a commercial license for business projects. Font Squirrel is particularly good at curating commercial-friendly free fonts.
- MyFonts, Creative Market, Fontspring: These are leading marketplaces for purchasing professional-grade fonts. Here you’ll find unique, expertly crafted typefaces from independent foundries and designers. While paid, these fonts often come with comprehensive character sets, multiple weights, and robust licensing options, which are crucial for establishing a strong “Brand” identity.
Leveraging Fonts for Branding and Design
Beyond mere aesthetics, fonts are a cornerstone of effective branding and design. They communicate personality, evoke emotion, and reinforce identity.
- Consistency is Key: A strong brand uses a consistent set of fonts across all its touchpoints—website, marketing materials, product packaging, social media. This consistency builds recognition and reinforces the brand’s identity, making it look professional and trustworthy.
- Conveying Personality: Fonts have distinct personalities. A clean, geometric sans-serif might convey modernity and efficiency, while a flowing script font suggests elegance or creativity. Choose fonts that align with your brand’s core values and message. For a “Tech” company, a futuristic or minimalist font might be appropriate; for a “Money” blog, something trustworthy and clear would be better.
- Readability and User Experience: While aesthetics are important, the primary function of text is to be read. Prioritize readability, especially for body text. Fancy display fonts are great for headlines and logos but can hinder legibility when used for large blocks of text. Good typography enhances the user experience, making content more digestible and engaging.
- Accessibility: Consider accessibility when choosing fonts. Some fonts are inherently more accessible for readers with visual impairments or dyslexia. Tools and guidelines exist to help designers make inclusive font choices.
By thoughtfully selecting and utilizing fonts, you’re not just decorating your Mac; you’re actively shaping the perception and impact of your digital presence.

Conclusion
Installing and managing fonts on your Mac is a fundamental skill for anyone looking to personalize their digital workspace or elevate their creative projects. With macOS’s intuitive Font Book application and the abundance of resources available online, building a robust and organized font library is straightforward.
From understanding the subtle yet profound impact of typography on readability and brand identity to mastering the different installation methods and troubleshooting common issues, you are now equipped to take full control of your font collection. Remember the synergy between “Tech” and “Brand”—utilizing the technical capabilities of your Mac to craft a powerful visual presence through smart font choices. Experiment with different styles, organize your collection, and always keep licensing in mind. Your Mac is now a more versatile and expressive canvas, waiting for you to unleash its full typographic potential. Happy designing!
aViewFromTheCave is a participant in the Amazon Services LLC Associates Program, an affiliate advertising program designed to provide a means for sites to earn advertising fees by advertising and linking to Amazon.com. Amazon, the Amazon logo, AmazonSupply, and the AmazonSupply logo are trademarks of Amazon.com, Inc. or its affiliates. As an Amazon Associate we earn affiliate commissions from qualifying purchases.