Minecraft, at its core, is a canvas for creativity, a digital sandbox where imagination knows no bounds. While the vanilla experience offers endless possibilities, a vibrant modding community continually pushes the boundaries of what’s achievable within its blocky confines. Among the myriad of modifications available, the “Create” mod stands out as a technological marvel, transforming simple machines into intricate, automated systems. It’s an engineering playground, encouraging players to delve into mechanics, kinetics, and automation on a grand scale.
This guide is more than just a step-by-step installation manual; it’s an exploration into the digital tools and community-driven innovations that empower such transformations. For enthusiasts of technology, software, and digital craftsmanship, integrating the Create mod is an invaluable lesson in system architecture, compatibility management, and the power of open-source development. We’ll navigate the prerequisites, provide a detailed installation walkthrough, troubleshoot common issues, and touch upon the broader implications of such intricate modding in the modern digital landscape. Prepare to elevate your Minecraft experience from simple building to sophisticated mechanical engineering.

Understanding the Foundation: Essential Tools for Minecraft Modding
Before diving into the exciting world of gears, pulleys, and automated farms that the Create mod offers, it’s crucial to understand the foundational components that make such modifications possible. Like any complex digital project, successful modding relies on a robust and compatible ecosystem of software. This initial phase involves installing and configuring key applications that act as the backbone for your modded Minecraft experience.
The Power of Java: Minecraft’s Core Engine
At the heart of Minecraft, and indeed many other applications, lies Java. This robust, class-based, object-oriented programming language is the bedrock upon which Minecraft is built. For your computer to run Minecraft, especially a modded version, it needs a Java Runtime Environment (JRE) or, more commonly for modding purposes, a Java Development Kit (JDK) installed. The JDK includes the JRE and additional tools useful for developers, but also crucial for ensuring optimal compatibility with mod loaders like Forge.
Java’s importance extends beyond merely running the game; it dictates how the game interacts with its various components, including mods. Different versions of Java exist, and compatibility is paramount. Installing the correct version (typically Java 17 for newer Minecraft versions like 1.18+, or Java 8 for older versions like 1.12.2) is the first critical step to avoid frustrating errors down the line. Java’s ubiquitous nature in the tech world also highlights the enduring appeal of reliable, cross-platform programming languages, even as new technologies emerge. Ensuring your Java installation is up-to-date and correctly configured is a fundamental digital security and performance best practice.
Minecraft Forge: The Modding Gateway
While Java provides the underlying framework, Minecraft Forge acts as the crucial intermediary, a sophisticated mod loader that allows independent modifications to seamlessly integrate with the base game. Think of Forge as a universal adapter, creating an API (Application Programming Interface) that mod developers can use to create content without directly altering Minecraft’s core code. This separation is vital for compatibility and stability.
Forge has become the industry standard for Minecraft Java Edition modding due to its extensive feature set, stability, and broad support from the modding community. It manages mod dependencies, resolves conflicts, and provides a unified environment for multiple mods to run together. The Forge project itself is a testament to community-driven development, a powerful “brand” in the modding world, built on trust and functionality. Its consistent updates, mirroring Minecraft’s own development cycle, ensure that players can continue to enjoy new content as the game evolves. Learning to install and manage Forge is a gateway skill for anyone interested in custom software environments and community-backed digital projects.
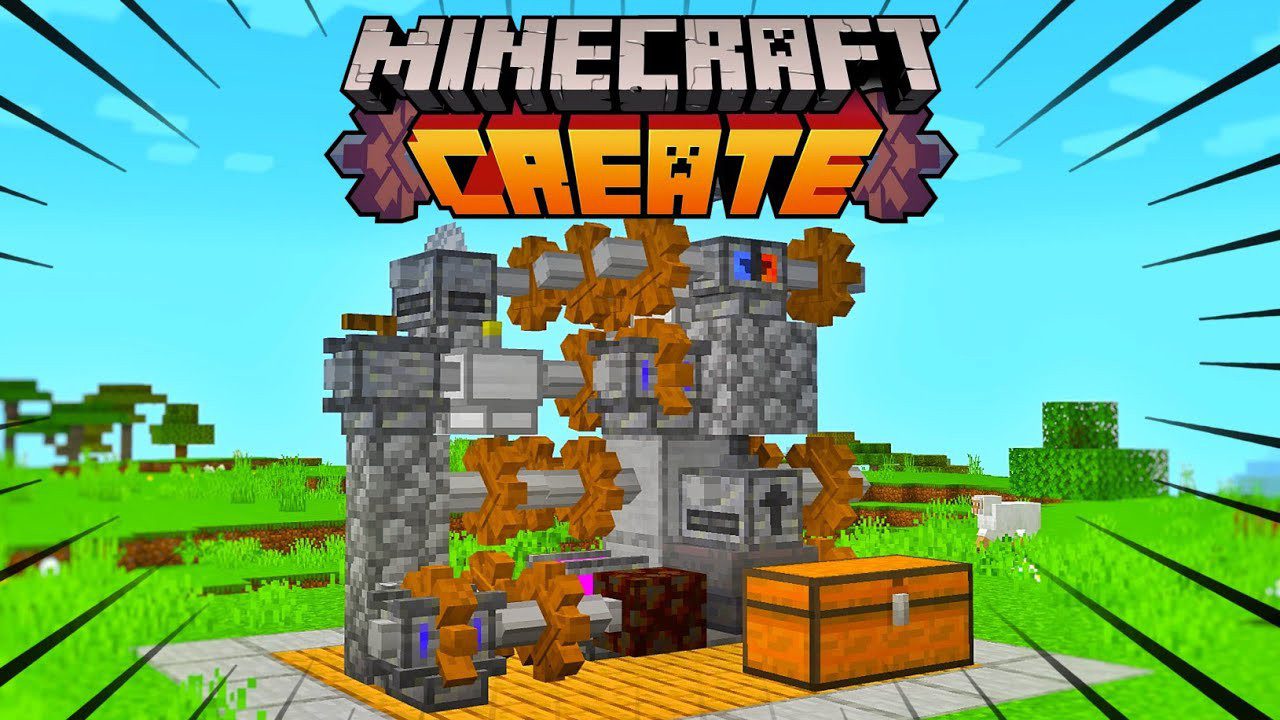
The Create Mod: Unleashing Mechanical Ingenuity
Finally, we arrive at the star of the show: The Create Mod. This modification is a feat of design and engineering within the game itself, offering an extensive suite of tools for automation, construction, and mechanical contraptions. Unlike many mods that add magic or new dimensions, Create focuses on realism (within Minecraft’s aesthetic) and logical mechanics. It introduces rotational power, gears, belts, drills, presses, saws, and a plethora of components that allow players to build complex factories, automated farms, and intricate transport systems.
The “brand” of Create mod is built on its innovative gameplay, aesthetic consistency with vanilla Minecraft, and its ability to empower players to solve problems with creative engineering. Its popularity has grown exponentially, not just among players but also among content creators. Streamers and YouTubers often feature Create mod builds, showcasing its potential and inspiring new designs. This creates an ecosystem where the mod contributes to online income generation for content creators, further demonstrating the financial ripple effect of well-designed, engaging software. Understanding the Create mod is an entry point into appreciating complex systems design and the impact of user-generated content on a game’s longevity and appeal.
The Step-by-Step Installation Guide: Building Your Modded Minecraft Environment
With the foundational knowledge established, it’s time to get your hands dirty with the actual installation process. This section will guide you through each step, ensuring you set up your Minecraft environment correctly to unleash the Create mod’s full potential. Precision and attention to detail are key to a smooth installation and a stable modded game.
Step 1: Installing the Java Development Kit (JDK)
As discussed, Java is non-negotiable. For modern Minecraft versions (1.17 and above), Java 17 (JDK 17) is typically required. For older versions (e.g., 1.12.2 or 1.16.5), Java 8 (JDK 8) is usually sufficient. It’s crucial to match the Java version to your desired Minecraft version and its Forge counterpart.
- Download Java: Visit the official Oracle website or an open-source distribution like Adoptium (Eclipse Temurin) to download the appropriate JDK version. For most users, Adoptium is a straightforward and reliable choice. Select the installer for your operating system (Windows, macOS, Linux).
- Run the Installer: Execute the downloaded installer. Follow the on-screen prompts, accepting the default installation path unless you have specific reasons not to. Ensure that Java is added to your system’s PATH variables, which the installer usually handles automatically.
- Verify Installation: Open your command prompt (CMD on Windows, Terminal on macOS/Linux) and type
java -version. You should see output indicating the installed Java version. If not, you may need to manually add Java to your system’s environment variables or reinstall.
This step is a fundamental aspect of digital literacy, ensuring your system has the necessary runtime environment for specific applications. It underpins many tech applications beyond Minecraft, making it a valuable skill.
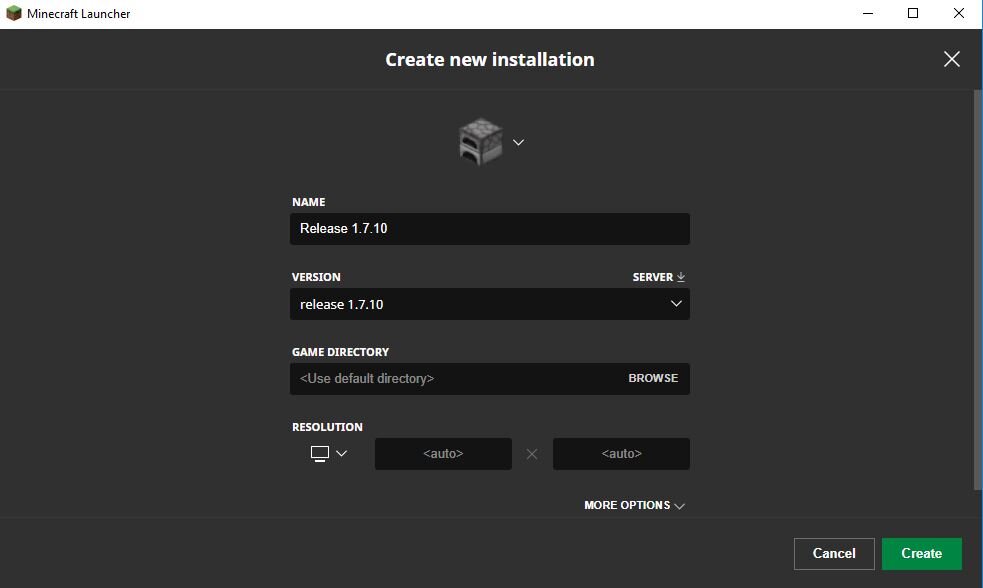
Step 2: Downloading and Setting Up Minecraft Forge
Forge is your gateway to modding. You must download the version of Forge that corresponds to your chosen Minecraft version.
- Navigate to the Official Forge Website: Go to
files.minecraftforge.net. This is the only trusted source for Forge downloads. - Select Minecraft Version: On the left sidebar, choose the Minecraft version you intend to mod (e.g., 1.18.2, 1.19.2, 1.20.1).
- Download the Installer: Look for the “Download Recommended” section and click on “Installer.” Avoid “Latest” unless you’re troubleshooting or an advanced user, as “Recommended” versions are generally more stable. You may encounter an ad page; wait for the “Skip” button to appear in the top right corner and click it.
- Run the Forge Installer: Once downloaded, locate the
.jarfile (e.g.,forge-1.18.2-40.2.1-installer.jar) and double-click it. If it doesn’t open with Java, right-click, select “Open with,” and choose Java. - Install Client: In the Forge installer window, ensure “Install client” is selected. Confirm the installation path points to your default Minecraft directory (
%appdata%/.minecrafton Windows). Click “OK.” Forge will download the necessary files and integrate itself with your Minecraft launcher. - Verification: Open your Minecraft launcher. You should now see a new profile named “forge” (or similar, indicating the version) in the profile selection dropdown menu. Do not launch it yet.
This process demonstrates how third-party tools integrate with existing software, a common practice in the tech world. Understanding official download sources is crucial for digital security and avoiding malicious software.
Step 3: Acquiring the Create Mod and its Dependencies
The Create mod, like many complex mods, might have dependencies – other mods that it requires to function correctly. Always check the mod’s official page for these requirements.
- Visit CurseForge: The primary and most reliable source for Minecraft mods is
www.curseforge.com. Search for “Create” mod. - Select Correct Version: On the Create mod’s CurseForge page, navigate to the “Files” tab. Find the file version that matches your installed Minecraft and Forge version. This is critical. For example, if you installed Forge for Minecraft 1.18.2, download the Create mod for 1.18.2.
- Download Dependencies: The Create mod often requires a library mod called “Flywheel” (or “Ponder” for some versions) which improves rendering performance. Always check the Create mod’s description or required dependencies on CurseForge and download ALL necessary dependency mods for the matching Minecraft version. Download these files in the same way you downloaded the Create mod.
- Do NOT Run Mod Files: Mod files (
.jar) are not executable installers. They are meant to be placed directly into a specific folder.
Relying on trusted platforms like CurseForge is a key aspect of digital hygiene, protecting users from potentially harmful downloads. It also highlights the “brand” value of community-maintained repositories.
Step 4: Integrating the Mod into Your Minecraft Client
Now that you have all the necessary .jar files, it’s time to place them where Forge can find them.
- Locate Your Minecraft
modsFolder:- Open your Minecraft launcher.
- Click on “Installations.”
- Hover over the “forge” profile you created and click the small folder icon that appears. This will open your
.minecraftdirectory. - Inside the
.minecraftfolder, you should see a folder namedmods. If it doesn’t exist, create it manually (ensure the spelling ismodsin lowercase).
- Move Mod Files: Drag and drop all the downloaded mod
.jarfiles (Create mod, Flywheel, and any other dependencies) into thismodsfolder. Do not extract them; keep them as.jarfiles.
This step is a practical lesson in software architecture and file system management, demonstrating how applications locate and load external components.
Step 5: Launching and Verifying Your Modded Game
The moment of truth! It’s time to launch Minecraft and ensure everything is working as intended.
- Open Minecraft Launcher: Select the “forge” profile from the dropdown menu (if it’s not already selected).
- Launch Game: Click the “Play” button.
- Monitor Initial Load: The first launch with new mods can take significantly longer as Forge loads and integrates everything. Do not panic if it appears to freeze.
- Verify Mod Presence: Once Minecraft loads, on the main menu, you should see a “Mods” button (or similar text). Click it. In the list, you should find “Create” and any of its dependencies (like “Flywheel”) listed as enabled.
- Create a New World (or load existing): Start a new single-player world in Creative mode to easily test the mod. In your inventory, search for Create mod items (e.g., “gearbox,” “shaft,” “mechanical arm”). If you can find and place these items, congratulations – your installation is successful!
This final verification step is crucial for any software installation, confirming functionality and troubleshooting potential issues early. It reinforces the concept of testing in a development cycle.
Troubleshooting Common Issues & Best Practices
Even with meticulous following of steps, issues can arise. Modding, by nature, is about integrating third-party software, and conflicts or misconfigurations are possible. Understanding how to troubleshoot and adhere to best practices will save you time and frustration, and contribute to a more stable modding experience.
Version Mismatches and Their Solutions
The most frequent culprit behind modding failures is version incompatibility. Minecraft, Java, Forge, and the Create mod (along with its dependencies) must all be aligned.
- Symptoms: Game crashes on startup, mods not appearing in the mod list, or specific Create mod items not functioning correctly.
- Common Causes:
- Forge for Minecraft 1.18.2 installed, but Create mod for 1.19.2 downloaded.
- Minecraft launched with a vanilla profile instead of the Forge profile.
- Using Java 8 for Minecraft 1.18+ (which requires Java 17).
- Solutions:
- Double-Check All Versions: Re-verify that your Minecraft game version, Forge installer, Create mod file, and all its dependency files are precisely for the same Minecraft version.
- Verify Java Version: Ensure the correct Java JDK (Java 17 for modern MC, Java 8 for older) is installed and being used by the Forge installer and Minecraft launcher. You might need to manually specify the Java executable in your Forge profile settings within the Minecraft launcher if you have multiple Java versions installed.
- Clean Reinstallation: If errors persist, consider deleting the
modsfolder contents, uninstalling Forge via your system’s Add/Remove Programs (if it created an entry), and reinstalling everything from scratch, paying extra attention to version numbers. - Read Crash Reports: If the game crashes, Forge generates a crash report (
crash-reportsfolder in.minecraft). These text files often contain clues about the offending mod or issue, though interpreting them can be complex. Looking for keywords like “java.lang.NoClassDefFoundError” or names of specific mods can guide your search.
Managing version control is a critical skill in software development and tech administration, directly applicable here. It underscores the importance of systematic debugging.
Memory Allocation and Performance Optimization
Adding complex mods like Create significantly increases the demands on your computer’s resources, particularly RAM (Random Access Memory). If you experience lag, stuttering, or out-of-memory errors, you likely need to adjust Minecraft’s allocated memory.
- Symptoms: Severe lag, game freezing, “OutOfMemoryError” messages in crash reports or game logs.
- Common Causes: Default Minecraft settings allocate insufficient RAM for a heavily modded environment.
- Solutions:
- Allocate More RAM:
- Open your Minecraft launcher.
- Go to “Installations.”
- Hover over your Forge profile and click the three dots (
...) -> “Edit.” - Click “More Options.”
- Under “JVM Arguments,” locate the entry that starts with
-Xmx(e.g.,-Xmx2G). This specifies the maximum memory allocation. - Change the number to a higher value, typically half of your system’s total RAM (e.g., if you have 16GB RAM, change
-Xmx2Gto-Xmx8G). Do not allocate more than ~75% of your total RAM to avoid starving your operating system. - Click “Save.”
- Monitor System Resources: Use Task Manager (Windows) or Activity Monitor (macOS) to see your system’s RAM usage while playing. This can help diagnose if memory is indeed the bottleneck.
- Consider Performance Mods: For extreme cases, performance-enhancing mods like OptiFine or Rubidium/Oculus (Forge alternatives to Sodium/Iris) can significantly improve frame rates, though care must be taken to ensure compatibility with Create.
- Allocate More RAM:
Optimizing resource allocation is a core tenet of system administration and performance engineering, directly impacting productivity and user experience. Understanding these settings can also save “money” by extending the lifespan of existing hardware by optimizing software.
The Importance of Reliable Sources and Digital Security
In the world of modding, exercising caution regarding download sources is paramount. The “wild west” of unofficial sites can expose your system to malware, viruses, or poorly coded software.
- Best Practices:
- Only Download from Official Sites: For Forge, use
files.minecraftforge.net. For mods,www.curseforge.comis the gold standard. Some mod authors also host their mods on GitHub or dedicated project websites, but always verify legitimacy. - Avoid Unofficial Mod Packs and “Free Downloads”: Sites promising premium mods or pre-made mod packs outside of CurseForge or approved launchers (like the official Twitch/CurseForge app, ATLauncher, MultiMC) are often risky.
- Keep Software Updated: Regularly update your Java installation and ensure your operating system has the latest security patches.
- Use Antivirus Software: A reputable antivirus program can provide an additional layer of defense against malicious downloads.
- Backup Your Saves: Before undertaking major mod installations or updates, always back up your Minecraft
savesfolder. This protects your hard-earned progress against unforeseen corruption.
- Only Download from Official Sites: For Forge, use
Adhering to these digital security practices is not just about protecting your game; it’s about safeguarding your entire system and personal data. It reinforces the importance of responsible software procurement and highlights the “brand reputation” of trusted platforms in the tech ecosystem.
Beyond Installation: Exploring the Create Mod’s Potential
With the Create mod successfully installed, a new realm of possibilities opens up in your Minecraft world. The journey doesn’t end with installation; it truly begins as you start to explore, design, and build with this incredible toolset.
Design Principles and Engineering Creativity
The Create mod isn’t just about adding new blocks; it’s about adding new mechanics that encourage creative problem-solving and an understanding of basic engineering principles. Players are challenged to think about rotational power, gearing ratios, kinetic energy, and efficient material transport. From automated cobblestone generators to complex rail networks, the mod encourages a systematic approach to design. This fosters a type of “productivity” within the game, where players optimize their in-game factories for maximum output, mirroring real-world industrial design. It’s an engaging way to learn about automation, physics, and resource management, all wrapped in Minecraft’s accessible interface.
Community and Content Creation
The Create mod has cultivated a massive, passionate community. This community is a rich source of inspiration, tutorials, and shared designs. On platforms like YouTube and Twitch, content creators showcase elaborate Create mod contraptions, demonstrating its versatility and complexity. These creators, through their inventive builds and detailed guides, not only entertain but also generate significant online income, turning their passion for modded Minecraft into a viable “side hustle” or even a full-time “business.” The mod’s visual appeal and logical mechanics make it highly watchable, attracting viewers interested in both gameplay and intricate engineering feats. This synergy between mod development, player creativity, and content generation underscores how software innovation can fuel entirely new forms of digital commerce and personal branding.
Conclusion: Engineering Your Future in Minecraft and Beyond
Installing the Create mod in Minecraft is more than just adding a few new items to your game; it’s an educational journey into the interconnected world of technology, software architecture, and community-driven innovation. From understanding the foundational role of Java and the vital function of mod loaders like Forge, to meticulously installing the Create mod and troubleshooting potential issues, each step provides valuable insights into how complex digital systems are built and maintained.
The “how-to” of mod installation seamlessly blends into the broader themes of our website. It’s a prime example of Tech in action – from software installation tutorials and managing system resources to embracing digital security best practices. The ecosystem surrounding the Create mod, with its dedicated developers and thriving content creation scene, exemplifies the power of Brand – how trust, functionality, and consistent engagement build strong communities and platforms. And for those who delve into the mod’s complexities, creating elaborate automated systems or sharing their builds online, there’s a tangible link to Money – through the “productivity” gained in-game, or the very real online income generated by showcasing their ingenuity to a global audience.
By successfully bringing the Create mod to life in your Minecraft world, you’re not just enhancing a game; you’re gaining practical experience in software management, problem-solving, and engaging with a vibrant digital community. So, fire up your game, unleash your inner engineer, and prepare to build wonders that transcend the basic blocks – one mechanical contraption at a time. The skills you hone here, in the world of Minecraft, are surprisingly transferable to the real-world challenges of technology and innovation.
aViewFromTheCave is a participant in the Amazon Services LLC Associates Program, an affiliate advertising program designed to provide a means for sites to earn advertising fees by advertising and linking to Amazon.com. Amazon, the Amazon logo, AmazonSupply, and the AmazonSupply logo are trademarks of Amazon.com, Inc. or its affiliates. As an Amazon Associate we earn affiliate commissions from qualifying purchases.