In today’s interconnected world, ensuring the safety and security of our homes has become paramount. Whether you’re looking to deter potential intruders, keep an eye on your property while you’re away, or simply monitor the comings and goings of your family and pets, a reliable surveillance system is an invaluable asset. Among the plethora of options available, the Blink Outdoor Camera has emerged as a popular choice for homeowners seeking an affordable, easy-to-use, and feature-rich security solution. This comprehensive guide will walk you through the entire process of installing your Blink Outdoor Camera, transforming your home into a more secure and connected space.
Understanding Your Blink Outdoor Camera System
Before diving into the installation process, it’s essential to understand what comes in the box and how the Blink system operates. This foundational knowledge will make the setup smoother and help you leverage the full capabilities of your new security camera.
What’s Inside the Box?
Typically, a Blink Outdoor Camera kit will contain:
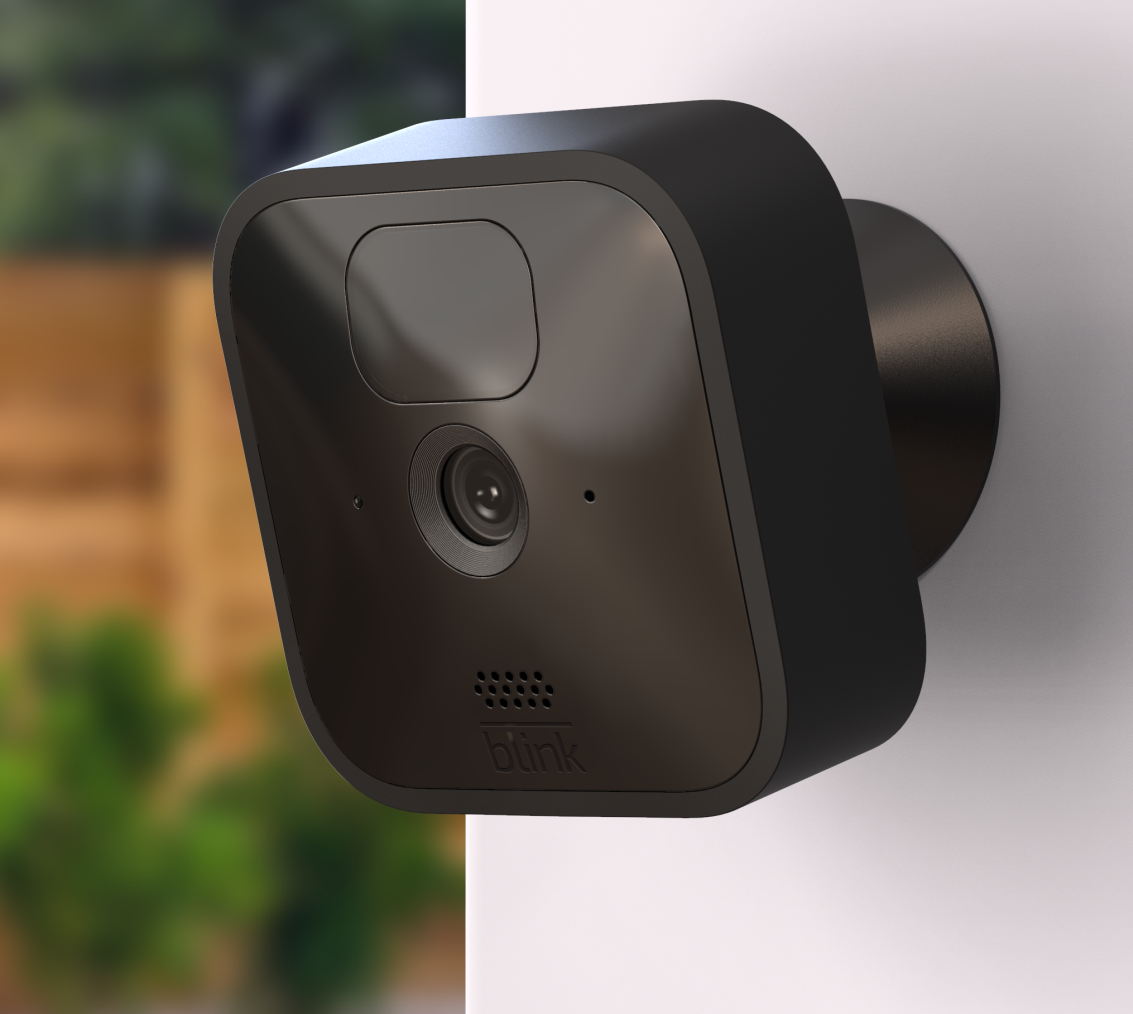
- Blink Outdoor Camera(s): These are the primary surveillance units. They are designed to withstand various weather conditions and capture high-definition video.
- Mounting Bracket: This allows you to securely attach the camera to walls, ceilings, or other surfaces. It often comes with screws and anchors for different wall types.
- Rechargeable Battery(ies): Blink cameras are powered by removable, rechargeable battery packs. Ensure these are fully charged before installation.
- Sync Module (if applicable): Depending on the Blink system you purchased (e.g., a kit with multiple cameras or a base station), you might receive a Sync Module. This device acts as the central hub, connecting your cameras to your Wi-Fi network and the Blink cloud. It’s crucial for managing your cameras and storing your footage.
- USB Power Cable and Adapter (for Sync Module): To power the Sync Module.
- Quick Start Guide: A handy booklet with basic instructions to get you started.
It’s always a good idea to check the contents of your package against the product description to ensure you have everything needed for a successful installation.
How the Blink System Works
The Blink Outdoor Camera system operates on a wireless principle, simplifying installation and placement. Here’s a brief overview:
- Camera Functionality: The cameras are motion-activated. When they detect movement within their field of view, they begin recording video clips. You can also initiate live views from the Blink app at any time.
- Connectivity: The Blink Outdoor Cameras connect wirelessly to the Blink Sync Module via a proprietary Wi-Fi network. The Sync Module, in turn, connects to your home’s Wi-Fi network. This means you don’t need to run Ethernet cables to each camera.
- Blink App: The heart of the system is the Blink mobile app, available for iOS and Android devices. This app allows you to:
- Set up and configure your cameras.
- View live streams.
- Receive motion detection alerts.
- Review recorded video clips.
- Adjust camera settings (sensitivity, recording duration, etc.).
- Manage your Blink subscription (for cloud storage and extended features).
- Power Source: The cameras are battery-powered, offering flexibility in placement. The rechargeable batteries provide months of operation on a single charge, though this can vary based on usage and settings.
Preparing for Installation: What You Need and Where to Place It
A little preparation goes a long way in ensuring a seamless installation. This section covers the essential prerequisites and strategic considerations for choosing the best locations for your Blink Outdoor Cameras.
Essential Tools and Requirements
Before you begin mounting your cameras, gather these items:
- Smartphone or Tablet: You’ll need a compatible iOS or Android device to download and use the Blink app.
- Wi-Fi Network: A stable and reliable home Wi-Fi network is crucial. Ensure the signal strength is good at the intended camera locations. You can use your phone’s Wi-Fi signal strength indicator to gauge this.
- Blink App Installed and Account Created: Download the Blink Home Monitor app from your device’s app store and create a Blink account.
- Charged Batteries: Make sure the batteries for your Blink Outdoor Cameras are fully charged.
- Optional: Ladder: If you plan to install cameras at higher elevations, a sturdy ladder will be necessary.
- Optional: Drill and Drill Bits: While many installations can be done without drilling, if you’re mounting to hard surfaces like brick or stucco, a drill might be required.
- Pencil or Marker: For marking drilling points.
- Safety Glasses: Recommended when drilling.
Strategic Camera Placement: Maximizing Coverage and Deterrence
The effectiveness of your Blink Outdoor Camera hinges on its placement. Consider these factors when deciding where to mount your cameras:
- Target Areas: Identify key areas you want to monitor. This typically includes:
- Entry Points: Front doors, back doors, garage doors, and ground-floor windows.
- Driveways and Garages: To monitor vehicles and activity.
- Backyards and Side Yards: For broader property surveillance.
- Gateways and Fences: To capture anyone entering or leaving your property.
- Height and Angle:
- Height: Mount cameras at a height of around 7-10 feet (2-3 meters) off the ground. This height is generally effective for capturing faces and deterring tampering, while also providing a good overview of the area.
- Angle: Position cameras to capture the widest possible view of your target area without including excessive sky, which can lead to false motion alerts due to clouds or birds. Angle them downwards slightly to focus on the ground level where most activity occurs.
- Power Source Accessibility: While the cameras are wireless, the Sync Module needs to be plugged into a power outlet. Consider its placement in relation to your Wi-Fi router and the areas you want to cover.
- Wi-Fi Signal Strength: As mentioned, a strong Wi-Fi signal is paramount. Test the signal strength at your intended mounting locations before you drill or permanently attach anything. You might need a Wi-Fi extender if signal strength is weak in certain areas.
- Environmental Considerations:
- Sunlight: Avoid pointing cameras directly into the sun, as this can wash out the image and affect recording quality.
- Rain and Snow: While the cameras are weather-resistant, try to position them under eaves or overhangs for added protection, which can also help keep the lens cleaner.
- Obstructions: Ensure there are no trees, bushes, or other objects that will obstruct the camera’s view, especially if they move in the wind.
- Deterrence Factor: Visible cameras can act as a deterrent. Place them in noticeable locations to make potential intruders think twice.
Step-by-Step Installation and Setup Process
Now that you’ve prepared and chosen your locations, it’s time to get your Blink Outdoor Camera up and running. This process is designed to be straightforward, even for those with limited technical experience.
Hardware Installation: Mounting Your Camera
- Charge the Battery: Ensure the Blink Outdoor Camera’s battery is fully charged. Insert it into the camera according to the instructions in the Quick Start Guide.
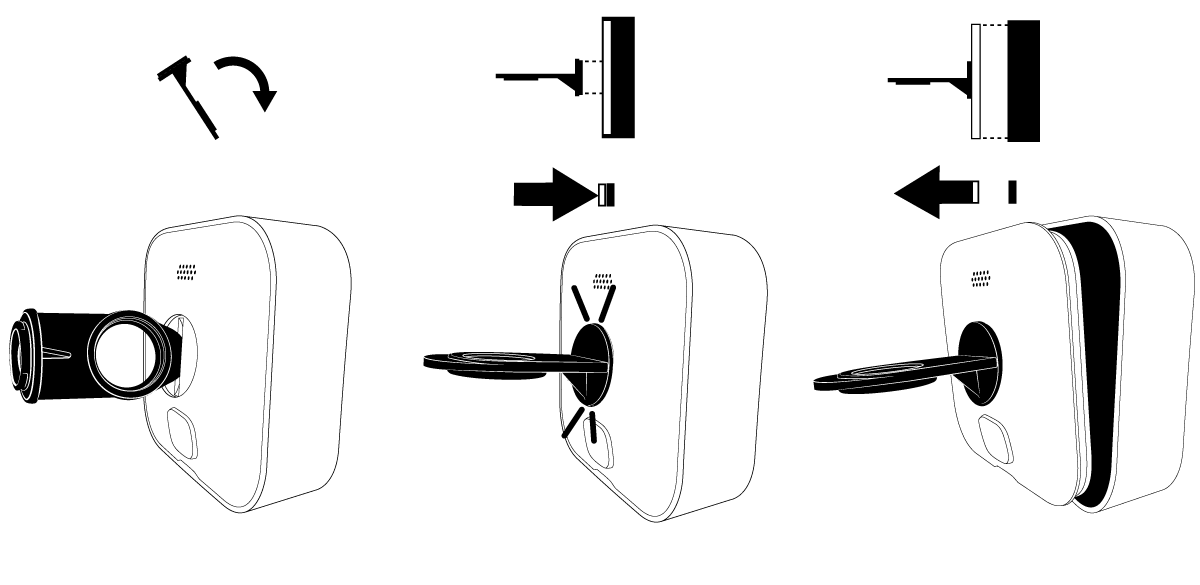
- Prepare the Mount:
- Indoor/Protected Mounting: If mounting on a flat surface like wood or drywall, you can often use the included adhesive strips for temporary placement or the screws for a more permanent fixture.
- Outdoor Mounting: For outdoor use, it’s highly recommended to use the screws provided.
- Position the Mount: Hold the mounting bracket in your desired location. Use a pencil to mark the screw holes.
- Drill Pilot Holes (if necessary): If you’re mounting into harder surfaces like brick, stucco, or concrete, you’ll likely need to drill pilot holes. Use a drill bit appropriate for the screw size and the material of your wall. If mounting into drywall without hitting a stud, use the provided wall anchors.
- Secure the Mount:
- If using anchors, insert them into the pilot holes.
- Align the mounting bracket with the holes (and anchors, if used) and screw it firmly into place. Ensure it’s securely attached.
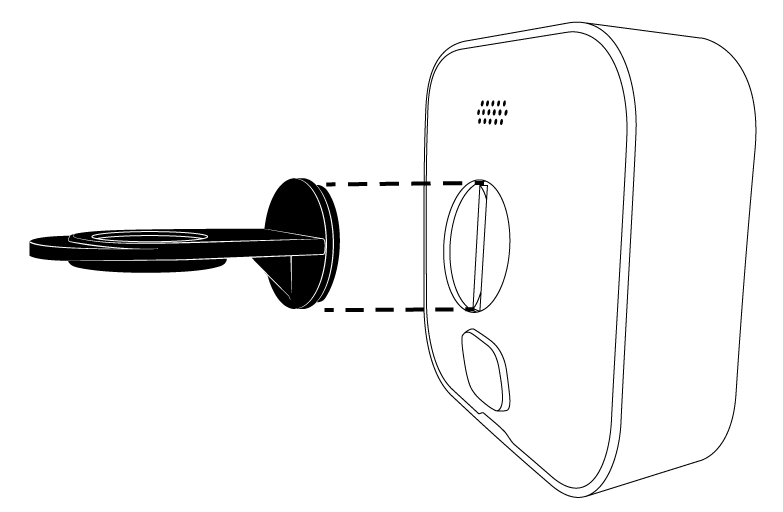
- Attach the Camera to the Mount:
- The Blink Outdoor Camera typically has a threaded screw hole on the back or bottom that aligns with a post on the mounting bracket.
- Screw the camera onto the bracket. You can usually adjust the angle by loosening a locking mechanism on the mount and then tightening it once you’ve found the desired position.
Software Setup: Connecting Your Camera to the Blink App
This is where your Blink Outdoor Camera truly comes to life.
- Power On the Sync Module (if applicable): If your system includes a Sync Module, plug it into a power outlet near your Wi-Fi router.
- Launch the Blink App: Open the Blink Home Monitor app on your smartphone or tablet.
- Add Device:
- Tap the “+” icon (usually in the top right corner of the app) to add a new device.
- Select “Outdoor Camera” from the list of device types.
- Scan the QR Code: The app will instruct you to scan a QR code. This QR code is typically found on the back of your Sync Module or on the camera itself (check the Quick Start Guide or the device packaging). Hold your phone’s camera steady over the QR code until it’s recognized.
- Connect to Wi-Fi:
- The app will guide you through connecting your Sync Module to your home Wi-Fi network. You’ll need to select your network name (SSID) and enter your Wi-Fi password.
- If you don’t have a Sync Module (e.g., for standalone cameras with Wi-Fi direct connectivity), the app will guide you through connecting the camera directly to your Wi-Fi.
- Name Your Camera: Once connected, you’ll be prompted to give your camera a descriptive name (e.g., “Front Door Camera,” “Backyard Camera”). This makes it easier to identify in the app.
- Camera Configuration and Testing:
- Motion Sensitivity: Adjust the motion detection sensitivity. Start with a medium setting and adjust based on your experience. Too high can lead to false alerts; too low might miss events.
- Activity Zones (if available): Some Blink models allow you to define specific areas within the camera’s view to monitor for motion, ignoring irrelevant activity (like passing cars).
- Recording Duration: Set how long video clips should record when motion is detected.
- Live View Test: Tap the “Live View” button for your newly installed camera to ensure you’re getting a clear picture and that the angle is correct. Make any necessary adjustments to the camera’s physical position on its mount.
- Motion Test: Trigger motion in front of the camera and check if you receive an alert and a video clip in the app. Fine-tune settings as needed.
Optimizing Your Blink System and Troubleshooting Common Issues
Once your Blink Outdoor Camera is installed and functioning, there are ways to enhance its performance and address any potential hiccups. This section delves into optimizing your settings and tackling common problems.
Maximizing Performance with Blink App Settings
The Blink app is your command center for fine-tuning your camera’s behavior.
- Motion Detection Settings:
- Sensitivity: Experiment with different sensitivity levels. If you’re getting too many alerts from minor movements like leaves blowing, reduce the sensitivity. If it’s not detecting people, increase it.
- Motion Detection Zone: For cameras with this feature, carefully define the areas you want to monitor. For a front door camera, you might exclude the street but include the porch and entryway.
- Recording Settings:
- Clip Length: A longer clip length captures more activity but uses more battery and data. A shorter clip might be sufficient for most events.
- Image Quality: Higher image quality provides clearer footage but also requires more storage space and bandwidth.
- Notification Settings:
- Push Notifications: Ensure these are enabled on your smartphone for timely alerts.
- Notification Delay: Some users prefer a short delay to filter out minor events.
- Scheduled Arming/Disarming: Set schedules for when your system should automatically arm (start monitoring) and disarm, saving battery and reducing unnecessary notifications when you’re home.
- Battery Management: Regularly check the battery levels in the app. Consider keeping a charged spare battery handy for quick swaps.
Troubleshooting Common Issues
Even with user-friendly systems, occasional issues can arise. Here are some common problems and their solutions:
- No Motion Alerts Received:
- Check Camera Armed Status: Ensure the camera is armed in the Blink app.
- Verify Motion Detection Settings: Increase sensitivity or re-evaluate activity zones.
- Check Wi-Fi Connection: Ensure the camera and Sync Module are connected to your Wi-Fi. Restart your router and Sync Module.
- Battery Level: Low battery can affect performance.
- Poor Video Quality:
- Check Lighting: Ensure adequate lighting in the area. Consider adding external lighting if necessary.
- Clean the Lens: Dust, dirt, or water spots can obscure the view. Gently clean the lens with a soft microfiber cloth.
- Wi-Fi Signal Strength: A weak signal can lead to choppy or low-quality video. Relocate the Sync Module or camera, or consider a Wi-Fi extender.
- Camera Offline:
- Check Power: Ensure the battery is charged and correctly inserted.
- Check Wi-Fi: Verify your home Wi-Fi is working. Restart your router and Sync Module.
- Sync Module Status: Check the indicator lights on the Sync Module for error codes. Refer to Blink’s support documentation for specific light patterns.
- False Motion Alerts:
- Adjust Sensitivity: Lower the motion detection sensitivity.
- Refine Activity Zones: Exclude areas with frequent, unwanted motion (e.g., trees swaying, passing traffic).
- Camera Angle: Ensure the camera isn’t pointed at reflective surfaces or areas with rapid light changes.
By following these steps and tips, you can confidently install and optimize your Blink Outdoor Camera, gaining peace of mind and enhancing the security of your home. Remember to consult the official Blink support resources for any advanced troubleshooting or specific model information.