In the dynamic world of technology, where new operating systems and specialized tools are constantly emerging, the ability to create bootable USB drives and SD cards is an essential skill for any tech enthusiast, developer, or system administrator. Whether you’re looking to install a new Linux distribution, flash a custom firmware to a microcontroller, or set up a Raspberry Pi, a reliable and user-friendly imaging tool is indispensable. Among the myriad options available, Balena Etcher stands out as a premier choice, renowned for its simplicity, cross-platform compatibility, and robust performance.
Balena Etcher, often simply referred to as Etcher, is a free and open-source utility designed to flash OS images to SD cards and USB drives safely and easily. Developed by Balena (formerly Resin.io), it boasts a sleek, intuitive graphical user interface (GUI) that streamlines the often-intimidating process of creating bootable media. Its “validate on success” feature is a particular highlight, ensuring the integrity of the flashed image and preventing frustrating boot failures down the line. For users running Ubuntu, one of the most popular and versatile Linux distributions, integrating Balena Etcher into their toolkit is a straightforward process that unlocks a world of possibilities for system deployment and experimentation.
This comprehensive guide will walk you through various methods of installing Balena Etcher on your Ubuntu system, ensuring you can choose the approach that best suits your comfort level and technical requirements. We’ll delve into the prerequisites, step-by-step installation instructions for different methods, and provide insights into using this powerful tool effectively. By the end of this article, you’ll not only have Etcher up and running but also a deeper understanding of why it’s a must-have application for anyone serious about managing their digital environment and exploring the vast landscape of operating systems and embedded computing. Let’s dive in and equip your Ubuntu machine with Balena Etcher, making your journey into system imaging both effortless and secure.
Understanding Balena Etcher and Why It’s Indispensable
Before we jump into the installation process, let’s take a moment to appreciate what Balena Etcher brings to the table and why it has garnered such a strong reputation within the tech community. At its core, Balena Etcher simplifies the creation of bootable media. While command-line tools like dd have long served this purpose in the Linux world, they come with a steep learning curve and a significant risk of data loss if not used precisely. Etcher eliminates this complexity with its three-step, graphical approach: select image, select drive, and flash.
Key Features and Benefits of Balena Etcher:
- User-Friendly Interface: Its intuitive GUI makes it accessible even for beginners, removing the intimidation factor often associated with disk imaging.
- Cross-Platform Compatibility: Etcher is available for Windows, macOS, and Linux, ensuring a consistent experience regardless of your primary operating system. This is a huge advantage for multi-platform users or those who switch between environments.
- Safe Flashing: Etcher automatically detects and warns against common issues, such as selecting your primary hard drive instead of a removable USB stick. This built-in safeguard is crucial for preventing accidental data loss.
- Image Validation: After flashing, Etcher performs an optional but highly recommended validation check to ensure the data was written correctly and completely. This prevents the frustration of trying to boot from a corrupted drive.
- Open Source: Being open-source means its code is transparent, allowing the community to inspect, contribute to, and verify its security and functionality.
- Support for Various Image Formats: It supports a wide array of image formats, including
.iso,.img,.zip,.dmg, and more, making it versatile for different types of projects.
For Ubuntu users, Etcher is particularly valuable when:
- Trying Out New Linux Distributions: Easily create bootable USBs for Fedora, Mint, Debian, Arch, or any other Linux distro you wish to experiment with.
- Installing Windows: If you need to create a bootable Windows installer from an ISO, Etcher handles it with ease.
- Setting Up Raspberry Pis: Flashing Raspberry Pi OS or other embedded operating systems to an SD card is a primary use case for Etcher, a common task for IoT projects and hobbyists.
- Creating Recovery Drives: Prepare bootable utility or rescue disks to troubleshoot system issues or recover data.
In essence, Balena Etcher is more than just a flashing tool; it’s a gateway to exploring new systems, deploying specialized software, and empowering users with the ability to manage their digital hardware efficiently and securely. Its focus on safety, simplicity, and reliability makes it an indispensable asset in any tech-savvy individual’s digital toolkit, perfectly aligning with the “Software” and “Productivity” aspects of a modern tech blog.
Prerequisites and Important Considerations
Before you embark on the installation journey for Balena Etcher on your Ubuntu system, there are a few essential prerequisites and considerations to keep in mind. Addressing these beforehand will ensure a smooth installation process and prevent common hurdles.
System Requirements:
- Ubuntu Operating System: This guide assumes you are running a recent version of Ubuntu (e.g., Ubuntu 20.04 LTS, 22.04 LTS, or newer). The commands and methods described are generally compatible across modern Ubuntu releases.
- Internet Connection: You’ll need an active internet connection to download the Etcher application or its repository files.
- Sudo Privileges: To install software on Ubuntu, you’ll need administrative rights, typically accessed via the
sudocommand. Ensure your user account hassudoprivileges. - Sufficient Disk Space: While Etcher itself is not a massive application, ensure you have a few hundred megabytes of free space for the application and any downloaded OS images.
Hardware Considerations:
- USB Drive or SD Card: Although not required for installing Etcher, you will need a USB flash drive or an SD card (and a card reader, if applicable) when you eventually use Etcher to flash an image. Ensure the drive has sufficient capacity for the OS image you intend to write.
- Backup Your Data: Crucially, when using Balena Etcher (or any disk imaging tool), the selected target drive will be completely erased. Before using Etcher, always double-check that you’ve selected the correct drive and that it contains no important data, or that any important data has been backed up. Etcher has safeguards, but user vigilance is the ultimate protection.
Security and Best Practices:
- Download from Official Sources: Always download Balena Etcher or its related files from the official Balena website (
balena.io) or trusted repositories. This mitigates the risk of downloading malicious or tampered software. - Verify Checksums (Optional but Recommended): For critical installations, you might consider verifying the checksum (MD5, SHA256) of the downloaded image file against the one provided by the operating system vendor. While Etcher validates the write process, verifying the source image adds another layer of security.
- Understand Commands: When using the terminal, always try to understand what each command does before executing it. This practice not only enhances your learning but also helps prevent unintended system changes.
By preparing your system and understanding these crucial points, you set the stage for a successful and secure Balena Etcher installation and usage experience. This careful approach is fundamental to digital security and productive computing, key areas highlighted in our website’s core topics.
Installation Methods for Balena Etcher on Ubuntu
Balena Etcher offers a few flexible ways to get it running on your Ubuntu system. Each method has its own advantages, from simplicity to integration with your system’s package management. We’ll explore the two most common and recommended approaches: using the AppImage and adding the official APT repository.
Method 1: Installing Balena Etcher using the AppImage
The AppImage format is a fantastic way to distribute applications on Linux without needing to install them onto your system in the traditional sense. An AppImage is a single file that contains the application and all its dependencies, allowing it to run on almost any Linux distribution without modification. This method is perfect if you prefer a standalone application that doesn’t touch your system’s package manager or if you need a specific version of Etcher quickly.
Step 1: Download the Balena Etcher AppImage
- Open your web browser and navigate to the official Balena Etcher website: https://www.balena.io/etcher/
- On the download page, you will see options for Windows, macOS, and Linux. Look for the “Download for Linux (64-bit)” button.
- Click this button to download the
.AppImagefile. Your browser will typically save it to yourDownloadsdirectory. The filename will look something likebalena-etcher-electron-x.y.z-linux-x64.AppImage, wherex.y.zis the version number.
Step 2: Make the AppImage Executable
By default, downloaded files are not marked as executable for security reasons. You’ll need to grant the AppImage execution permissions.
- Open your terminal (you can usually do this by pressing
Ctrl + Alt + T). - Navigate to your
Downloadsdirectory using thecdcommand:
bash

cd ~/Downloads
- Now, make the AppImage executable using the
chmodcommand. Replacebalena-etcher-electron-x.y.z-linux-x64.AppImagewith the actual filename you downloaded:
bash

chmod a+x balena-etcher-electron-x.y.z-linux-x64.AppImage
chmod: Changes file permissions.a+x: Adds execute permission for all users (afor all,+xfor execute).
Step 3: Run Balena Etcher
With the AppImage made executable, you can now run it directly.
- From the terminal, still in your
Downloadsdirectory, execute the AppImage:
bash

./balena-etcher-electron-x.y.z-linux-x64.AppImage
- Alternatively, you can navigate to your
Downloadsfolder in your file manager, right-click the AppImage file, and select “Run” or “Open.” On some systems, you might need to confirm that you want to execute it.
Balena Etcher should now launch.
Advantages of the AppImage Method:
- No Installation: Doesn’t modify your system’s core files or package database.
- Portability: You can move the AppImage file to another Linux machine and run it there without re-installation.
- Latest Version: Often provides the absolute latest stable release directly.
Disadvantages:
- Manual Updates: You’ll need to manually download a new AppImage for future updates.
- No System Integration: Doesn’t appear in your applications menu by default, though you can create a desktop shortcut manually if desired.
Method 2: Installing Balena Etcher using the Official APT Repository
For a more integrated and automatically updating experience, adding Balena Etcher’s official APT repository to your Ubuntu system is the preferred method. This allows you to install and manage Etcher just like any other software package through Ubuntu’s standard apt command.
Step 1: Add the Balena Etcher APT Repository Key
First, you need to add the GPG key for the Balena repository to your system. This key is used to verify the authenticity of the packages you download from the repository, ensuring they haven’t been tampered with.
- Open your terminal.
- Use
curlto fetch the key andgpg --dearmorto convert it into a format suitable forapt, then pipe it to/usr/share/keyrings/balena-etcher.gpg:
bash

curl -1sLf 'https://dl.cloudsmith.io/public/balena/etcher/gpg.DEB.key' | sudo gpg --dearmor -o /usr/share/keyrings/balena-etcher.gpg
curl -1sLf: Downloads the file (securely, silently, following redirects).sudo gpg --dearmor: Decrypts and converts the key.sudo tee /etc/apt/trusted.gpg.d/balena-etcher.asc > /dev/null: This command is an older way butteewrites it to a file. The more modern and secure way is using/usr/share/keyrings/.
Step 2: Add the Balena Etcher Repository to Your Sources List
Next, you need to tell your system where to find the Etcher packages by adding the repository to your apt sources.
- In the same terminal, execute the following command:
bash

echo "deb [signed-by=/usr/share/keyrings/balena-etcher.gpg] https://dl.cloudsmith.io/public/balena/etcher/deb/debian stable main" | sudo tee /etc/apt/sources.list.d/balena-etcher.list
echo "...": Prints the repository line.sudo tee /etc/apt/sources.list.d/balena-etcher.list: Writes the output to a new file namedbalena-etcher.listwithin the/etc/apt/sources.list.d/directory. This directory is where APT looks for additional repositories. Thesigned-bypart specifies the GPG key to use for this repository, enhancing security.
Step 3: Update Your APT Package List
After adding a new repository, it’s crucial to update your system’s package list so that apt knows about the newly available packages.
- Run the update command:
bash

sudo apt update
You should see output indicating thataptis fetching information from the Balena Etcher repository.
Step 4: Install Balena Etcher
Finally, you can install Balena Etcher like any other package.
- Execute the installation command:
bash

sudo apt install balena-etcher-electron
- When prompted, type
Yand pressEnterto confirm the installation.
Step 5: Launch Balena Etcher
Once the installation is complete, you can launch Balena Etcher from your applications menu. Search for “Etcher” in Ubuntu’s Dash (by pressing the Super/Windows key) and click its icon.
Advantages of the APT Repository Method:
- System Integration: Etcher integrates seamlessly with your Ubuntu desktop environment and applications menu.
- Automatic Updates: When you run
sudo apt update && sudo apt upgrade, Etcher will be updated automatically along with your other system packages. - Dependency Management:
apthandles all necessary dependencies automatically.
Disadvantages:
- Requires adding external repositories and GPG keys, which some users might find slightly more complex than the AppImage method.
Both methods are viable, but for most users seeking a “set-and-forget” solution with automatic updates, the APT repository method is generally recommended. Whichever you choose, you’re now ready to harness the power of Balena Etcher!
A Quick Guide to Using Balena Etcher
Now that Balena Etcher is successfully installed on your Ubuntu system, let’s briefly walk through its intuitive interface to demonstrate how to flash an operating system image to a USB drive or SD card. This process is remarkably simple, designed to minimize user error.
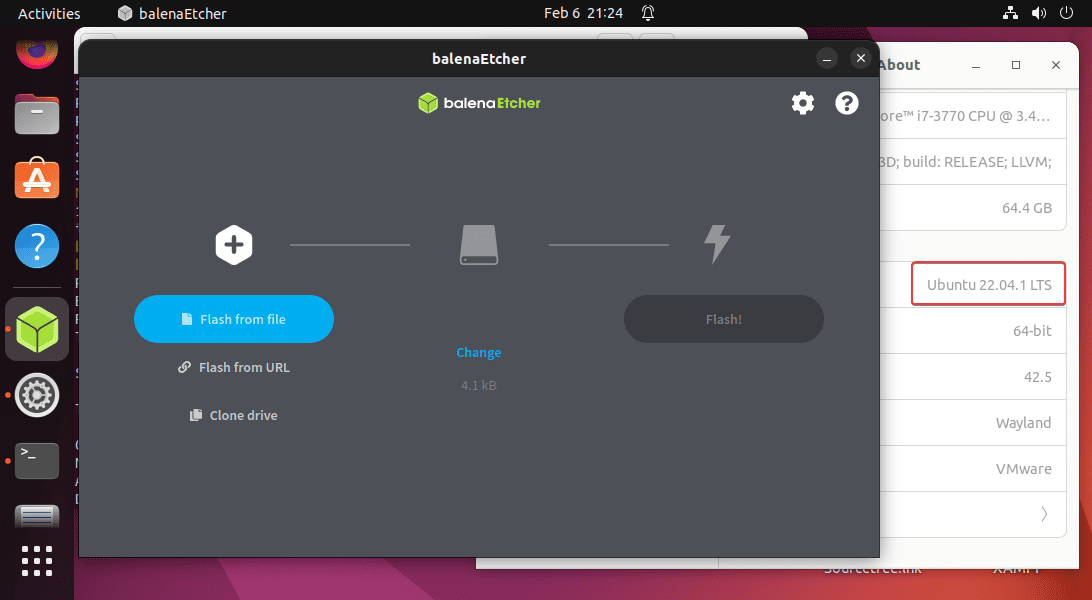
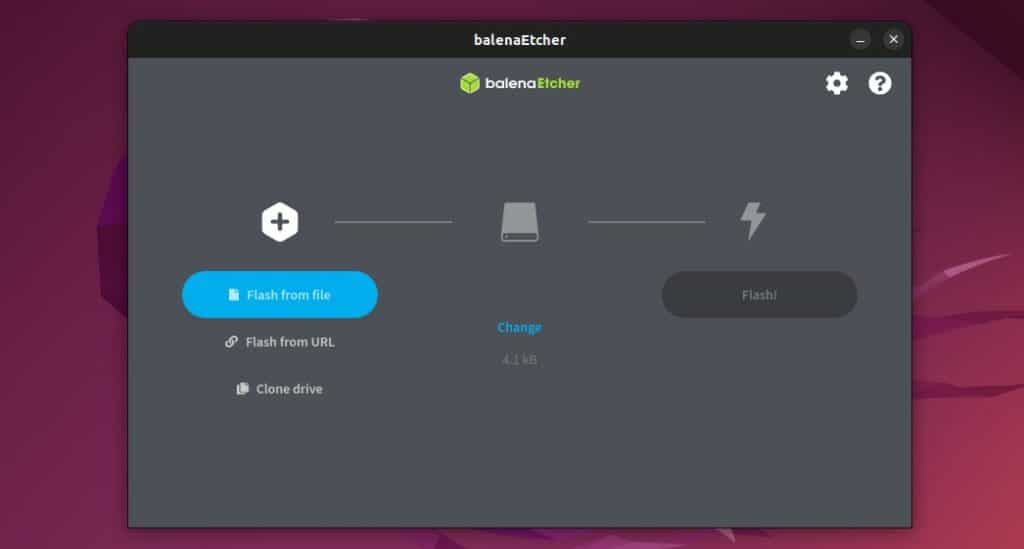
Step 1: Select Image
- Launch Balena Etcher from your applications menu.
- The first step in the Etcher window is “Flash from file.” Click the “Flash from file” button.
- A file explorer dialog will open. Navigate to the location where your OS image file (e.g., a
.isofor a Linux distribution, a.imgfor Raspberry Pi OS) is stored and select it.- Pro Tip: Ensure you’ve downloaded the correct OS image for your target device and verified its integrity if possible.
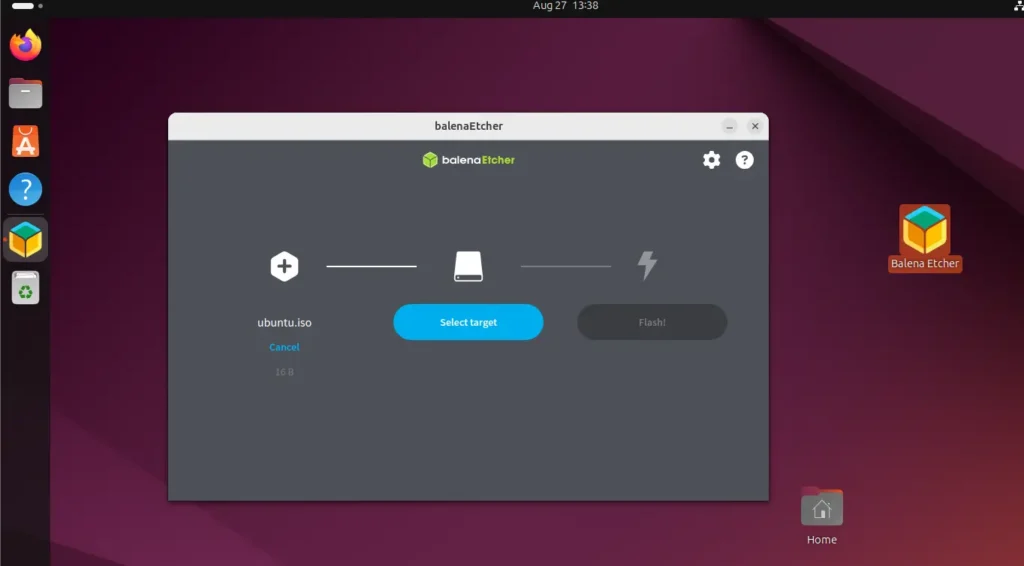
Step 2: Select Target
- After selecting your image, Etcher will automatically move to the “Select target” step.
- Insert your USB drive or SD card into your computer.
- Etcher should detect it automatically. Click the “Select target” button.
- A list of detected drives will appear. Carefully select the correct USB drive or SD card. This is the most critical step, as flashing the wrong drive will permanently erase its contents. Etcher attempts to hide your primary hard drive, but always double-check.
- Warning: If you have multiple external drives connected, confirm the drive size and label to ensure you’re selecting the intended target.
Step 3: Flash!
- Once both the image and target drive are selected, the “Flash!” button will become active. Click it.
- Etcher will prompt you for your user password (if you’re using the AppImage or if the installed version requires elevated permissions for direct disk access). Enter your password and click “Authenticate” or “OK.”
- The flashing process will begin. Etcher will display a progress bar showing the percentage complete for both writing and validating the image.
- Do not remove the USB drive/SD card or interrupt the process during this stage.
- After the writing is complete, Etcher will automatically proceed to validate the written image against the original source. This ensures data integrity.
- Once the validation is successful, you’ll see a “Flash Complete!” message. Your bootable drive is now ready.
You can now safely eject the USB drive or SD card from your system. Congratulations, you’ve successfully created a bootable media using Balena Etcher! You can now use this drive to install an OS, boot into a live environment, or set up your Raspberry Pi. This straightforward workflow is a testament to Etcher’s design philosophy, prioritizing ease of use and reliability for all users.
Troubleshooting Common Issues and Further Tips
Even with a user-friendly tool like Balena Etcher, you might occasionally encounter minor hiccups. Here are some common issues and their straightforward solutions, along with a few extra tips to enhance your experience.
Common Troubleshooting Scenarios:
-
Etcher Not Starting After AppImage Installation:
- Permission Issue: The most common reason. Ensure the AppImage file has execute permissions.
bash

chmod a+x ~/Downloads/balena-etcher-electron-x.y.z-linux-x64.AppImage
- Dependency: While AppImages are self-contained, very occasionally a fundamental system library might be missing. Ensure your system is up-to-date:
sudo apt update && sudo apt upgrade. - Corruption: The download might be corrupted. Delete the AppImage and re-download it from the official website.
- Permission Issue: The most common reason. Ensure the AppImage file has execute permissions.
-
“Permission Denied” Errors During Flashing:
- Sudo Rights: Ensure your user account has
sudoprivileges. - Authentication: When prompted, correctly enter your user password. Etcher needs root privileges to write directly to disk devices. If you’re running the AppImage and it doesn’t prompt for a password, try running it from the terminal with
sudo(though this is less common for modern AppImages which prompt internally). - Drive Lock: Sometimes, the USB drive might be mounted and “locked” by the system. Unmount it before flashing:
bash

sudo umount /dev/sdX1 # Replace X1 with your drive's partition, e.g., sdb1
It’s generally safer to just let Etcher handle this, but if errors persist, manual unmounting can help.
- Sudo Rights: Ensure your user account has
-
Flashing Process Fails or Gets Stuck:
- Bad USB Drive/SD Card: The media itself might be faulty or nearing its end of life. Try a different USB drive or SD card.
- Corrupted Image File: The
.isoor.imgfile might be corrupted. Re-download the image and, if the source provides them, verify its checksums. - Power Issues: Ensure your computer has stable power, especially when flashing large images.
- Insufficient Permissions for Image File: Make sure the image file you selected is readable by Etcher.
-
“Flash Complete!” but Drive Won’t Boot:
- Boot Order: Check your computer’s BIOS/UEFI settings to ensure it’s configured to boot from the USB drive first.
- UEFI/Legacy Mismatch: Some OS images are specific to UEFI or Legacy (BIOS) boot modes. Ensure your computer’s boot mode matches the image’s requirements.
- Image Integrity: While Etcher validates the write, the source image might have been bad. Re-download and verify.
- Hardware Compatibility: The OS you’re trying to install might not be compatible with your computer’s hardware.
Further Tips for Optimal Use:
- Always Use High-Quality Media: Invest in reliable USB drives and SD cards from reputable brands. Cheap, no-name drives are often slow and prone to errors.
- Keep Etcher Updated: If you installed via the APT repository, regular
sudo apt update && sudo apt upgradewill keep Etcher current. If using AppImage, periodically check the official website for newer versions. Updates often include bug fixes and performance improvements. - Close Other Applications: While flashing, especially with older hardware, close unnecessary applications to free up system resources and ensure a smoother process.
- Format Drive Before Flashing (Optional): While Etcher will overwrite the drive, sometimes pre-formatting a problematic drive with a tool like GParted can resolve underlying issues, especially if the drive was previously used for something unusual.
By understanding these common pitfalls and applying the troubleshooting steps, you can ensure a reliable and frustration-free experience with Balena Etcher. This proactive approach to problem-solving is a hallmark of good digital security and productivity, ensuring your tech projects stay on track and your systems remain robust.
Conclusion: Empowering Your Ubuntu with Balena Etcher
In the ever-evolving landscape of technology, the ability to efficiently and reliably manage operating system deployments is more crucial than ever. From system administrators provisioning servers to hobbyists tinkering with Raspberry Pis, the need for robust bootable media creation tools is universal. Balena Etcher, with its elegantly simple interface and powerful underlying mechanics, perfectly addresses this need, making it an indispensable asset for any Ubuntu user.
Throughout this guide, we’ve explored what makes Balena Etcher a standout choice—its user-friendliness, cross-platform compatibility, and crucial validation feature that ensures the integrity of your flashed images. We’ve walked through two distinct yet equally effective methods for installation on Ubuntu: the portable AppImage approach, ideal for quick deployment and minimal system footprint, and the APT repository method, offering seamless system integration and automatic updates. Each method caters to different preferences, ensuring that every Ubuntu user can readily integrate Etcher into their workflow.
Beyond installation, we’ve touched upon the practical application of Etcher, providing a quick guide to its intuitive three-step flashing process, emphasizing the critical importance of careful drive selection to prevent data loss. Furthermore, anticipating potential hurdles, we’ve detailed common troubleshooting scenarios, offering practical solutions that empower you to overcome minor issues and maintain a smooth operational flow.
Balena Etcher is more than just a utility; it’s a tool that fosters exploration and innovation. It democratizes the process of interacting with various operating systems, making it easier for users to experiment with new Linux distributions, set up development environments, or revive ailing systems with recovery tools. In line with the core values of modern tech, Etcher enhances productivity, bolsters digital security by ensuring image integrity, and simplifies complex tasks, allowing you to focus on the exciting possibilities that technology offers.
By installing Balena Etcher on your Ubuntu system, you’re not just adding another piece of software; you’re equipping yourself with a powerful capability that opens doors to endless technological ventures. So go ahead, flash that new OS, deploy that embedded project, and dive deeper into the world of computing with the confidence and ease that Balena Etcher provides. Your Ubuntu setup is now more versatile, more secure, and ready for whatever tech challenge comes its way.
aViewFromTheCave is a participant in the Amazon Services LLC Associates Program, an affiliate advertising program designed to provide a means for sites to earn advertising fees by advertising and linking to Amazon.com. Amazon, the Amazon logo, AmazonSupply, and the AmazonSupply logo are trademarks of Amazon.com, Inc. or its affiliates. As an Amazon Associate we earn affiliate commissions from qualifying purchases.