Embarking on the journey of installing a new operating system can be both exciting and daunting, especially when you’re considering a distribution like Archcraft, known for its performance and customization. For many users, the desire to experience Archcraft’s unique blend of elegance and functionality doesn’t mean abandoning their existing operating system. This is where the concept of dual-booting comes into play, allowing you to seamlessly switch between two operating systems on a single machine. This comprehensive guide will walk you through the intricate process of installing Archcraft in a dual-boot configuration with another operating system, typically Windows, although the principles can be adapted for other Linux distributions as well.

Understanding the Dual-Boot Landscape
Before diving into the technicalities, it’s crucial to grasp what dual-booting entails and the potential implications. Dual-booting involves partitioning your hard drive into separate sections, each dedicated to a different operating system. When you power on your computer, a boot manager will present you with a choice of which OS to launch. This approach offers the best of both worlds: the familiarity and application compatibility of your primary OS, alongside the cutting-edge features and flexibility of Archcraft.
Why Choose Archcraft for Dual-Booting?
Archcraft, a derivative of the highly customizable Arch Linux, presents a compelling option for dual-booting. It aims to provide a user-friendly experience while retaining the power and flexibility of its parent distribution. Its meticulously crafted desktop environments, often inspired by macOS and other popular interfaces, make it an attractive choice for users who value both aesthetics and performance. By dual-booting Archcraft, you can:
- Explore a New Ecosystem: Experience the vast software repositories, package management system (pacman), and the rolling-release model of Arch Linux without committing your entire system.
- Enhance Productivity: Leverage Archcraft’s optimized environments for specific tasks, such as development, content creation, or system administration, alongside your everyday OS.
- Learn and Customize: Dive deep into the Linux world, understand system configurations, and tailor your Archcraft experience to your exact preferences.
- Maintain Stability: Keep your primary, often Windows, installation for critical applications or gaming while experimenting with a powerful Linux distribution.
Preparation is Key: Before You Begin Installation
A successful dual-boot installation hinges on thorough preparation. Rushing this stage can lead to data loss or a non-bootable system. Therefore, treat this phase with the utmost importance.
1. Backup Your Existing Data
This is the most critical step. Before making any changes to your storage, ensure all your important files, documents, photos, and any other data are backed up to an external hard drive, cloud storage, or another safe location. Partitioning errors or unexpected issues can sometimes lead to data corruption or loss. A reliable backup strategy is your ultimate safety net.
2. Download the Archcraft ISO Image
Head over to the official Archcraft website and download the latest ISO (International Organization for Standardization) image. Ensure you’re downloading from a trusted source to avoid any potential security risks. The ISO file contains the entire operating system that you will use to install Archcraft.
3. Create a Bootable USB Drive
Once you have the ISO image, you need to transfer it to a USB drive in a bootable format. Several free tools can help you with this:
- Rufus (Windows): A popular and straightforward utility for creating bootable USB drives.
- balenaEtcher (Windows, macOS, Linux): A user-friendly, cross-platform tool known for its simple interface and reliability.
- Ventoy (Windows, Linux): A powerful tool that allows you to boot from multiple ISO files by simply copying them to the USB drive.
Choose your preferred tool, select the downloaded Archcraft ISO, and your USB drive, and initiate the creation process. This will effectively transform your USB drive into an installation medium for Archcraft.
4. Prepare Your Disk Space (Partitioning)
This is where you allocate space for Archcraft. You have two primary approaches:
- Shrinking Your Existing Partition (Recommended for Windows): If you’re dual-booting with Windows, the safest method is to shrink your existing Windows partition to create unallocated space.
- In Windows:
- Press
Windows Key + Xand select “Disk Management.” - Right-click on your C: drive (or the partition you want to shrink).
- Select “Shrink Volume.”
- Enter the amount of space you want to shrink in MB (e.g., 30GB = 30720 MB). Ensure you leave enough space for your Windows installation and applications.
- Click “Shrink.” This will create “Unallocated space” on your drive.
- Press
- In Windows:
- Using Free Space on a Separate Drive: If you have a secondary hard drive or SSD, you can dedicate it entirely to Archcraft, which simplifies partitioning significantly.
Important Considerations for Partitioning:
- Minimum Space: Archcraft, while efficient, still requires a reasonable amount of space. Aim for at least 20-30 GB for the base system and additional space for applications and user data.
- UEFI vs. BIOS: Your system’s firmware (UEFI or Legacy BIOS) will influence how you partition. Most modern systems use UEFI. Archcraft installers generally support both.
5. Disable Secure Boot and Fast Startup (Windows)
To ensure your computer can boot from the USB drive and that Archcraft can install without interference, it’s often necessary to disable Secure Boot and Fast Startup in your BIOS/UEFI settings and Windows.
- Disable Secure Boot: Access your system’s BIOS/UEFI settings during startup (usually by pressing keys like
Del,F2,F10, orF12). Look for a “Secure Boot” option, typically found under “Boot” or “Security” settings, and disable it. - Disable Fast Startup in Windows:
- Search for “Power Options” in the Windows search bar and open it.
- Click “Choose what the power buttons do.”
- Click “Change settings that are currently unavailable.”
- Uncheck “Turn on fast startup (recommended).”
- Click “Save changes.”
Note: The exact location of these settings can vary depending on your motherboard manufacturer and BIOS/UEFI version. Consult your motherboard’s manual if you’re unsure.
The Installation Process: Step-by-Step
With your preparations complete, you’re ready to embark on the Archcraft installation. This section assumes you have a Windows installation already present and you are creating unallocated space for Archcraft.
1. Booting from the Archcraft USB Drive
- Insert the bootable Archcraft USB drive into your computer.
- Restart your computer.
- As the computer starts, press the designated key (often
F12,F10,F2, orDel) to access the boot menu. - Select your USB drive from the boot menu and press Enter.
Your computer should now boot into the Archcraft live environment. You’ll typically be presented with a GRUB boot menu. Select the option to boot into Archcraft.
2. Launching the Archcraft Installer
Once the Archcraft live environment has loaded, you’ll see a desktop. Locate and launch the installer application. This is usually an icon on the desktop or in the application menu, often named something like “Archcraft Installer” or “Calamares Installer” (a popular graphical installer used by many Arch-based distributions).
3. Guided Installation with Calamares (Typical Scenario)
Archcraft often utilizes the user-friendly Calamares installer. Follow the on-screen prompts carefully:
a. Welcome and Language Selection
Choose your preferred language for the installation process.
b. Location and Keyboard Layout
Select your geographical location and the keyboard layout you intend to use. This ensures correct time zones and character input.
c. Installation Type: Partitioning
This is the crucial step where you’ll define where Archcraft will be installed.
-
Select “Install alongside…” or “Manual Partitioning.”
-
“Install alongside…” (If available and recognized): If the installer automatically detects your existing OS (e.g., Windows) and offers an “Install alongside” option, this can be the easiest path. It will typically automatically create and format partitions in the unallocated space.
-
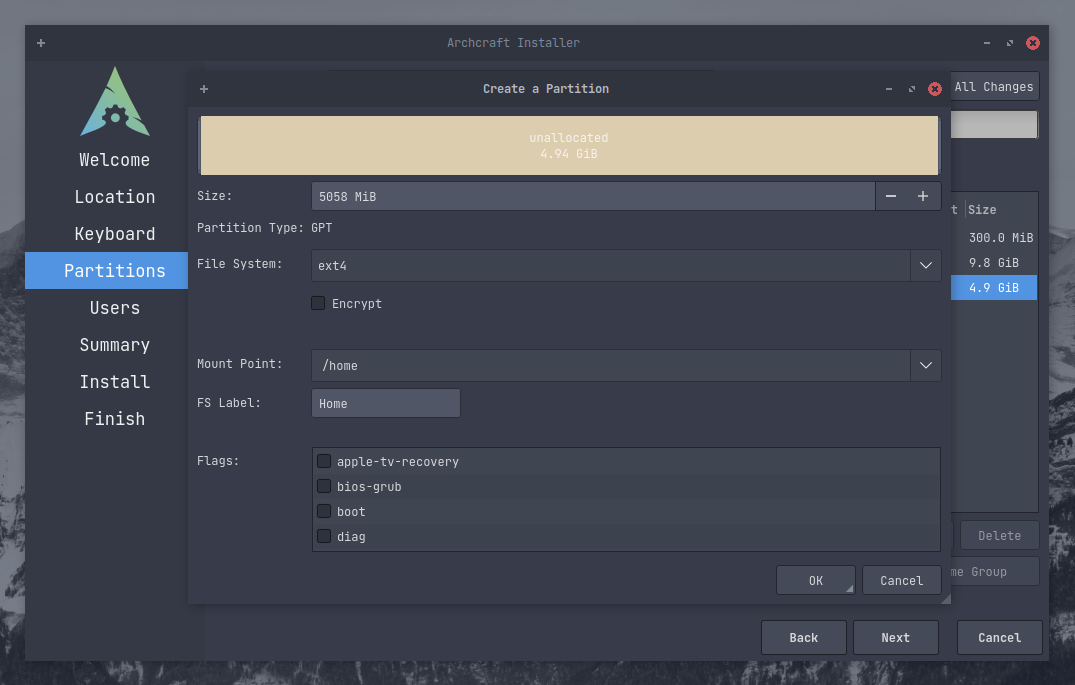
“Manual Partitioning” (Recommended for control): This is where you’ll explicitly tell the installer how to use your unallocated space.
- You’ll see a list of your drives and partitions. Identify the “Unallocated” space you created earlier.
- Create a Root Partition (
/):- Select the unallocated space.
- Click the “+” button to create a new partition.
- Size: Allocate the majority of your unallocated space here (e.g., 25GB+).
- File System:
ext4is a robust and commonly used file system for Linux. - Mount Point:
/(This is the root directory of your Linux system).
- Create a Swap Partition (Optional but Recommended):
- Create another partition from the remaining unallocated space.
- Size: Typically, it’s recommended to be at least as large as your RAM, or up to 8GB for most users.
- File System:
linux-swap - Mount Point: None (the system recognizes it as swap).
- Create a Home Partition (
/home) (Optional but Recommended):- This separates your user data from the system. If you reinstall Archcraft in the future, you can format the root partition without losing your personal files.
- Allocate the remaining unallocated space to this partition.
- File System:
ext4 - Mount Point:
/home
-
Boot Loader Installation: Ensure the boot loader (GRUB) is set to be installed on the main drive (e.g.,
/dev/sda, not a specific partition like/dev/sda1). The installer usually handles this correctly.
-
d. User Creation
Create a username, a computer name (hostname), and a strong password.
e. Summary and Installation
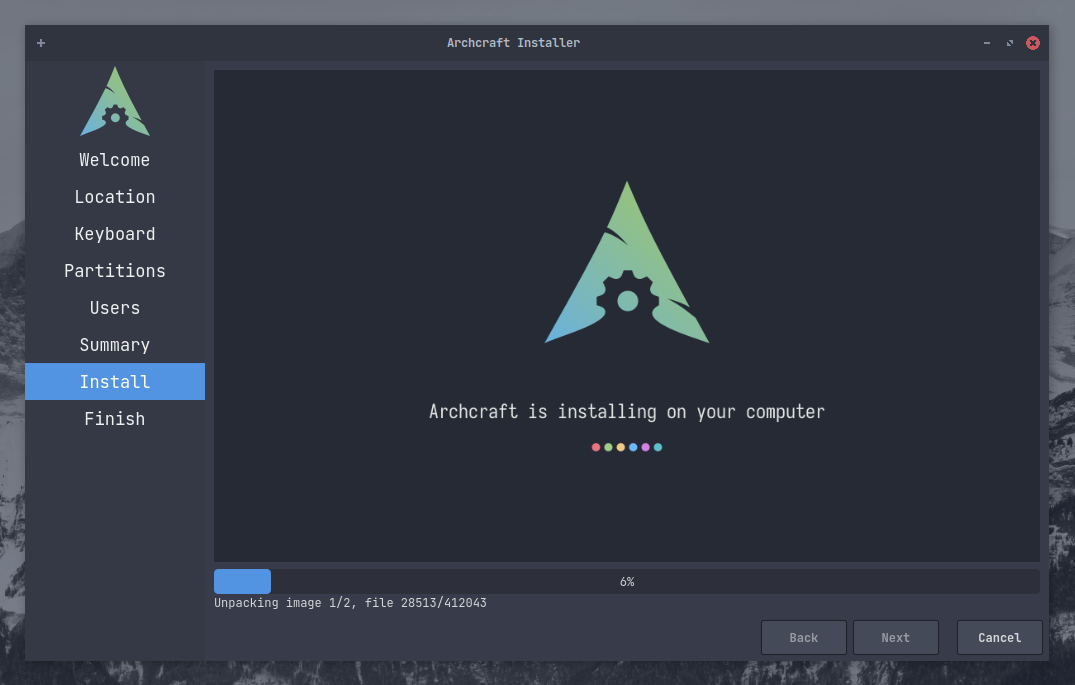
Review all your settings. Once you’re satisfied, click “Install.” The installer will now proceed to format the partitions and copy the necessary files.
4. Post-Installation and Boot Manager Configuration
After the installation is complete, you’ll be prompted to restart your computer. Remove the USB drive before restarting.
Upon rebooting, you should be presented with the GRUB boot menu, listing both Archcraft and your other operating system (e.g., Windows Boot Manager).
- Selecting Archcraft: Choose Archcraft from the menu to boot into your newly installed system.
- Selecting Your Other OS: Choose the other operating system to boot into it.
If GRUB doesn’t appear, or if it only shows one OS, don’t panic. This often means the bootloader configuration needs a slight adjustment. You might need to boot back into the Archcraft live environment and run grub-install and grub-mkconfig commands, or use a tool like boot-repair. However, in most modern installations with Calamares, this should be handled automatically.
Troubleshooting Common Dual-Boot Issues
While this guide aims for a smooth installation, encountering issues is part of the learning process. Here are some common problems and their solutions:
Issue: GRUB Boot Menu Not Appearing or Only Showing One OS
- Cause: Incorrect GRUB installation or configuration, or the other OS’s boot loader interfering.
- Solution:
- Boot from the Archcraft USB drive.
- Open a terminal.
- Mount your Archcraft root partition (e.g.,
sudo mount /dev/sdaX /mnt, where/dev/sdaXis your root partition). - Mount necessary virtual filesystems:
sudo mount --bind /dev /mnt/dev,sudo mount --bind /proc /mnt/proc,sudo mount --bind /sys /mnt/sys. - If you have a separate EFI partition, mount it:
sudo mount /dev/sdXY /mnt/boot/efi(replace/dev/sdXYwith your EFI partition). chrootinto your installed system:sudo arch-chroot /mnt.- Reinstall GRUB:
grub-install --target=x86_64-efi --efi-directory=/boot/efi --bootloader-id=Archcraft --recheck(adjust--efi-directoryif needed). - Generate GRUB configuration:
grub-mkconfig -o /boot/grub/grub.cfg. - Exit chroot and reboot:
exit, thenreboot.
Issue: One OS Overwrites the Other’s Bootloader
- Cause: Installing one OS after the other without proper bootloader management.
- Solution: Reinstall the bootloader (GRUB for Linux) from the Archcraft live environment as described above. GRUB is generally good at detecting other operating systems.
Issue: System Boots Directly into One OS Without a Choice
- Cause: GRUB is not the primary bootloader, or it’s not configured correctly.
- Solution: Access your BIOS/UEFI settings and ensure that “GRUB” or “Archcraft” is set as the primary boot device. If you have an EFI system, you might need to adjust the boot order within the EFI settings.
Issue: “No Bootable Device Found” Error
- Cause: Boot order is incorrect, or the boot partition is not recognized.
- Solution: Re-check your BIOS/UEFI boot order and ensure the drive containing GRUB and your operating systems is selected. Verify that partitions were created correctly during the installation.
Conclusion: Embracing Your Dual-Boot Setup
Congratulations! You have successfully navigated the process of installing Archcraft in a dual-boot configuration. You now have the flexibility to choose between your familiar operating system and the powerful, customizable world of Archcraft. This setup not only expands your computing horizons but also serves as an excellent platform for learning and experimentation.
Remember to periodically update your Archcraft system using sudo pacman -Syu to benefit from the latest software and security patches. Enjoy exploring the unique features and immense possibilities that Archcraft offers, all while maintaining the comfort and utility of your existing OS. The dual-boot journey is a testament to your technical curiosity and a gateway to a more diverse and capable computing experience.