Arch Linux, a rolling-release distribution renowned for its simplicity, flexibility, and user-centric approach, has long been the darling of experienced Linux users. Unlike many distributions that offer pre-configured environments, Arch Linux provides a barebones foundation, empowering you to build a system precisely to your needs. This hands-on approach, while demanding, unlocks unparalleled control and a deep understanding of your operating system. This guide, tailored for those who appreciate the intricate workings of technology and aspire to optimize their digital workspace, will walk you through the process of installing and configuring Arch Linux, transforming it into a powerful platform for productivity, innovation, and even digital security.
The Arch Linux Philosophy: Building Your Digital Foundation
At its core, Arch Linux embodies the KISS principle: Keep It Simple, Stupid. This translates to a minimalistic design and a focus on providing users with the tools and knowledge to construct their own tailored operating system. There are no lengthy, hand-holding graphical installers here. Instead, the installation process is command-line driven, a deliberate design choice that encourages a deeper engagement with the system’s architecture.
This philosophy aligns perfectly with the “Tech” pillar of our platform. For those who delve into technology trends, explore new software, experiment with AI tools, or seek to enhance their digital security, understanding the underlying operating system is paramount. Arch Linux offers a unique opportunity to demystify the Linux kernel, package management, and system configuration in a way that more abstract, pre-configured distributions simply cannot. It’s about building your own digital fortress, brick by digital brick, ensuring every component serves a purpose and is configured for optimal performance.
For individuals focused on personal branding and corporate identity within the “Brand” pillar, a custom-built Arch Linux system can reflect a meticulous attention to detail and a commitment to a streamlined, efficient workflow. Imagine showcasing your technical prowess by highlighting a system optimized for specific design software or development environments, all meticulously assembled on Arch.
And while Arch Linux itself doesn’t directly address the “Money” pillar, the efficiency and control it offers can indirectly contribute to financial goals. A well-tuned system can lead to faster development cycles, more efficient data processing, and reduced troubleshooting time, all of which can translate to increased productivity and potential for online income or side hustles. Furthermore, the deep understanding of system administration gained from installing Arch can open doors to freelance IT opportunities or specialized tech roles.
Preparing for the Arch Installation: Laying the Groundwork
Before diving into the installation, meticulous preparation is crucial. This stage is as much about understanding your hardware and your intended use case as it is about downloading the necessary files.
1. Understanding Your Hardware and Boot Mode
The first step in any OS installation is to ensure compatibility and understand your system’s boot mode.
- Hardware Requirements: Arch Linux is remarkably lightweight, but it’s always good practice to check the official Arch Linux Wiki for any specific hardware recommendations or potential conflicts. Generally, any modern computer capable of running a graphical desktop environment will handle Arch Linux with ease. Pay attention to your storage (SSD is highly recommended for performance), RAM, and CPU.
- UEFI vs. BIOS: Modern computers typically use UEFI (Unified Extensible Firmware Interface) for booting, while older systems rely on BIOS (Basic Input/Output System). Arch Linux supports both. However, the installation process and bootloader configuration will differ significantly. You will need to determine which mode your system is currently using. Most UEFI systems will have a “Secure Boot” option that may need to be temporarily disabled for the installation, depending on your bootloader choice. You can usually find this information in your system’s firmware settings (often accessed by pressing keys like F2, Del, F10, or F12 during startup).
2. Downloading the Arch Linux Installation Medium
The Arch Linux installation ISO image is your gateway to the system.
- Obtaining the ISO: Head to the official Arch Linux download page (archlinux.org/download/). You’ll find a list of mirror servers worldwide. Choose a mirror geographically close to you for faster download speeds. Download the latest stable ISO image.
- Verifying the Integrity: It’s essential to verify the integrity of the downloaded ISO to ensure it hasn’t been corrupted during download. The download page provides checksums (like SHA256) for each ISO. You can use tools like
sha256sum(on Linux/macOS) orGet-FileHash(on Windows PowerShell) to calculate the checksum of your downloaded file and compare it with the provided value. - Creating Bootable Media: Once you have a verified ISO, you need to create a bootable USB drive or DVD.
- For USB Drives:
- Linux/macOS: Use
dd. For example, if your USB drive is/dev/sdX(replace X with the correct drive letter, be extremely careful as this will erase all data on the drive), the command would be:sudo dd bs=4M if=/path/to/archlinux.iso of=/dev/sdX status=progress conv=fsync - Windows: Tools like Rufus or Etcher are excellent graphical options for creating bootable USB drives. Simply select the ISO and your USB drive, and the tool will handle the rest.
- Linux/macOS: Use
- For USB Drives:
3. Booting from the Installation Medium
With your bootable media ready, it’s time to boot your computer into the Arch Linux installer.
- Accessing Boot Menu: Restart your computer and access your system’s boot menu. This is typically done by pressing a specific key during startup (often F12, F10, F8, or Esc). You may need to consult your motherboard or computer manufacturer’s documentation to find the correct key.
- Selecting the Boot Device: From the boot menu, select your USB drive or DVD drive as the boot device.
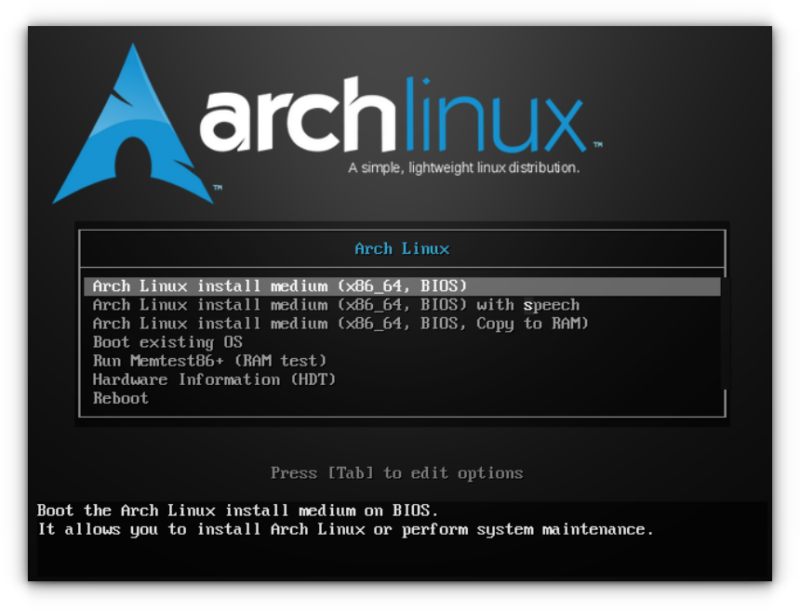
- The Arch Linux Live Environment: If successful, you will be greeted by the Arch Linux bootloader menu. Select the default “Arch Linux install medium” option. This will boot you into a command-line environment. You’ll see a message indicating you are logged in as the
rootuser, which is what you want for the installation.
The Installation Process: Building Your Arch System from the Ground Up
The installation process itself is a series of command-line operations. Each step is deliberate and builds upon the previous one. This is where the true power and flexibility of Arch Linux begin to manifest.
1. Network Configuration
Before proceeding, you need a stable internet connection to download packages.
- Wireless Connectivity: If you’re using Wi-Fi, you’ll need to connect.
- First, identify your wireless interface using
ip link. It will likely be named something likewlan0. - Then, use
wifi-menuto scan for available networks and connect. Follow the on-screen prompts to select your network and enter your password.
- First, identify your wireless interface using
- Wired Connectivity: If you’re using an Ethernet cable, the connection is usually established automatically. You can verify your network status by running
ip linkandping archlinux.org. If you can ping the Arch Linux website, your internet connection is working.
2. Partitioning and Formatting Storage Devices
This is a critical step where you define how your hard drive will be used.
- Identifying Your Drive: Use
lsblkorfdisk -lto list your storage devices and their partitions. Identify the drive you want to install Arch Linux on (e.g.,/dev/sda,/dev/nvme0n1). - Partitioning with
fdiskorgdisk:- For MBR (older BIOS) systems: Use
fdisk. For example,fdisk /dev/sda. - For GPT (UEFI) systems: Use
gdisk. For example,gdisk /dev/sda. - Common Partitions:
- EFI System Partition (ESP): Essential for UEFI booting. Typically 100-512MB, formatted as FAT32.
- Swap Partition: Used for virtual memory. The size is often recommended to be equal to your RAM, or at least 4GB.
- Root Partition (
/): The main partition where the operating system will reside. A minimum of 20-30GB is recommended, but more is better for applications and data. - Home Partition (
/home): Recommended to keep your user data separate from the system. This makes reinstallations and upgrades easier. Size depends on your storage needs.
- Formatting: After partitioning, you need to format each partition with a suitable filesystem.
- EFI System Partition:
mkfs.fat -F 32 /dev/sdX1(replace/dev/sdX1with your ESP partition) - Swap Partition:
mkswap /dev/sdX2(replace/dev/sdX2with your swap partition) - Root Partition:
mkfs.ext4 /dev/sdX3(replace/dev/sdX3with your root partition) - Home Partition:
mkfs.ext4 /dev/sdX4(replace/dev/sdX4with your home partition)
- EFI System Partition:
- For MBR (older BIOS) systems: Use
3. Mounting Partitions
Once formatted, you need to mount your partitions to make them accessible within the live environment.
- Mount the Root Partition:
mount /dev/sdX3 /mnt(replace/dev/sdX3with your root partition) - Create and Mount Other Partitions:
mkdir /mnt/bootmount /dev/sdX1 /mnt/boot(if you have a separate /boot partition for UEFI)mkdir /mnt/homemount /dev/sdX4 /mnt/home(replace/dev/sdX4with your home partition)
- Enable Swap:
swapon /dev/sdX2(replace/dev/sdX2with your swap partition)
4. Installing Essential Packages
Now it’s time to install the core Arch Linux system and essential utilities.
- Selecting Mirrors: Edit
/etc/pacman.d/mirrorlistto ensure you’re downloading from a fast and reliable mirror. - The
pacstrapCommand: This is the primary command for installing packages into your new root directory.pacstrap /mnt base linux linux-firmware nano grub efibootmgrbase: The minimal Arch Linux system.linux: The Linux kernel.linux-firmware: Firmware for various hardware.nano: A simple text editor.grub: A bootloader.efibootmgr: For managing UEFI boot entries.
5. System Configuration
With the base system installed, you need to configure it.
- Generate
fstab: This file defines how your partitions are mounted at boot.genfstab -U /mnt >> /mnt/etc/fstab
- Chroot into the New System: This allows you to work within your newly installed Arch system as if you were booted into it.
arch-chroot /mnt
- Time and Locale:
- Set Timezone:
ln -sf /usr/share/zoneinfo/Region/City /etc/localtime(e.g.,ln -sf /usr/share/zoneinfo/America/New_York /etc/localtime) - Run
hwclock:hwclock --systohc - Configure Locale: Uncomment your desired locale in
/etc/locale.gen(e.g.,en_US.UTF-8 UTF-8) and then runlocale-gen. Create/etc/locale.confwith your chosen locale (e.g.,LANG=en_US.UTF-8).
- Set Timezone:
- Hostname: Create
/etc/hostnameand add your desired hostname. - Hosts File: Edit
/etc/hoststo include entries for your hostname. - Root Password: Set a strong password for the root user:
passwd - Bootloader Installation (GRUB):
- For UEFI:
grub-install --target=x86_64-efi --efi-directory=/boot --bootloader-id=ARCHgrub-mkconfig -o /boot/grub/grub.cfg
- For BIOS:
grub-install /dev/sdX(replace/dev/sdXwith your disk, not a partition)grub-mkconfig -o /boot/grub/grub.cfg
- For UEFI:
6. Finalizing the Installation
- Exit
chroot: Typeexitto leave the chroot environment. - Unmount Partitions:
umount -R /mnt - Reboot:
reboot
7. Post-Installation: Customizing Your Arch Experience
Congratulations, you’ve installed Arch Linux! Now the real fun begins: tailoring it to your specific needs.
- Creating a User Account:
useradd -m -G wheel,audio,video,storage -s /bin/bash yourusernamepasswd yourusername
- Installing a Display Manager and Desktop Environment (Optional): If you want a graphical interface, you’ll need to install these. Popular choices include:
- Display Managers: SDDM, LightDM, GDM
- Desktop Environments: GNOME, KDE Plasma, XFCE, LXQt
- Window Managers: i3, dwm, AwesomeWM
- Install them using
pacman -S(e.g.,pacman -S sddm plasma kde-applications). - Enable your display manager service (e.g.,
systemctl enable sddm.service).
- Installing Essential Software: Use
pacman -Sto install your preferred applications, such as web browsers, office suites, development tools, and more. - Enabling Services: Many services need to be enabled to run at boot (e.g., NetworkManager, sshd). Use
systemctl enable service_name.
Embracing the Arch Way: Continuous Learning and Optimization
Installing Arch Linux is not an end point; it’s the beginning of a journey. The Arch User Repository (AUR) provides access to a vast collection of community-maintained packages, allowing you to install virtually any software imaginable. Regular system updates using pacman -Syu are crucial for maintaining security and stability in a rolling-release model.
The “Tech” enthusiast will find Arch Linux a playground for experimentation. You can meticulously tune system performance, explore different kernel modules, and delve into the intricacies of systemd. For those in the “Brand” space, a well-maintained Arch system can be a testament to technical acumen and a commitment to efficiency. And for the “Money”-minded, the productivity gains and the potential for specialized IT skills fostered by Arch Linux can be invaluable.
Arch Linux is more than just an operating system; it’s a philosophy. It’s about taking control, understanding your tools, and building a digital environment that perfectly suits your workflow and aspirations. Embrace the challenge, and you’ll discover a level of mastery over your technology that is truly rewarding.
aViewFromTheCave is a participant in the Amazon Services LLC Associates Program, an affiliate advertising program designed to provide a means for sites to earn advertising fees by advertising and linking to Amazon.com. Amazon, the Amazon logo, AmazonSupply, and the AmazonSupply logo are trademarks of Amazon.com, Inc. or its affiliates. As an Amazon Associate we earn affiliate commissions from qualifying purchases.