In today’s digital landscape, applications are the lifeblood of our devices, transforming a powerful piece of hardware like the MacBook into a versatile tool for productivity, creativity, communication, and entertainment. Whether you’re a seasoned macOS user or new to the Apple ecosystem, understanding the various methods of installing and managing apps is fundamental to maximizing your MacBook’s potential. This comprehensive guide will walk you through every step, from navigating the official App Store to securely downloading software from the web, ensuring you build a robust and efficient digital environment. As part of a website dedicated to Tech, Brand, and Money, we emphasize not just the how-to, but also the security implications and productivity benefits of smart app management, ensuring your digital experience is both seamless and secure.
Navigating the Mac App Store: Your Primary Gateway to Applications
The Mac App Store is Apple’s official marketplace for macOS applications, offering a curated and secure environment for discovering and downloading software. It’s the easiest and often safest way to get apps onto your MacBook, as every app undergoes a review process by Apple to ensure it meets their guidelines for functionality, content, and security. For most users, especially those prioritizing simplicity and safety, the App Store is the first and only stop for their software needs.
Discovering and Acquiring Apps from the App Store
Accessing the App Store is straightforward. You can find its icon in your Dock, or you can search for “App Store” using Spotlight (Command + Spacebar). Once open, you’ll be greeted by a user-friendly interface designed for easy navigation.
The App Store’s homepage often features curated collections, new releases, and editor’s picks, making it easy to stumble upon great software. If you have a specific app in mind, the search bar in the top-left corner is your best friend. Simply type the name of the app or a relevant keyword, and press Enter.
Each app has its own product page, providing details such as a description, screenshots, user reviews, ratings, system requirements, and in-app purchase information. This is invaluable for making informed decisions, allowing you to gauge an app’s reputation and suitability before committing.
To download a free app, simply click the “Get” button, which will then change to “Install.” For paid apps, the button will display the price. Clicking it will prompt you to confirm your purchase using your Apple ID password, Touch ID, or Face ID (if your MacBook supports it and it’s configured). The app will then download and automatically install itself into your Applications folder, becoming instantly accessible from your Launchpad or by searching via Spotlight. This streamlined process is a cornerstone of the Apple experience, emphasizing ease of use and immediate gratification. The App Store also keeps track of your purchases, allowing you to redownload any app you’ve previously acquired, even across multiple Mac devices linked to the same Apple ID, without repurchasing them. This helps in maintaining a consistent set of tools across your digital brand and ensures financial efficiency by preventing duplicate purchases.
Managing Your App Store Downloads and Updates
Beyond initial installation, the Mac App Store also serves as a central hub for managing your applications. Keeping your apps updated is crucial for security, performance, and accessing the latest features. Developers frequently release updates to fix bugs, introduce new functionalities, and patch security vulnerabilities.
To check for updates, open the App Store and click on the “Updates” tab in the sidebar. Any available updates for your App Store-installed applications will be listed here. You can choose to update individual apps by clicking the “Update” button next to each, or click “Update All” to streamline the process. macOS itself also receives updates through the App Store, usually found under System Settings > General > Software Update on newer macOS versions, or System Preferences > Software Update on older versions.
For apps you no longer need, uninstalling them is as simple as finding the app in your Applications folder, dragging its icon to the Trash in your Dock, and then emptying the Trash. This method generally removes the main application file, although some associated preference files or caches might remain. While simple, understanding this basic management is key to maintaining a clutter-free and efficient system, contributing to better overall productivity and avoiding unnecessary resource consumption.
Beyond the App Store: Installing Apps from the Web with Confidence
While the Mac App Store is a fantastic resource, many popular and niche applications are distributed directly by developers via their websites. Installing apps from the web offers a broader selection but requires a slightly different approach and a greater awareness of security best practices. This method empowers users with more choice, but also places a greater responsibility on them to ensure the legitimacy and safety of the software they install.
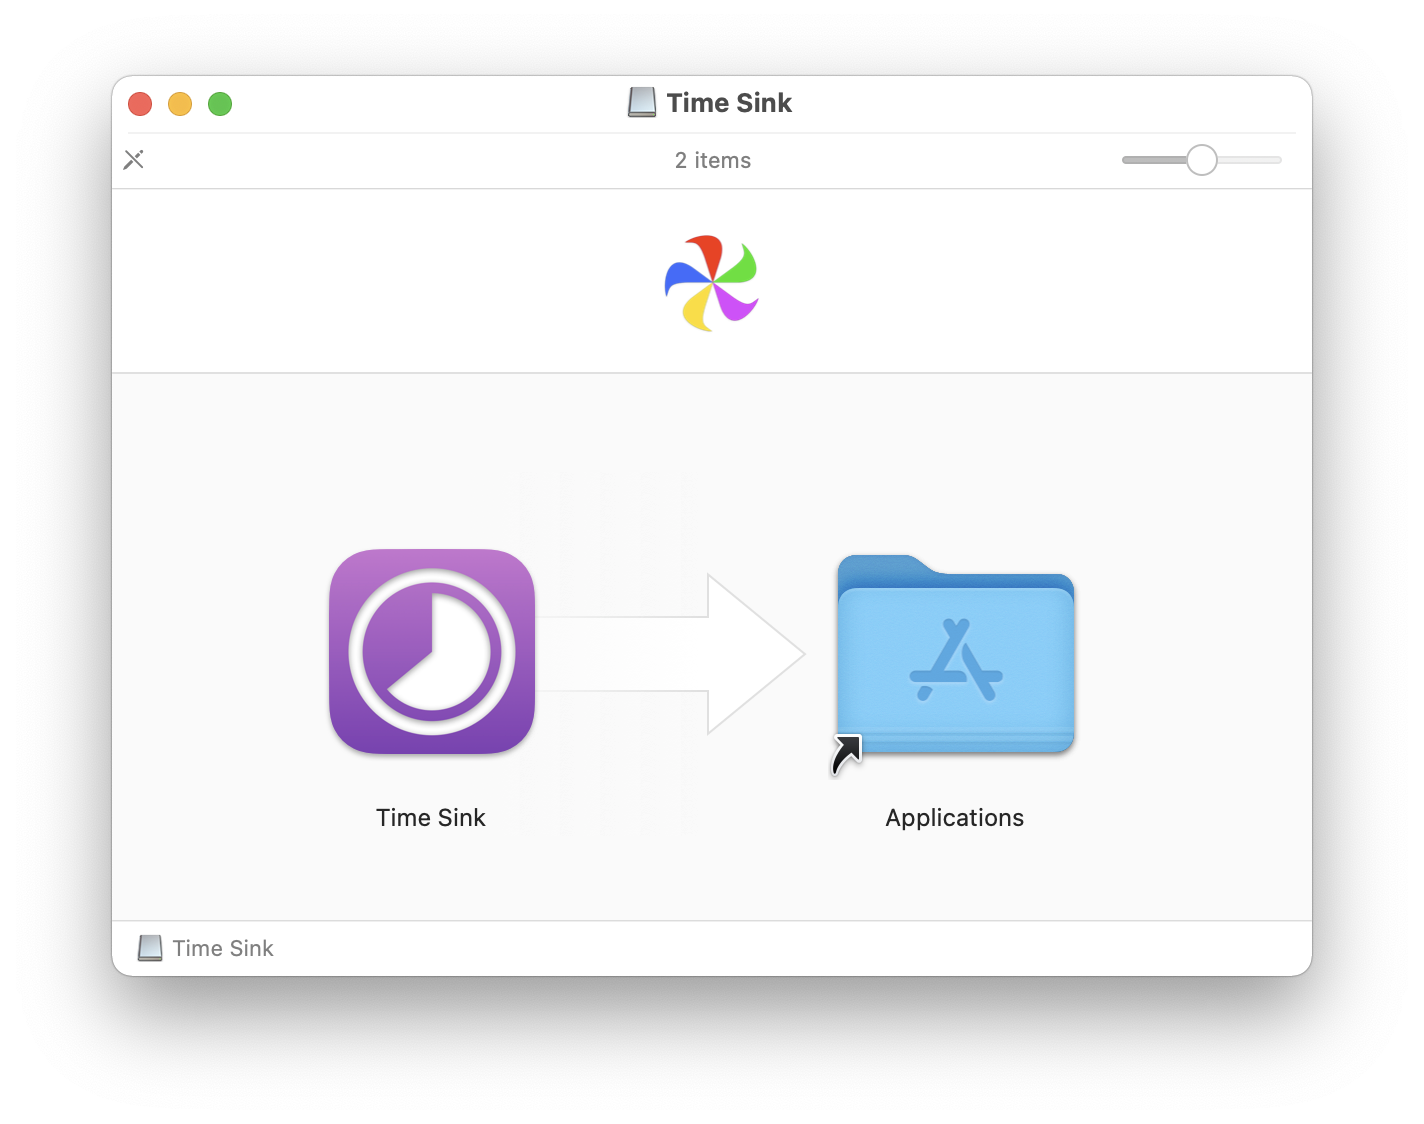
Understanding DMG Files and the Drag-and-Drop Method
The most common way to distribute macOS applications outside the App Store is through Disk Image files, identified by the .dmg extension. These files are essentially virtual disks that, when opened, mount like a physical drive on your desktop or in Finder’s sidebar.
The process typically involves:
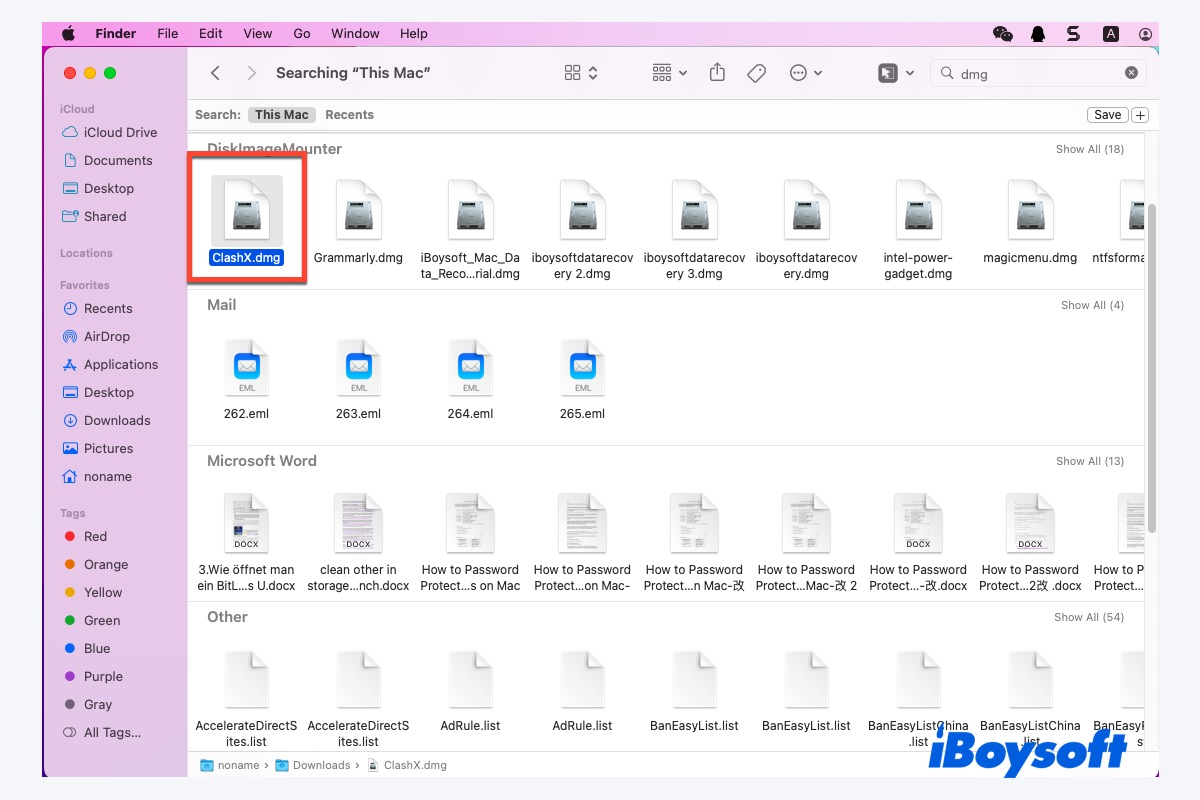
- Downloading the DMG: Visit the official website of the software developer and download the
.dmgfile. Always prioritize official sources to avoid malicious software. - Opening the DMG: Double-click the downloaded
.dmgfile. A new window will appear, often containing the application icon and an alias to your Applications folder. - Installing the App: Drag the application icon from the
.dmgwindow to the Applications folder alias. This copies the app to your system. - Ejecting the DMG: Once the app is copied, drag the mounted disk image icon from your desktop or Finder sidebar to the Trash (which will change to an eject symbol), or right-click it and select “Eject [Disk Image Name]”. You can then delete the original
.dmgfile from your Downloads folder as it’s no longer needed.
This drag-and-drop method is intuitive and prevalent. It’s crucial to understand that simply opening a DMG file does not install the app; you must explicitly drag it to your Applications folder. Many third-party apps, from web browsers like Chrome and Firefox to productivity suites and creative tools, follow this installation model.
Navigating Security Settings for Web Downloads (Gatekeeper)
Apple has robust security features built into macOS, notably “Gatekeeper,” designed to protect users from inadvertently installing malicious software. When you download an app from outside the App Store, Gatekeeper performs checks to ensure the app is from an identified developer and hasn’t been tampered with.
By default, macOS is set to allow apps downloaded from the App Store and “identified developers.” When you try to open an app from an identified developer for the first time, you’ll see a warning dialog stating that the app was “downloaded from the internet.” Clicking “Open” will allow it to run. This initial security check helps confirm that the app is indeed legitimate and hasn’t been altered since it was digitally signed by the developer.
If you attempt to open an app from an unidentified developer, macOS will block it with a more stern warning, stating that the app “cannot be opened because the developer cannot be verified.” While it’s generally advised to stick to identified developers, there might be legitimate reasons to install software from smaller, open-source projects or beta versions that haven’t been notarized by Apple.
To bypass this warning for a trusted unidentified app (and only if you are absolutely sure about its source and integrity):
- Go to System Settings (or System Preferences) > Privacy & Security.
- Scroll down to the “Security” section.
- You might see a message indicating that the app was blocked. Click “Open Anyway” or “Allow Anyway” next to the app’s name. You may need to authenticate with your password or Touch ID.
- You will then be prompted with the “downloaded from the internet” dialog; click “Open” to proceed.
Exercise extreme caution when overriding Gatekeeper. Always verify the source and reputation of the software before proceeding. Unidentified developers could pose a digital security risk, potentially leading to malware or privacy breaches. For users focused on Brand and Money, ensuring software integrity protects not only personal data but also the professional image and financial security that rely on a secure computing environment.
Working with Package (.pkg) Installers
Another method for web-distributed apps is the .pkg (package) installer, similar to how software is installed on Windows. These are typically used for more complex applications that require specific components to be placed in various locations on your system, or for installing system-level drivers and utilities.
The process is akin to a traditional software installation wizard:
- Download the PKG: Obtain the
.pkgfile from the developer’s official website. - Run the Installer: Double-click the
.pkgfile. This will launch an installer wizard. - Follow On-Screen Prompts: The wizard will guide you through several steps, including agreeing to terms and conditions, choosing an installation location (usually the default is fine), and confirming the installation with your administrator password or Touch ID.
- Complete Installation: Once the installation is complete, the wizard will notify you. You can then close the installer and, optionally, move the
.pkgfile to the Trash.
Like DMG files, always ensure the .pkg file comes from a reputable source. Gatekeeper will also apply its security checks to .pkg installers, prompting you for confirmation if the developer is identified or blocking it if they are not. These types of installers are common for professional-grade software, ensuring all necessary components are correctly integrated into your macOS system.
Advanced App Management: Updating, Uninstalling, and Optimization
Effective app management goes beyond just installation; it encompasses keeping your software healthy, secure, and only retaining what you truly need. A well-managed app ecosystem contributes significantly to your MacBook’s overall performance, digital security posture, and your personal productivity.
Keeping Your Apps Up-to-Date for Performance and Security
Regularly updating your apps is a cornerstone of good digital hygiene. Updates often bring:
- Security Patches: Developers frequently release updates to fix vulnerabilities that could be exploited by malicious actors. Keeping software current significantly reduces your exposure to security risks.
- Performance Improvements: Updates can optimize app code, leading to faster loading times, smoother operation, and reduced resource consumption.
- New Features: Developers constantly innovate, adding new functionalities that can enhance your productivity or creative capabilities.
- Bug Fixes: Updates resolve glitches and stability issues, improving the overall user experience.
While App Store apps are easily updated through the App Store itself, apps installed from the web require a slightly different approach. Many web-downloaded applications include their own built-in update mechanisms. This often appears as a notification within the app, or you might find an “Check for Updates” option in the app’s menu bar (e.g., App Name > Check for Updates). Some apps, like web browsers, update automatically in the background. For others, you may need to periodically visit the developer’s website to download the latest version and reinstall it (often the new version will simply overwrite the old one).
Developing a routine for checking updates, perhaps once a week or month, ensures your software is always performing optimally and securely.
Efficiently Uninstalling Unwanted Applications
Just as important as installing apps is knowing how to remove them cleanly. Uninstalling apps you no longer use frees up valuable storage space, reduces clutter, and can even improve performance by eliminating background processes or outdated files.
- App Store Apps: As mentioned, drag the app from your Applications folder to the Trash.
- DMG-installed Apps: Similar to App Store apps, drag the app icon from your Applications folder to the Trash. For both App Store and DMG apps, emptying the Trash is the final step.
- PKG-installed Apps: These can be trickier. Some
.pkginstallers come with a corresponding uninstaller application, usually found within the original.pkgor sometimes in the Applications folder after installation. If not, you may need to consult the developer’s website for specific uninstallation instructions. Simply dragging a.pkginstalled app to the Trash might leave behind numerous associated files.
While dragging to Trash works for most simple apps, it often leaves behind “leftover” files such as preference files, caches, and support folders scattered across your system. For the average user, this isn’t a major issue, but over time these can accumulate.
Embracing Third-Party Tools for Enhanced App Control
For those who want a more thorough cleanup or advanced app management, third-party uninstaller applications can be incredibly useful. Tools like CleanMyMac X, AppCleaner, or OnyX specialize in identifying and removing all associated files when you uninstall an app, ensuring a truly clean removal. These tools typically work by monitoring app installations or scanning your system for files related to a specific application.
While these tools often offer free basic functionalities, their premium versions might include additional features for system optimization, malware scanning, and other maintenance tasks. For users deeply invested in their MacBook’s long-term performance and digital hygiene, investing in such a tool can be a wise decision, especially in a productivity-focused environment where system efficiency translates directly to financial and time savings. These tools can also help identify and remove brand-related junk files that might be inadvertently slowing down your system.
Best Practices for a Secure and Productive App Ecosystem
Maintaining a healthy and efficient app ecosystem on your MacBook isn’t just about technical steps; it involves adopting smart habits that enhance digital security and maximize your personal and professional productivity.
Prioritizing Digital Security and App Integrity
Your MacBook is a gateway to your digital life, and the apps you install play a critical role in its security.
- Always Download from Official Sources: This is the golden rule. Whether it’s the Mac App Store or a developer’s website, always ensure you’re downloading software from its legitimate, official source. Avoid third-party download sites that might bundle legitimate software with adware or malware.
- Pay Attention to Gatekeeper Warnings: Don’t dismiss security warnings without understanding them. If macOS warns you about an unidentified developer, proceed with extreme caution and only if you have independently verified the software’s legitimacy.
- Read Reviews and Research: Before installing a new app, especially a less-known one, take a moment to read user reviews, check its ratings, and do a quick online search for any reported issues or security concerns.
- Understand Permissions: When an app requests access to your camera, microphone, location, or other sensitive data, understand why it needs those permissions. Grant only what is necessary for the app’s functionality. You can manage these permissions in System Settings > Privacy & Security.
- Regular Security Software Checks: While macOS has built-in protections, consider using reputable antivirus or anti-malware software for an additional layer of security, especially if you frequently download from various sources.
Optimizing Your MacBook’s Performance Through App Management
A lean and well-managed app environment contributes directly to your MacBook’s speed and longevity.
- Regularly Audit Your Apps: Periodically review the apps in your Applications folder. If you haven’t used an app in months, consider uninstalling it. Clutter slows down your cognitive processes as well as your machine.
- Monitor Resource Usage: Use Activity Monitor (found in Applications > Utilities) to identify apps that consume excessive CPU, memory, or energy. If an app is a resource hog and you don’t critically need it, look for alternatives or manage its usage.
- Manage Login Items: Many apps are configured to launch automatically when you start your MacBook. While convenient for some, too many login items can significantly slow down startup times. Go to System Settings > General > Login Items to manage which apps launch at startup.
- Clear Caches and Temporary Files: Over time, apps accumulate cache files and temporary data. While some are useful for performance, others can grow large and become redundant. Utility tools (as mentioned above) can help clear these safely.
By adhering to these best practices, you not only safeguard your MacBook from potential threats but also ensure it runs smoothly and efficiently, supporting your productivity and contributing to a positive user experience. Whether you’re a tech enthusiast, a brand builder, or someone focused on financial well-being, a well-curated and securely managed app ecosystem is a fundamental asset in the modern digital age. Mastering app installation and management on your MacBook is an investment in your digital future, providing a foundation for innovation and efficiency.
aViewFromTheCave is a participant in the Amazon Services LLC Associates Program, an affiliate advertising program designed to provide a means for sites to earn advertising fees by advertising and linking to Amazon.com. Amazon, the Amazon logo, AmazonSupply, and the AmazonSupply logo are trademarks of Amazon.com, Inc. or its affiliates. As an Amazon Associate we earn affiliate commissions from qualifying purchases.