The operating system (OS) is the fundamental software that manages all the hardware and software resources on your computer. It’s the conductor of your digital orchestra, allowing you to run applications, interact with your hardware, and manage files. Without an OS, your computer is little more than a sophisticated paperweight. Whether you’re setting up a brand-new machine, upgrading an older one, troubleshooting persistent issues, or exploring the world of dual-booting, knowing how to install an operating system is a crucial skill for any tech enthusiast or professional. This comprehensive guide will walk you through the entire process, from initial preparations to post-installation optimization, ensuring a smooth and successful transition to your new digital environment.

Understanding the Essentials: What You Need Before You Start
Before embarking on the OS installation journey, thorough preparation is key. Rushing into the process without the necessary tools and understanding can lead to frustrating setbacks. This section outlines the critical components and considerations you need to address upfront.
Choosing Your Operating System
While the core installation process shares similarities across different platforms, your choice of OS dictates many specifics. The three dominant players are:
- Windows: The most widely used desktop OS, known for its broad software compatibility and user-friendly interface. Ideal for gaming, general productivity, and business applications.
- macOS: Apple’s proprietary OS, exclusive to Mac hardware. Valued for its elegant design, robust security, and seamless integration within the Apple ecosystem, particularly popular among creative professionals.
- Linux: An open-source, highly customizable OS with numerous distributions (e.g., Ubuntu, Fedora, Mint). Favored by developers, IT professionals, and users who prioritize control, privacy, and free software. It’s also an excellent choice for breathing new life into older hardware.
For the purpose of this guide, we’ll focus on a generalized process applicable to most modern OS installations, with specific mentions where distinctions are significant.
Gathering Your Arsenal: Prerequisites for a Smooth Installation
A successful OS installation hinges on having the right tools and information readily available. Don’t skip these crucial preparatory steps.
Hardware Compatibility
Before anything else, ensure your computer’s hardware meets the minimum requirements for your chosen OS. Each operating system has specific demands for processor speed, RAM, and storage space. Overlooking this can result in a sluggish system or even a failed installation. Check the official website of your chosen OS (Microsoft, Apple, or your Linux distribution) for detailed specifications. For instance, Windows 11 requires a TPM 2.0 module and Secure Boot support, which might be a sticking point for older hardware.
Installation Media (ISO & Bootable Drive)
You’ll need a way to transfer the OS installation files to your computer. This typically involves:
- Downloading the ISO File: An ISO file is a disk image that contains all the installation files for the operating system. You can usually download these directly from the OS developer’s website (e.g., Microsoft’s Media Creation Tool for Windows, a specific Linux distribution’s website).
- Creating a Bootable Drive: Once you have the ISO file, you’ll need to “burn” it to a USB flash drive (recommended) or a DVD.
- For USB drives: Tools like Rufus (Windows) or Etcher (Windows, macOS, Linux) are excellent for creating bootable USBs. They simplify the process of making your USB drive recognized as an installation medium. Ensure your USB drive has at least 8GB of storage for most modern OS installations.
- For DVDs: While less common now, you can use built-in burning utilities in your OS or third-party software to burn the ISO to a DVD.
Crucial Backups
This is arguably the most critical step. Installing an OS, especially a “clean” installation, will erase all data on the target drive. If you have any files, photos, documents, or software configurations you wish to keep, they must be backed up to an external hard drive, cloud storage, or another computer before you begin. Do not proceed until you are absolutely certain your valuable data is safe.
Power and Connectivity
Ensure your computer is connected to a stable power source throughout the installation. A power interruption during critical installation phases can corrupt your drive and force you to start over, or worse, render your drive unusable without advanced recovery techniques. An internet connection (preferably wired Ethernet) is also highly recommended, as modern OS installations often download critical updates and drivers during setup.
Product Keys and Licenses
If you’re installing a commercial OS like Windows, you’ll likely need a product key to activate it. Have this key readily available. For macOS, activation is typically tied to your Apple ID and hardware. Most Linux distributions are free and don’t require product keys.
Preparing Your System: Setting the Stage for Success
With your prerequisites gathered, the next phase involves configuring your computer to accept the new operating system. This includes preparing your bootable media, adjusting BIOS/UEFI settings, and managing your disk partitions.
Creating Bootable Installation Media
As mentioned, this step transforms your downloaded ISO file into a functional installer.
- Using Rufus (for Windows ISOs on Windows PC):
- Download and run Rufus.
- Insert your USB drive.
- Select your USB drive under “Device.”
- Click “SELECT” and choose your OS ISO file.
- For “Partition scheme,” choose MBR or GPT based on your computer’s firmware (most modern PCs use GPT for UEFI, older ones MBR for BIOS). Rufus will often suggest the correct option.
- Click “START” and confirm any warnings about data erasure.
- Using Etcher (for all OS ISOs on Windows, macOS, Linux):
- Download and install Etcher.
- Click “Flash from file” and select your OS ISO.
- Click “Select target” and choose your USB drive.
- Click “Flash!” and enter your system password if prompted.
Once complete, your USB drive is ready to serve as the installation medium.
Configuring BIOS/UEFI Settings
The BIOS (Basic Input/Output System) or its modern successor, UEFI (Unified Extensible Firmware Interface), is the firmware that initializes your computer’s hardware before the OS loads. You need to access it to tell your computer to boot from your newly created installation media instead of your existing hard drive.
Accessing BIOS/UEFI
Restart your computer and repeatedly press a specific key (e.g., Delete, F2, F10, F12, Esc) as soon as it starts up. The exact key varies by manufacturer (check your motherboard manual or look for a prompt on screen). You’ll enter a text-based or graphical interface.
Setting the Boot Order
Within BIOS/UEFI, navigate to the “Boot” or “Startup” section. Here, you’ll see a list of boot devices. You need to move your USB drive (or DVD drive) to the top of the boot order, ensuring it’s the first device your computer attempts to boot from. Save your changes and exit. Your computer will then restart and attempt to boot from your installation media.
Disabling Secure Boot (for some Linux installs)
Secure Boot is a UEFI feature designed to prevent malicious software from loading during startup. While beneficial for security, it can sometimes interfere with Linux installations or older OS versions. If you encounter issues booting a Linux installer, you might need to temporarily disable Secure Boot in your UEFI settings. Remember to re-enable it after installation if desired.
Disk Management and Partitioning Considerations
During the installation, you’ll be prompted to select where to install the OS. This involves interacting with your hard drive’s partitions.
Understanding Disk Types (MBR vs. GPT)
- MBR (Master Boot Record): An older partitioning scheme that supports up to 4 primary partitions and disk sizes up to 2TB. Typically used with legacy BIOS systems.
- GPT (GUID Partition Table): The newer standard, used with UEFI systems. It supports virtually unlimited partitions and much larger disk sizes. Most modern OS installations prefer GPT.
Ensure your chosen partition scheme matches your system’s firmware mode (UEFI with GPT, BIOS with MBR) to avoid boot issues.
Partitioning for Single OS vs. Dual Boot
- Single OS (Clean Install): If you’re installing a single OS on a blank drive or want to wipe everything, you can simply select the entire drive and let the installer create the necessary partitions (e.g., system reserved, OS partition). Alternatively, you can delete all existing partitions, leaving “unallocated space,” and then proceed.
- Dual Boot: If you want to run two operating systems (e.g., Windows and Linux) on the same machine, you’ll need to create a separate partition for each OS. This requires careful planning. You’ll typically shrink an existing partition (e.g., your Windows C: drive) to create unallocated space for the new OS. It’s often recommended to install Windows first, then Linux, as Linux installers are generally better at detecting and configuring dual-boot options.
The Installation Process: A Step-by-Step Walkthrough
Once your system is prepared and configured to boot from your installation media, the actual installation begins. While the exact screens vary by OS, the general flow remains consistent.
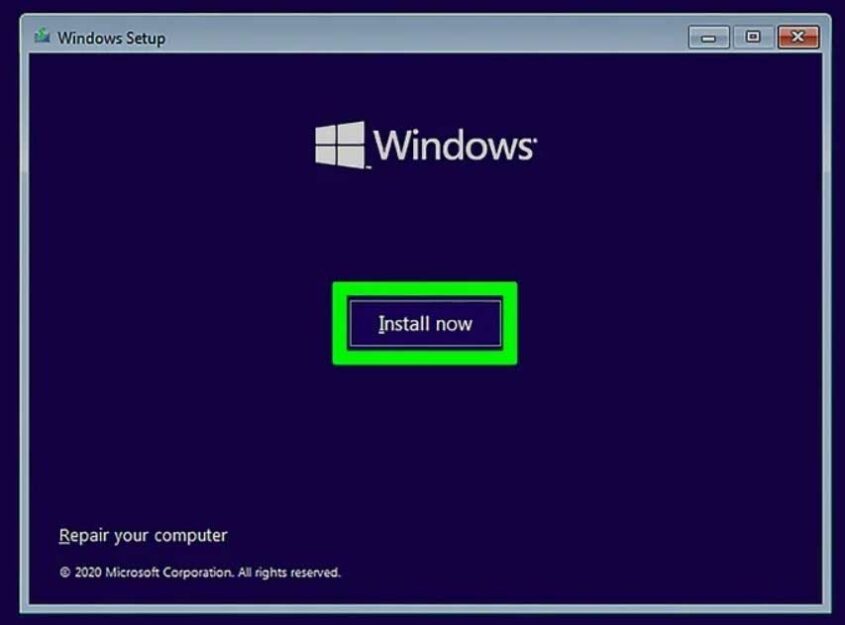
Initiating the Installation
With the boot order set, restart your computer. You should see a message like “Press any key to boot from USB…” or the OS installer’s logo (e.g., Windows logo, Linux distribution logo). If you don’t, revisit your BIOS/UEFI settings.
Navigating the Setup Wizard
The installer will guide you through a series of prompts.
Language, Time, and Keyboard Selection
Your first choices will typically be your preferred language, time and currency format, and keyboard layout. Select the options appropriate for your region.
License Agreement and Product Key Entry
You’ll be presented with the End-User License Agreement (EULA). Read it (or at least scroll through it) and accept the terms to proceed. For Windows, this is often where you enter your product key. If you don’t have one readily available or plan to activate later, there’s usually an option to skip this step temporarily.
Choosing Installation Type (Upgrade vs. Custom/Clean)
- Upgrade: This option attempts to install the new OS while preserving your files, settings, and applications from a previous version. It’s generally less reliable than a clean install and can sometimes carry over old issues.
- Custom (or Clean Install): This is the recommended option for a fresh start. It installs a completely new copy of the OS, wiping all data on the target partition. This results in the most stable and performant system. You must have backed up your data if choosing this option.
Selecting/Creating a Partition for Your OS
This is where you tell the installer where to put the operating system files.
- If performing a clean install on a blank drive or wiping everything: You might see “Unallocated Space.” Select this and click “New” to create a new partition, or simply select the drive and let the installer do it automatically.
- If performing a clean install on a drive with existing data you want to remove: Select the existing partitions one by one and click “Delete” until the entire drive is “Unallocated Space.” Then, proceed as above.
- If dual-booting: Select the pre-allocated partition you created earlier for the new OS. Ensure you do not accidentally select or format the partition containing your existing OS. Pay close attention to partition sizes and labels. For Linux, you might need to manually create root (
/), swap, and home (/home) partitions.
After selecting or creating your target partition, the installer might ask to format it. Confirm this, as it prepares the partition for the OS files.
The Core Installation Phase
Once you’ve made your partitioning choices and clicked “Next” or “Install,” the installer will begin copying files, expanding components, and installing the core operating system. This phase is largely automated and can take anywhere from 15 minutes to an hour or more, depending on your hardware speed and the OS. Your computer may restart multiple times during this process. Do not turn off your computer or remove the installation media during this phase.
Initial System Configuration and User Setup
After the core installation finishes and your computer restarts, it will boot into the newly installed OS for the first time. You’ll be prompted to complete the initial setup:
- Region and Keyboard Layout: Reconfirm these settings.
- Network Connection: Connect to your Wi-Fi or wired network.
- User Account Creation: Create your main user account, choose a username, and set a strong password. For Windows, you might be prompted to sign in with a Microsoft account. For macOS, an Apple ID.
- Privacy Settings: Configure privacy options regarding data collection, location services, and diagnostic data. Review these carefully.
- Time Zone: Set your correct time zone.
Once these steps are complete, you’ll finally be greeted by your brand-new desktop!
Post-Installation Essentials: Optimizing Your New OS
Getting to the desktop is a significant milestone, but your journey isn’t quite over. Several critical steps remain to ensure your system is secure, functional, and performs optimally.
Installing Drivers: The Lifeline of Your Hardware
Drivers are software components that allow your operating system to communicate effectively with your computer’s hardware (graphics card, sound card, network adapter, motherboard chipset, etc.). While modern OS installers often include generic drivers, installing the latest manufacturer-specific drivers is crucial for best performance and stability.
- Windows: Use Windows Update (Settings > Update & Security > Windows Update > Check for updates) which often finds many drivers. For graphics cards (NVIDIA, AMD), visit the manufacturer’s website. For motherboard chipset drivers and other peripherals, check your PC or motherboard manufacturer’s support page.
- macOS: Drivers are typically handled automatically through macOS updates.
- Linux: Most drivers are included in the kernel. For proprietary drivers (e.g., NVIDIA graphics), use your distribution’s “Additional Drivers” tool or follow specific instructions for your distro.
Install drivers for your chipset, graphics card, audio, network adapter, and any other critical peripherals. Restart your computer after installing drivers if prompted.
System Updates: Staying Secure and Current
Once your drivers are in place, immediately check for and install all available operating system updates. These updates contain critical security patches, bug fixes, and performance improvements.
- Windows: Go to Settings > Update & Security > Windows Update and click “Check for updates.”
- macOS: Go to System Preferences/Settings > Software Update.
- Linux: Use your distribution’s software updater (e.g.,
sudo apt update && sudo apt upgradefor Debian/Ubuntu-based systems).
Keep your OS updated regularly to protect against vulnerabilities and ensure optimal performance.
Essential Software and Data Restoration
Now it’s time to install the applications you need for daily use and restore your backed-up data.
- Web Browser: Download your preferred browser (Chrome, Firefox, Edge, Brave).
- Office Suite: Install Microsoft Office, LibreOffice, or Google Workspace apps.
- Antivirus/Security Software: While Windows Defender is built into Windows, you might prefer a third-party antivirus. macOS and Linux generally have robust built-in security, but vigilance is always recommended.
- Cloud Storage Clients: Install Dropbox, Google Drive, OneDrive clients if you use them.
- Other Productivity Tools: Any specialized software you use for work, creativity, or entertainment.
- Data Restoration: Copy your backed-up personal files (documents, photos, videos) back to your new system.
Personalization and Optimization
Finally, customize your new OS to your liking.
- Desktop Background and Theme: Make it feel like yours.
- Display Settings: Adjust resolution, scaling, and multiple monitor setups.
- Sound Settings: Configure audio output and input.
- Power Options: Optimize for performance or battery life.
- Security Settings: Fine-tune firewall, user account control, and privacy settings.
- Uninstall Bloatware: Remove any unnecessary pre-installed applications to free up resources.
Troubleshooting Common Issues and Advanced Scenarios
Even with careful preparation, issues can arise. Knowing how to troubleshoot and understanding advanced installation scenarios will further empower your tech journey.
Dealing with Installation Failures
- “Operating System Not Found” or Boot Loop: Recheck your BIOS/UEFI boot order. Ensure the bootable media was created correctly. Try recreating it with a different USB drive or tool.
- Error Messages During Installation: Note down the exact error code or message. A quick web search often reveals common solutions. Common culprits include corrupted ISO files, faulty RAM, or a dying hard drive. Run hardware diagnostics if suspecting hardware issues.
- Disk Partitioning Errors: Ensure your partition scheme (MBR/GPT) matches your BIOS/UEFI mode. If existing partitions are problematic, try deleting all of them and starting with unallocated space (remembering backups!).
- Slow Installation: Could indicate issues with your installation media, USB port, or underlying hardware. Try another USB port, or a different USB drive.
Addressing Boot Problems
- After Installation, System Won’t Boot: If you removed the installation media and the system still won’t boot, re-enter BIOS/UEFI and set your newly installed OS drive as the primary boot device.
- Dual-Boot Issues: If you installed two OSes and one isn’t showing up in the boot menu, you might need to repair the bootloader. For Linux, try using a live USB to run a boot repair tool (e.g., Boot-Repair for Ubuntu). For Windows, use the Windows installation media to access “Repair your computer” options and select “Startup Repair.”
Exploring Dual-Boot and Virtual Machine Installations
- Dual-Booting: As mentioned, this involves installing two OSes side-by-side. Always install Windows first, then Linux, as Linux installers are more accommodating. During Linux installation, explicitly select the partition you allocated for it and be careful not to overwrite Windows. Grub (the Linux bootloader) will usually detect Windows and create a boot menu.
- Virtual Machines (VMs): If you only need occasional access to another OS or want to experiment without altering your primary system, consider installing it in a virtual machine using software like VirtualBox, VMware Workstation Player, or Hyper-V. This creates a virtual computer environment within your existing OS, allowing you to run a second OS as an application. VMs are excellent for testing, development, and safely running legacy software.
Upgrading an Existing Operating System
While this guide focuses on clean installations, you can also upgrade an existing OS. This typically involves running the installer from within your current OS and selecting the “Upgrade” option. While convenient, a clean installation often yields better performance and fewer lingering issues. Always back up your data before any OS upgrade.

Conclusion: Empowering Your Digital Journey
Installing an operating system might seem like a daunting task, but by meticulously following these steps and understanding the underlying principles, you can confidently set up your computer’s foundation. From selecting the right OS and preparing your installation media to navigating partitioning and optimizing your post-installation setup, you are now equipped with the knowledge to bring your digital environment to life. This fundamental tech skill not only saves you time and money but also provides a deeper understanding of your computer’s inner workings, empowering you to maintain, troubleshoot, and personalize your digital journey with confidence. Remember, the digital world is ever-evolving, and mastering core skills like OS installation ensures you’re always ready for what comes next.
aViewFromTheCave is a participant in the Amazon Services LLC Associates Program, an affiliate advertising program designed to provide a means for sites to earn advertising fees by advertising and linking to Amazon.com. Amazon, the Amazon logo, AmazonSupply, and the AmazonSupply logo are trademarks of Amazon.com, Inc. or its affiliates. As an Amazon Associate we earn affiliate commissions from qualifying purchases.