In the contemporary digital landscape, a reliable and efficient pointing device is paramount for productivity, navigation, and overall user experience. While wired mice have served us faithfully for decades, the advent and refinement of wireless technology have ushered in an era of unparalleled freedom and convenience. Untethered from the constraints of cables, a wireless mouse offers a cleaner workspace, enhanced portability, and a more comfortable computing experience, whether you’re working on a desktop, laptop, or even a tablet.
The shift towards wireless peripherals is more than just a trend; it’s a testament to the continuous innovation in gadget design aimed at optimizing our interaction with technology. From the casual browser to the professional gamer or graphic designer, the ability to control your cursor without a physical tether significantly impacts workflow and reduces desktop clutter. This comprehensive guide will demystify the process of installing a wireless mouse, ensuring you achieve seamless connectivity with minimal hassle. We’ll cover everything from understanding the different types of wireless mice to a step-by-step installation process for various operating systems, and even offer crucial troubleshooting tips to keep you productive.

Understanding Your Wireless Mouse: Types and Technologies
Before diving into the installation process, it’s crucial to understand the different types of wireless mice available on the market. While they all aim to provide cable-free operation, the underlying technology can vary, influencing compatibility, performance, and the setup procedure. Knowing your mouse’s technology will streamline the installation and help you troubleshoot potential issues more effectively.
Bluetooth Wireless Mice
Bluetooth technology is a short-range wireless communication standard that allows devices to connect and exchange data over a personal area network (PAN). Bluetooth mice leverage this technology to connect directly to your computer’s built-in Bluetooth adapter, eliminating the need for a separate USB receiver.
Advantages:
- No USB Dongle Required: This frees up a valuable USB port on your computer, which is especially beneficial for modern laptops with limited ports.
- Multi-Device Pairing: Many Bluetooth mice can pair with multiple devices, allowing you to switch seamlessly between your laptop, tablet, or even smart TV with a press of a button.
- Portability: Without a dongle to keep track of, Bluetooth mice are often more portable and convenient for users on the go.
Disadvantages:
- Initial Pairing Complexity: The pairing process can sometimes be slightly more involved than with USB receiver mice, requiring navigation through operating system settings.
- Potential Latency: While greatly improved, some older or cheaper Bluetooth implementations might exhibit slight input lag compared to 2.4GHz connections, though this is rarely an issue for everyday use.
- Power Consumption: Bluetooth can sometimes consume more battery power than 2.4GHz technology, though modern mice are highly optimized.
USB Receiver (2.4GHz) Wireless Mice
The most common type of wireless mouse, 2.4GHz models, communicate with your computer via a small USB dongle (receiver) that plugs into an available USB port. This technology operates on the same frequency band as Wi-Fi, offering a robust and responsive connection.
Advantages:
- Plug-and-Play Simplicity: These mice are often “plug-and-play,” meaning you simply insert the dongle, and the mouse connects automatically without any manual pairing.
- Reliable Connection: The dedicated 2.4GHz connection often provides a very stable and low-latency experience, making them popular among gamers and professionals who demand precision.
- Wide Compatibility: Almost any computer with a USB port can use a 2.4GHz wireless mouse, regardless of its Bluetooth capabilities.
Disadvantages:
- Uses a USB Port: The necessity of a dongle means one USB port will always be occupied, which can be a limitation for devices with few ports.
- Dongle Can Be Lost: The small size of the USB receiver makes it easy to misplace, rendering the mouse unusable until it’s found or replaced (if possible).
- Potential for Interference: As it shares the 2.4GHz band with Wi-Fi and other wireless devices, there’s a slight chance of interference, although modern mice are designed to mitigate this.
Hybrid and Advanced Wireless Mice
Some premium wireless mice offer the best of both worlds, providing both 2.4GHz USB receiver and Bluetooth connectivity options. This versatility allows users to choose the most suitable connection method for their specific device or situation. Beyond basic connectivity, the “Gadgets” aspect of our website highlights how manufacturers are integrating advanced features like rechargeable batteries, customizable buttons, ergonomic designs, high DPI sensors for precision, and multi-surface tracking capabilities, catering to diverse user needs from casual browsing to professional creative work and intense gaming. When choosing a mouse, consider these advanced features as they significantly impact your long-term comfort and productivity.
Preparing for Installation: The Essentials You Need
A smooth installation process begins with proper preparation. Ensuring you have all the necessary components and your system is ready will save you time and prevent unnecessary frustrations. Think of this as the digital security and pre-flight check for your new peripheral gadget.
Unboxing and Initial Checks
Upon receiving your new wireless mouse, the first step is to carefully unbox it.
- Identify Components: Look for the mouse itself, any included USB receiver (if it’s a 2.4GHz model), batteries (usually AA or AAA), a charging cable (if it’s rechargeable), and the user manual.
- Visual Inspection: Give the mouse a quick visual inspection for any physical damage or manufacturing defects. While rare, it’s good to catch these early.
- Read the Manual: While often overlooked, the user manual frequently contains specific instructions for your model, including details on battery installation, pairing buttons, and software installation. It’s a valuable resource, especially for unique features.
Powering Up Your Mouse
Your wireless mouse needs power to operate.
- Battery Installation: If your mouse uses disposable batteries (typically AA or AAA), open the battery compartment (usually on the underside of the mouse) and insert the batteries, paying attention to the polarity (+/-) indicators.
- Charging Rechargeable Mice: If your mouse has a built-in rechargeable battery, connect it to your computer’s USB port or a wall adapter using the provided charging cable. Allow it to charge sufficiently before first use, as recommended by the manufacturer.
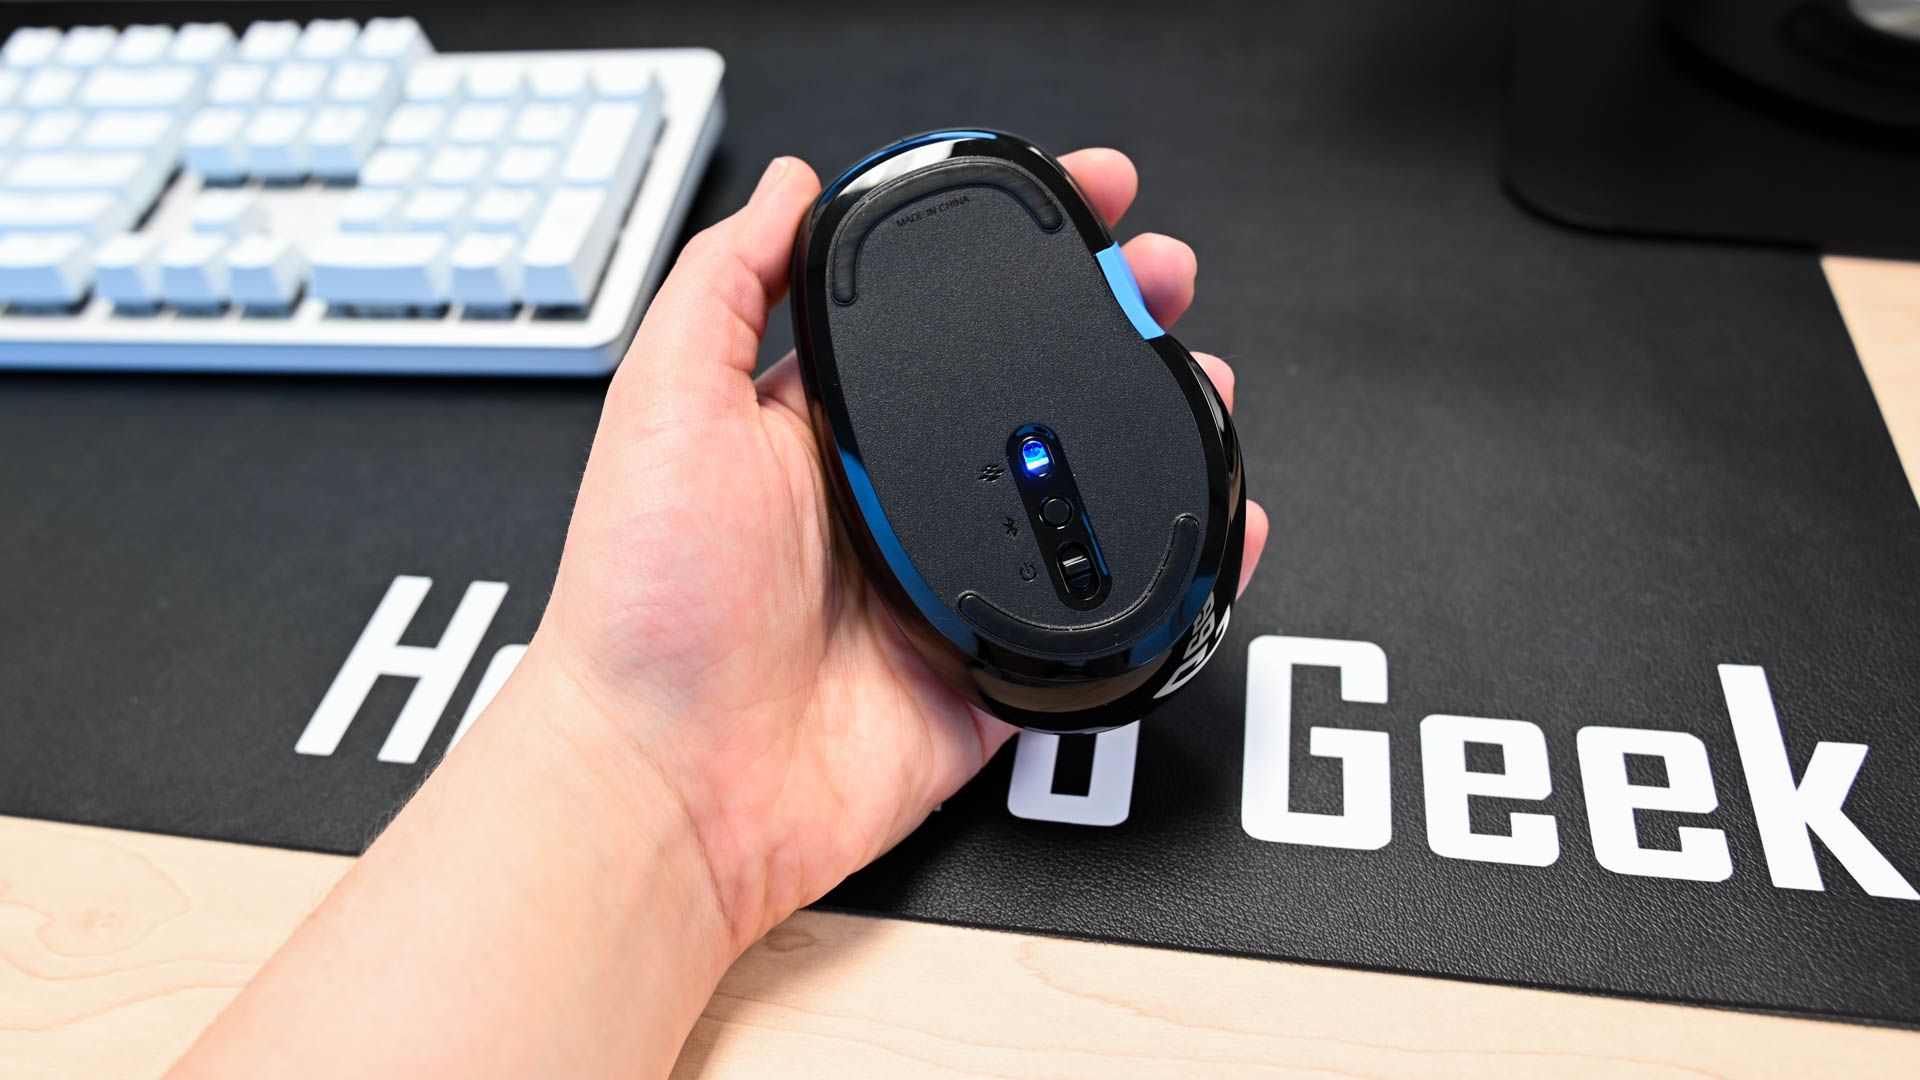
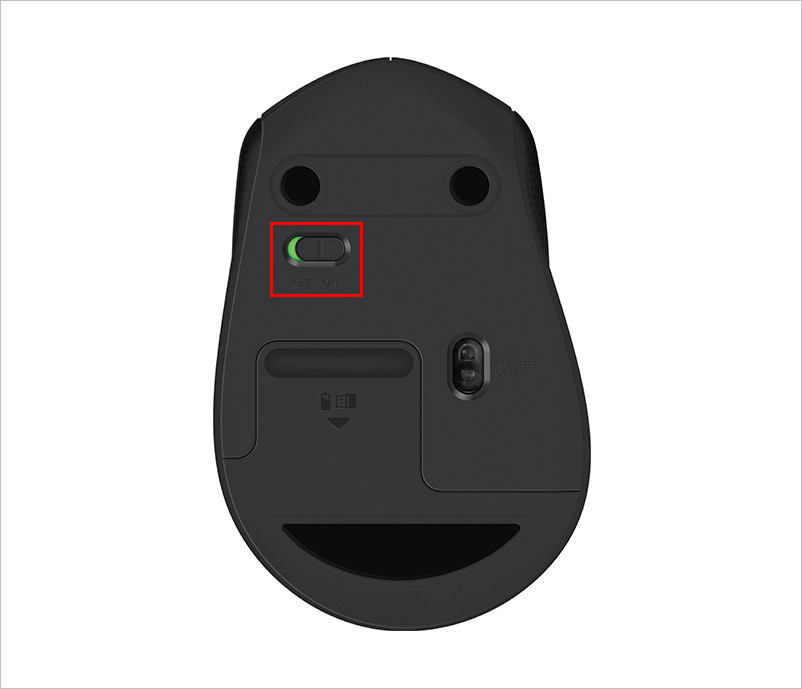
- Power Switch: Locate the power switch on the underside of the mouse and turn it to the “ON” position. Some mice also have a dedicated “connect” or “pairing” button, which you might need for Bluetooth setup.
System Requirements and Compatibility
While most modern operating systems are highly compatible with wireless mice, a quick check can prevent issues.
- Operating System: Ensure your computer’s operating system (Windows, macOS, Linux, ChromeOS) is compatible. Most wireless mice are universally compatible, but some advanced features or software might be OS-specific.
- Available Ports: For 2.4GHz mice, you’ll need an available USB-A port. If your computer only has USB-C, you might need an adapter or a USB-C compatible receiver (less common). For Bluetooth mice, your computer needs a working Bluetooth adapter.
- Driver Considerations: Modern operating systems typically install generic drivers automatically upon connection (“plug-and-play”). However, some advanced mice come with optional software that provides customization options like button remapping, DPI adjustments, and macro creation. We’ll cover this later, but usually, the basic functionality works without specific driver installation.
Step-by-Step Installation Guide
The installation process varies slightly depending on whether you have a USB receiver (2.4GHz) or a Bluetooth wireless mouse. Follow the instructions relevant to your device.
For USB Receiver (2.4GHz) Wireless Mice
This is often the simpler and more straightforward installation method, embodying the true “plug-and-play” experience that contributes to user productivity.
- Locate the USB Receiver: This is usually a tiny dongle stored within the mouse’s battery compartment or packaged separately.
- Plug in the USB Receiver: Insert the USB receiver into an available USB port on your computer. It can be a desktop, laptop, or even a USB hub. For optimal performance, avoid placing the receiver too far from the mouse or in a position where it might be obstructed by metal objects. Your operating system should detect the new hardware and often automatically install the necessary generic drivers, usually indicated by a notification.
- Turn On Your Mouse: Flip the power switch on the underside of your wireless mouse to the “ON” position.
- Allow for Automatic Connection: In most cases, the mouse will instantly connect to the receiver. You should see the mouse’s optical sensor light up (if it has one) and be able to move the cursor on your screen immediately.
- Test Functionality: Move the mouse around, click the left and right buttons, and test the scroll wheel. If everything works as expected, your installation is complete!
For Bluetooth Wireless Mice
Connecting a Bluetooth mouse involves pairing it with your computer’s built-in Bluetooth adapter. This process leverages the existing “Tech” infrastructure of your device.
- Ensure Bluetooth is Enabled on Your Computer:
- Windows: Go to
Start > Settings > Devices > Bluetooth & other devices. Make sure the Bluetooth toggle is switched “On.” - macOS: Go to
Apple menu > System Settings > Bluetooth. Ensure Bluetooth is turned “On.” - Linux/ChromeOS: Check your system’s settings or quick settings panel for the Bluetooth option and ensure it’s enabled.
- Windows: Go to
- Put Your Mouse in Pairing Mode: This step is crucial and varies by mouse model.
- Most Bluetooth mice have a dedicated “pairing” or “connect” button, often on the underside. Press and hold this button for a few seconds until an LED indicator on the mouse starts blinking, signifying it’s discoverable.
- Refer to your mouse’s manual if you can’t find the pairing button or specific instructions.
- Add a New Device via OS Settings:
- Windows: In the
Bluetooth & other devicessettings, clickAdd Bluetooth or other device, then selectBluetooth. Your computer will start searching for nearby Bluetooth devices. - macOS: In the
Bluetoothsettings, your computer will automatically scan for devices. - Linux/ChromeOS: Navigate to your Bluetooth settings and look for an option to “Add Device” or “Scan for devices.”
- Windows: In the
- Select Your Mouse and Complete Pairing:
- Once your mouse’s name appears in the list of available devices (e.g., “Logitech MX Master 3,” “Microsoft Bluetooth Mouse”), click or tap on it.
- Your computer will attempt to pair with the mouse. Sometimes, you might be prompted to enter a PIN (usually 0000) or confirm a code, though this is less common for mice.
- Once paired, the mouse’s LED indicator might stop blinking and become solid, and your computer will confirm the successful connection.
- Test Functionality: Move the mouse, click buttons, and test the scroll wheel to ensure everything works correctly. Your Bluetooth mouse is now ready for use.
Installing Optional Software and Customization
Many reputable peripheral brands (like Logitech, Razer, SteelSeries, Microsoft) offer companion software for their mice. While not strictly necessary for basic functionality, installing this software can unlock your mouse’s full potential, enhancing your “Productivity” and user experience.
- Manufacturer Software Examples: Logitech Options+, Razer Synapse, Microsoft Mouse and Keyboard Center.
- Benefits:
- Button Remapping: Customize button functions to execute specific commands, launch applications, or perform macros, tailoring the mouse to your workflow.
- DPI/Sensitivity Adjustment: Fine-tune cursor speed and precision, essential for graphic designers, gamers, and anyone needing precise control.
- Macro Creation: Record sequences of commands to be executed with a single click, automating repetitive tasks.
- Battery Monitoring: Track battery levels directly from your desktop.
- Profile Management: Create different profiles for various applications, allowing your mouse settings to change automatically based on the software you’re using.
- How to Install: Visit the manufacturer’s official website, navigate to the support or downloads section for your specific mouse model, and download the latest software. Always download software directly from the official source to ensure “Digital Security” and avoid malware.
Troubleshooting Common Wireless Mouse Issues
Even with careful installation, you might occasionally encounter issues. Here’s how to troubleshoot some common problems, ensuring your tech gadgets remain reliable.
Mouse Not Connecting or Responding
- Check Power: Is the mouse powered on? Are the batteries dead or low? Replace disposable batteries or charge rechargeable ones.
- Check Receiver/Bluetooth Status:
- USB Receiver: Is the receiver fully plugged into a working USB port? Try a different USB port. Some desktop ports might be disabled.
- Bluetooth: Is Bluetooth enabled on your computer? Is the mouse in pairing mode? Try re-pairing the mouse by removing it from your computer’s Bluetooth devices list and repeating the pairing steps.
- Restart Devices: Sometimes, a simple restart of your computer and turning the mouse off and on again can resolve connectivity glitches.
- Driver Issues: Although rare for basic functionality, in Windows Device Manager (search for “Device Manager”), check under “Mice and other pointing devices” or “Bluetooth” for any yellow exclamation marks indicating driver problems. You can try uninstalling the device and letting Windows reinstall it upon restart.
- Interference: Other wireless devices (Wi-Fi routers, cordless phones, microwaves) operating on the 2.4GHz band can sometimes cause interference. Try moving closer to the receiver/computer or temporarily moving other wireless devices away.
Laggy or Erratic Cursor Movement
- Surface Issues: Wireless mice, especially optical ones, rely on a good surface for tracking. Try using a quality mouse pad. Highly reflective, transparent (glass), or very uneven surfaces can cause problems.
- Clean Sensor: Dust or debris on the mouse’s optical sensor can interfere with tracking. Gently clean the sensor aperture on the underside of the mouse with a cotton swab or compressed air.
- Distance and Obstructions: Ensure the mouse is not too far from its receiver or your computer’s Bluetooth adapter. Physical obstructions (like metal desk frames) can also degrade the signal.
- Battery Level: Low battery power can sometimes lead to inconsistent performance before the mouse completely dies.
- Software Conflicts: Occasionally, third-party software or background processes might interfere with mouse input. Check your task manager for resource-heavy applications.
Other Minor Glitches
- Scrolling Issues: If the scroll wheel isn’t working, or scrolls erratically, try cleaning around the scroll wheel with compressed air to dislodge any debris. In software, check if “smooth scrolling” or other scroll settings are enabled and try disabling them.
- Button Not Working: If a specific button isn’t responding, check the manufacturer’s software for any custom mappings that might be overriding its default function. If the issue persists, it might be a hardware fault.
Optimizing Your Wireless Mouse Experience
Once your wireless mouse is installed and working perfectly, there are several ways to optimize its performance, extend its lifespan, and truly integrate it into your “Productivity” and “Tech” ecosystem.
Battery Management and Longevity
Batteries are the lifeline of your wireless mouse. Efficient management ensures uninterrupted workflow and contributes to overall sustainability.
- Turn Off When Not in Use: Most wireless mice have a power switch. Get into the habit of turning it off when you’re done for the day or packing it away for travel.
- Invest in Quality Batteries: High-quality alkaline batteries last longer.
- Consider Rechargeable Options: If your mouse supports disposable batteries, consider investing in rechargeable AA/AAA batteries. This is an environmentally friendly choice and can save money in the long run. Many modern premium mice come with built-in rechargeable batteries, which are incredibly convenient.
- Monitor Battery Life: Use the manufacturer’s software or your operating system’s settings to monitor battery levels and avoid unexpected power loss during critical tasks.
Maintaining Your Mouse
Regular maintenance ensures your mouse remains accurate and hygienic.
- Keep it Clean: Dust, dirt, and skin oils can accumulate on your mouse. Regularly wipe down the mouse body with a soft, slightly damp cloth. Use a cotton swab or compressed air to clean around buttons and especially the optical sensor to maintain tracking precision.
- Protect the Receiver: If you have a USB receiver, store it securely when not in use, ideally within the mouse’s designated storage slot if available. This prevents loss and damage, maintaining the integrity of your “Gadget.”
- Optimal Surface: Always use your mouse on a clean, consistent surface, ideally a good quality mouse pad. This protects the mouse feet and ensures consistent tracking.
Enhancing Productivity and Ergonomics
A wireless mouse is not just a pointing device; it’s a tool for enhancing your “Productivity.”
- Ergonomics: For extended use, consider an ergonomically designed mouse that fits comfortably in your hand and supports a natural wrist posture. This can prevent repetitive strain injuries and improve comfort during long work sessions, directly impacting your efficiency.
- Customization for Workflow: Leverage the optional manufacturer software to customize your mouse to your specific needs. Assign macros to frequently used commands in software like Photoshop or Excel, remap buttons for navigation, or adjust DPI on the fly for tasks requiring varying levels of precision. This personalization is a key “Tech Trend” in user experience design.
- Multi-Device Connectivity: If your mouse supports multi-device pairing (common in Bluetooth and some hybrid models), configure it to switch between your primary computer and a secondary device like a tablet. This seamless transition boosts flexibility and productivity across your digital ecosystem.
Conclusion
Installing a wireless mouse is a straightforward process that significantly upgrades your computing experience. By understanding the different technologies, preparing adequately, and following our step-by-step guides, you can quickly achieve seamless connectivity and unlock the full potential of your new peripheral. Whether you choose the plug-and-play simplicity of a 2.4GHz USB receiver mouse or the port-free elegance of a Bluetooth model, the freedom from cables translates directly into a cleaner, more organized, and more efficient workspace.
Remember to leverage optional software for customization, stay vigilant with battery management, and perform routine maintenance to ensure your wireless mouse remains a reliable companion for all your digital endeavors. In a world increasingly focused on “Tech” innovation and “Productivity” hacks, a properly installed and optimized wireless mouse is more than just a gadget; it’s an essential tool that empowers you to navigate, create, and achieve with unparalleled ease. Enjoy the untethered freedom and enhanced precision your new wireless mouse brings to your daily tasks!
aViewFromTheCave is a participant in the Amazon Services LLC Associates Program, an affiliate advertising program designed to provide a means for sites to earn advertising fees by advertising and linking to Amazon.com. Amazon, the Amazon logo, AmazonSupply, and the AmazonSupply logo are trademarks of Amazon.com, Inc. or its affiliates. As an Amazon Associate we earn affiliate commissions from qualifying purchases.