Embarking on DIY projects can be incredibly rewarding, especially when they expand your vehicle’s capabilities. Installing a trailer hitch on your car is a prime example. Whether you’re looking to haul a small utility trailer for weekend projects, a teardrop camper for an adventure, or even a bike rack for your next sporting excursion, a trailer hitch is an essential piece of equipment. While many opt for professional installation, understanding the process can empower you to tackle it yourself, saving money and gaining valuable mechanical knowledge. This comprehensive guide will walk you through the steps, from choosing the right hitch to the final bolt, all while keeping in mind the broader themes of technology, brand, and the financial sense behind such an undertaking.

Understanding Your Hitch and Vehicle: The Foundation of a Successful Installation
Before you even think about grabbing a wrench, it’s crucial to understand the type of trailer hitch that best suits your needs and your vehicle’s capabilities. This is where a blend of technological consideration and financial prudence comes into play.
Choosing the Right Hitch: More Than Just a Piece of Metal
Trailer hitches are not one-size-fits-all. They are categorized by their “Class,” which indicates their towing capacity and is directly tied to the strength and size of your vehicle. Understanding these classes is paramount to both safety and effective towing.
- Class I Hitches: Typically for smaller vehicles like sedans and compact SUVs, with a towing capacity of up to 2,000 lbs. They are ideal for very light trailers, cargo carriers, or some bike racks.
- Class II Hitches: Designed for slightly larger vehicles, offering a capacity of up to 3,500 lbs. They can handle small utility trailers, kayaks, or pop-up campers.
- Class III Hitches: Commonly found on SUVs and trucks, these hitches can tow up to 5,000 lbs. They are suitable for medium-sized trailers, including small travel trailers and boats.
- Class IV Hitches: Primarily for heavy-duty trucks, with capacities often exceeding 10,000 lbs. These are for serious towing of large travel trailers, horse trailers, or construction equipment.
- Class V Hitches: The heavyweights, designed for commercial trucks and heavy-duty applications, with capacities that can reach or exceed 20,000 lbs.
The “tech” aspect here lies in the engineering and design of these hitches. Manufacturers use advanced software to simulate stress and load-bearing capabilities, ensuring their products meet rigorous safety standards. When selecting a hitch, consider the Gross Vehicle Weight Rating (GVWR) of what you intend to tow and the tongue weight it will exert. Your vehicle’s owner’s manual will specify its towing capacity, and it’s crucial never to exceed this limit. Overestimating can lead to catastrophic failure and dangerous situations.
From a “money” perspective, investing in the correct hitch class is a long-term financial decision. Buying a hitch that’s too small for your needs will mean replacing it later, costing you more in the long run. Conversely, over-specifying can be an unnecessary upfront expense. Researching different brands and their offerings will help you find a balance between quality, capacity, and cost. Reputable brands often have detailed specifications and customer reviews that can guide your decision.
Vehicle Compatibility and Mounting Points: The “Smart” Fit
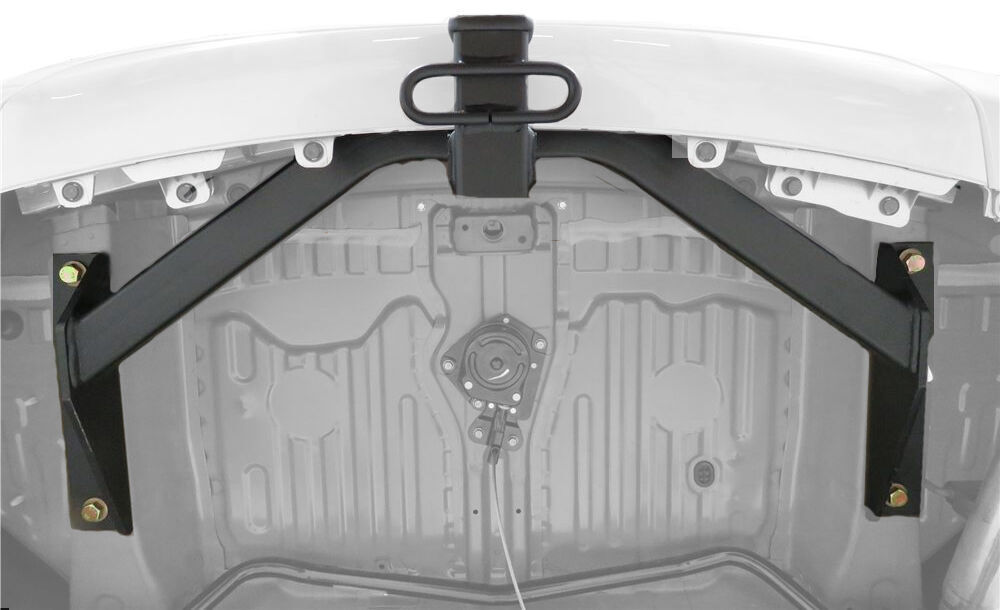
Once you’ve determined the class of hitch, you need to ensure it’s compatible with your specific vehicle. Trailer hitches are designed to bolt onto existing frame rails or designated mounting points on your car’s chassis. The “tech” here involves precision engineering; the mounting brackets are engineered to align perfectly with your car’s frame.
Most aftermarket hitches are vehicle-specific. When purchasing, you’ll need to know your car’s year, make, and model. Websites and parts catalogs will often have a compatibility checker. Some vehicles come “pre-wired” for trailer lights, which simplifies the electrical connection process considerably. Identifying these features before you buy the hitch can save you time and potential headaches.
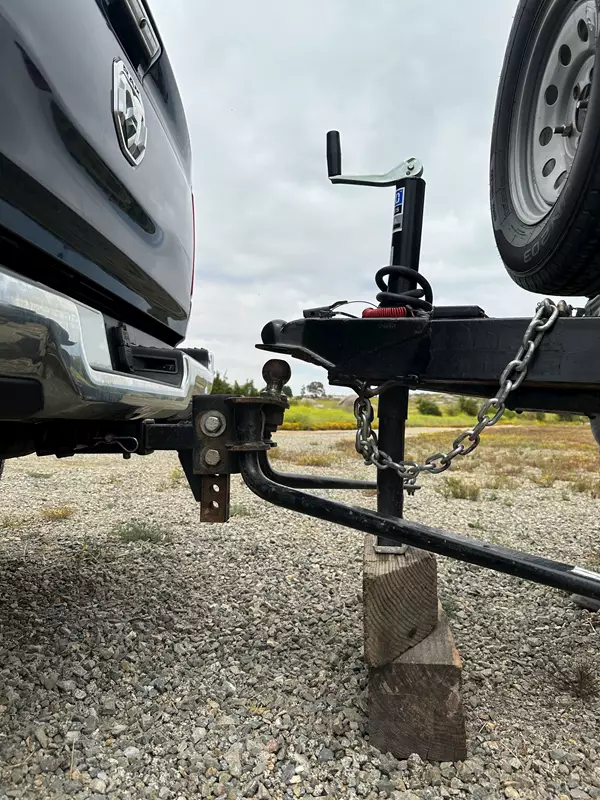
Consider also the type of hitch receiver. The most common is the 2-inch receiver, but smaller hitches might use a 1.25-inch receiver. This dictates the size of the hitch ball mount and any accessories you might use.
The Installation Process: A Step-by-Step Approach
With the right hitch in hand and a clear understanding of your vehicle, you’re ready to begin the installation. This section dives into the practical “how-to,” a tutorial that leverages basic mechanical principles and the right tools.
Gathering Your Tools and Preparing the Vehicle: The Pre-Flight Check
Before you start, ensure you have all the necessary tools. A well-equipped toolbox will make the job smoother and safer.
- Wrench Set and Socket Set: You’ll need a range of sizes, likely including metric and standard. Ratchet wrenches are invaluable for speed and ease of use.
- Torque Wrench: This is non-negotiable. Over-tightening or under-tightening bolts can compromise the hitch’s structural integrity and safety.
- Drill and Drill Bits (if required): Some installations may require drilling new mounting holes if your vehicle doesn’t have pre-drilled locations. Use appropriate, sharp bits for metal.
- Safety Glasses and Gloves: Essential for protecting your eyes and hands from debris and sharp edges.
- Jack and Jack Stands: For lifting the vehicle to gain better access to the undercarriage. Never work under a vehicle supported only by a jack.
- Wire Brush: To clean any rust or debris from mounting holes and bolts.
- Penetrating Oil (e.g., WD-40): To loosen any stubborn or rusted bolts.
- Helper: Having a second person can be extremely helpful, especially when maneuvering the hitch into place.
- Your Hitch Kit: This should include the hitch receiver, mounting hardware (bolts, washers, nuts), and instructions specific to your hitch and vehicle.
Preparation is Key:
- Park on a Level Surface: This ensures stability and accurate measurements.
- Engage the Parking Brake: And consider chocking the wheels for extra security.
- Consult Your Vehicle’s Manual and Hitch Instructions: Read both thoroughly. The hitch instructions are specific to your model, and your car’s manual might offer insights into jacking points or undercarriage components to be aware of.
- Inspect the Mounting Area: Look for existing bolt holes. If you find rust or debris, use a wire brush to clean them thoroughly. Apply penetrating oil to any bolts you need to remove or will be threading into.
Mounting the Hitch: The Core of the Installation
This is the most critical phase. Precision and adherence to instructions are paramount.
- Lift and Support the Vehicle (if necessary): If access to the mounting points is limited, use your jack to lift the rear of the vehicle and secure it with jack stands. Ensure the vehicle is stable and on a solid surface.
- Position the Hitch: With your helper, carefully maneuver the hitch into position under the vehicle. Align the hitch’s mounting brackets with the designated holes on your car’s frame. This can be the trickiest part, as the hitch can be heavy and awkward.
- Insert Hardware: Start by hand-threading the bolts through the hitch brackets and into the vehicle’s frame. Do not tighten them fully yet. This allows for some adjustment.
- Tighten Bolts Progressively: Once all bolts are in place and hand-tightened, begin to tighten them evenly. Work in a criss-cross pattern, similar to tightening lug nuts on a tire, to ensure the hitch sits flush against the frame.
- Torque to Specification: This is where your torque wrench comes in. Refer to your hitch’s installation instructions for the specific torque values for each bolt. Tighten each bolt to the specified torque. This step is critical for safety. Overtightening can strip threads or damage the frame; undertightening can lead to the hitch loosening over time.
- Electrical Connections (if applicable): If your hitch kit includes a wiring harness, follow the instructions carefully to connect it to your vehicle’s taillight system. This usually involves plugging into a factory-installed connector or splicing into existing wires. This is a crucial “tech” component that enables your trailer lights to function correctly. Ensure all connections are secure and waterproofed, often with dielectric grease.
Post-Installation Checks and Considerations: Ensuring Longevity and Safety
The installation isn’t complete once the last bolt is torqued. A thorough inspection and understanding of ongoing maintenance are vital for long-term use and safety.
The Final Inspection: Peace of Mind
After installation, take a moment for a comprehensive check.
- Visual Inspection: Ensure the hitch is sitting flush against the frame with no gaps. All bolts should be present and appear securely tightened.
- Wiggle Test: With the vehicle still on the ground, try to wiggle the hitch. It should feel solid and immovable.
- Test Electricals: If you connected wiring, test your trailer lights by having a helper operate the brake lights, turn signals, and hazard lights while you visually confirm they illuminate correctly on the trailer (or a test light).
Maintenance and Responsible Towing: Building Brand Loyalty and Smart Finance
The “brand” of your vehicle and the trailer hitch extends to how well you maintain them. Regular checks and responsible towing practices will ensure both your car and hitch perform reliably for years.
- Regular Inspections: Periodically check the hitch for signs of wear, rust, or damage. Inspect the bolts and ensure they remain tight.
- Keep it Clean: Wash your hitch along with your car. This helps prevent rust and corrosion.
- Understand Towing Limits: Always adhere to your vehicle’s and hitch’s specified towing capacities. Exceeding these limits is dangerous and can void warranties.
- Proper Loading: Distribute the weight evenly in your trailer and ensure the tongue weight is appropriate (typically 10-15% of the trailer’s loaded weight). This is crucial for stable towing.
- Braking and Cornering: Account for the extra weight and length when braking and turning. Drive at a reduced speed, especially in adverse weather conditions.
From a “money” perspective, a properly installed and maintained trailer hitch is an investment that pays dividends. It opens up possibilities for recreation, business, and personal projects, potentially saving you money on rentals or moving services. Furthermore, a well-cared-for vehicle with a functional hitch can enhance its resale value.
Common Pitfalls and Troubleshooting: Anticipating Issues
Even with careful planning, minor issues can arise. Understanding common pitfalls can save you frustration.
- Stuck Bolts: If existing frame bolts are rusted solid, use a good quality penetrating oil and let it soak in. If they still won’t budge, you might need to use a breaker bar or, as a last resort, carefully cut them out and replace them with new hardware.
- Misaligned Holes: If the hitch holes don’t perfectly align with the vehicle’s frame holes, it’s usually an indication of a slight misalignment. Try loosening all bolts slightly and gently shifting the hitch. If there’s a significant difference, double-check that you have the correct hitch for your specific vehicle model.
- Electrical Glitches: If your trailer lights aren’t working, start with the simplest checks: ensure the trailer connector is fully seated in the vehicle’s socket, check the bulbs in your trailer, and then trace the wiring for any visible damage.
By following these steps and keeping safety and proper procedure at the forefront, you can successfully install a trailer hitch on your car, expanding its utility and embarking on new adventures. This DIY endeavor is a testament to the practical application of knowledge, a smart financial decision, and a satisfying way to enhance your vehicle’s capabilities.
aViewFromTheCave is a participant in the Amazon Services LLC Associates Program, an affiliate advertising program designed to provide a means for sites to earn advertising fees by advertising and linking to Amazon.com. Amazon, the Amazon logo, AmazonSupply, and the AmazonSupply logo are trademarks of Amazon.com, Inc. or its affiliates. As an Amazon Associate we earn affiliate commissions from qualifying purchases.