Upgrading your computer with a Solid State Drive (SSD) is one of the most impactful performance enhancements you can make. While SATA SSDs have been around for a while, PCIe SSDs, often referred to as NVMe SSDs, represent a significant leap forward in storage speed. These drives connect directly to your motherboard’s PCIe (Peripheral Component Interconnect Express) slot, bypassing the limitations of the SATA interface and unlocking dramatically faster read and write speeds. This translates to quicker boot times, faster application loading, snappier file transfers, and a generally more responsive computing experience.
This guide will walk you through the process of installing a PCIe SSD. Whether you’re building a new PC or looking to breathe new life into an existing one, understanding the installation steps is crucial. We’ll cover everything from identifying the right type of PCIe slot to physically securing the drive and ensuring your system recognizes it.
Understanding PCIe SSDs and Compatibility
Before diving into the physical installation, it’s essential to understand what a PCIe SSD is and what makes it different from other storage drives.
What is a PCIe SSD?
PCIe SSDs leverage the high-bandwidth PCIe interface found on your motherboard. This is the same interface used for graphics cards, network adapters, and other high-performance components. Unlike SATA SSDs, which communicate through a slower SATA controller, PCIe SSDs communicate directly with the CPU, drastically reducing latency and increasing throughput.
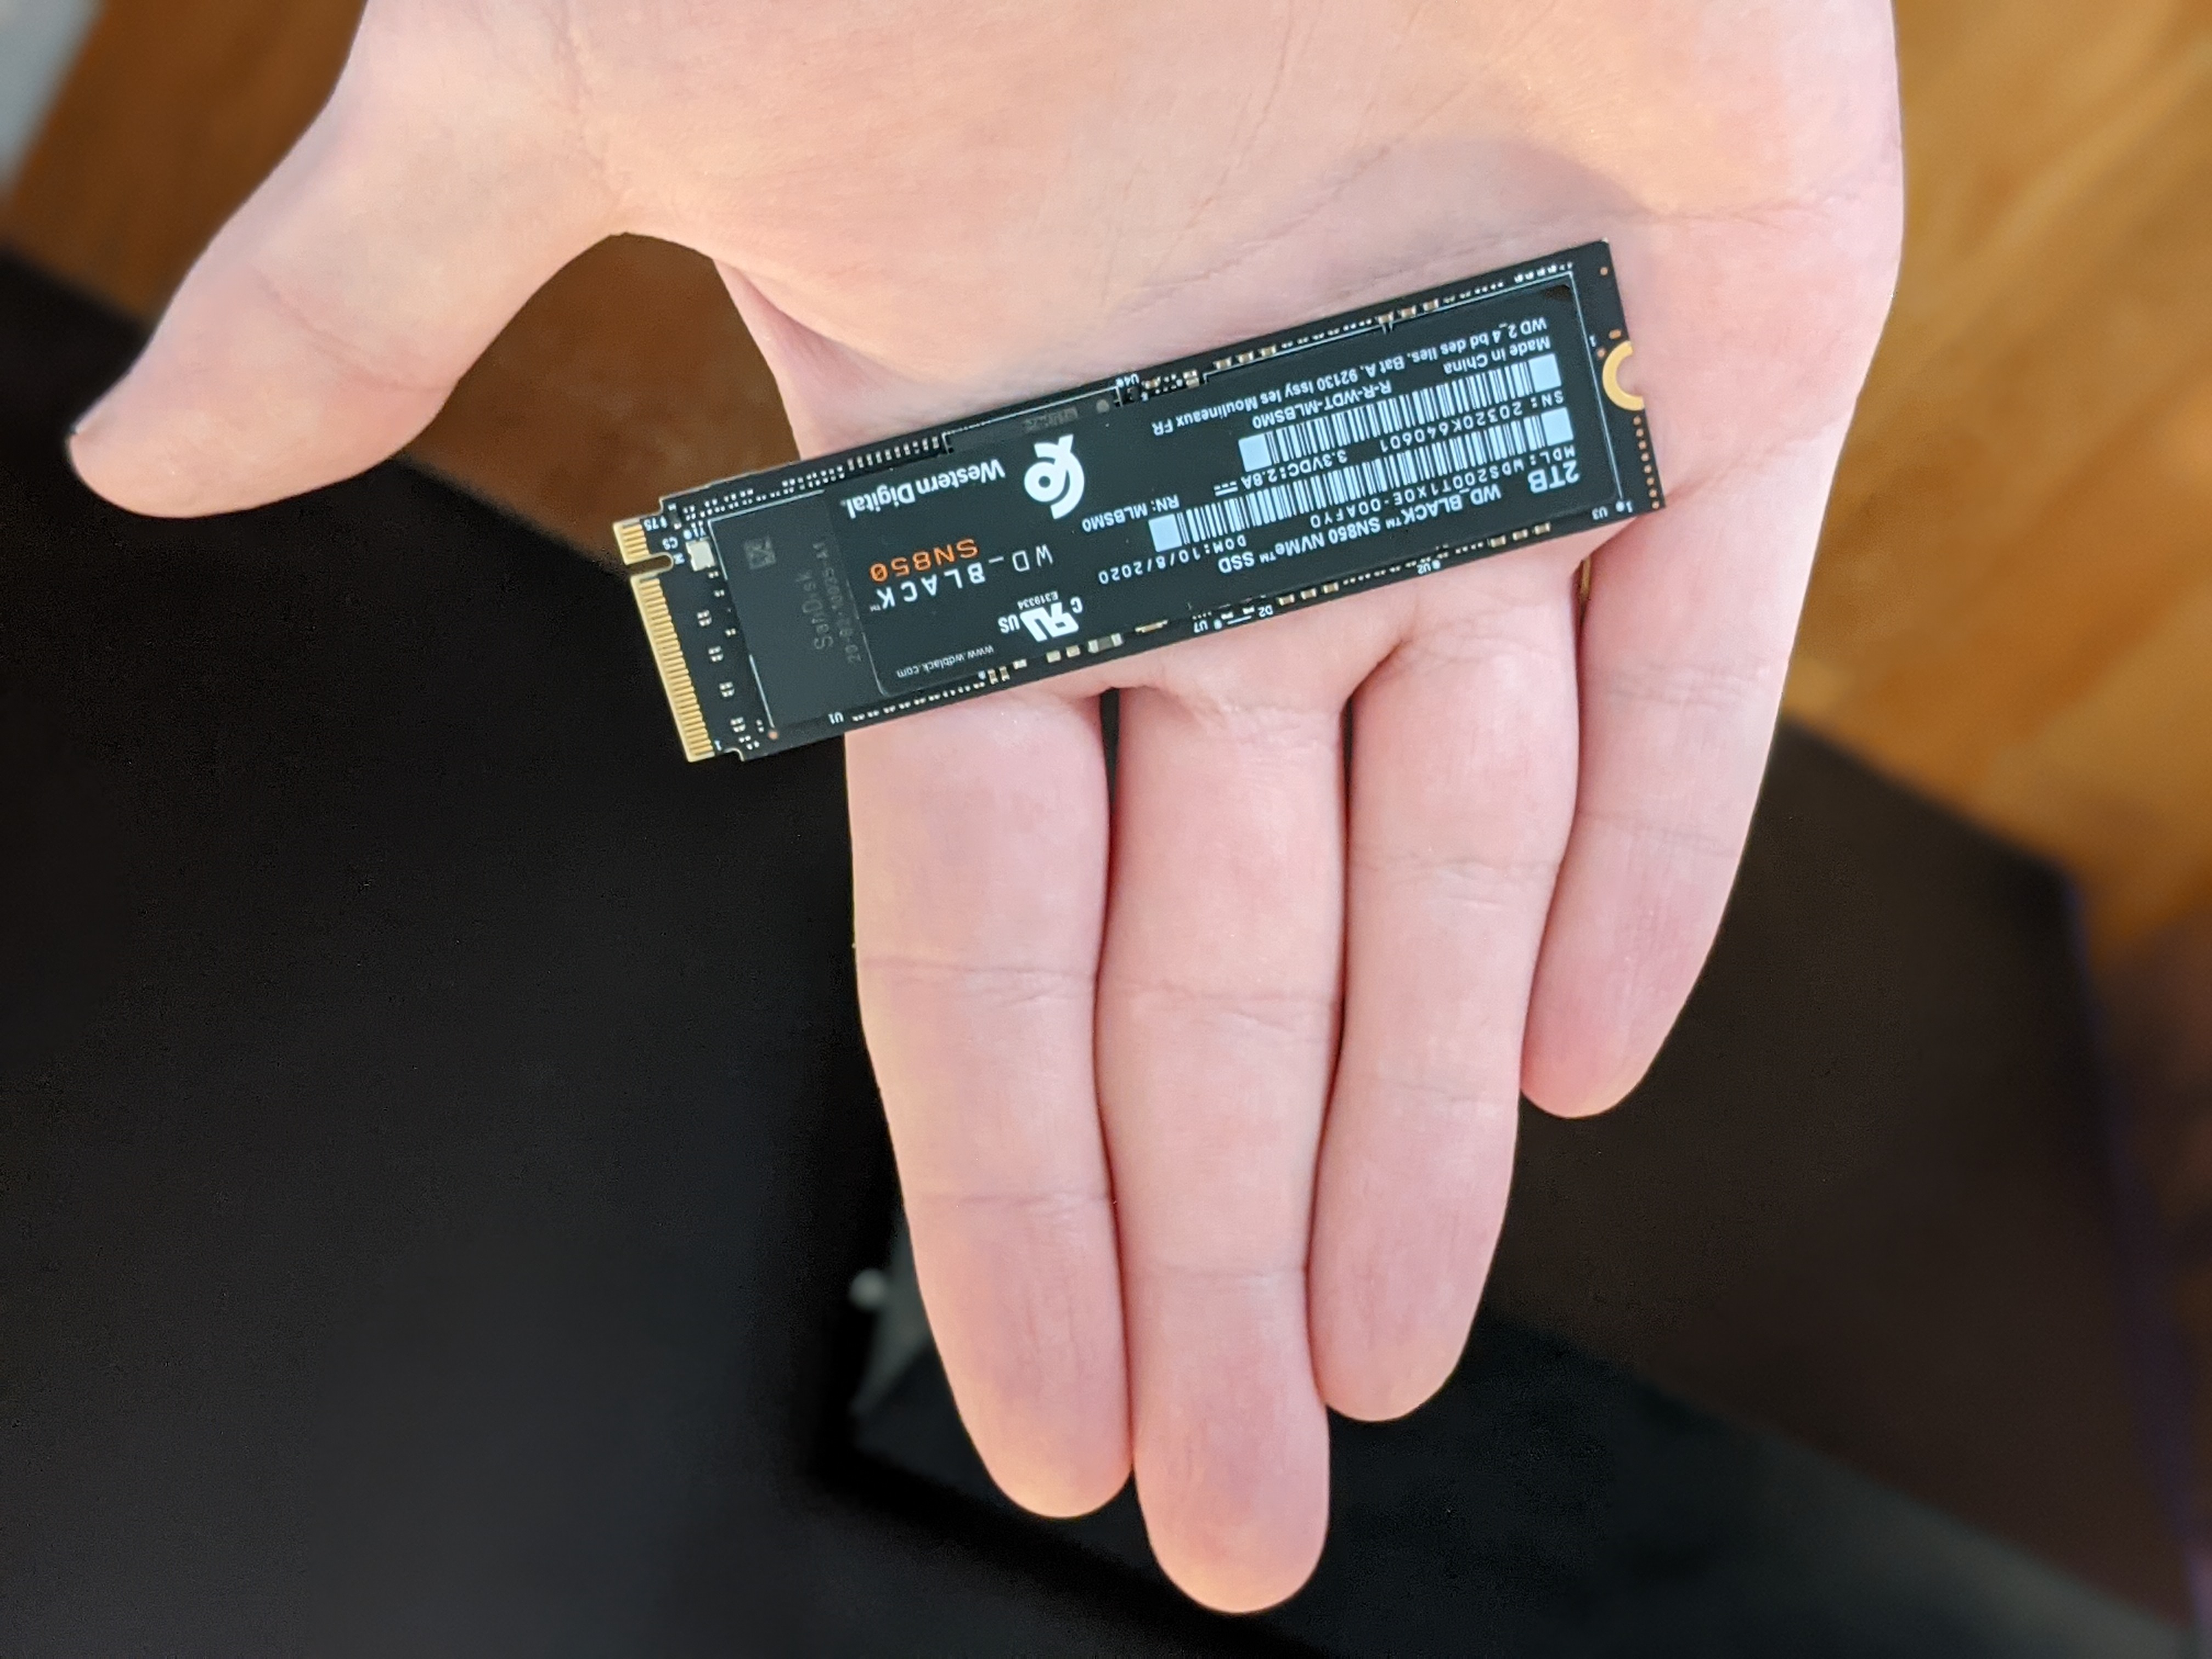
The most common type of PCIe SSD you’ll encounter today is an NVMe (Non-Volatile Memory Express) SSD. NVMe is a protocol specifically designed for flash storage, optimized to take full advantage of the low latency and high parallelism of SSDs. When people refer to PCIe SSDs, they are almost always talking about NVMe drives.
Types of PCIe Connectors and Form Factors
PCIe SSDs come in various physical form factors, and understanding these is key to ensuring compatibility with your motherboard.
M.2 SSDs
The most prevalent form factor for PCIe SSDs is M.2. M.2 drives are small, gumstick-like modules that plug directly into an M.2 slot on your motherboard. However, not all M.2 slots are created equal.
- M.2 Keying: M.2 slots and drives use “keys” – physical notches that prevent you from inserting an incompatible drive. You’ll most commonly see M.2 drives with a “B+M key.” This type of key is designed to support both SATA and NVMe (PCIe) protocols. However, an M.2 slot on the motherboard also needs to be compatible with NVMe for your PCIe SSD to function at its full speed.
- M.2 Slot Support: Check your motherboard’s specifications. An M.2 slot might be listed as supporting SATA only, NVMe only, or both. If it’s listed as supporting NVMe or PCIe, you’re good to go for a PCIe SSD. Some M.2 slots might also be keyed for “B” or “M” keys, which have different pin configurations. A drive with a B+M key will fit into a B or M keyed slot, but to utilize NVMe speeds, the slot must support NVMe and be keyed correctly.
PCIe Add-in Card (AIC) SSDs
Less common for consumer builds but still available are PCIe AIC SSDs. These drives look more like traditional expansion cards (similar to graphics cards) and plug into a standard PCIe slot (e.g., PCIe x4, PCIe x8, or PCIe x16). These are often high-performance, enterprise-grade drives, or specialized solutions for users with motherboards that lack M.2 slots or sufficient M.2 bandwidth.
Checking Your Motherboard’s Compatibility
Before purchasing a PCIe SSD, you must consult your motherboard’s manual or its product page on the manufacturer’s website. Look for information regarding M.2 slots, specifically:
- M.2 Slot Type: Does it support NVMe or only SATA?
- M.2 Slot Keying: What keying does the slot have (B, M, or B+M)?
- PCIe Generation Support: Most modern motherboards support PCIe Gen3 or Gen4. PCIe Gen4 SSDs offer the fastest speeds, but will still work in a Gen3 slot, albeit at Gen3 speeds. Similarly, a Gen3 SSD will work in a Gen4 slot. For optimal performance, match the SSD’s generation to your motherboard’s slot generation.
Most modern motherboards (from around 2016 onwards) will have at least one M.2 slot that supports NVMe. Older systems might require an adapter card to use an M.2 NVMe SSD in a standard PCIe slot.
Preparing for Installation
Once you’ve confirmed compatibility and purchased your PCIe SSD, it’s time to get ready for the physical installation. This stage involves gathering tools and taking necessary precautions.
Tools and Materials Needed
You won’t need a vast array of specialized tools, but a few essentials will make the job easier and safer.
- Screwdriver Set: A small Phillips head screwdriver is usually all that’s required to secure the SSD and motherboard components.
- Anti-Static Wrist Strap: This is highly recommended to protect your computer’s sensitive components from electrostatic discharge (ESD). You can purchase these affordably at electronics stores or online.
- Your PCIe SSD: The new drive you’ll be installing.
- Motherboard Manual: Crucial for identifying the correct M.2 slot and any specific installation instructions.
- Computer Case: The PC you are upgrading.
- Optional: Thermal Pad/Heatsink: Some high-performance NVMe SSDs can get quite hot under load. Many motherboards have integrated M.2 heatsinks. If yours doesn’t, or if your SSD didn’t come with one, consider purchasing a separate M.2 heatsink for optimal performance and longevity.
Safety Precautions
Working with computer hardware requires a degree of caution to prevent damage to yourself and your components.
- Power Off and Unplug: Before opening your computer, ensure it is completely powered off and unplugged from the wall outlet. For extra safety, press the power button a few times after unplugging to discharge any residual power in the capacitors.
- Ground Yourself: Static electricity can easily damage delicate electronic components. Wear an anti-static wrist strap, attaching the other end to a grounded metal object (like an unpainted part of your computer case). If you don’t have a wrist strap, periodically touch a grounded metal object to discharge static.
- Work in a Clean Environment: Avoid working on carpet, as it’s a prime source of static electricity. A clean, well-lit, and static-free surface is ideal.
- Handle Components Carefully: Hold SSDs by their edges, avoiding contact with the gold connectors and any chips on the circuit board.
Installing the PCIe SSD
This is the core of the process. We’ll break it down into steps, focusing on the most common M.2 installation.
Locating the M.2 Slot
Refer to your motherboard manual to identify the M.2 slot. On many motherboards, M.2 slots are located on the front of the board, often between the CPU socket and the RAM slots, or sometimes on the underside of the motherboard. Note any markings around the slot, such as its PCIe generation (e.g., “M2_1 PCIe Gen4”).
- Integrated Heatsinks: If your motherboard has an M.2 heatsink, you’ll typically need to remove a few small screws to lift it off. Underneath, you’ll find the M.2 slot and likely a thermal pad. If your SSD came with a heatsink, you’ll install that later.
Physically Installing the M.2 Drive
- Remove the Securing Screw: Most M.2 slots have a small screw at the end of the slot that holds the SSD in place. You may need to remove this screw and its standoff (if applicable) before inserting the drive. Keep this screw safe, as you’ll need it to secure the SSD.
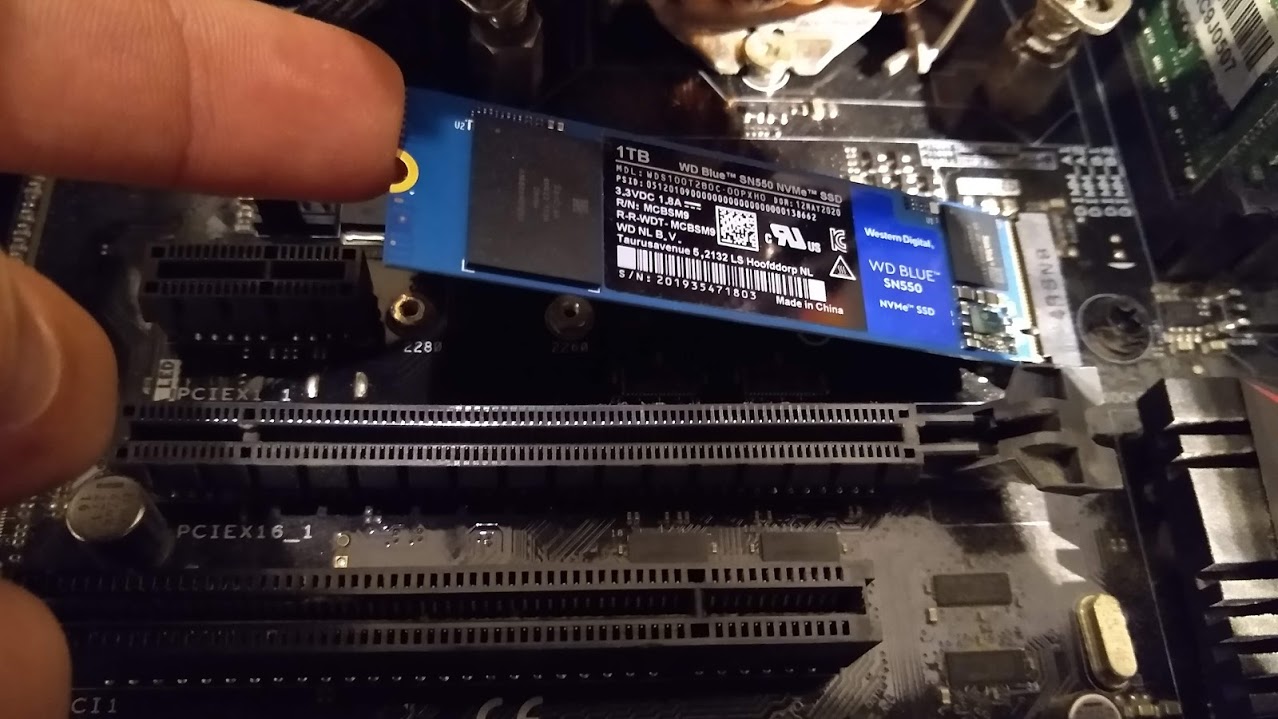
- Insert the M.2 Drive: Gently insert the M.2 SSD into the M.2 slot at an approximate 30-degree angle. The gold connectors should slide in smoothly. Ensure the drive is inserted fully and the notch(es) on the drive align with the keying in the slot.
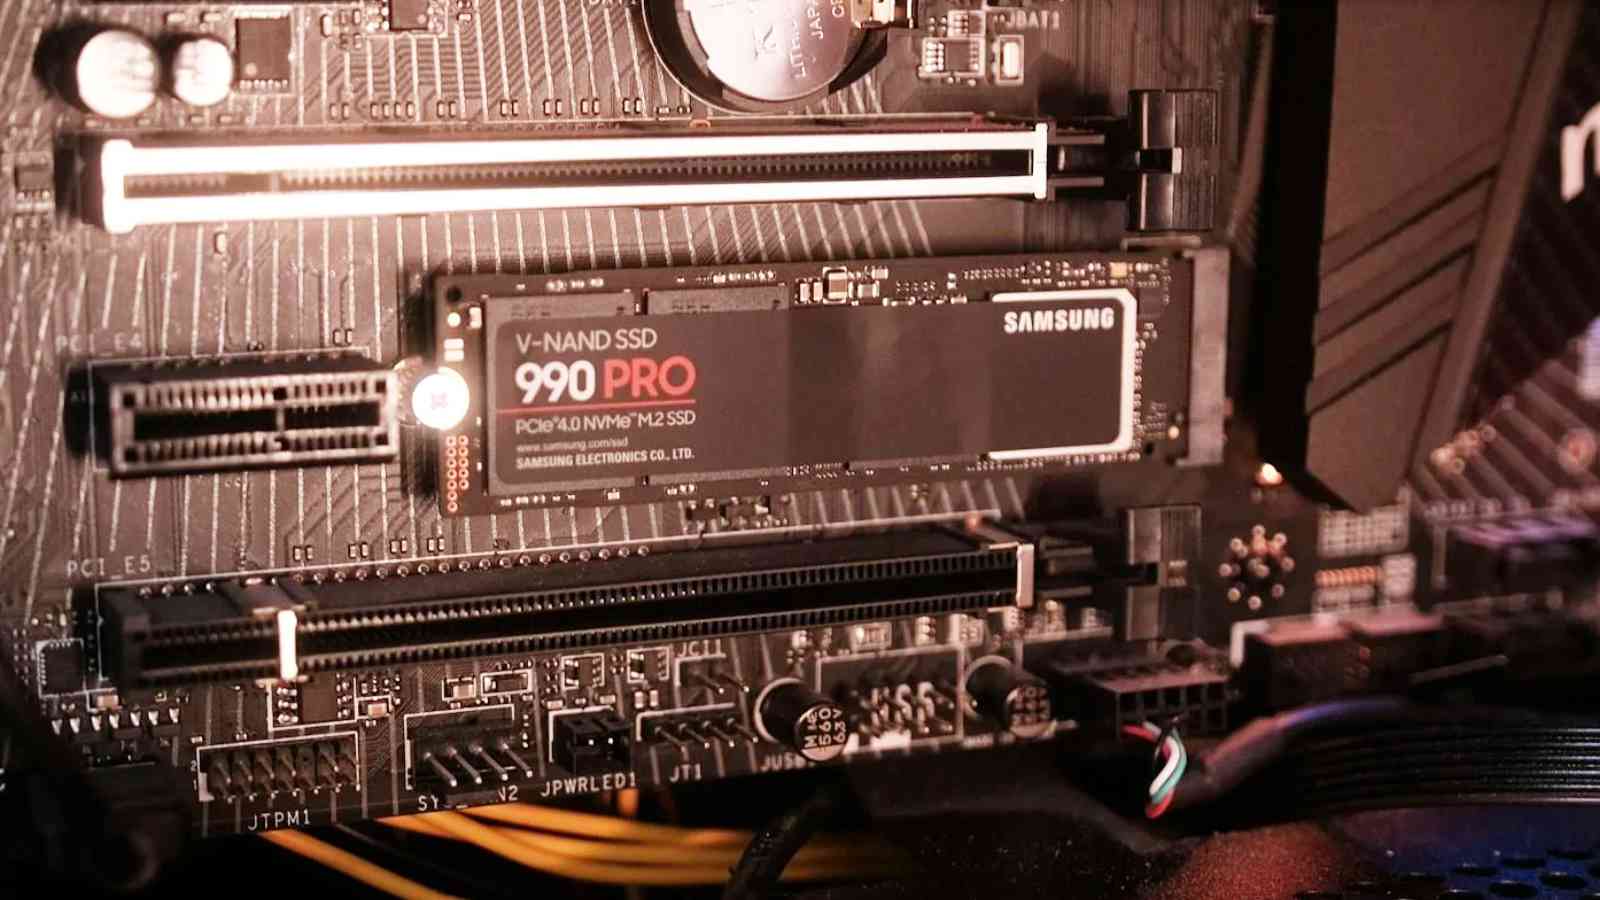
- Lower and Secure the Drive: Once the drive is fully seated, gently push it down so it lies flat against the motherboard. Align the screw hole on the end of the SSD with the standoff or screw hole on the motherboard.
- Install the Securing Screw: Use your Phillips head screwdriver to carefully screw the M.2 SSD into place. Do not overtighten. The drive should feel secure but not forced.
- Install Heatsink (if applicable): If your motherboard has an integrated heatsink, reattach it over the SSD, ensuring the thermal pad makes good contact. If you have a separate M.2 heatsink, follow its installation instructions, which typically involve attaching it to the SSD and then securing it to the motherboard, often using screws that pass through the M.2 slot’s mounting points.
Installing a PCIe AIC SSD (if applicable)
If you are installing a PCIe Add-in Card (AIC) SSD:
- Identify the Correct PCIe Slot: Consult your motherboard manual to find an available PCIe slot that matches the size and generation of your AIC SSD. PCIe x4 slots are common for NVMe AICs.
- Remove Slot Cover: On the back of your computer case, locate the corresponding expansion slot cover and remove it.
- Insert the AIC SSD: Align the SSD’s connector with the PCIe slot and gently push down until it is fully seated.
- Secure the Card: Use the screw that held the slot cover in place to secure the AIC SSD’s bracket to the computer case.
Post-Installation Steps: BIOS and Operating System
Once the physical installation is complete, you need to ensure your computer recognizes the new drive and can boot from it (if you intend to install an operating system on it).
Accessing the BIOS/UEFI
The BIOS (Basic Input/Output System) or UEFI (Unified Extensible Firmware Interface) is the firmware that initializes your hardware when you turn on your computer. You need to enter it to check if the SSD is detected.
- Power On Your Computer: Turn on your PC.
- Enter BIOS/UEFI: Immediately after powering on, you’ll see a splash screen with instructions on how to enter the BIOS/UEFI. This is typically done by pressing a specific key, such as DEL, F2, F10, or F12, repeatedly as the computer boots. The exact key varies by motherboard manufacturer.
- Navigate to Storage Information: Once in the BIOS/UEFI, look for a section related to storage, boot order, or system information. This might be labeled “Storage Configuration,” “SATA Configuration,” “NVMe Configuration,” or “Boot Menu.”
- Verify SSD Detection: Your newly installed PCIe SSD should be listed among the detected storage devices. If it’s not showing up, double-check the physical installation and motherboard compatibility.
Configuring Boot Order and Formatting (if installing a new OS)
If you plan to install your operating system on the new PCIe SSD, or if you’re cloning an existing OS to it, you’ll need to configure the boot order.
- Setting the Boot Order: In the BIOS/UEFI’s boot section, you’ll see a list of bootable devices. Set your new PCIe SSD as the primary boot device.
- Formatting the SSD (if it’s not a boot drive): If you’re adding this SSD as a secondary drive for extra storage, you’ll need to format it within your operating system. After the SSD is recognized by the BIOS, you can proceed to boot into your existing OS (or install a new one from a USB drive).
- Windows:
- Right-click the Start button and select “Disk Management.”
- Your new SSD should appear, likely as “Unallocated Space.”
- Right-click on the unallocated space and select “New Simple Volume.”
- Follow the on-screen wizard to assign a drive letter, format it with NTFS, and set allocation unit size (default is usually fine).
- macOS:
- Open “Disk Utility” (Applications > Utilities > Disk Utility).
- Select your new SSD from the sidebar.
- Click “Erase.”
- Choose a format (e.g., APFS for modern Macs) and a scheme (GUID Partition Map).
- Linux:
- Use tools like
gpartedorfdiskto partition and format the drive.
- Use tools like
- Windows:
Installing Drivers (if necessary)
While modern operating systems often have built-in drivers for NVMe SSDs, sometimes installing specific drivers from the SSD manufacturer can provide optimal performance or additional features. Check the manufacturer’s website for your specific SSD model.
Conclusion
Installing a PCIe SSD, particularly an NVMe M.2 drive, is a straightforward upgrade that offers significant performance benefits. By carefully following these steps, ensuring compatibility, and taking proper safety precautions, you can successfully enhance your computer’s speed and responsiveness. The improved boot times, application loading, and file transfer speeds will make your daily computing tasks more efficient and enjoyable. With the right preparation and a steady hand, you’ll have your new, blazing-fast storage solution up and running in no time.
aViewFromTheCave is a participant in the Amazon Services LLC Associates Program, an affiliate advertising program designed to provide a means for sites to earn advertising fees by advertising and linking to Amazon.com. Amazon, the Amazon logo, AmazonSupply, and the AmazonSupply logo are trademarks of Amazon.com, Inc. or its affiliates. As an Amazon Associate we earn affiliate commissions from qualifying purchases.